Cleaning your car is more than just about pride in your vehicle’s appearance. It can prevent or even correct damage that has taken place, extending the life of your car’s body.
Proper car detailing can be expensive to do on your own if you are buying the supplies for one-time use. If you plan on regularly performing your own car detailing, it will be a good investment as part of your regular car maintenance.
The main difference between cleaning and detailing is the extent to which everything is cleaned. Cleaning a car involves vacuuming all of the soft surfaces and cleaning and wiping down all of the hard surfaces. Detailing involves cleaning each and every part individually trying to get the car to look the same as it did from the factory. Detailing every once in a while will keep your vehicle in good condition for longer.
Whether you are polishing your car, applying car wax, cleaning your glass, or shining your wheels, it is important to start with a clean car.
Give yourself 4 to 6 hours to completely and thoroughly detail your car’s exterior. The time you put into detailing your car’s exterior will show through with the end product.
Part 1 of 6: Interior detailing
Materials Needed
- Air compressor
- All-purpose cleaners
- Car washing soap
- Chamois
- Clay bar
- Foaming carpet cleaner
- Glass cleaner
- High-pressure water sprayer
- Leather conditioner (if necessary)
- Metal polish
- Microfiber towels
- Plastic/trim cleaner
- Polish/wax
- Razor/box cutter
- Rubber protectant
- Sponges
- Tire cleaner/protector
- Vacuum cleaner
- Wheel brush
- Wood cleaner/protector (if necessary)
Step 1: Take everything out of the car interior. This includes the entire contents of the glove compartment and all of the floor mats.
Nothing should be covered by anything unless absolutely necessary. Don’t take the interior apart, but get as close as you can.
Some storage compartments or ash trays are removable, so take advantage of this feature if present.
Step 2: Vacuum everything in the interior. This includes the carpet in the trunk.
Vacuum the headliner first and work down from the roof. That way any dust knocked loose will be vacuumed up later.
If the vacuum has a brush attachment, use this and gently scrub the surface being vacuumed in order to knock dirt and other debris loose.
Use the air compressor and blow air into every crack, hole, and crevice where dust and debris may be, then vacuum it up.
Focus on really getting all of the dirt and dust out of the seats. They see a lot of use and abuse, so they will need more thorough cleaning later on. To make that easier, vacuum them thoroughly now.
When you think you are finished, make one more pass over each surface with the vacuum, making sure not to miss a spot.
Step 3: Clean any stains with foaming cleaner. On carpets and floor mats, there are often stains and discolored patches that stick out more once the carpet has been vacuumed.
Use the foaming cleaner to deal with spots like these. Spray the foam on top of any stains or discolored spots.
Let it sit for a minute before scrubbing the cleaner lightly into the carpet.
Use a towel to blot the spots dry. Repeat this process until the stains are all gone.
Step 4: Remove any stains that cannot be cleaned. If the stain is too deep or if the material is melted or damaged, it can be cut short with a razor blade or box cutter.
If it is still noticeable, the patch can be cut out and a patch of fabric retrieved from a remote spot like behind the rear seats can be put in its place.
If you are unsure how to do this properly, it may be best to call a professional.
Step 5: Wash the floor mats and interior pieces outside of the car. Use a high-pressure hose attachment.
Blast these pieces with water before washing the carpet with carpet cleaner and cleaning the interior pieces with all-purpose cleaner.
Blot the carpets to speed up drying, and make sure everything is dry before putting it back into the car.
Step 6: Clean all hard surfaces in the car’s interior. Use all-purpose cleaner to wipe down and clean every hard surface inside of the car.
Step 7: Individually clean different surfaces with specialized cleaners. Use individual cleaners to make the interior look brand new:
Plastic protectant gives plastic parts a nice-looking finish and helps keep the plastic from growing brittle.
Wood protectant is a must for any wood trim, as wood can shrink or warp if it dries out.
Metal trim pieces need to be polished with a polish appropriate for that metal. Use a small amount of product and polish until the surface is shiny and spotless.
Use a small detailing brush to remove dust from the vents and speakers.
Step 8: Thoroughly clean the seats. Make sure to use the correct cleaner for your seat material.
Leather or vinyl seats need to be cleaned and wiped down with a specialized cleaner for either leather or vinyl. Leather conditioner can be applied if the car is a few years old and the leather has grown dry or developed cracks.
Cloth seats should be washed with a fabric cleaner on the seats. Then vacuum the liquid out with a wet-dry vacuum.
Step 9: Clean the inside of all windows and both windshields. Clean mirrors as well.
Use a chamois to wipe the glass dry, as letting glass air dry will make spots appear.
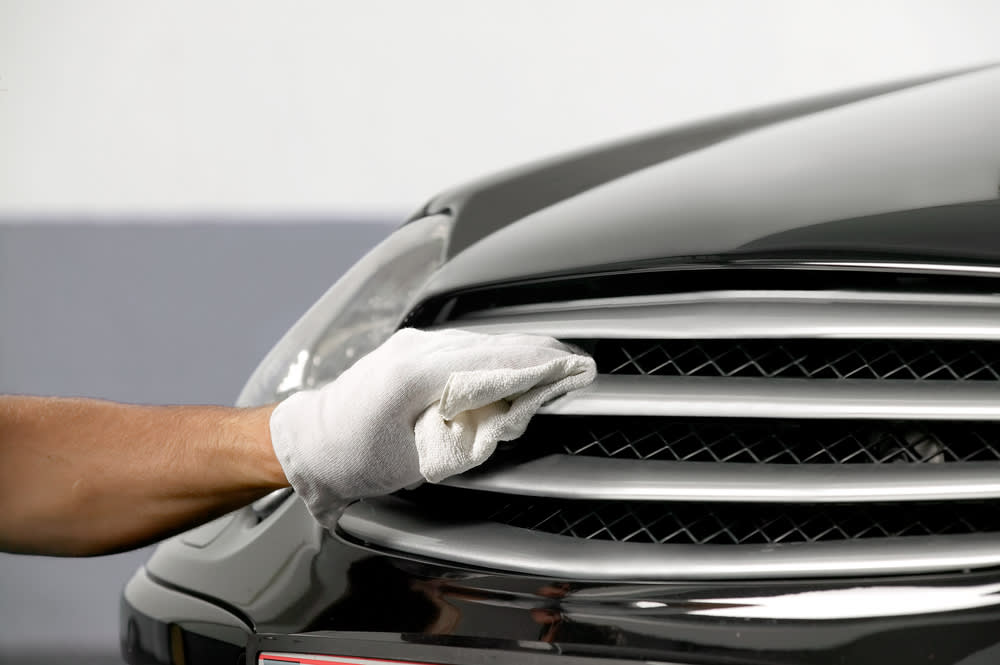
Part 2 of 6: Cleaning the exterior
Materials Needed
- Bucket
- Bug and tar remover spray such as Turtle Wax Bug and Tar Remover
- Concentrated car wash soap such as Meguiar’s
- Microfiber cloths
- Spray bottle
- Tire dressing such as Meguiar’s
- Wash mitt
- Water source
- Wheel cleaner spray
- Wheel cleaning brush
Step 1: Prepare to wash your car. Fill your bucket with water and add car wash soap according to the instructions on the soap’s label. Stir it to get suds.
Soak your car wash mitt in your bucket of sudsy water.
Spray bug and tar remover on any spots that have built up on your car. Let it soak for 5 to 10 minutes before rinsing your car.
Step 2: Spray down the entire car exterior. Wash everything with a high-pressure hose to get dirt and grime off.
The hood can be open for this step, but any electronics should be covered in plastic bags just to be sure that a direct blast of water won’t hit them.
Don’t forget to spray the wheel wells and the underside of the vehicle.
Use a pressure washer if you have one available or use a garden hose with adequate water pressure to rinse your car well.
Start at the top of the car and work your way down. The water running down the car’s exterior will help to pre-soak some of the stuck-on bits, especially if you are using warm water to rinse.
Step 3: Scrub your wheels. Clean your wheels well with soap and water as described in Part 1.
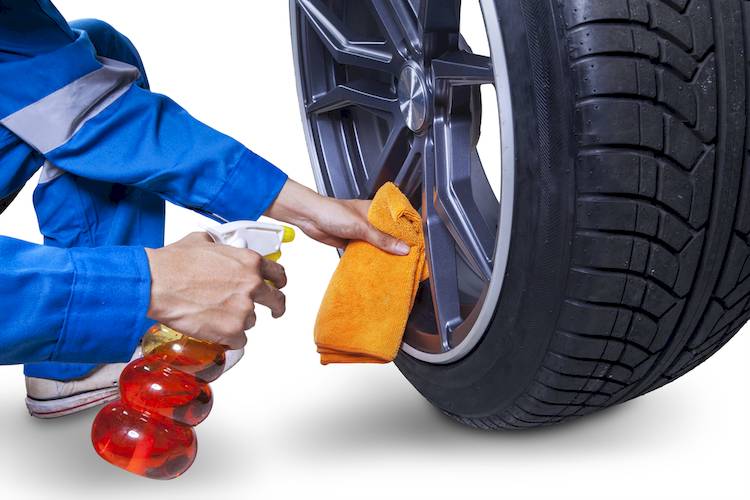
Step 4: Apply the wheel cleaner. Spray wheel cleaner onto your wheel.
Warning: Choose a wheel cleaner spray that is safe for use on your particular wheels. Many wheel cleaners contain harsh chemicals and are safe for use only on coated alloy and aluminum wheels or wheel covers. If you have uncoated aluminum wheels, use a product designed specifically for them.
Tip: Clean one wheel at a time from start to finish so you are sure you haven’t missed any spots.
Let the cleaning spray foam sit on your wheel for 30 seconds to break up the brake dust and grime.
Use a wheel brush to wash all sides of the wheel’s spokes, rinse them off regularly as they get cleaned.
Scrub wheels clean, then use metal polish to bring out the finish.
Apply tire protectant to the sidewalls of the tires.
- Note: Since the wheels contain so much dirt and grime, washing them can cause dirty water to splash all over the rest of the car. That is why they get cleaned first.
Step 5: Rinse the wheel with clean water. Rinse until you no longer have any soapy, foamy water or visible dirt running off your wheel.
Give your wheel time to dry. Move on, cleaning your other wheels.
Step 6: Administer the tire dressing. Apply tire dressing to your tires.
Start with a dry tire. If there is still water on your tire, wipe it off with a microfiber cloth. Use a separate cloth for your wheels than any other purpose.
Spray tire dressing onto your applicator pad.
Wipe your tire in circles all the way around, leaving a shiny, clean black finish on your tire.
Let it dry before driving your car. Wet tire dressing will collect dirt and dust, giving your tires an unsightly brownish look.
Step 7: Clean the engine components. Spray any grimy components under the hood with degreaser and let it sit for a minute or so.
Blast the grease off with the hose once the cleaner has soaked in. This can be repeated until the engine bay is totally clean.
Put rubber protectant on rubber parts under the hood to keep them soft and flexible.
Step 8: Clean the exterior of the car. Scrub your car’s exterior with the wash mitt. Put the wash mitt on your hand and scrub each panel one by one.
Start at the top of the car, working your way down. Leave the dirtiest panels until last.
Completely wash each panel or window before moving onto the next to make sure you haven’t missed any spots.
- Tip: Rinse your wash mitt whenever it looks like it is gathering a lot of dirt on it.
After all car body parts are soaped, use the wash mitt to scrub the wheels. Brake dust and road grime builds up on your wheels, discoloring them and making them look dull.
Step 9: Completely rinse your car's exterior. Start at the top and work your way down. Once again, the water you rinse the top of the car with will run down, helping rinse the soap off your car on lower sections.
Rinse your wheels thoroughly. Try to rinse between the spoke and onto the brake parts to get any soap off of them as well as rinsing off as much loose brake dust and grime as possible.
Step 10: Dry your car’s exterior. Wipe your car’s exterior from the top down with a damp microfiber cloth. A damp microfiber cloth easily absorbs the water from your car’s glass and paint.
You’ll be left with a slightly wet car finish. You can completely dry the exterior by running a dry microfiber cloth over it to pick up any remaining moisture.
Your car will now be relatively clean, but you aren’t finished here. To get the shiniest, cleanest finished product, there is still much more to do.
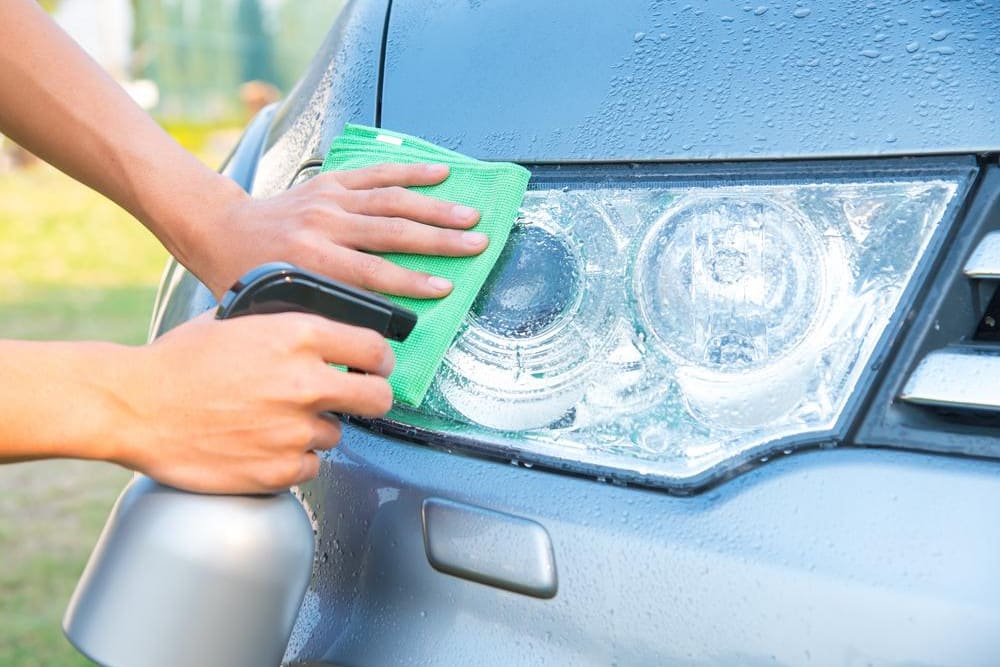
Step 11: Clean exterior glass. Since glass cleaner can leave spots or streaks on a clean car, it is important to clean the windows and mirrors before the rest of the exterior.
Use the glass cleaner, and make sure to dry the glass with a chamois instead of air-drying to stay free of spots and streaks.
Part 3 of 6: Polish your car
Polishing is a repair procedure that removes the appearance of scratches and marks in your paint by removing a thin layer of clear coat and blending in the scratch. It should always be done with extreme caution or you could cause expensive damage to your car’s exterior.
Materials needed
- Clean cloth
- Polishing compound
- Polishing pad
Warning: Never attempt to polish your car when it is still dirty. The grit in the dirt will cause deep scratches in the paint, making it even worse to fix.
Step 1: Prepare the polisher. Apply polishing compound to the pad on your power polisher and work it into the foam lightly.
This essentially “primes” the pad so it doesn’t overheat your car’s paint.
Step 2: Apply the polishing compound. Apply a silver dollar-sized spot of polishing compound onto the scratch or spot you are polishing.
Spread the polish with the pad on the power polisher without turning it on.
Step 3: Begin polishing your vehicle. Turn the polisher onto medium-low speed and put the pad against the polish on your car, already starting a side-to side movement over the spot you are polishing.
Maintain light pressure on the polisher and always keep it moving in a side to side motion.
Step 4: Stop when the blemishes or polish is gone. When the polish is almost gone from the paint or the scratch or mark you are polishing has disappeared, stop the polisher.
If the scratch is still present, apply more polish to the location and repeat Step 4.
Check the paint temperature with your hand between each polishing step. If the paint is comfortably warm, you can continue. If it’s too warm to keep your hand on it, wait until it cools down.
Step 5: Wipe down the polished spots. Wipe the area with a clean, dry cloth.
Part 4 of 6: Clean exterior metal parts
Typical car soaps along with environmental elements can leave your chrome, aluminum, or stainless steel trim looking dull, faded, or dirty. Restore the shine using a high-quality metal cleaner whenever you do a thorough car detailing.
Materials Needed
- Metal cleaner and polish
- Microfiber cloths
Step 1: Prepare the microfiber cloth. Apply metal cleaner to a clean microfiber cloth.
Use a dime-sized spot to start with so you can easily control where the cleaner goes.
Step 2: Use the microfiber cloth to spread cleaner. Spread the cleaner over your metal trim. Use your fingertip in the microfiber cloth to work the cleaner onto the surface, trying not to get the cleaner onto painted surfaces.
Step 3: Coat all the metal trim with cleaner. Spread the cleaner over all the metal trim on your car. Let it dry after you’ve worked it on.
Step 4: Wipe the metal trim clean. Use a clean microfiber cloth to wipe the metal trim clean. The dried cleaner will easily buff off with a cloth in your hand.
Your chrome or metal trim will be shiny and bright.
Part 5 of 6: Apply a protective wax coating
Waxing your car should be part of its regular maintenance. A fresh coat of wax should be applied every 6 months, sooner if you notice the paint looks like it’s faded and dull again.
Materials Needed
- Car wax
- Foam applicator pad
- Microfiber cloth
Step 1: Start with a clean car. Wash it as described in Part 1.
Waxing your car when it is dirty can cause noticeable scratches in your paint.
Step 2: Add wax to the applicator. Apply liquid wax directly to your applicator pad.
Use a 1-inch spot of wax on your applicator.
Step 3: Begin waxing your vehicle. Spread the wax in wide circles all over one panel of your car in overlapping strokes.
Use light pressure. You’re applying a coating on top of the paint, not trying to rub it into the paint.
Wax one panel at a time from start to finish.
Step 4: Dry the wax. Let the wax dry for 3-5 minutes.
- Test if it is dry by swiping your fingertip across the wax. If it spreads, leave it longer. If the swipe is clean and dry, move to the next step.
Step 5: Wipe the dried wax**. Wipe the dried wax from the panel. It will come off as a powdery white substance, leaving a shiny painted surface behind.
Step 6: Repeat the steps for all of your car's panels. Repeat for the rest of your painted panels on your car.
Part 6 of 6: Clean your car windows
Cleaning your car’s windows should be left until the last step. If you clean them sooner in the process, you run the risk of getting another substance on the glass, meaning you will have to redo the glass cleaning at the end anyway.
Material Needed
- Foaming glass cleaner
- Microfiber cloth
Step 1: Apply the glass cleaner to the window. Spray the foaming glass cleaner directly onto the window.
Apply enough that you can spread it over the whole window surface. On the front and rear windshields, you’ll want to spray enough to deal with one half of the glass at a time.
Step 2: Coat the surface completely with cleaner. Wipe the glass cleaner over the whole surface with a microfiber cloth.
Wipe the cleaner in a vertical direction to start, then in a horizontal direction to achieve a streak-free finish.
Step 3: Slightly lower windows. Roll the side windows down a few inches.
- Use your window cloth, dampened with the glass cleaner you’ve just wiped, and wipe the top half-inch that rolls into the window channel.
The top edge is often neglected, leaving an unsightly line whenever the window is rolled down a little ways.
Patience is key when detailing, as there is really no point in doing it if it won’t be done properly. Doing a thorough detailing like this helps your car retain value, and feeling like you have a brand new car makes you appreciate it that much more. If there is anything that seems not sufficiently clean, go over it immediately to make the car totally detailed and near-perfect.
If following the guide above is not adequate for the extent of detailing that your car needs, you may need to consult a professional. For particularly old or classic cars, rare cars, and cars in really rough shape, special products or techniques may be necessary.
If you come across any problems with your wheels, windows, or other parts of your car while you’re closely examining them, make sure you address the issue right away. Call a certified mechanic, such as one from YourMechanic, in order to get your car not only looking great but running smoothly and safely as well.
