The cooling system of a vehicle’s engine is designed to perform two functions. The first function is to keep the engine at an operating and safe temperature for optimal combustion. The second function is for climate control in the vehicle’s cab during cold ambient temperatures.
The water pump (auxiliary), or known as a water pump with and auxiliary drive, is a basic water pump that is driven by an electric motor. The electric motor serves the same purpose of a drive or serpentine belt.
By having a water pump (auxiliary) and not having a belt drive the pump allows the engine to have immense power. As a pump pushes water through galleries and through hoses, there is a large load drawn upon the engine’s power. By having the water pump driven without a belt frees up the extra load giving more power to the wheels.
The downside of the water pump (auxiliary) is when electrical power to the electric motor is lost. In most vehicles that are equipped with a water pump auxiliary and have the electrical power disconnected, the red engine light comes on along with the yellow engine light. When the red engine light comes on, it means that something is seriously wrong and will damage the engine. If the light is illuminated, the engine will only run for short periods of time-meaning round 30 seconds to 2 minutes.
Water pumps (auxiliary) can fail in five different ways. If the weep hole is leaking coolant, this indicates that the dynamic seal has failed. If the water pump leaks into the engine, it makes the oil milky and thin. The water pump impeller fails and makes a chirping noise as it contacts the housing. The galleries in the water pump may become plugged from sludge buildup, and if the electric motor fails, it makes the water pump inoperable.
Most people will misdiagnose the issue with milky oil when there is an internal water pump. They usually think that a head gasket has failed due to the symptoms of the coolant being low and the engine overheating.
Some other common symptoms include a heater with fluctuating heat, a heater with no heat at all, and the window defrost not working.
Engine light codes related to water pump failure:
P0125, P0128, P0197, P0217, P2181.
- Note: Some vehicles have a large timing cover and a water pump that mounts to it. The timing cover can crack behind the water pump making the oil milky. This can lead up to a misdiagnosis.
Part 1 of 4: Verifying the condition of the water pump (auxiliary)
Materials Needed
- Coolant pressure tester
- Flashlight
- Safety glasses
- Spray bottle of water and soap
Step 1: Open the hood to the engine compartment. Grab a flashlight and visually check the water pump for any leakage or external damage.
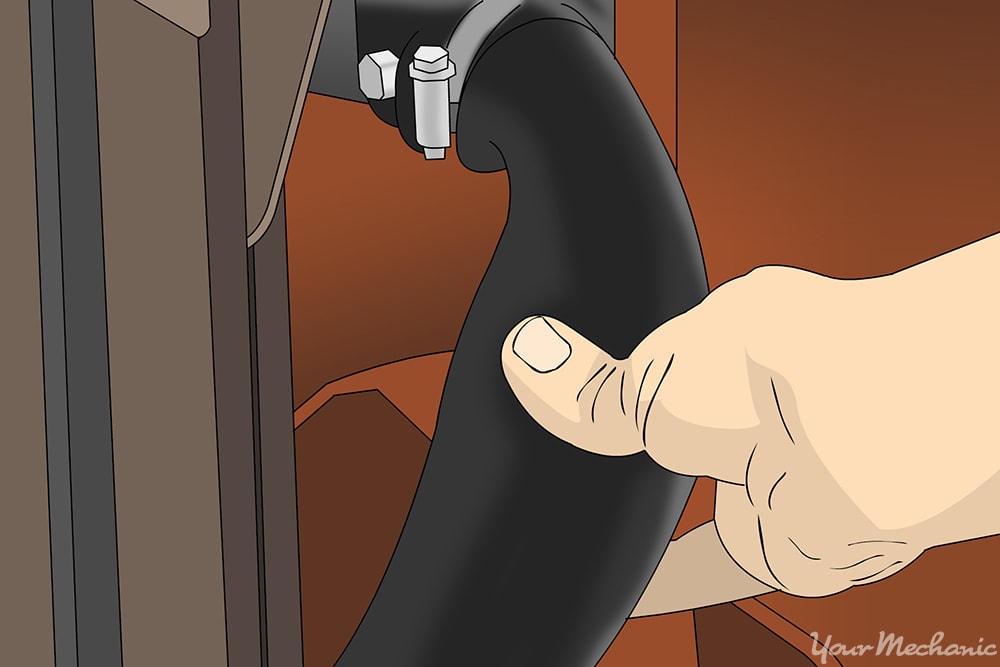
Step 2: Squeeze the upper radiator hose. This is a check to see if the system still has pressure or not.
- Note: If the upper radiator hose is hard, you will need to leave the vehicle’s cooling system alone for 30 minutes.
Step 3: Check to see if the upper radiator hose is squeezable. Remove the radiator or reservoir cap.
- Warning: Do not open a radiator cap or reservoir on an engine that is overheating. The coolant will flash boil and spray everywhere.
Step 4: Get a coolant test kit out. Find the proper attachments and attach the tester to the radiator or reservoir.
Pump up the pressure tester to the pressure indicated on the cap. If you do not know the pressure or the pressure is not shown, then default the system to 13 psi (pounds per square inch). Let the pressure tester hold pressure for 15 minutes.
If the system holds pressure, then the cooling system is sealed. If the pressure drops slowly, before you jump to conclusions, check the tester to make sure that it is not leaking. Use a spray bottle of water and soap to spray down the tester.
If the tester is leaking, it will bubble up. If the tester is not leaking, then spray down the cooling system to find the leak.
- Note: If the dynamic seal in the water pump has a small leak that is not visible, hooking up the pressure tester will reveal the the leak and could cause a mass leak.
Part 2 of 4: Replacing a water pump (auxiliary)
Materials Needed
- Allen wrench set
- Boxed end wrenches
- Breaker bar
- Camshaft locks
- Coolant drain pan
- Coolant resistant gloves
- Coolant resistant silicone
- Emery cloth 320 grit
- Flashlight
- Floor jack
- Harmonic balancer puller
- Jack stands
- Large flathead screwdriver
- Large pick
- Leather type protective gloves
- Non-lint cloth
- Oil drain pan
- Protective clothing
- Putty knife/scraper
- Ratchet with metric and standard sockets
- Safety glasses
- Serpentine belt removal tool
- Torque wrench
- Torx bit set
- Wheel chocks
Step 1: Park your vehicle on a flat, hard surface. Make sure that the transmission is in park (for automatics) or in 1st gear (for manuals).
Step 2: Place wheel chocks around the tires. In this case, the wheel chocks go around the front tires since the rear of the vehicle will be lifted up.
Engage the parking brake to the lock the rear tires from moving.
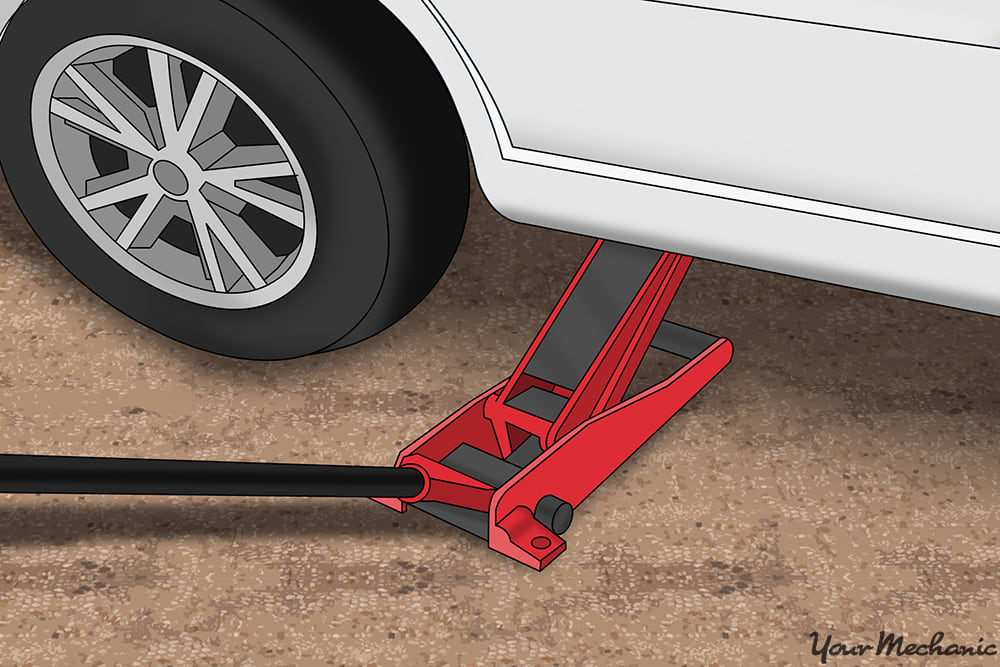
Step 3: Raise the vehicle. Using a floor jack, lift under the vehicle at its specified jacking points until the wheels are completely off the ground.

Step 4: Place the jack stands. The jack stands should go under the jacking point locations.
Then lower the vehicle onto the jack stands. For most modern cars, the jacking points for jack stands are on the pinch weld just under the doors along the bottom of the car.
Step 5: Remove the coolant from the system. Get a coolant drain pan and place it under the radiator drain cock.
Drain out all of the coolant. Once there is no more coolant coming out of the drain cock, close the drain cock and place the drip pan under the water pump area.
On a rear wheel drive vehicle with water pump (auxiliary):
Step 6: Remove the lower radiator hose from the radiator and water pump. You can turn the hose to remove it from the mounting surfaces.
You may have to use a large pick to help break the hose free from the mounting surfaces.
Step 7: Remove the serpentine or v-belt. If you have to remove a serpentine belt to get to the electric motor, then use a breaker bar to loosen the belt.
Remove the serpentine belt. If you have to remove v-belts to get to the electric motor, then loosen the adjuster and relax the belt. Remove the v-belt.
Step 8: Remove the heater hoses. Remove the heater hoses connecting to the water pump (auxiliary), if there are any.
Discard the heater hose clamps.
Step 9: Remove the mounting bolts to the water pump (auxiliary) electric motor. Use a breaker bar and remove the mounting bolts.
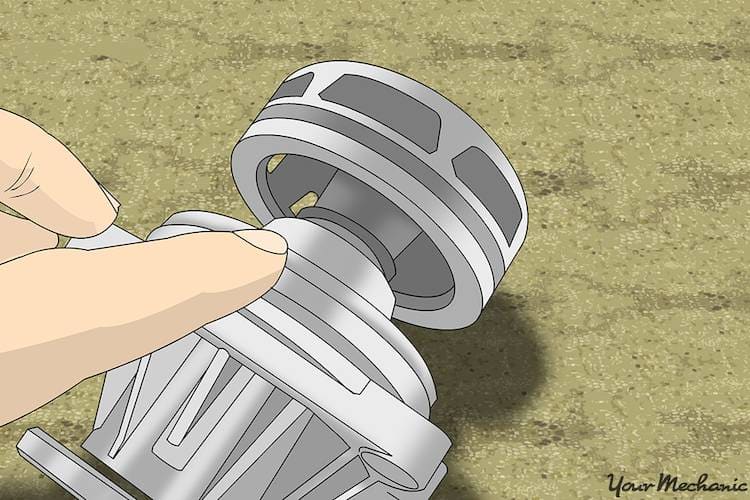
Grab a large flat screwdriver and slightly pop off the electric motor. Disconnect the harness from the electric motor.
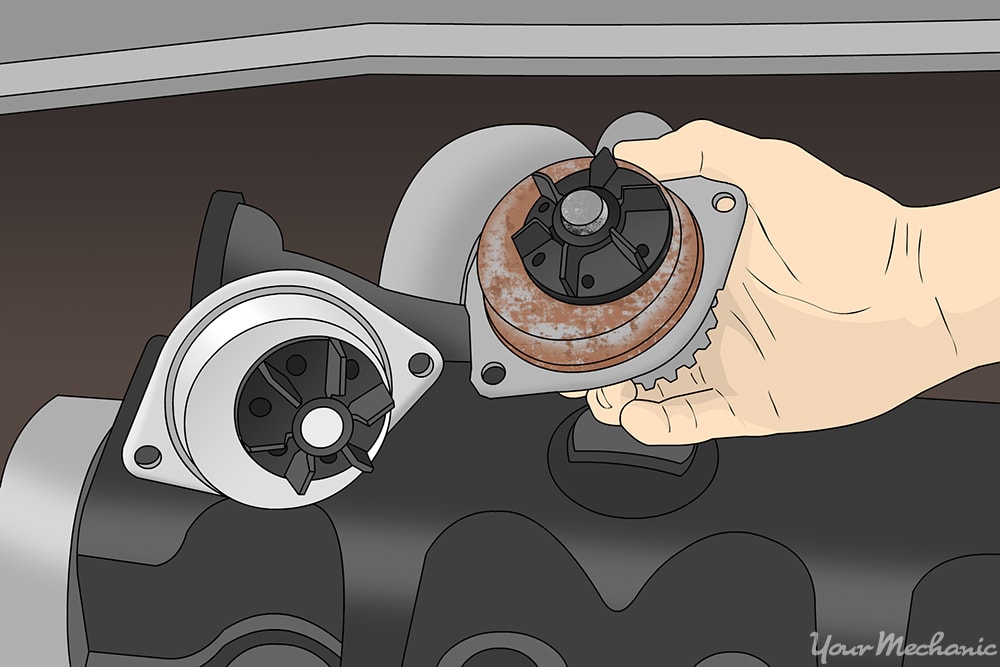
Step 10: Remove the mounting bolts. Use a breaker bar and remove the mounting bolts to the water pump (auxiliary) from the engine block or timing cover.
Use your large flat screwdriver to pop out the water pump.
On front wheel drive vehicle with water pump (auxiliary):
Step 11: Take off the engine cover it there is one.
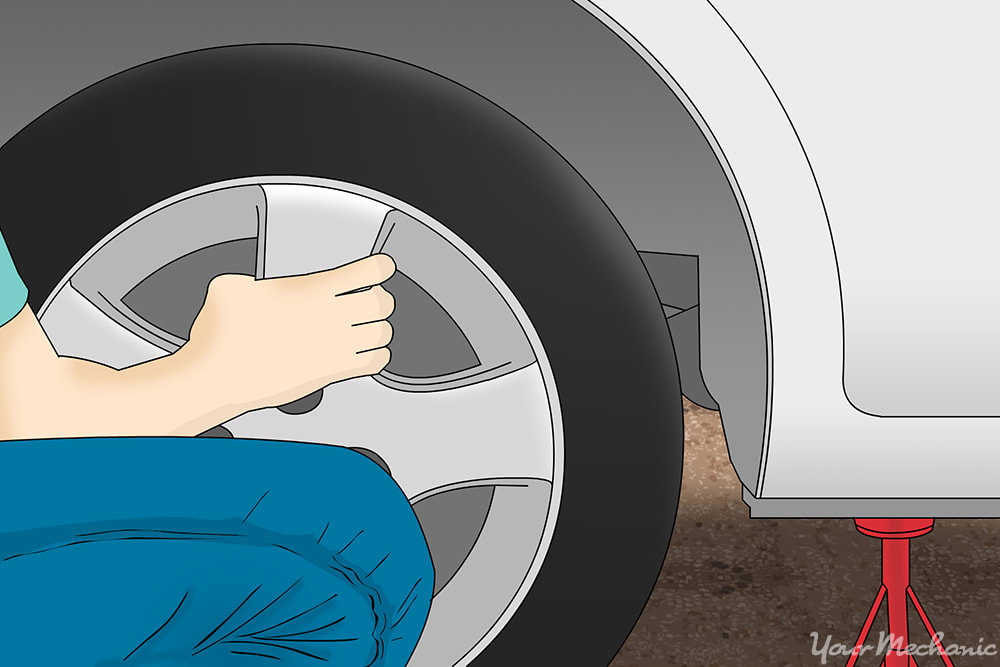
Step 12: Remove the tire and wheel assembly. Remove this on the side of the vehicle where the water pump (auxiliary) is located.
This will give you room to work under the car when reaching through the fender to access the bolts to the water pump and electric motor.
Step 13: Remove the lower radiator hose from the radiator and water pump. You can turn the hose to remove it from the mounting surfaces.
You may have to use a large pick to help break the hose free from the mounting surfaces.
Step 14: Remove the serpentine or v-belt. If you have to remove a serpentine belt to get to the electric motor, then use a serpentine belt removal tool to loosen the belt.
Remove the serpentine belt. If you have to remove v-belts to get to the electric motor, then loosen the adjuster and relax the belt. Remove the v-belt.
Step 15: Remove the heater hoses. Remove the heater hoses connecting to the water pump (auxiliary), if there are any.
Discard the heater hose clamps.
Step 16: Remove the mounting bolts. Reach through the fender and use a breaker bar to remove the mounting bolts to the water pump (auxiliary) electric motor.
Grab a large flathead screwdriver and slightly pop off the electric motor. Disconnect the harness from the electric motor.
Step 17: Remove the mounting bolts. Use a breaker bar and remove the mounting bolts to the water pump (auxiliary) from the engine block or timing cover.
You may have to reach through the fender in order to remove the mounting bolts. Use your large flat screwdriver to pop out the water pump when the bolts are removed.
On rear wheel drive vehicles with water pump (auxiliary):
- Note: If the water pump has an o-ring for a seal, install a new o-ring only. Do not put silicone on the o-ring. The silicone will make the o-ring leak.
Step 18: Apply silicone. Apply a thin coat of coolant resistant silicone to the mounting surface of the water pump.
Also, apply a thin coat of coolant resistant silicone to the mounting surface for the water pump on the engine block. This helps the gasket seal in the coolant and prevents any leaks for up to 12 years.
Step 19: Put on the new gasket or o-ring onto the water pump. Put coolant resistant silicone onto the mounting bolts for the water pump.
Place the water pump onto the engine block or timing cover and install mounting bolts by hand. Tighten the bolts up hand tight.
Step 20: Tighten the water pump bolts to the specs recommended. The specs should be found on the information given with the purchase of the water pump.
If you do not know the specs, then you can tighten the bolts to 12 foot pounds, then torque to 30 foot pounds. If you do it in steps, you will be able to secure the seal correctly.
Step 21: Install that harness to the electric motor. Put the electric motor onto the new water pump and tighten the bolts down to specs that were provided.
If you do not have any specs, then you can torque the bolts down to 12 foot pounds and additional 1/8 turn.
Step 22: Put on the lower radiator hose to the water pump and radiator. Make sure that you use new clamps to ensure that the hose seals tight.
Step 23: Install the drive belts or serpentine belt, if you had to remove them. Make sure that you set the tension to the drive belts to its width or 1/4 inch play.
On front wheel drive vehicle with water pump (auxiliary):
Step 24: Apply silicone. Apply a thin coat of coolant resistant silicone to the mounting surface of the water pump.
Also apply a thin coat of coolant resistant silicone to the mounting surface for the water pump on the engine block. This helps the gasket seal in the coolant and prevents any leaks for up to 12 years.
- Note: If the water pump has an o-ring for a seal, install a new o-ring only. Do not put silicone on the o-ring. The silicone will make the o-ring leak.
Step 25: Put the new gasket or o-ring onto the water pump. Put coolant resistant silicone onto the mounting bolts for the water pump.
Place the water pump onto the engine block or timing cover and install mounting bolts by hand. Reach through the fender tighten the bolts up hand tight.
Step 26: Tighten the water pump bolts. Reach through the fender and tighten the water pump bolts to the specs recommended by the information given with the pump.
If you do not know the specs, then you can tighten the bolts to 12 foot pounds, then torque to 30 foot pounds. If you do it in steps, you will be able to secure the seal correctly.
Step 27: Install that harness to the electric motor. Put the electric motor onto the new water pump and tighten the bolts down to specs that were provided.
If you do not have any specs, then you can torque the bolts down to 12 foot pounds and an additional 1/8 turn.
Step 28: Put on the lower radiator hose to the water pump and radiator. Make sure that you use new clamps to ensure that the hose seals tight.
Step 29: Install the drive belts or serpentine belt, if you had to remove them. Make sure that you set the tension to the drive belts to its width or 1/4 inch play.

- Note: If the water pump (auxiliary) is mounted in the engine block behind the front cover, you may have to remove the oil pan to remove the front cover. If you have to remove the engine oil pan, you will need a new oil drain pan and a new oil pan gasket to drain and reseal the engine oil pan. Once you have put on the engine oil pan, make sure that you fill up the engine with new engine oil.
Part 3 of 4: Filling and checking the coolant system
Material Needed
- Coolant
- Coolant pressure tester
- New radiator cap
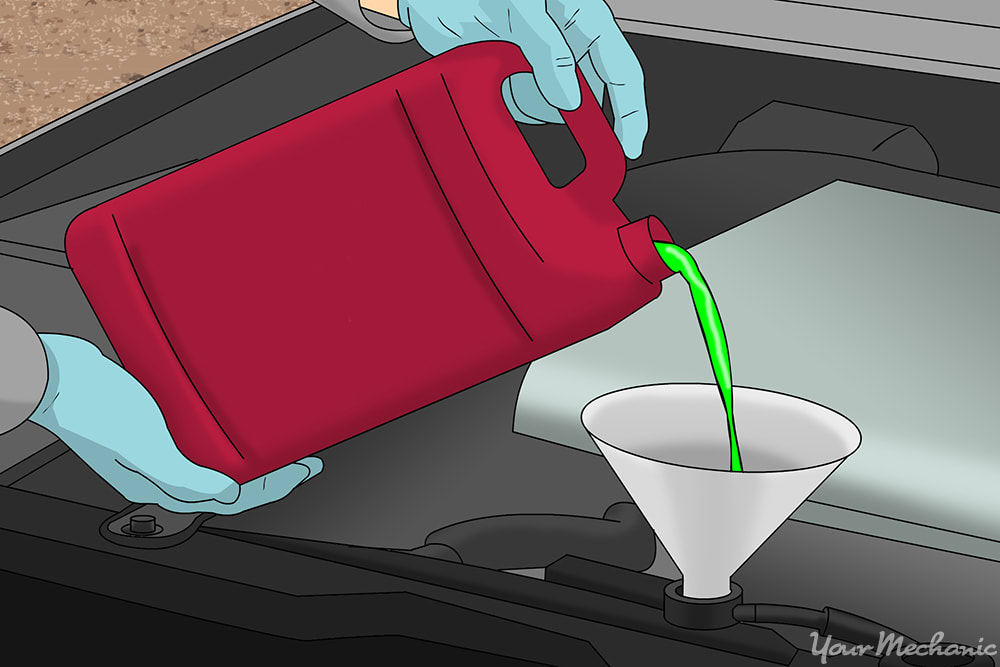
Step 1: Fill up the cooling system with what is recommended by the dealer. Let the system burp and continue to fill until the system is full.
Step 2: Get your coolant pressure tester and put it onto the radiator or reservoir. Pump up the pressure tester to the pressure indicated on the cap.
If you do not know the pressure or the pressure is not shown, then default the system to 13 psi (pounds per square inch).
Step 3: Watch the pressure tester for 5 minutes. If the system holds pressure, then the cooling system is sealed.
- Note: If the pressure tester leaks down and you do not see any coolant leaking, then you will need to check the tool for a good seal. To do this, get your spray bottle with soap and water and spray the tester. If the hoses leak, check the clamps for proper tightness.
Step 4: Put a new radiator or reservoir cap on. Do not use the old cap as it may not hold the proper pressure.
Step 5: Put on the engine cover if you had to remove it.
Step 6: Raise the vehicle. Using a floor jack, lift under the vehicle at its specified jacking points until the wheels are completely off the ground.
Step 7: Remove the jack stands and keep them far away from the vehicle.
Step 8: Lower the vehicle to where all four wheels are on the ground. Pull out the jack and put it aside.
Step 9: Remove the wheel chocks.
Part 4 of 4: Test drive the vehicle
Material Needed
- Flashlight
Step 1: Drive the vehicle around the block. While you are driving around, check to see if the engine light comes back on.
Also, monitor the cooling temperature to make sure that it is working correctly.
Step 2: Check for leaking coolant. When you are done with the test drive, grab a flashlight and look under the vehicle for any leaking coolant.
Open the hood and check the water pump (auxiliary) for any leaks. Also, check the lower radiator hose and heater hoses for any leakage.
If your vehicle continues leaking coolant or overheating, or the engine light comes on after replacing the water pump (auxiliary), then there may be further diagnosis of the water pump (auxiliary) needed or an electrical issue. If the problem persists, then you should seek out help from one of YourMechanic’s certified mechanics who can inspect the water pump (auxiliary) and perform a replacement if needed.
