The fan control module is part of the AC control system. It is used to tell the AC condenser fan when to turn on and in some cases the same unit is used for the radiator fan as well. Though uncommon the AC fan control module can fail over time.
This article will cover the most common replacement of the fan control module. The location of the fan control module and the repair procedure will vary by make and model. Consult the owner's manual for specifics on your vehicle.
Part 1 of 2: Replacement of the AC fan control module
Materials required
- Basic tool set
- New fan control module
- Owner's manual
- Socket set and ratchet
Step 1: Check the fan control module. Before any repairs are made it is important to make sure the fan control module is the culprit. It can have many different symptoms such as the fans not working at all or running to long.
Before the AC control module is replaced it must be diagnosed as the fan control relay or a failed fan are more common causes of these symptoms.
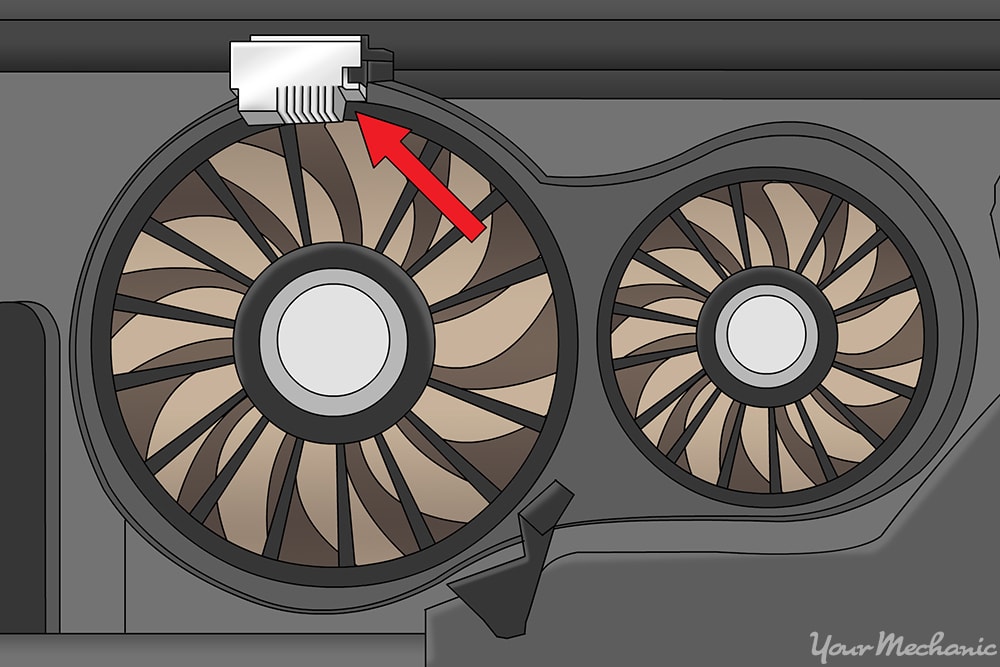
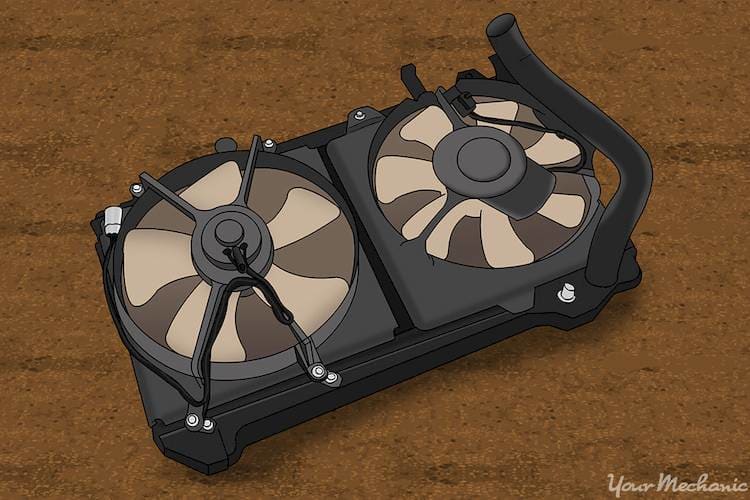
Step 2: Locate the fan control module. The fan control module can be located in a variety of places on the vehicle. The most common is on the radiator fan and condenser fan assembly as shown above.
Other possible places are along the firewall of the vehicle or even under the dash.
Check the owner's manual if you are having trouble locating your particular vehicle's fan control module.
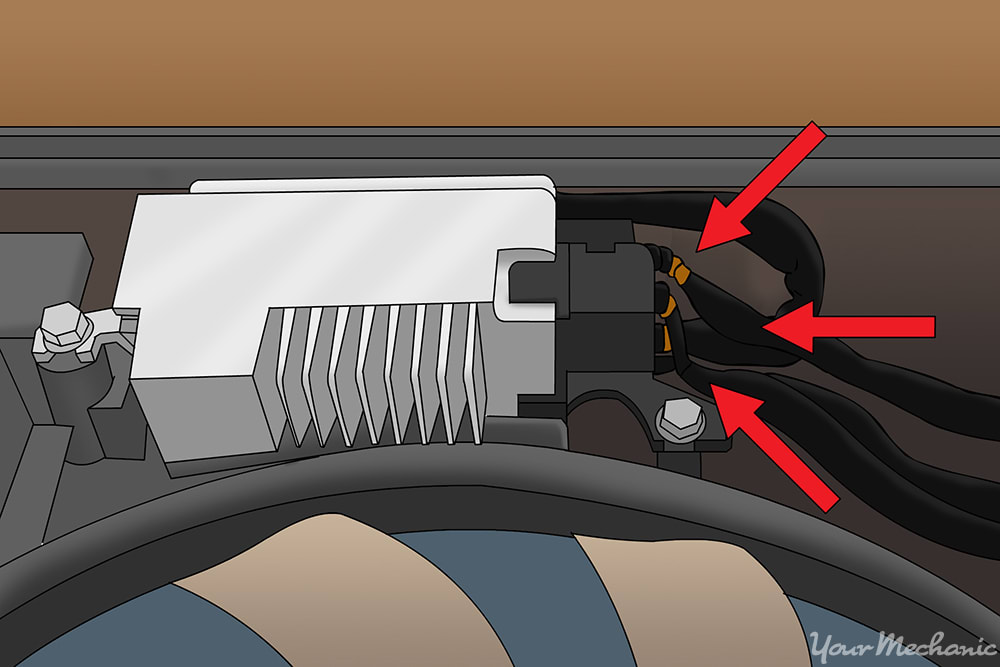
Step 3: Unplug the connectors for the fan control module. Before the fan control module is removed the electrical connectors must be removed.
There may be multiple connectors depending on how many fans the unit controls.
Unplug the connectors and set them close but out of the way.
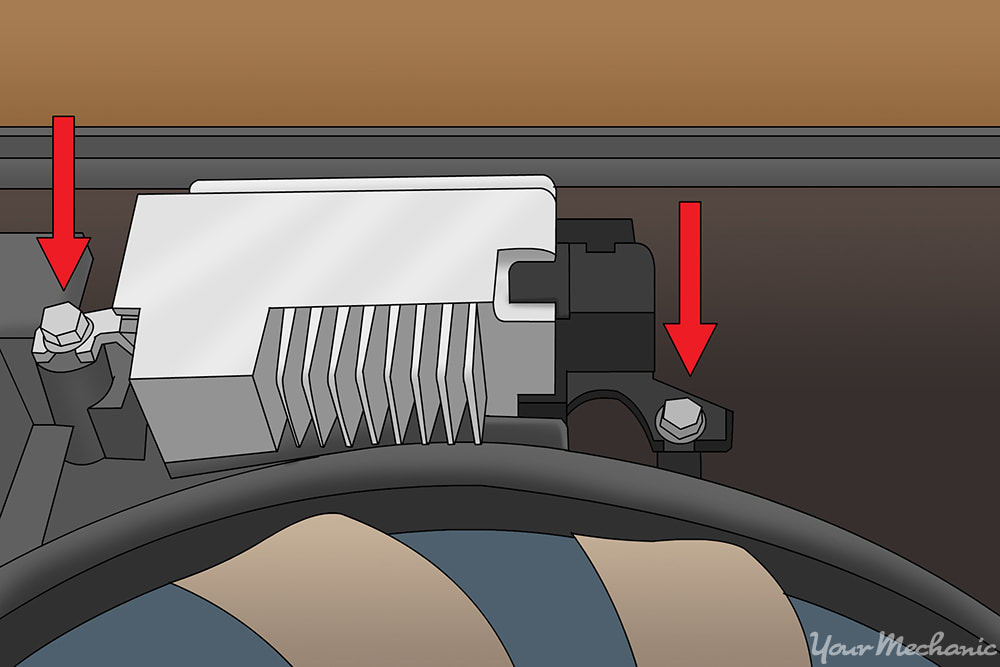
Step 4: Removing the Fan control module. Once the electrical connectors are disconnected we can now unbolt the unit.
Typically only a few bolts hold the control module in place on the fan assembly.
Remove these bolts and place them in a safe location. They will be reused in a moment.
With the unit removed compare it to the new one and make sure they are identical and have the some connections.
Step 5: Installing the new fan control module. Install the new fan control module in place of the one that was removed.
Loosely install all of the mounting bolts before tightening anything.
Once all bolts are installed tighten them to factory specifications.
After all of the bolts are tight we will grab the electrical connectors that were set aside. Now plug the electrical connectors into the new fan control module.
Part 2 of 2: Checking work and final touches
Step 1: Check over the installation. With any repairs we will always check our work for any errors before starting the vehicle.
Make sure the fan control module in in the proper location and seated fully.
Take a look at the electrical connections and ensure they are all tight.
Step 2: Checking fan operation. Now we can start the engine and inspect the fans. Turn the AC on and set it to the coldest setting. The condenser fan should turn on immediately.
The radiator fan will take longer to turn on. This fan does not turn on until the engine has warmed up.
Wait for the engine to warm up and ensure the radiator fan is working as well.
Lastly make sure the AC is blowing cold air and the vehicle is not overheating.
When a fan control module fail it can be no fun and lead to the AC not working and the vehicle overheating. Replacing the fan control module can restore proper operation to both these systems and the repair should be performed as soon as symptoms are detected. If any of the instructions are unclear or you do not fully understand contact a professional such as the ones at YourMechanic for a service appointment.
