Whether it is to breathe new life into a commuter or work vehicle, or for hobby in a classic car, there are many cases in which rebuilding an engine can be a great alternative to replacing one. Generally speaking, rebuilding an engine can be a large task, but one that is very possible with proper research, planning, and preparation.
As the exact difficulty of a job like this can vary greatly depending on the exact model of engine, and the number different types of engines is great, we will focus on how to rebuild a classic pushrod style engine. The pushrod design uses an engine block shaped like a “V”, places the camshaft in the block, and uses pushrods to actuate the cylinder heads.
The pushrod has been used for many decades, and remains popular to this day due to its its reliability, simplicity, and easy access to parts, when compared to other engine designs. In this step by step guide, we will go over what a typical engine rebuild would entail.
Part 1 of 9: Preparing the vehicle and your tools
Materials Needed
- Air compressor
- Engine assembly lube
- Basic set of hand tools
- Blow gun and air hose
- Brass punch
- Camshaft bearing tool
- Cylinder bore honing tool
- Cylinder bore ridge reamer
- Electric drill
- Engine hoist (to remove engine)
- Engine stand
- Engine rebuild kit
- Fender covers
- Flashlight
- Jack stands
- Masking tape
- Oil drain pan (at least 2)
- Permanent marker
- Plastic sandwich bags and boxes (to store and organize hardware and parts)
-
Piston ring compressor
- Rod journal protectors
- Service Manual
- Silicone gasket maker
- Timing gear puller
- Torque wrench
- Wheel chocks
- Water displacement lubricant
Step 1: Research and preview the removal procedure. Before beginning, thoroughly research the removal and rebuild procedures for your specific vehicle and engine and gather all of the necessary tools for the job.
Most pushrod V8 engines have very similar designs, however it is always a good idea to be knowledgeable on the specifics of the vehicle or engine you are working on.
If necessary, purchase a service manual, or find one on online, so that the exact procedures for a thorough, and quality rebuild are followed.
Part 2 of 9: Draining the vehicle’s fluids

Step 1: Raise the front of the vehicle. Raise the front of the vehicle off the ground, and lower it onto jack stands. Set the parking brake, and place wheel chocks underneath the rear wheels.
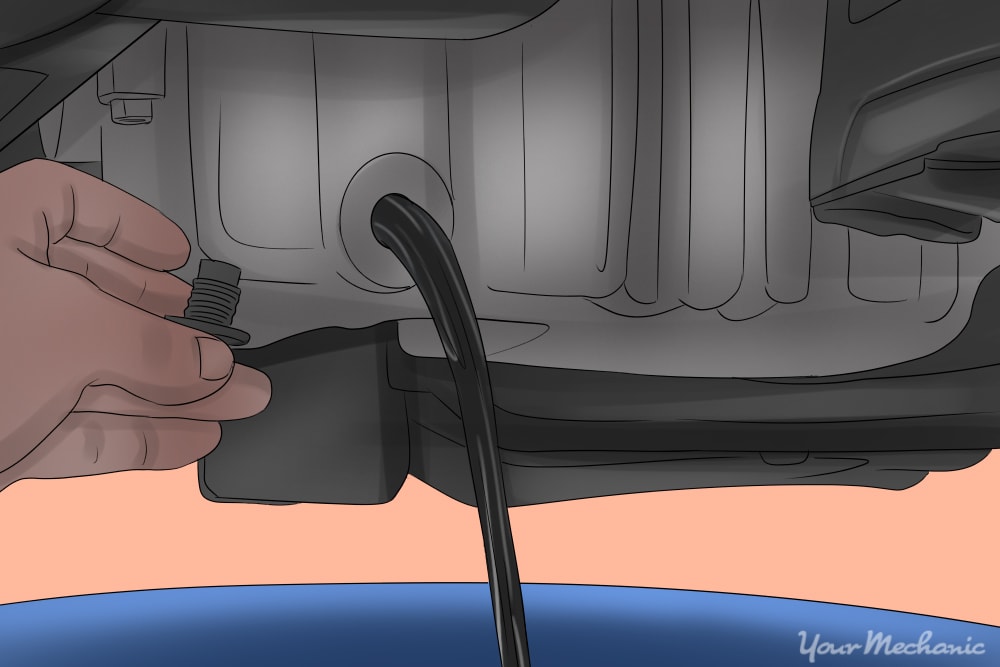
Step 2: Drain the engine’s oil into a pan. Place fender covers on both fenders, and then proceed to drain the engine’s oil and coolant into your drain pans.
Take precaution to drain the oil and coolant into separate pans, as the two mixed together can sometimes make proper disposal and recycling more difficult.
Part 3 of 9: Prepare the engine for removal
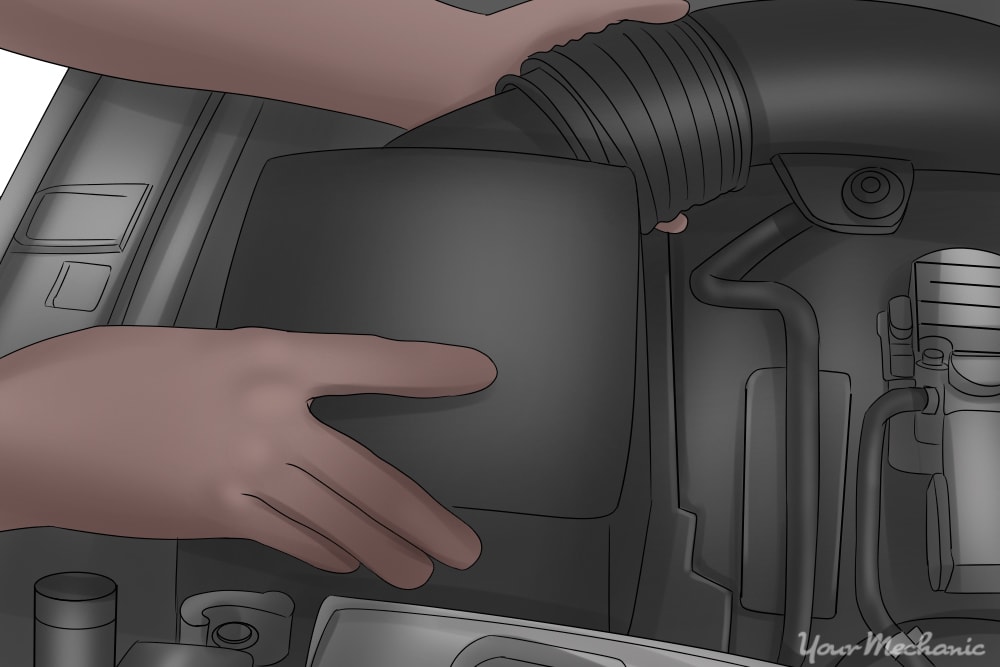
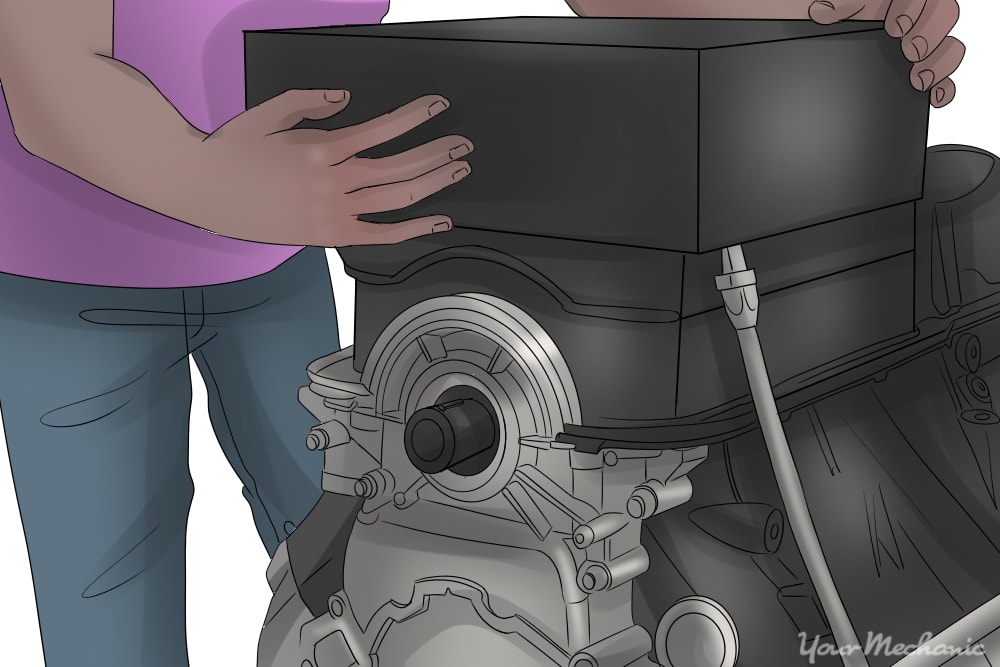
Step 1: Remove any plastic covers. While the fluids are draining, proceed to removing any of the engine’s plastic covers, as well as any air intake tubes or filter housings that need to be removed before the engine can come out.
Place any hardware you remove into sandwich bags, and then label the bags using the masking tape and marker, so that no hardware gets lost, or left over during reassembly.

Step 2: Remove the radiator. Once the fluids are drained and covers removed, proceed to remove the radiator from the vehicle.
Remove the radiator brackets, undo the upper and lower radiator hoses, as well as any transmission lines if necessary, and then remove the radiator from the vehicle.
Removing the radiator will prevent it from possibly being damaged when the engine is being lifted out of the vehicle.
Also, take this time to disconnect any heater hoses going to the firewall, most vehicles will usually have two of them that need to be removed.
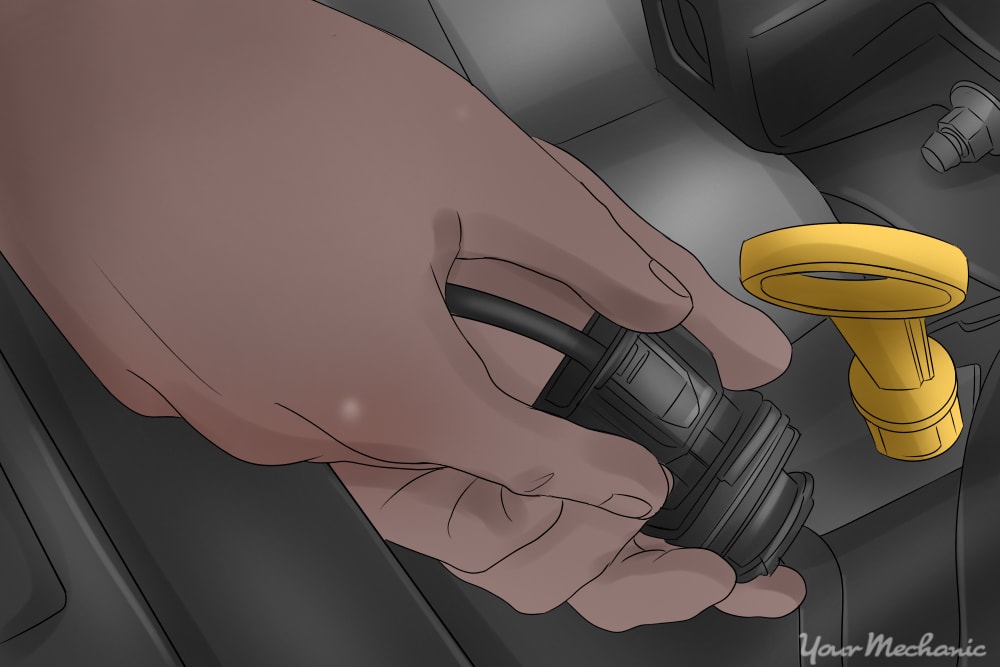
Step 3: Disconnect the battery and starter. Next, disconnect the battery, and then all of the engine’s various harnesses and connectors.
Use the flashlight to carefully check around the entire engine, including the underside and near the firewall, to make sure that no connectors are missed.
Also remember to disconnect the starter, which will be located on the underside of the engine. Once all of the electrical connectors have been unplugged, set the harness over to the side, out of the way.
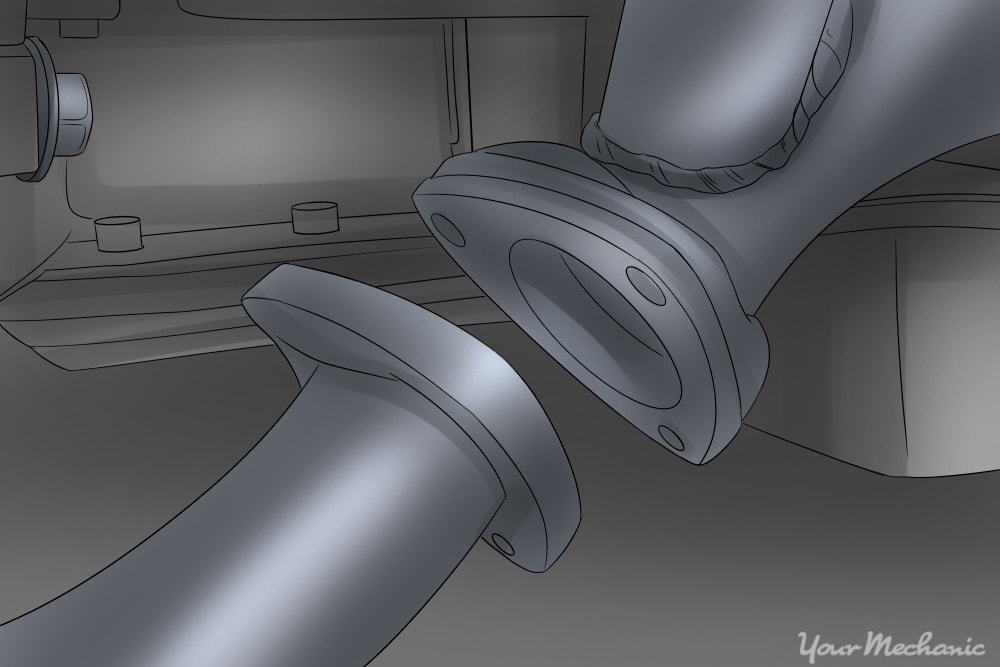
Step 4: Remove the starter and exhaust manifolds. With the harness out of the way, proceed to removing your starter and unbolting the engine’s exhaust manifolds from their respective downpipes, and if necessary from the engine cylinder heads.
Some engines can be removed with the exhaust manifolds still bolted on, while others require definite removal, refer to your service manual for specifics if you are unsure.
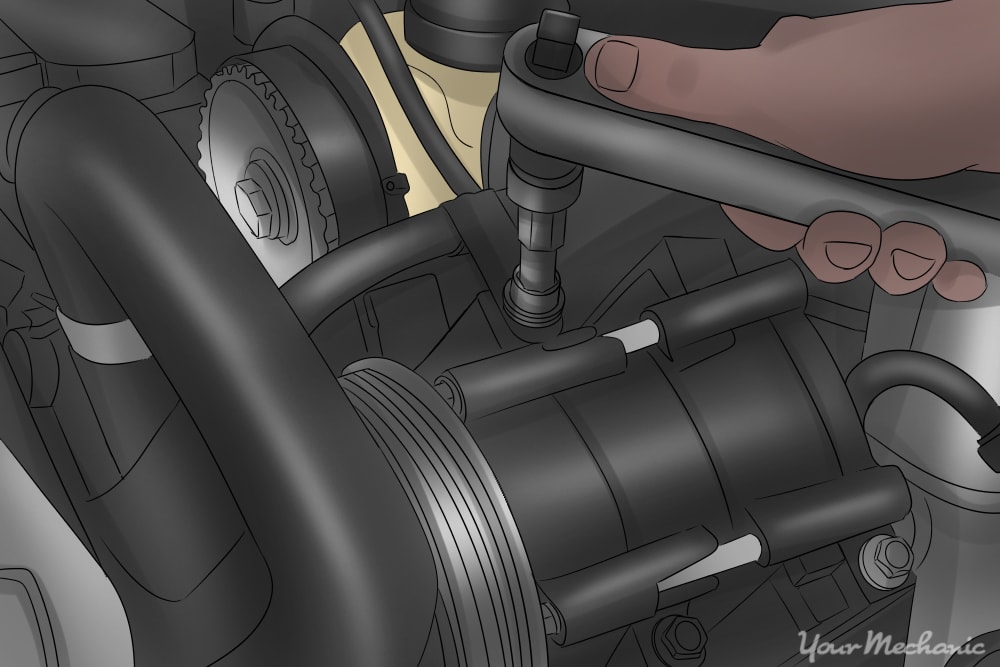
Step 5: Remove the air compressor and belts. Next, if your vehicle is equipped with air conditioning remove the belts, and unbolt the air conditioning compressor from the engine and set it aside, out of the way.
If possible, leave the air conditioning lines attached to the compressor, as the system will need to be refilled with refrigerant later if it is opened.

Step 6: Unbolt the engine from transmission. Proceed to unbolting the engine from the transmission bell housing.
Support the transmission with a jack if there is not a crossmember or mount securing it onto the vehicle, and then remove all of the bell housing bolts.
Put all of the removed hardware in a plastic bag, and label it for easier identification during reassembly.
Part 4 of 9: Removing the engine from the vehicle
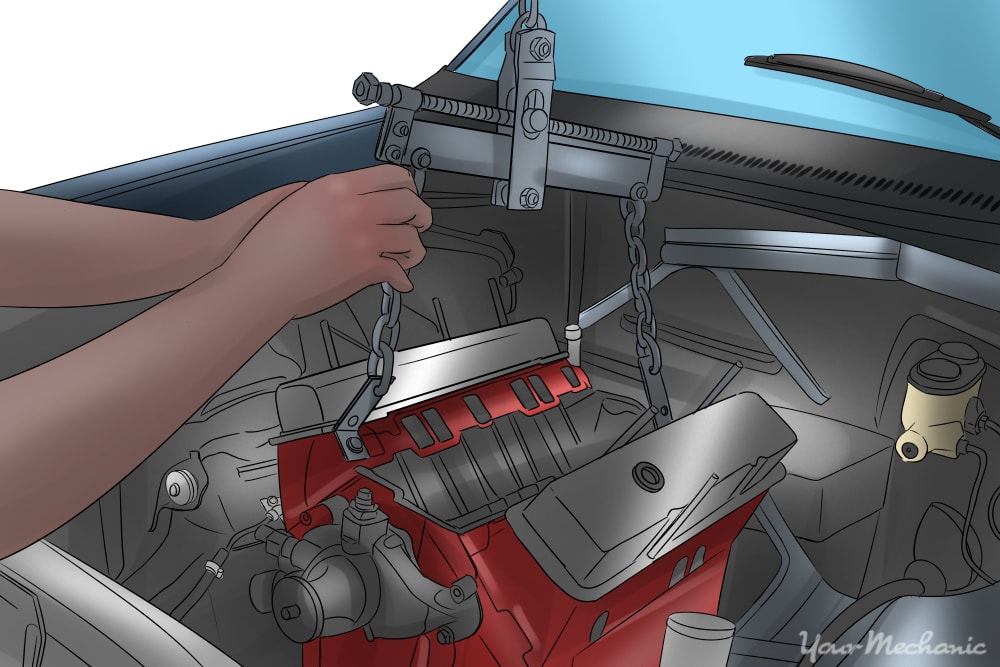
Step 1: Prepare your engine hoist. At this point, position your engine hoist over the engine, and attach the chains to the engine in a safe and secure manner.
Some engines will have hooks or brackets specifically in place for the engine hoist to hook onto, while others will require you to thread a bolt and washer through one of the chains links.
If you do run a bolt through one of the chains links, make sure that the bolt is of a high grade, and that it threads adequately into the bolt hole, as to ensure that it does not break, or damage the threads, with the weight of the engine.
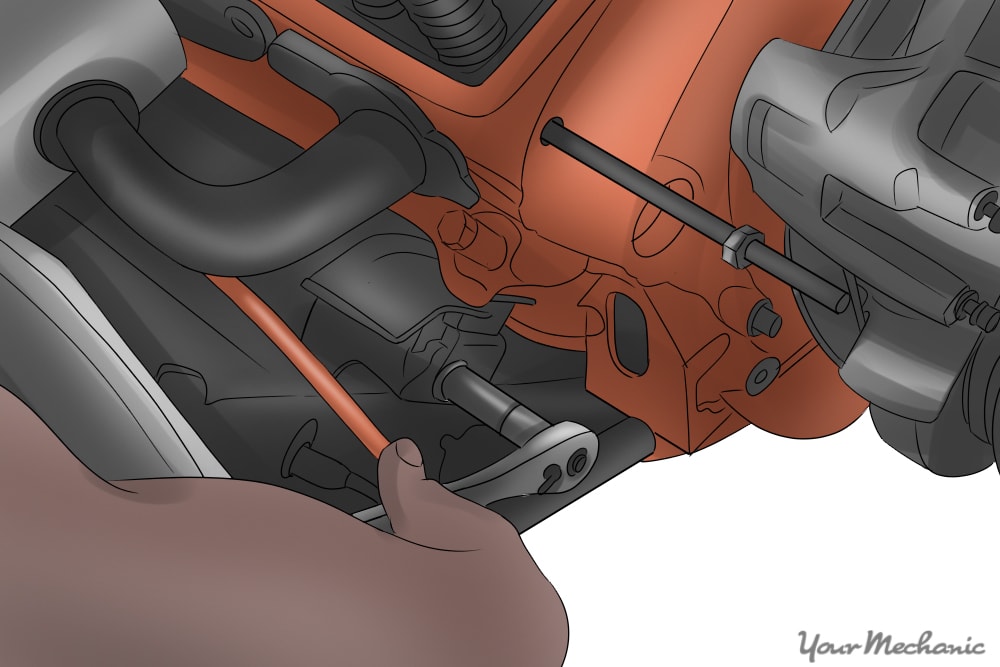
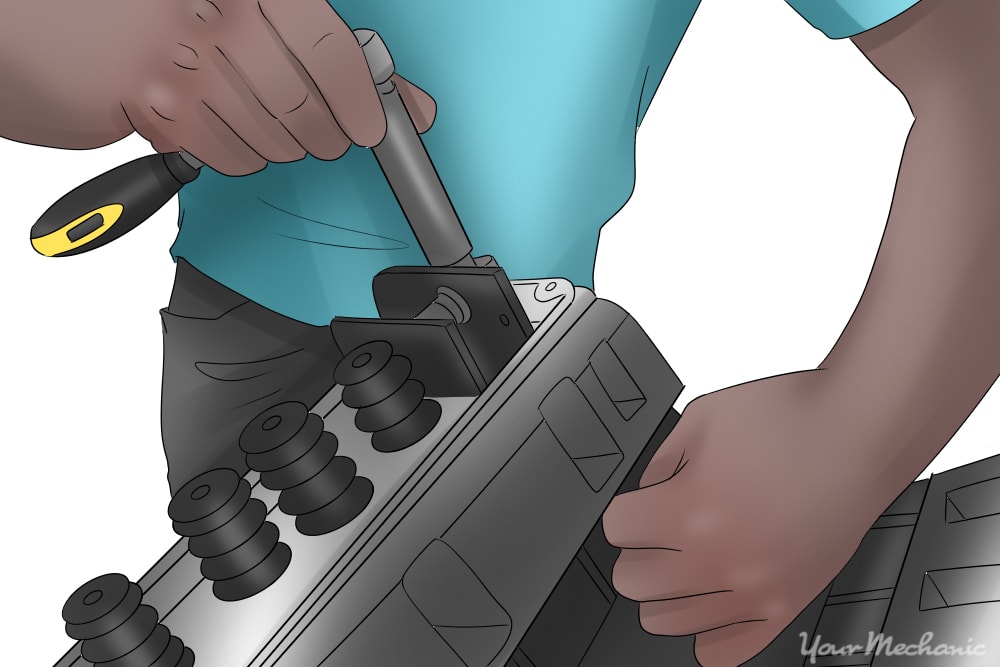
Step 2: Unbolt the engine from the motor mounts. Once the engine hoist is properly secured to the engine and all of the transmission bolts are removed, proceed to unbolting the engine from the motor mounts, leaving the motor mounts attached to the vehicle if possible.
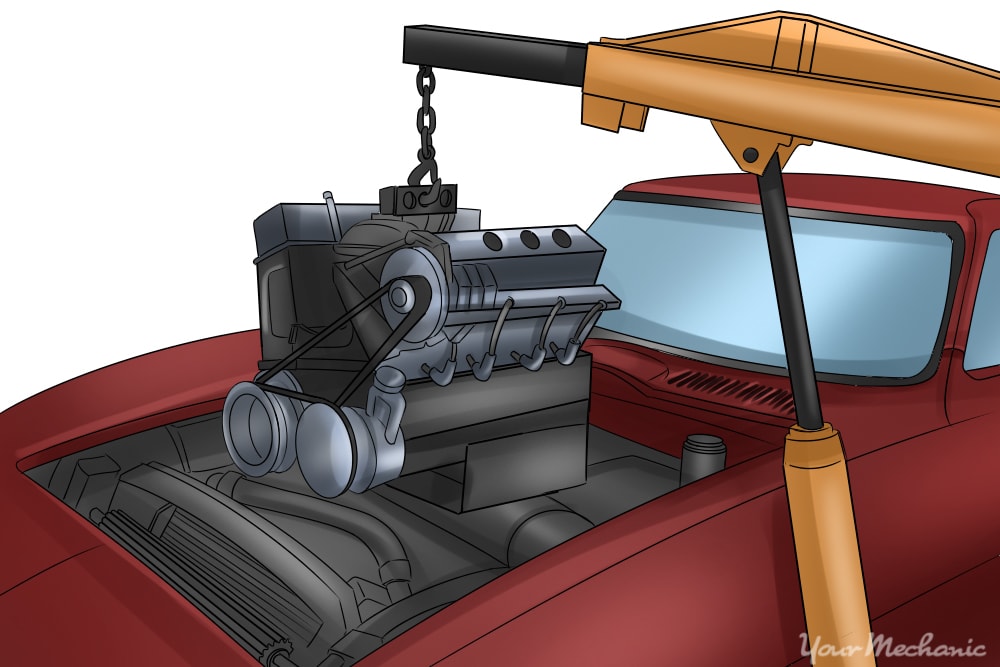
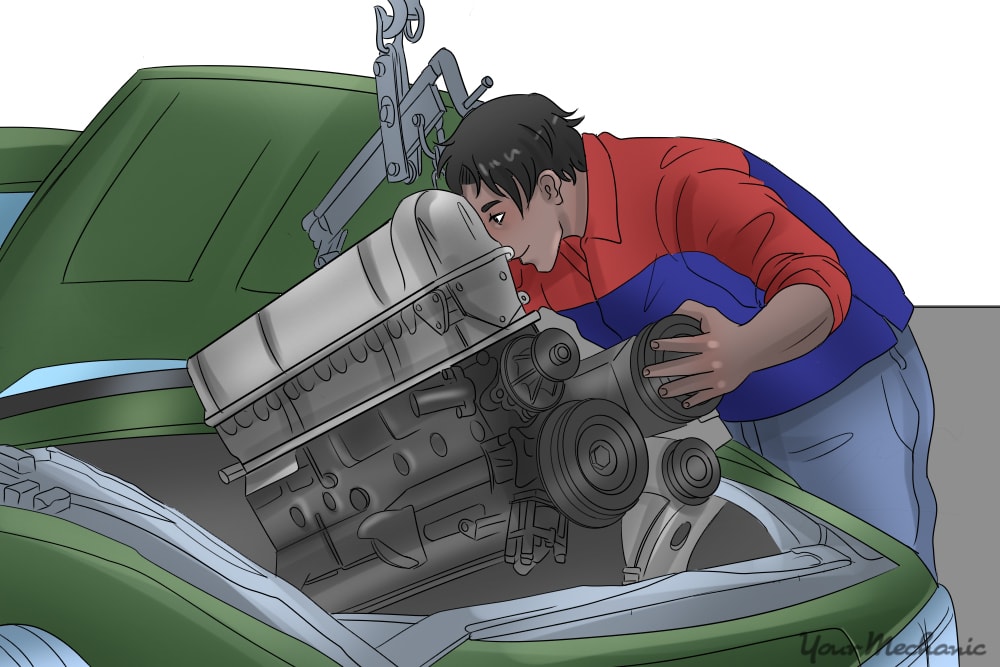
Step 3: Carefully lift the engine out of the car. The engine should now be ready to come out. Carefully double check to make sure that no electrical connectors or hoses remain connected, and that all the necessary hardware is removed, and then proceed to lift the engine out.
Lift it out slowly, and carefully maneuver it up and away from the vehicle. If necessary, have someone help you with this step, as engines are very heavy, and can be cumbersome to try and maneuver on one's own.
Part 5 of 9: Mounting the engine onto the engine stand
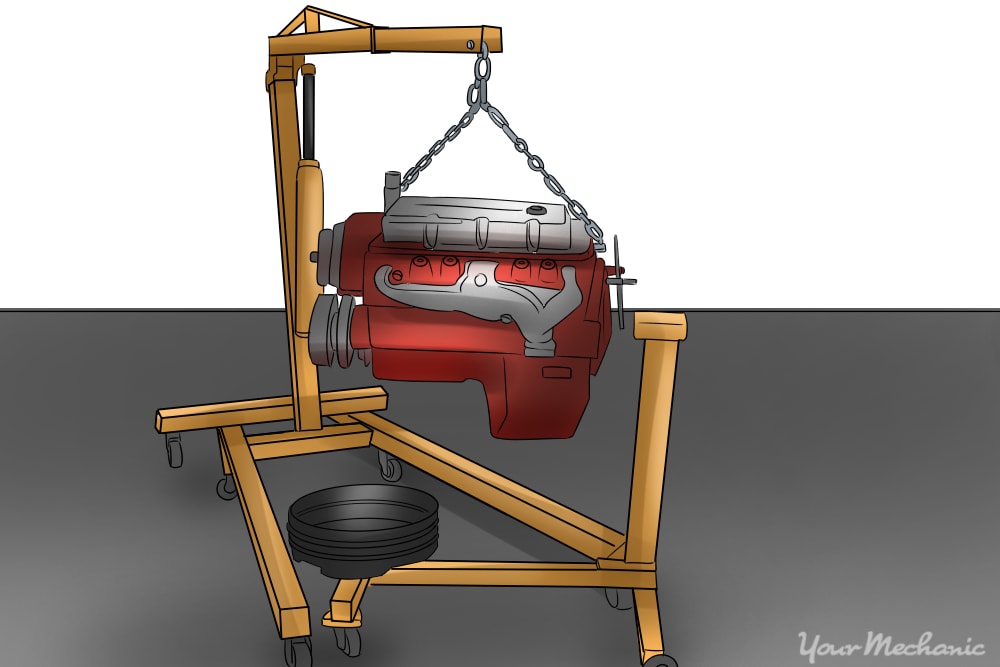
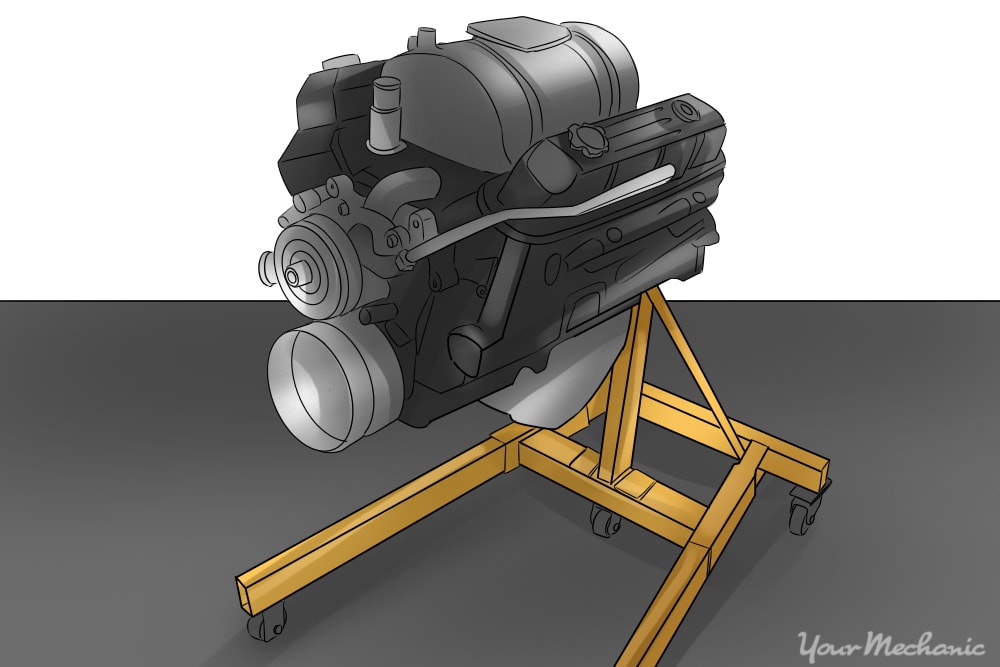
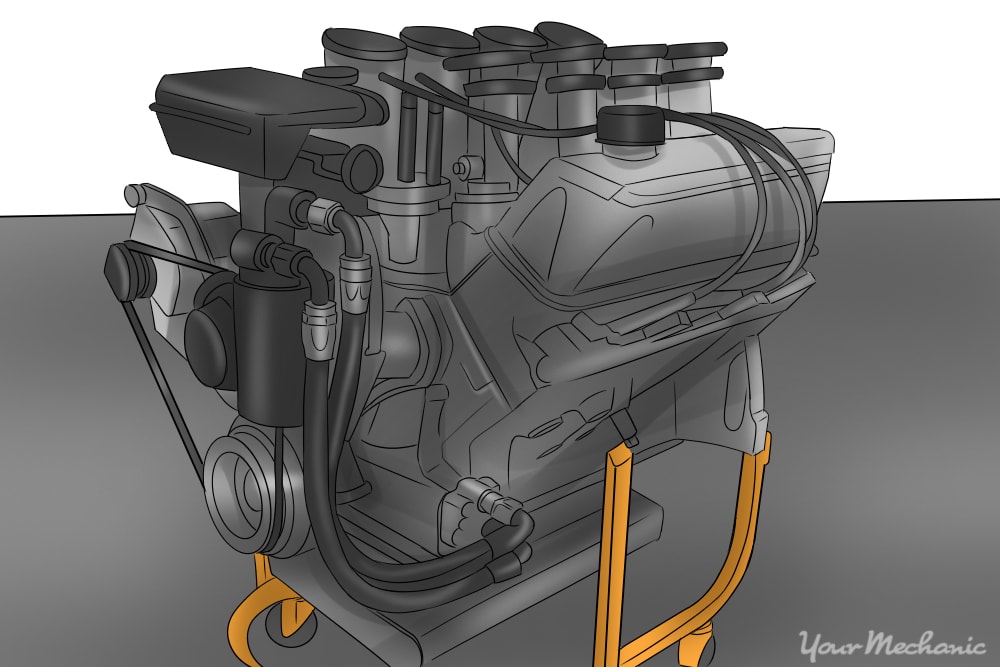
Step 1: Place the engine on an engine stand. With the engine removed, it is time to mount it onto the engine stand.
Position the hoist over your engine stand and secure the engine to the stand using nuts, bolts, and, washers.
Again, make sure to use high grade bolts, to ensure that they do not break under the weight of the engine.
Part 6 of 9: Disassembling the engine
Step 1: Remove all belts and accessories Once the engine is mounted we can begin disassembly.
Begin by removing all of engine’s belts and accessories if they have not been removed already.
Remove the distributor and wires, crankshaft pulley, oil pump, water pump, alternator, power steering pump, and any other accessories or pulleys that may be present.
Remember to properly store and label all of the hardware and parts that you remove to facilitate reassembly later on.
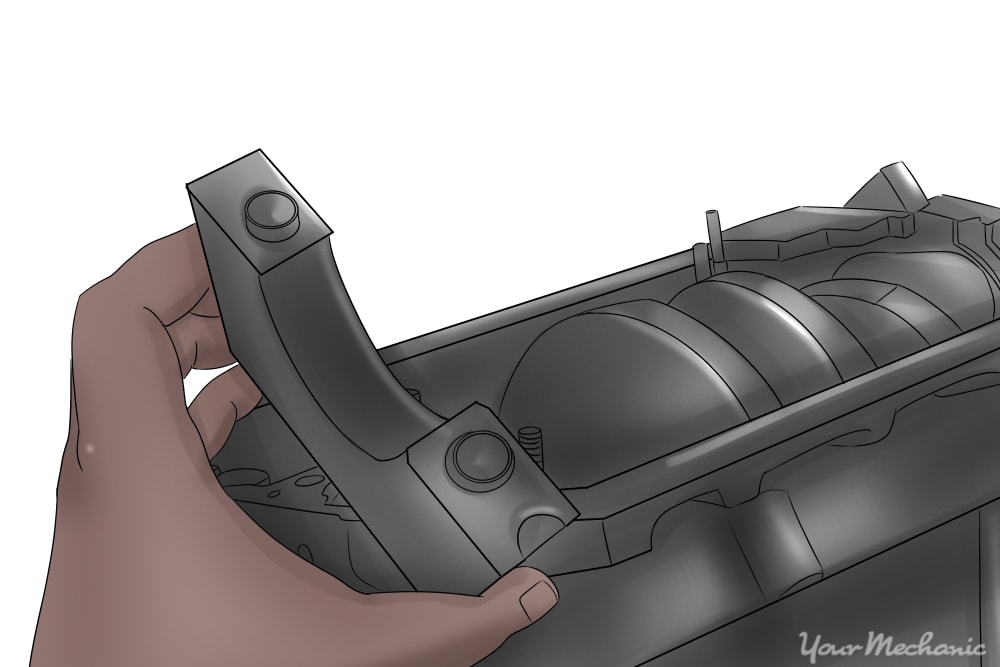
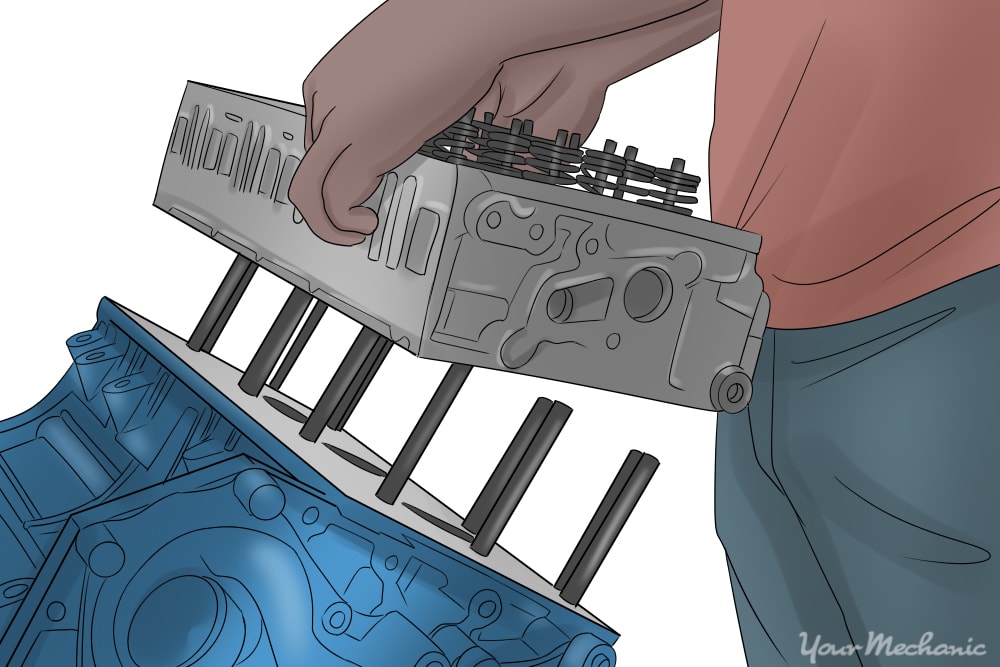
Step 2: Remove the bare components of the engine. Once the engine is bare, proceed to removing the intake manifold, oil pan, timing cover, flexplate or flywheel, rear engine cover, and valve covers from the engine.
Place a drain pan underneath the engine to catch any remaining oil or coolant that may fall from the engine when these components are removed. Again, be sure to store and label all hardware appropriately for ease of assembly later on.
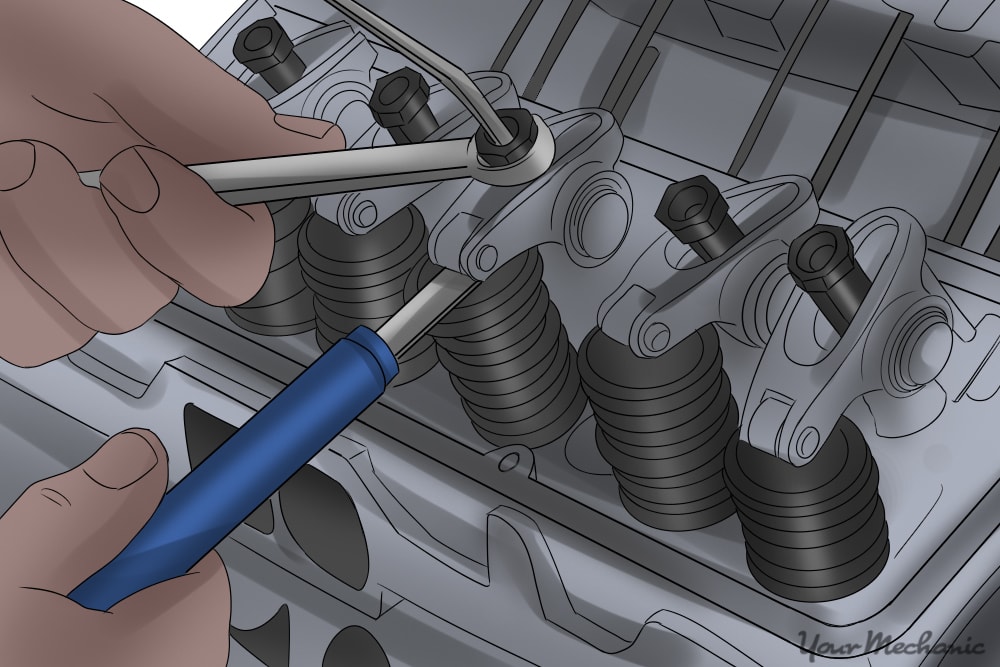
Step 3: Remove the rocker arms and pushrods. Disassemble the cylinder heads’ valvetrain. Begin by removing the rocker arms and pushrods, which should now be exposed.
Remove, and then closely inspect the rocker arms and pushrods to make sure that they are not bent or excessively worn at the contact points. Once the pushrods are removed, remove the lifter retainers and lifters as well.
Once all of the valve train components are removed closely inspect all of them. If you find any of the components to be damaged, replace them with new ones.
As these types of engines are very common, these parts are usually readily available on the shelf at most parts stores.
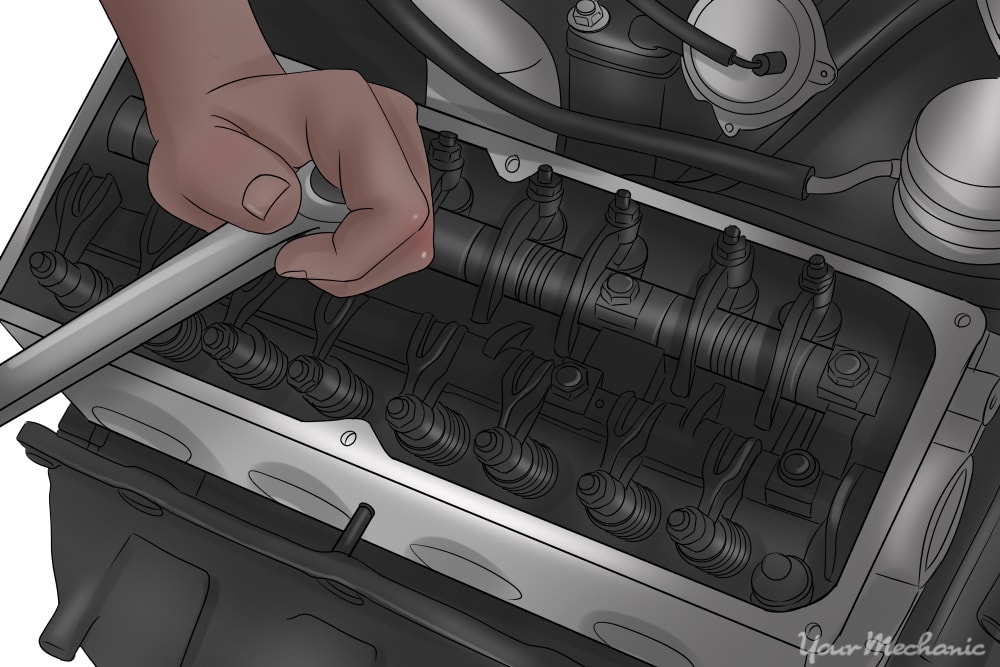
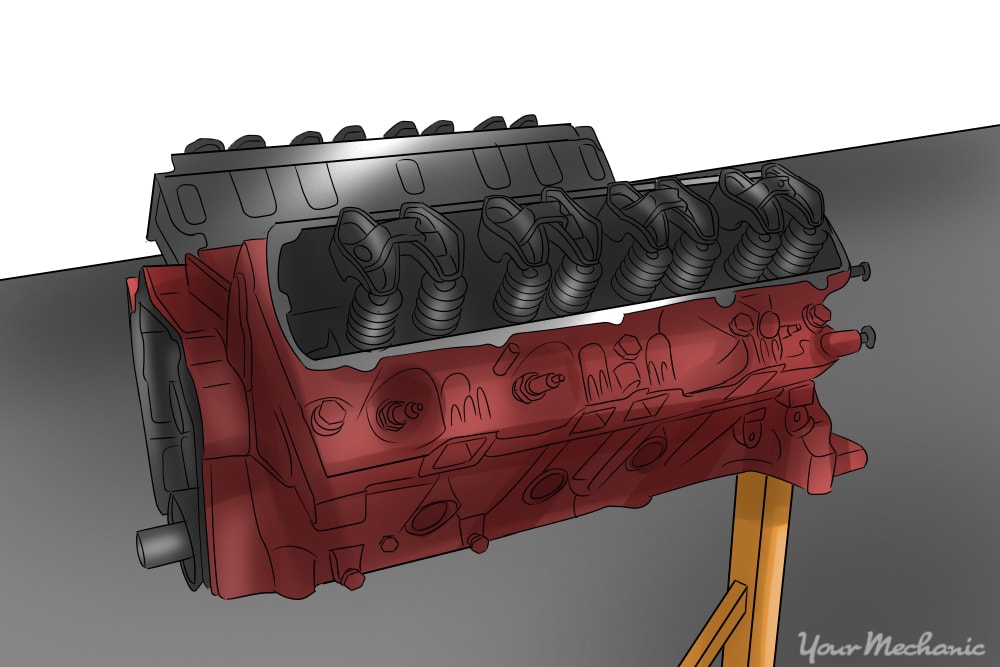
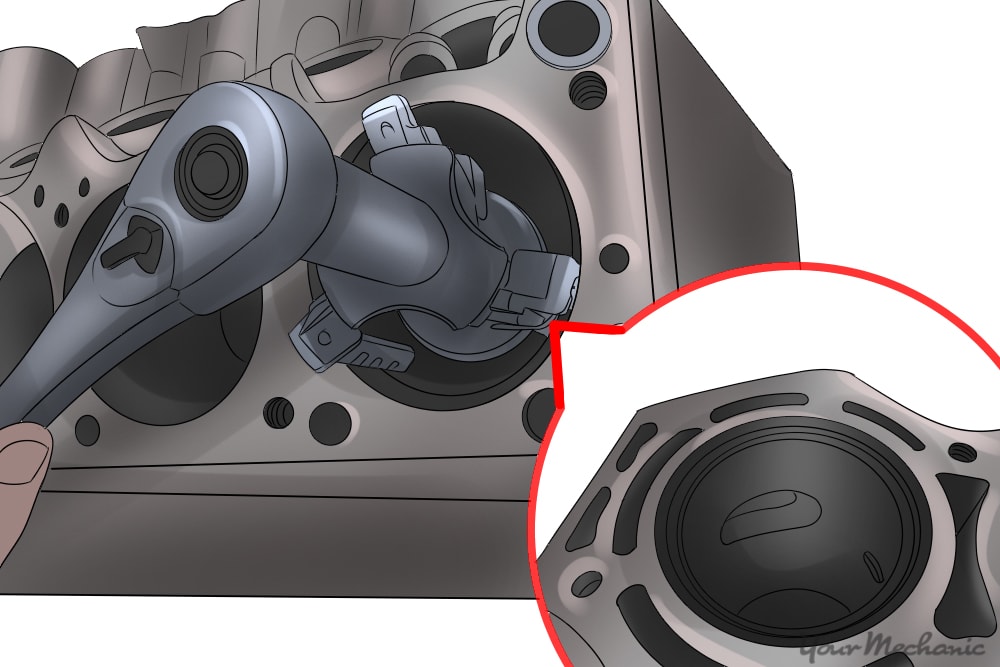
Step 4: Remove the cylinder head. With the pushrods and rocker arms removed, proceed to remove the cylinder head bolts.
Remove the bolts in an alternating fashion, from outside to inside, to prevent the head from warping when the torque is released, and then remove the cylinder heads from the block.
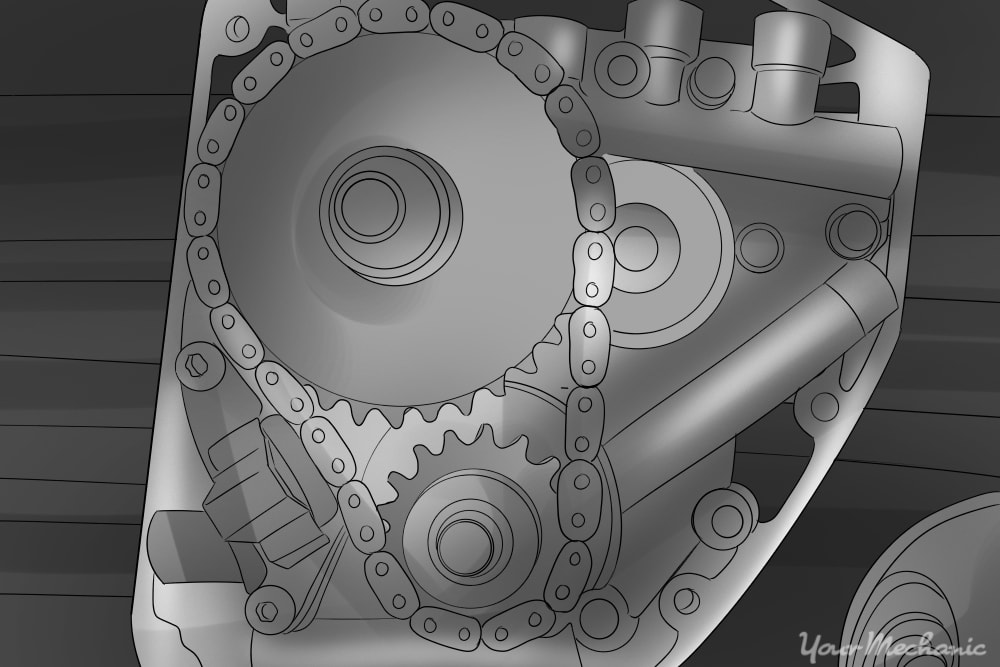
Step 5: Remove the timing chain and the camshaft. Remove the timing chain and sprockets that connect the crankshaft to the camshaft, and then carefully remove the camshaft from the engine.
If either of the sprockets are difficult to remove use the timing gear puller to remove them.
Step 6: Remove the piston rod caps. Rotate the engine upside down and begin to remove the piston rod caps one by one, keeping all of the caps with the same hardware that you removed from them as a set.
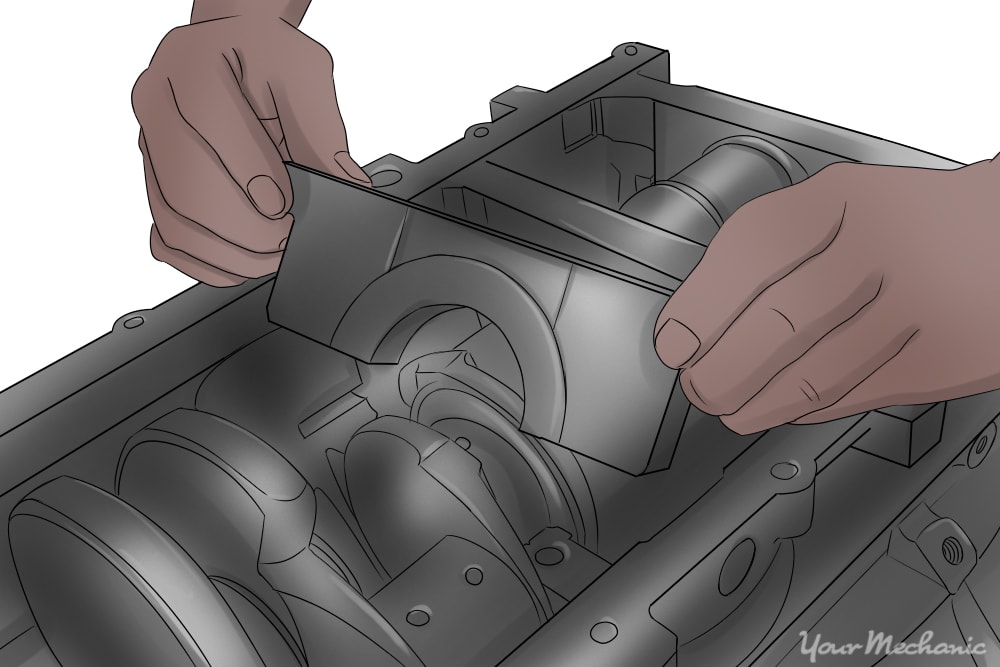
Once all of the caps are removed, place rod journal protectors on each of the connecting rod studs to prevent them from scratching or scoring the cylinder walls when they are removed.
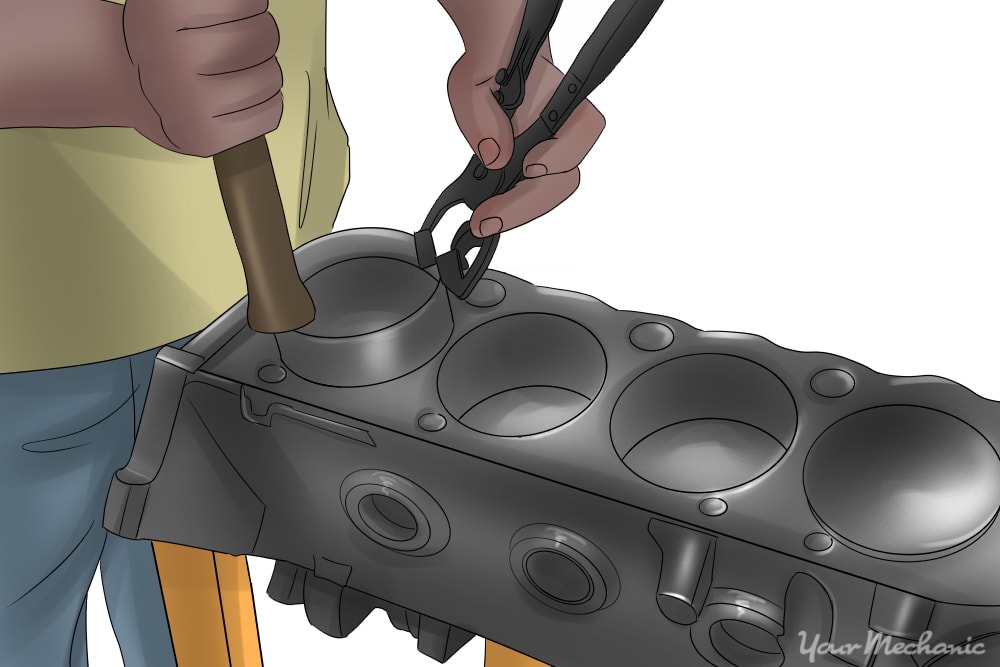
Step 7: Clean the tops of each cylinder. Once all of the connecting rod end caps have been removed, use the cylinder ridge reamer to remove the carbon build up from the tops of each cylinder, and then pull each piston out, one by one.
Be careful not to scratch or damage the cylinder walls when removing the pistons.
Step 8: Inspect the crankshaft. The engine should now be mostly disassembled with the exception of the crankshaft.
Rotate the engine upside down and remove the crankshaft main bearing caps, and then the crankshaft and the main bearings.
Thoroughly inspect all of the crankshaft journals (bearing surfaces) for any signs of damage, such as scratches, scoring, signs of possible overheating, or oil starvation.
If the crankshaft has sustained visible damage, it may be a wise idea to have a machine shop double check it, and machine, or replace it if necessary.
Part 7 of 9: Preparing the engine and components for reassmbly
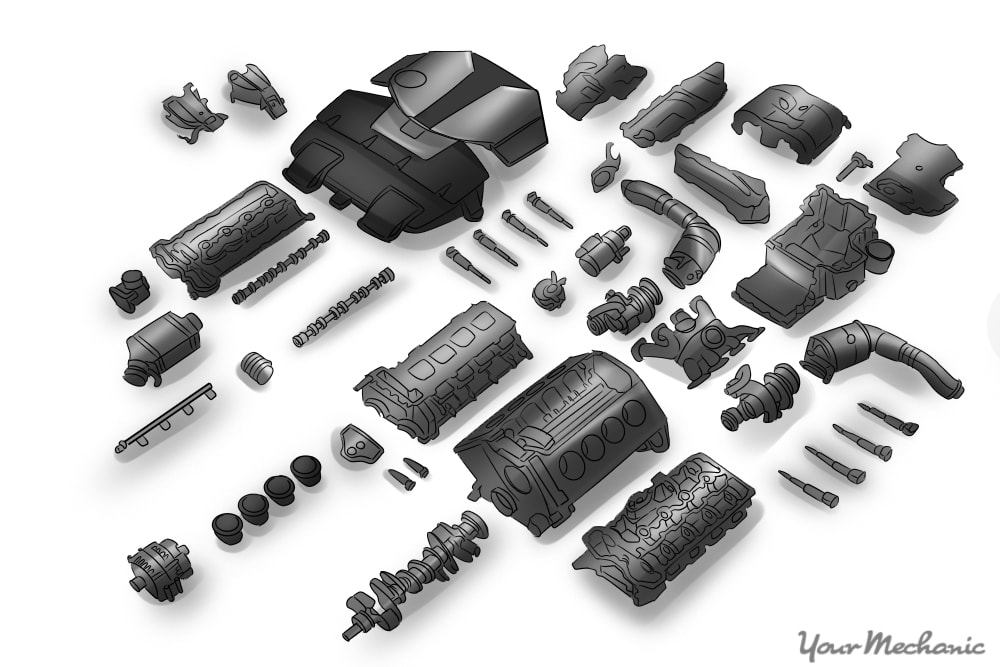
Step 1: Clean all of the removed components. At this point the engine should be completely disassembled.
Lay all of the parts that are going to be reused, such as the crankshaft, camshaft, pistons, rods, valve covers, front and rear covers out onto a table, and thoroughly clean each component.
Remove all old gasket material that may be present, and wash the parts with warm water and a water soluble detergent. Then blow them dry with compressed air.
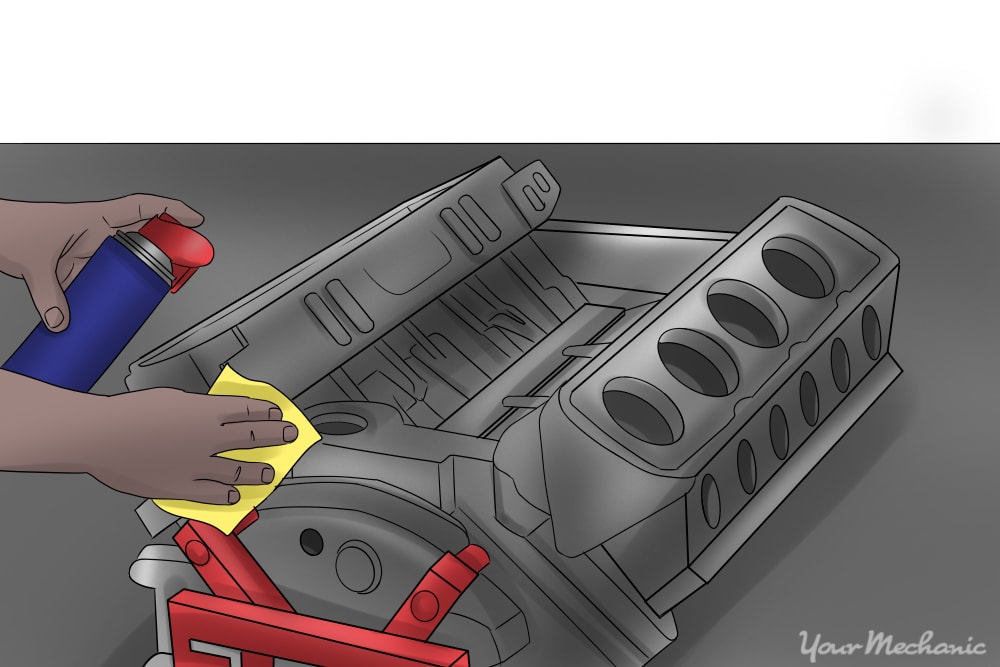
Step 2: Clean the engine block. Prepare the block and heads for reassembly by thoroughly cleaning them. Same as with the parts, remove all old gasket material that may be present, and clean the block with warm water and a water soluble detergent to the best of your ability. Inspect the block and heads for signs of possible damage while you clean them. Then blow them dry with compressed air.

Step 3: Inspect the cylinder walls. Once the block is dry, thoroughly inspect the cylinder walls for any signs of scratching or scoring.
If any signs of serious damage are found, consider having a machine shop double check, and if necessary, machine the cylinder walls.
If the walls appear to be okay, mount your cylinder honing tool onto your drill, and lightly hone the walls of each individual cylinder.
Honing the walls will make it easier to break in and seat the piston rings when the engine is started. Once the walls are honed, spray a light coat of your water displacement lubricant to keep the walls from rusting.
Step 4: Replace the engine’s freeze plugs. Proceed to remove and replace each of the engine’s freeze plugs.
Use a brass punch and hammer to tap one edge of the freeze plug inward. The opposite edge of the freeze plug should come up and you should be able to pull it out with a pair of pliers.
Install the new freeze plugs by gently tapping them into place, making sure that they install onto the block flush and even. At this point, the engine block itself should be ready for reassembly.
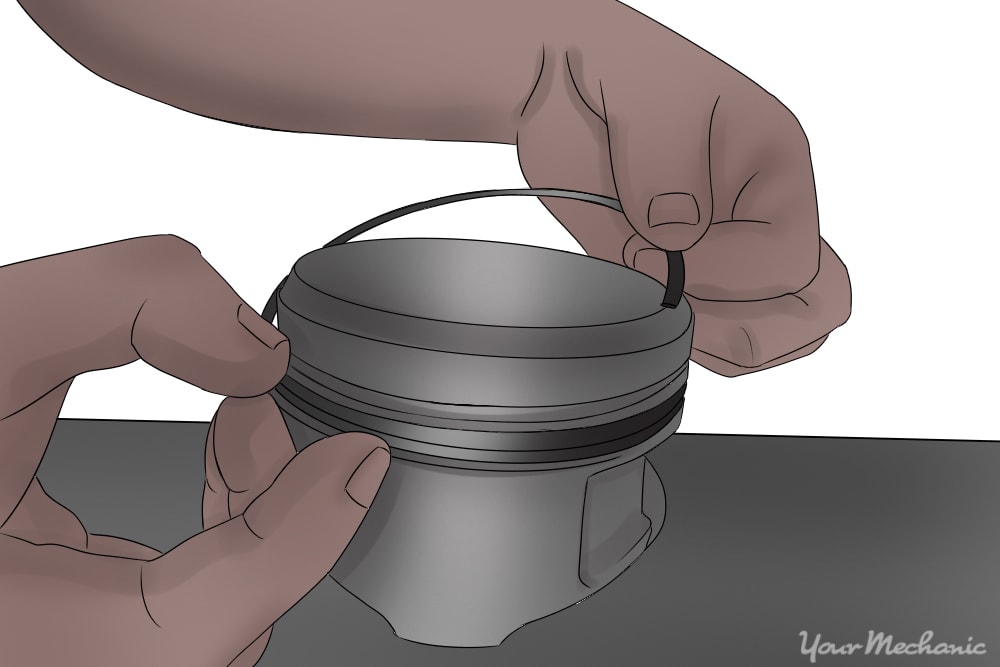
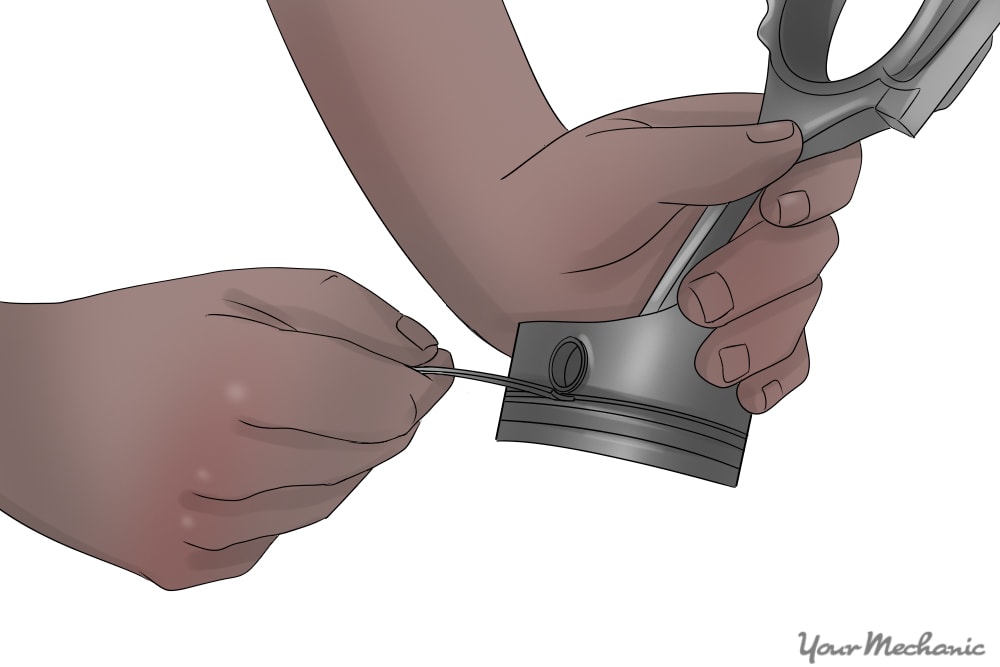
Step 5: Install new piston rings. Before beginning reassembly prepare your pistons by installing new piston rings if they are included as part of your rebuild kit.
- Tip: Follow the installation instructions provided closely, as piston rings are designed to be installed and function in a very specific manner. Installing them incorrectly may lead to issues with the engine later on down the line.
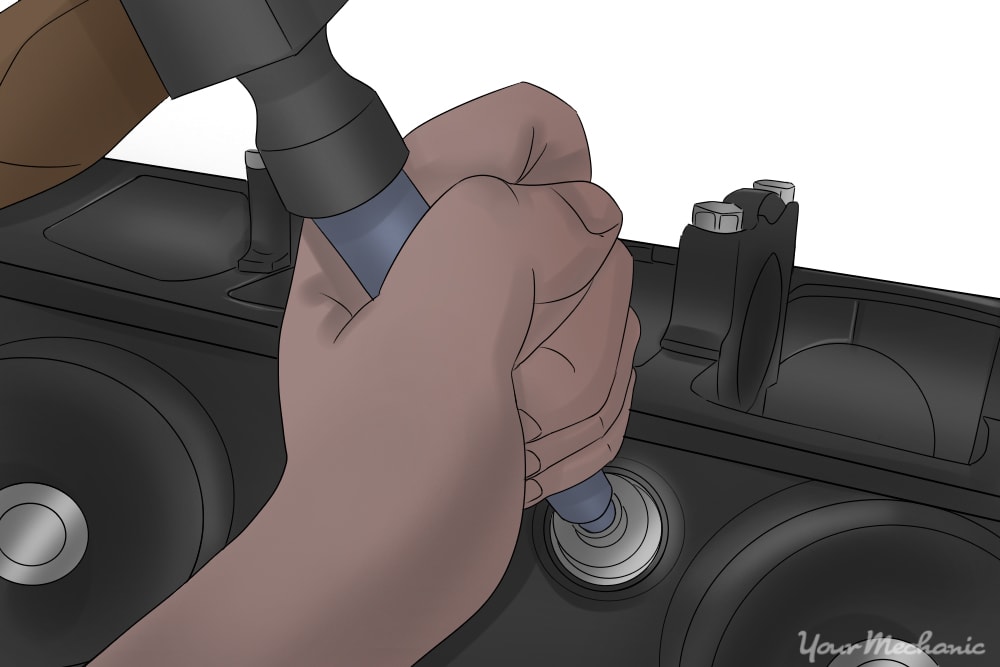
Step 6: Install new camshaft bearings. Install the new camshaft bearings using the camshaft bearing tool. Once installed, apply a generous layer of assembly lube to each of them.
Part 8 of 9: Reassembling the engine
Step 1: Reinstall the main bearings, crankshaft, and then the caps. Rotate the engine upside down, and then install the main bearings, crankshaft, and then the caps.
Make sure to generously lubricate each bearing and journal with assembly grease, and then install each main bearing cap hand tight.
The rear bearing cap may also have a seal that needs to be installed. If that is the case, do so at this time.
Once all of the caps are installed, torque down each cap to the proper specification, and in the correct sequence, to avoid the possibility of damaging the crankshaft due to incorrect installation procedures.
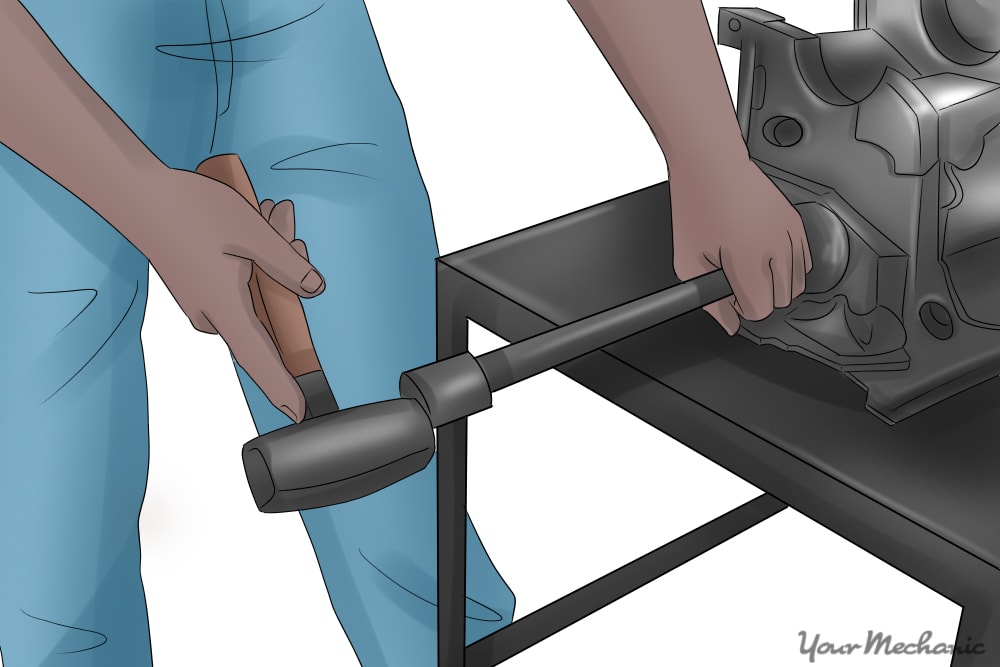
Once the crankshaft is installed rotate it by hand to make sure that it turns smoothly and does not bind. Refer to your service manual if you are unsure about any of the specifics for installing the crankshaft.
Step 2: Install the pistons. At this point, you are ready to install the pistons. Prepare the pistons for installation by installing the new bearings onto the rods, and then installing the pistons into the engine.
As the pistons rings are designed to expand outward, like springs, use the cylinder ring compression tool to compress them, and then lower the piston down into the cylinder, and onto the corresponding crankshaft journal.
Once the piston is lowered into the cylinder and the bearing on the crankshaft journal, rotate the engine upside down and install the corresponding connecting rod end cap onto the piston.
Repeat this procedure for each piston until all the pistons are installed.
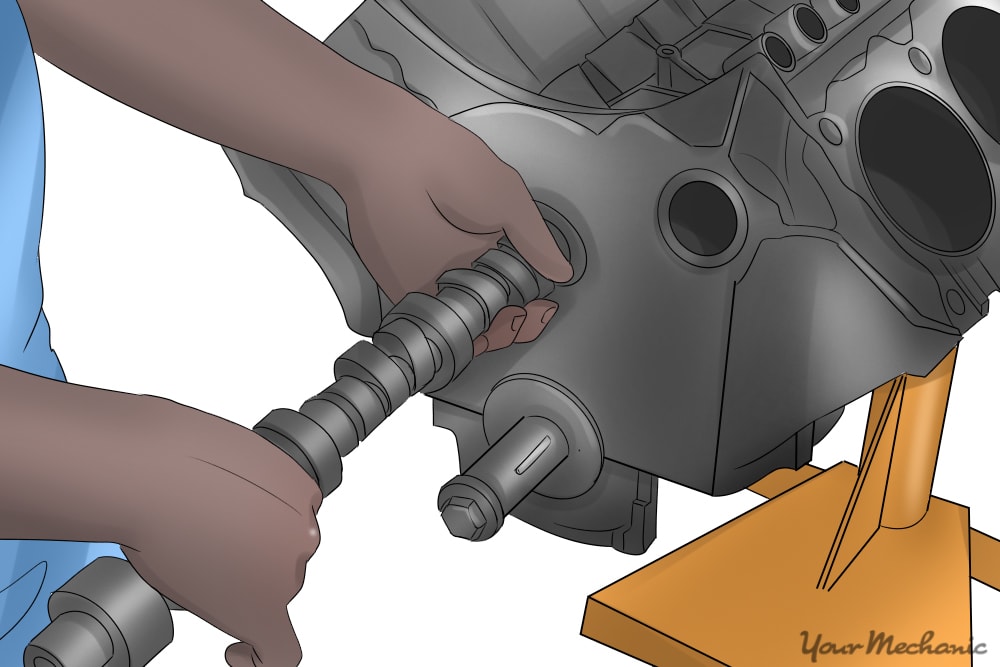
Step 3: Install the camshaft. Apply a generous layer of assembly lube to each one of the camshafts journals and and cam lobes and then carefully install it into the engine block, taking care not to scratch or score any of the bearings when installing the camshaft.
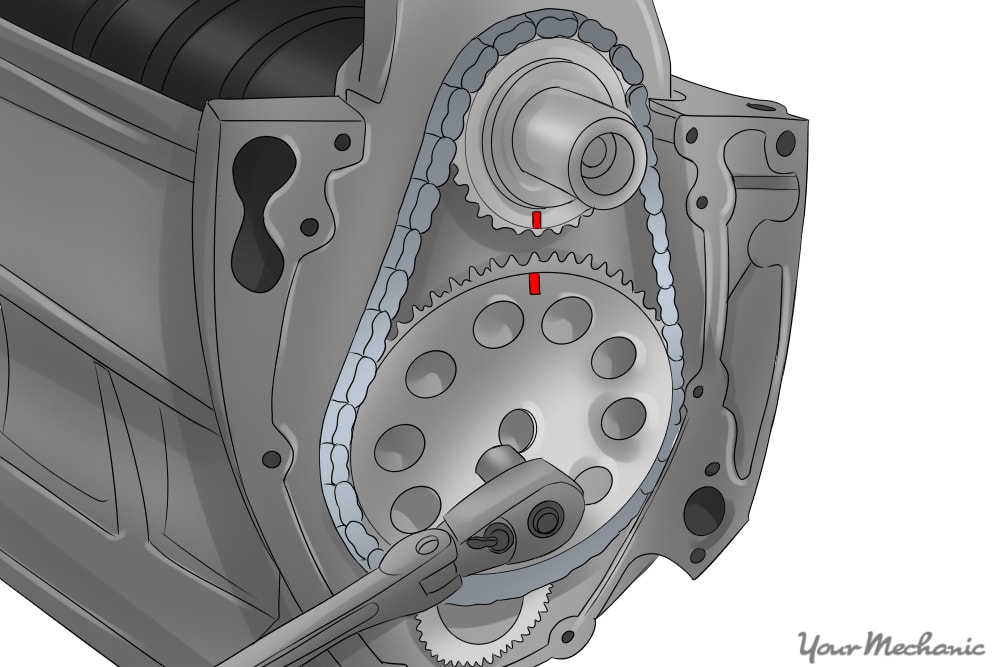
Step 4: Install the timing components. With the cam and crank installed we are now ready to install the timing components, the cam and crank sprockets and timing chain.
Install your new sprockets, and then clock them according to the instructions provided with your timing kit or in your service manual.
For most pushrod engines it is a simple matter of turning the cam and crankshaft until the correct cylinder or cylinders are at TDC, and the marks on the sprockets line up in a certain manner or point in a certain direction. Refer to the service manual for specifics.
Step 5: Test the crankshaft. At this point the rotating assembly should be fully assembled.
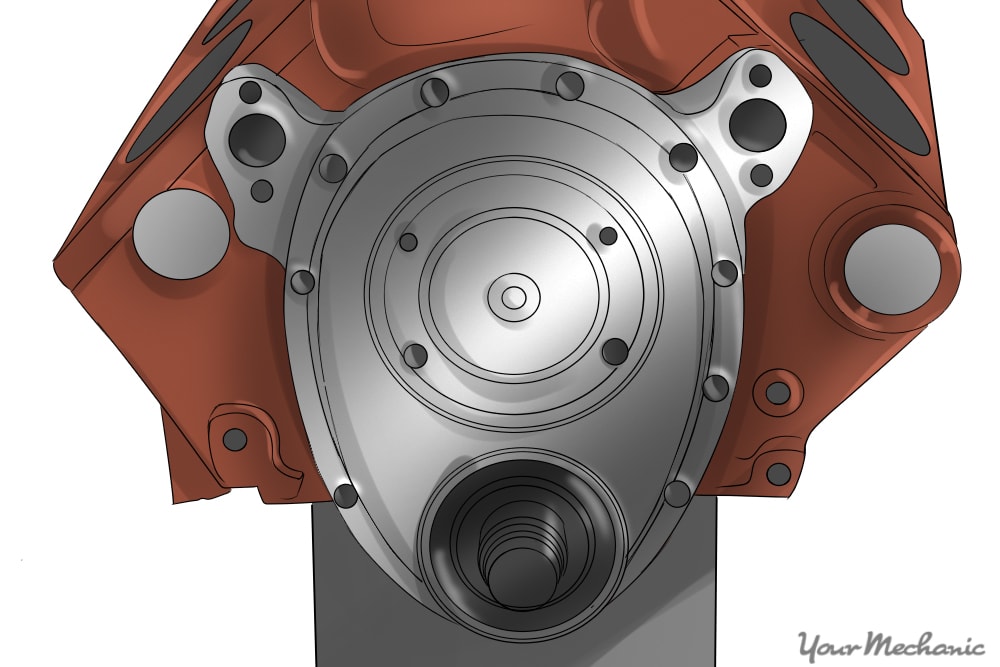
Rotate the crankshaft by hand a few times to verify that the cam and crank sprockets are installed correctly and then install the timing chain cover and the rear engine cover.
Make sure to replace any seals or gaskets that are pressed into the engine covers with new ones.
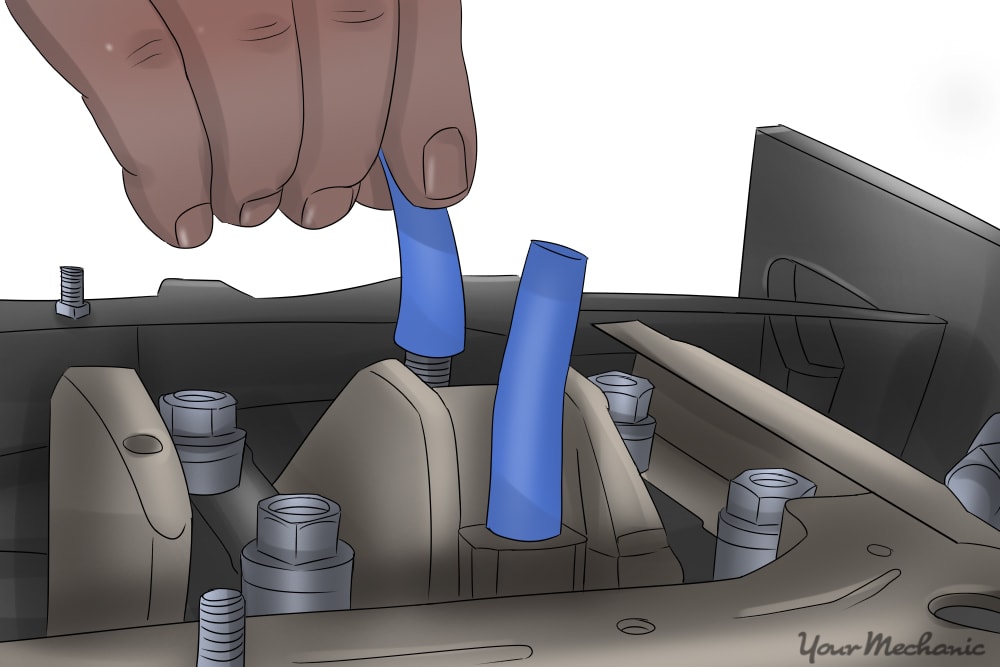
Step 6: Install the oil pan. Rotate the engine upside down and install the oil pan. Use the gasket provided in your rebuild kit or make your own with silicone gasket maker.
Remember to lay a thin bead of silicone gasket maker along any corners or edges where the pan and gaskets meet.
Step 7: Install the head gaskets and head. With the lower end now assembled, we can begin to assemble the engine’s top end.
Install your new head gaskets that should be included as part of your rebuild kit, taking care to make sure that they are installed with the correct side facing up.
Once the head gaskets are in place, install the heads, and then all of the head bolts, tightening them hand tight. Then follow the proper procedure for torquing the head bolts.
There is usually a torque specification and sequence that need to be followed, and often times repeated more than once. Refer to your service manual for specifics.
Step 8: Reinstall the valve train. Once the heads are installed you can reinstall the rest of the valve train. Begin by installing the lifters, the guide retainer, then the pushrods and rocker arms.
- Tip: Remember to coat all of the components with assembly lube as you install them, to protect them from accelerated wear when the engine is first started.
Step 9: Install covers and intake manifold. Install the valve covers, rear engine cover, and then intake manifold.
Use the new gaskets that should be provided with your rebuild kit, remembering to lay a bead of silicone around any corners or edges where mating surfaces meet, and around the water jackets.
Step 10: Install the water pump, exhaust manifolds, and flywheel. At this point the engine should almost be fully reassembled, with only the water pump, exhaust manifolds, flexplate or flywheel, and accessories left to install.
Install the water pump and manifolds using the new gaskets provided in your rebuild kit, and then proceed to install the rest of the accessories in the reverse of the order in which you removed them.
Part 9 of 9: Reinstalling engine into vehicle
Step 1: Mount the engine back onto your hoist. The engine should now be fully reassembled and ready for installation in the vehicle.
Mount the engine back onto your hoist, and then into the vehicle in reverse of the order in which it was removed, as shown in Steps 6-12 of Part 3.

Step 2: Reconnect the engine and fill with oil and coolant. Once the engine is mounted, reconnect all of the hoses, electrical connectors and harnesses in reverse of the order that you removed them, and then fill the engine up to level with oil and antifreeze.
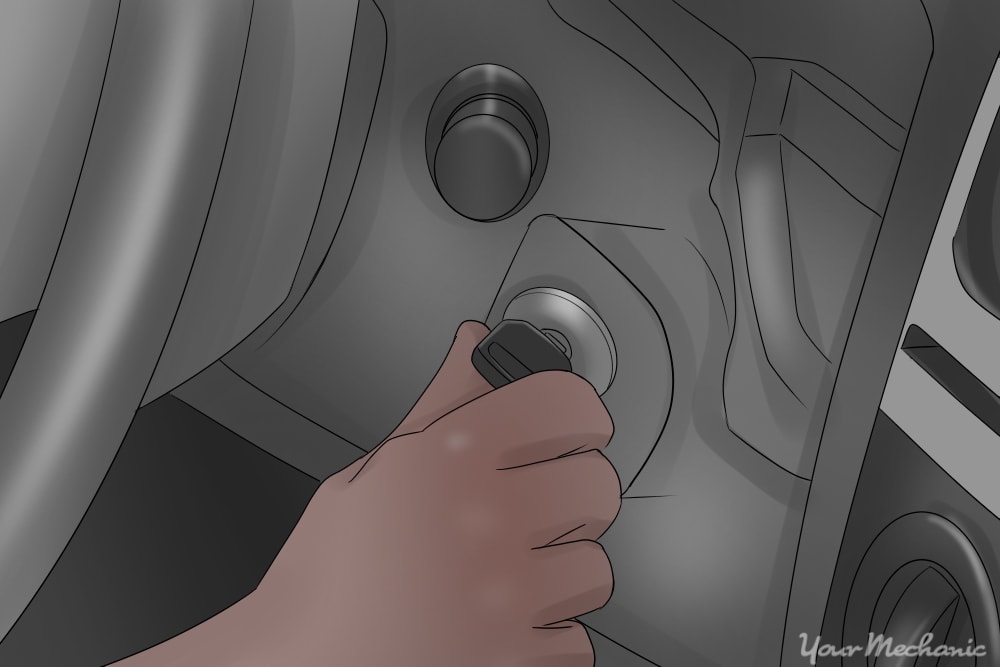
Step 3: Test the engine. At this point the engine should be ready to start. Make your final checks, and then refer to your service manual for the exact procedures for engine start up and break in to ensure you get the optimum performance and life from your rebuilt engine.
All things considered, rebuilding an engine is no small task, however, with the right tools, knowledge, and time, this is a task that is very possible to do on one's own. While YourMechanic does not currently offer engine rebuilding as part of its services, it is always a good idea to get a second opinion before taking on an intensive job such as this. If you need to have your car inspected, YourMechanic provides comprehensive inspections to make sure that you are making the correct repair with your car.
