Many factors contribute to a foggy window. For one thing, it’s vital to first comprehend where the haze is happening, for example, whether on the outside or inside of the window.
Exterior condensation on windows occurs when the temperature inside the home falls well below that outside, like on a hot humid day. At the point when the contrast between inside and outside temperature and humidity is drastic, moisture develops on the glass.
Optional defoggers - for example, those utilized on a vehicle’s backglass and/or side perspective mirrors - regularly consist of a progression of parallel direct resistive conductors in or on the glass. At the point when force is connected, these conductors heat up, defrosting ice and vanishing buildup from the glass.
These conduits might be made out of a silver-fired material printed onto the inside surface of the glass or might be a progression of fine wires implanted inside the glass. If this gets damaged, it can be repaired effortlessly with a conductive paint material.The rear window defogger is actuated by a manual switch. The switch is usually located somewhere on the dash panel. Some switches are located in the center portion of the console area on the dash panel while other switches are located next to the mirror adjusting switch.
Common signs that the rear window defogger switch is failing if the button does not light up, if the rear window does not clear, or if the defogger only works sporadically. If you are dealing with any of these symptoms on your car, you may need a new rear window defogger switch.
Part 1 of 3: Verifying the rear window defogger switch condition
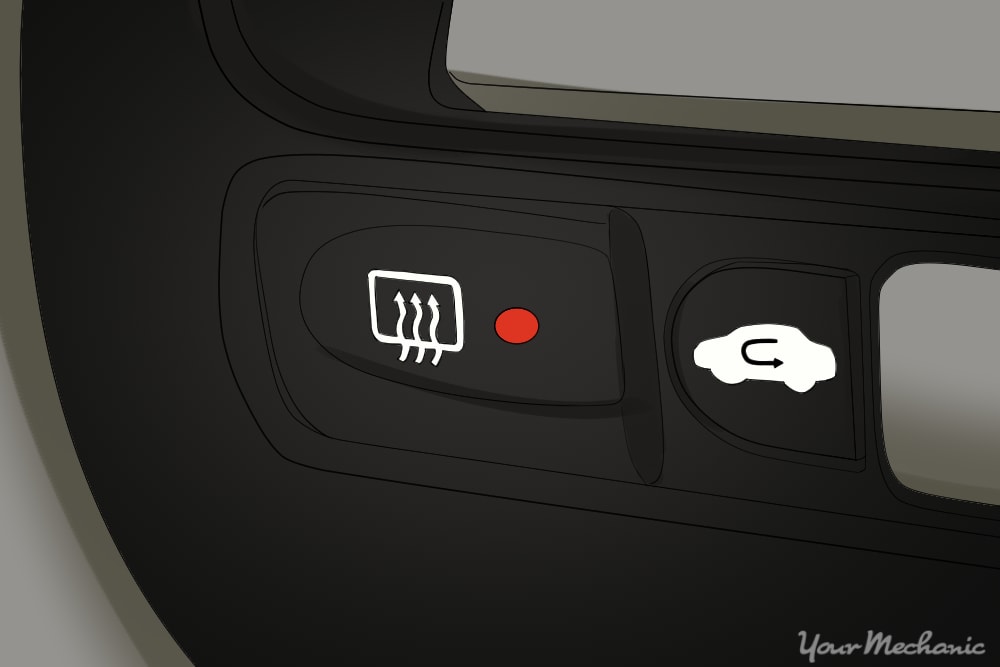
Step 1: Locate the rear window defogger switch. Visually look at the switch for any exterior damage.

Step 2: Turn on the ignition key to the on position. Operate the rear window defogger switch.

Step 3: Take a temperature reading of the glass. Have multiple readings to verify if the defogger is indeed heating up.
- Note: If the switch is on and the rear window does not change temperature, you may need to check for a blown fuse. If the fuse is blown, replace it and recheck your temperatures.
Part 2 of 3: Replacing the rear window defogger switch
Materials Needed
- Cross-tip screwdriver
- Flathead screwdriver
- Needle-nose plyers
- Nine volt battery saver
- Ratchet with metric and standard sockets
- Torque bit set
- Wheel chocks
Step 1: Park your vehicle on a flat, hard surface. Make sure that the transmission is in park (for automatics) or in 1st gear (for manuals).
Step 2: Place wheel chocks around the tires. In this case, the wheel chocks go around the front tires since the rear of the vehicle will be lifted up.
Engage the parking brake to the lock the rear tires from moving.
Step 3: Install a nine volt battery saver into your cigarette lighter. This will keep your computer live and keep your setting current in the vehicle.
If you do not have a nine volt battery saver, that is ok.
- Note: Do not install a nine volt battery saver into the cigarette lighter on the center console if you have to remove the center console. Find another location to install the battery saver, if there is any additional cigarette lighter plugs.

Step 4: Open the vehicle’s hood to disconnect your battery. Take the ground cable off of the battery’s negative post disabling the power to the vehicle.
If the switch is located on the driver side of the dash panel, follow these steps:

Step 5: Remove the mounting screws. These screw to the tabs that secure the dash panel onto the dashboard.
Pull off the dash panel.
Step 6: Remove the mounting screws for switch. Remove the switch or tabs that secure the switch to the dashboard.
Disconnect the wiring harness from the switch.
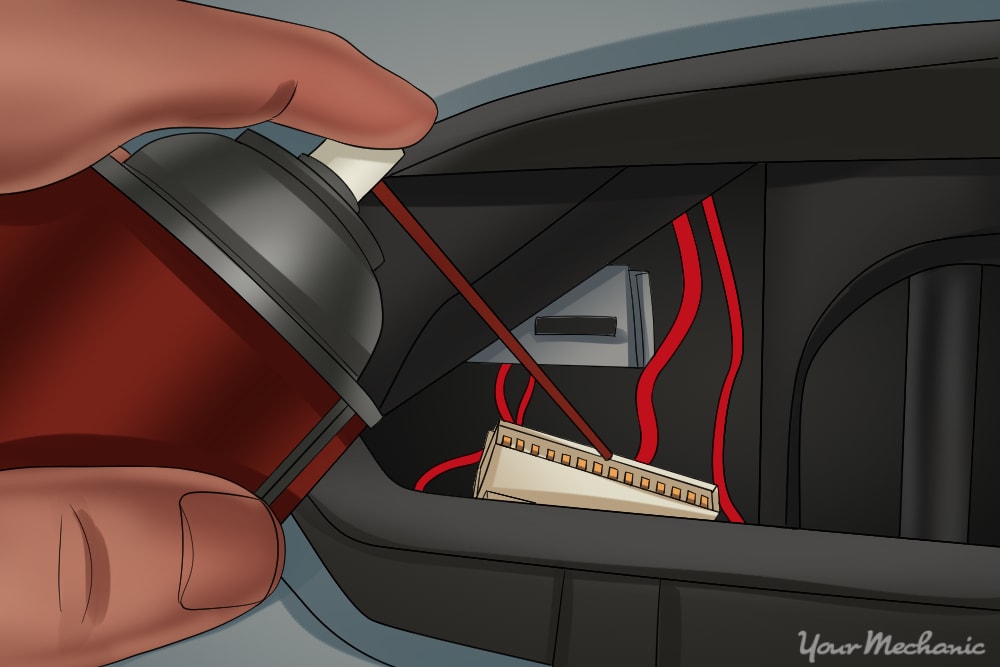
Step 7: Use electrical cleaner to clean the terminals on the wiring harness. This will remove all the moisture and debris for a strong connection.

Step 8: Connect the wiring harness to the rear window defogger switch. Install the mounting screws or tabs that secure the switch to the dashboard.
Step 9: Place the dash panel onto the dashboard. Install the mounting screws or tabs that secure the dash panel onto the dashboard.
If the switch is located in the center console, follow these steps:
Step 10: Remove mounting screws. Remove the mounting screws or tabs that secure the center console to the dashboard.

Some center consoles have the stereo system built into them. As you pull off the panel, you will need to remove the harness to the stereo and any other components.
Step 11: Remove the mounting screws for switch. Remove the screws or tabs that secure the switch to the dashboard.
Disconnect the wiring harness from the switch.
Step 12: Use electrical cleaner to clean the terminals on the wiring harness. This will remove all the moisture and debris for a strong connection.
Step 13: Connect the wiring harness to the rear window defogger switch. Install the mounting screws or tabs that secure the switch to the dashboard.
Step 14: Get the console and put it onto the dashboard. If you had to remove any harnesses from the center console, then hook them up.
Step 15: Install mounting screws. Install the mounting screws or tabs that secure the center console to the dashboard.
Part 3 of 3: Checking the new rear window defogger switch

Step 1: Reconnect battery. Reconnect the ground cable back onto the battery’s negative post.
Remove the nine volt battery saver from the cigarette lighter.
Step 2: Tighten the battery clamp. Ensure that the connection is good.
- Note: If you did not have a nine volt battery saver, you will have to reset all of the settings in your vehicle, like your radio, electric seats, and electric mirrors.
Step 3: Turn the ignition key on. Flip the switch to the rear window defogger to make the heating elements activate.
Step 4: Check the temperatures of the back glass. Verify that the coils in the glass are heating up.
If your rear window defogger does not work after replacing the rear window defogger switch, then there may be further diagnosis of the defogger system needed or a possible electrical issue within the electrical system. If the problem persists, have one of YourMechanic’s certified technicians take and a look a perform a replacement if needed.
