Ignition timing refers to the ignition system that allows the spark plug to fire, or ignite, a few degrees before the piston reaches top dead center (TDC) on its compression stroke. In other words, ignition timing is the adjustment of the spark produced by the spark plugs in the ignition system.
When the piston travels to the top of the combustion chamber, the valves close and allow the engine to compress the mixture of air and fuel inside the combustion chamber. The ignition system's job is to ignite that air/fuel mixture to make a controlled explosion to allow the engine to rotate and produce power that can be used to move your vehicle. The ignition timing or spark is measured in the degrees the crankshaft is rotating, bringing the piston to the top of the combustion chamber, or TDC.
If the spark comes before the piston reaches the top of the combustion chamber, also known as advanced timing, the controlled explosion will work against the engine rotating and produce less power. If the spark comes after the piston starts traveling back down the cylinder, known as retarded timing, the pressure created when compressing the air/fuel mixture will dissipate and create a weak explosion, not allowing the engine to produce maximum power.
A good indicator that ignition timing may need to be adjusted is when the engine runs too lean (too much air, not enough fuel in the fuel mixture) or too rich (too much fuel and not enough air in the fuel mixture). These conditions are sometimes shown by the engine backfiring or pinging while accelerating.
Having the correct ignition timing will allow the engine to efficiently produce maximum power. The number of degrees will vary between manufacturers so it is best to check the service manual for your specific vehicle to determine exactly what degree to set your ignition timing.
Part 1 of 3: Locating timing marks
Materials Needed
- Distributor wrench of the appropriate size
- Free repair manuals Autozone provides free online repair manuals for certain makes and models Autozone
- Repair manuals (optional) Chilton
Older vehicles that have a distributor ignition system will have the ability to fine-tune ignition timing. Typically, timing will need to be adjusted due to the normal wear of moving parts in the ignition system. One degree may not be noticeable at idle, but at higher speeds this can cause the vehicle’s ignition system to fire a little early or late, which will decrease overall performance of the engine.
If your vehicle uses a distributorless ignition system such as coil on plug, timing cannot be adjusted as the computer makes these changes on the fly when necessary.
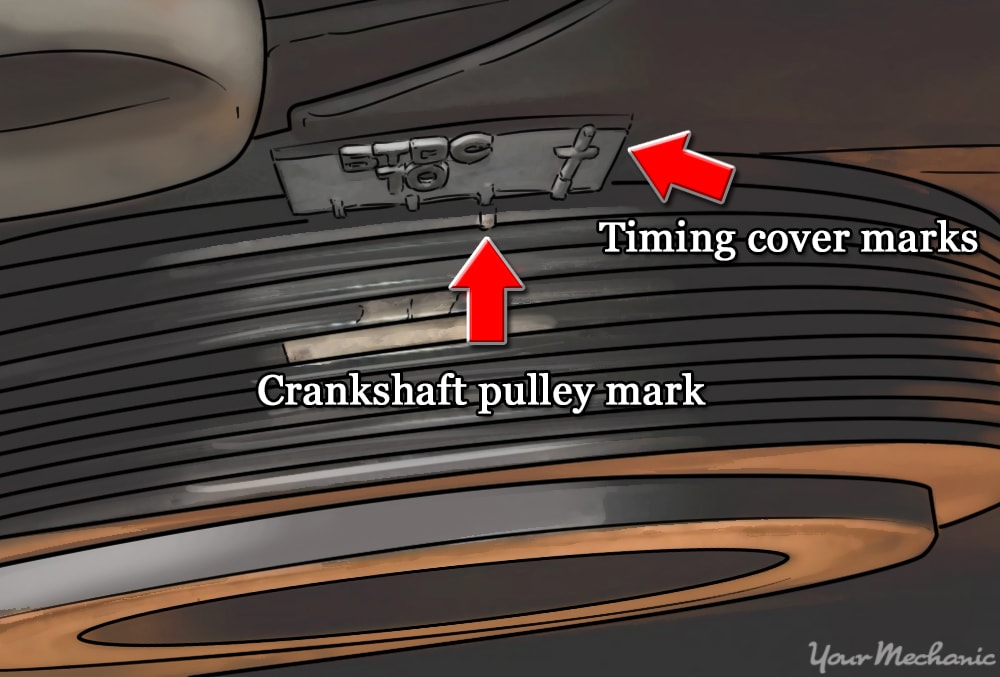
Step 1: Locate the crankshaft pulley. With the engine off, open the hood and locate the crankshaft pulley.
There will be a mark on the crankshaft pulley along with degree mark(s) on the timing cover.
- Tip: These marks can be observed while the engine is running by illuminating this area with the timing light to check and adjust ignition timing.
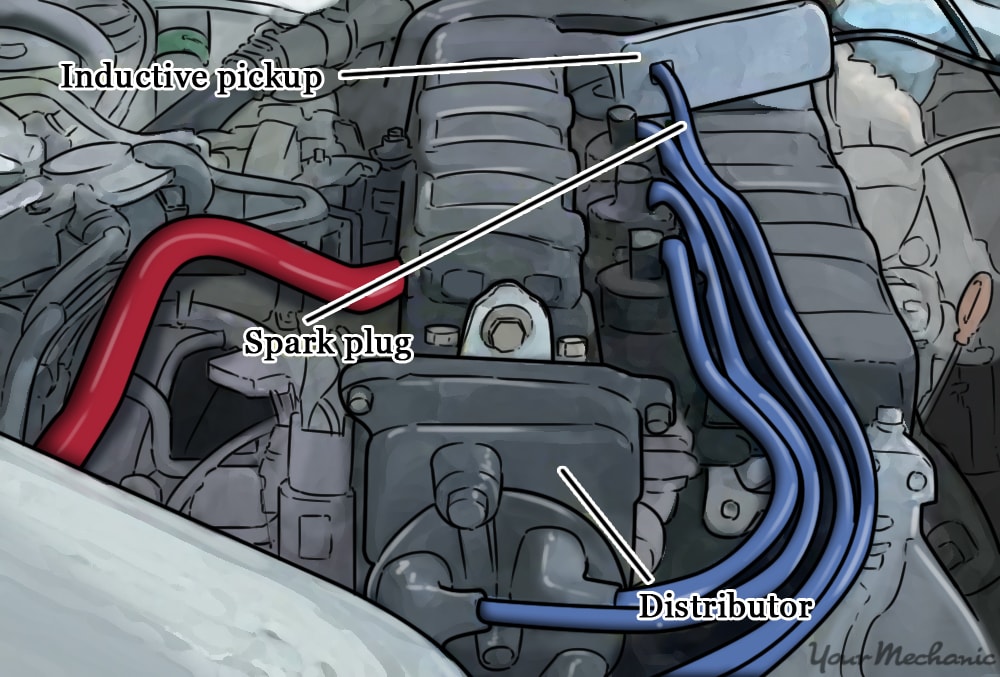
Step 2: Locate the number one cylinder. Most timing lights will have three clamps.
A positive/red and negative/black clamp is hooked up to the vehicle’s battery and a third clamp also known as the inductive clamp, clips around the number one cylinder’s spark plug wire.
- Tip: If you do not know which cylinder is #1, consult the factory repair information for the firing order.

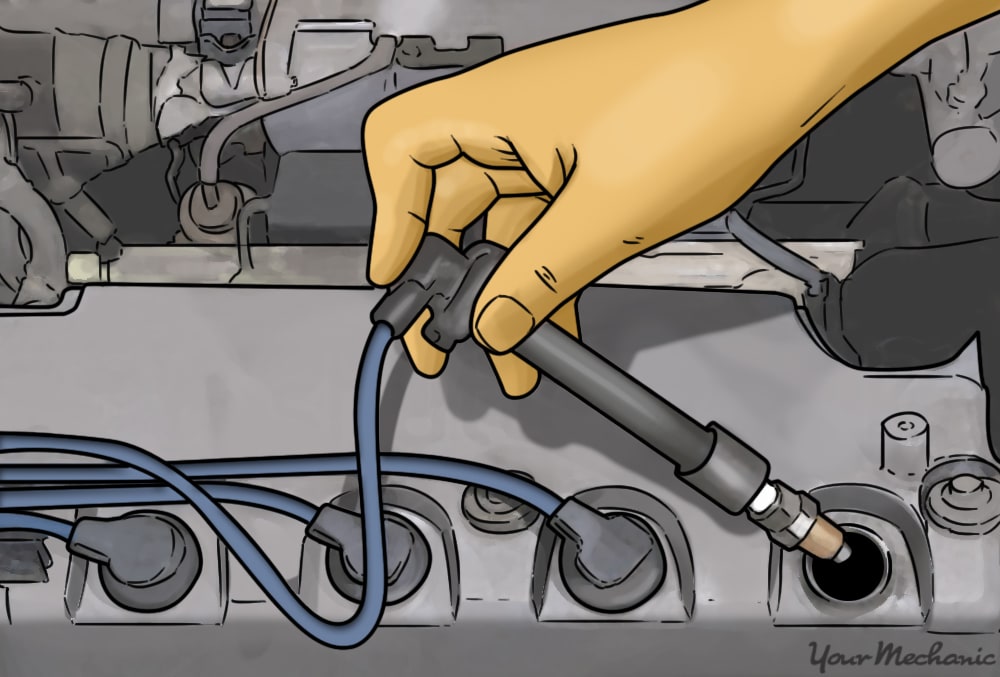
Step 3: Loosen the adjusting nut on your distributor. If ignition timing needs to be adjusted, loosen this nut enough to allow the distributor to rotate so timing can be advanced or retarded.
Part 2 of 3: Determining if adjustment is needed
Materials Needed
- Distributor wrench of the appropriate size
- Free repair manuals Autozone provides free online repair manuals for certain makes and models Autozone
- Repair manuals (optional) Chilton
- Timing light
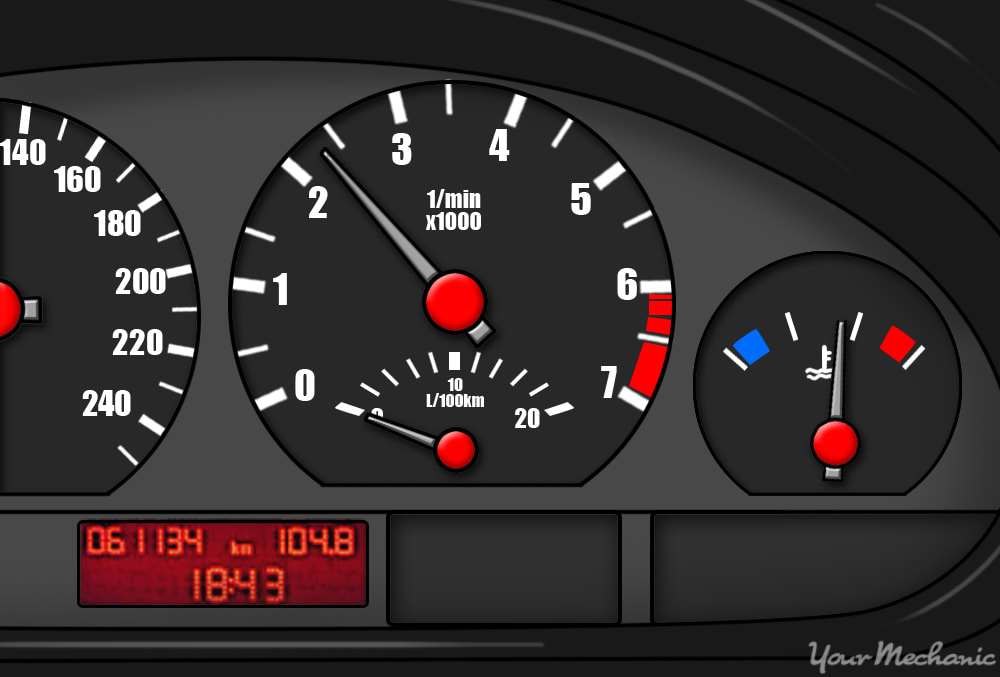
Step 1: Warm up the engine. Start the engine and allow it to rise to an operating temperature of 195 degrees.
This is indicated with the temperature gauge needle reading in the middle of the gauge.
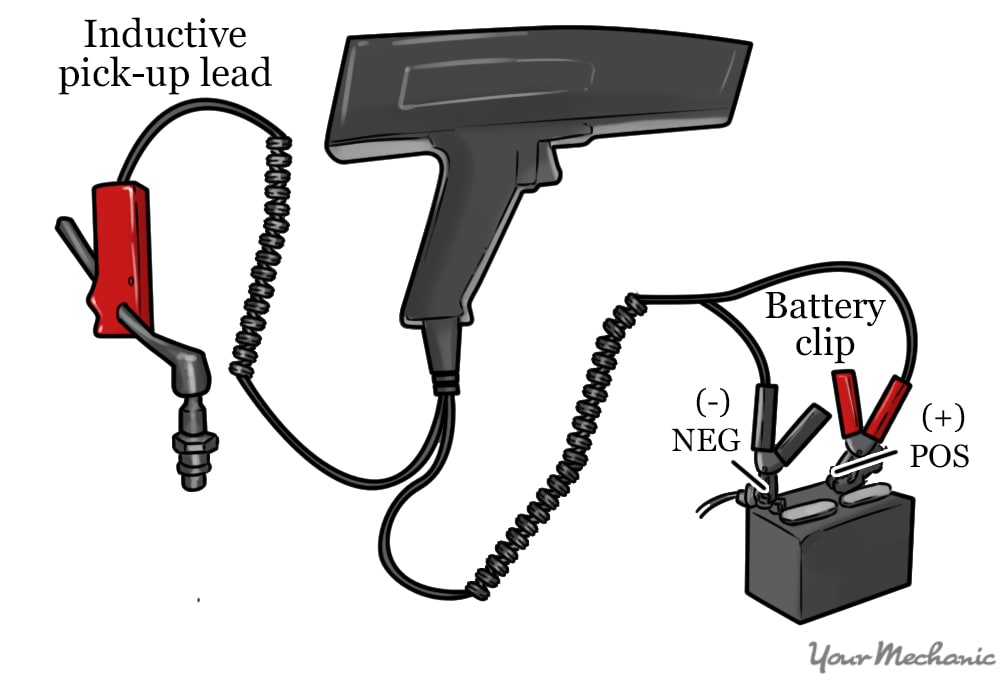
Step 2: Attach the timing light. Now is a good time to attach your timing light to the battery and number one spark plug and shine the timing light at the crankshaft pulley.
Compare your readings to the manufacturer's specifications in the factory repair manual. If the timing is out of spec, you will need to adjust it in order for the engine to run at maximum performance.

- Tip: If your vehicle has vacuum-assisted ignition timing, disconnect the vacuum line going into the distributor and plug the line with a small bolt to prevent a vacuum leak while the timing is being adjusted.
Part 3 of 3: Performing the adjustment
Materials Needed
- Distributor wrench of the appropriate size
- Free repair manuals Autozone provides free online repair manuals for certain makes and models Autozone
- Repair manuals (optional) Chilton
- Timing light
Step 1: Loosen the adjusting nut or bolt. Return to the adjusting nut or bolt on the distributor and loosen it enough to allow the distributor to rotate.
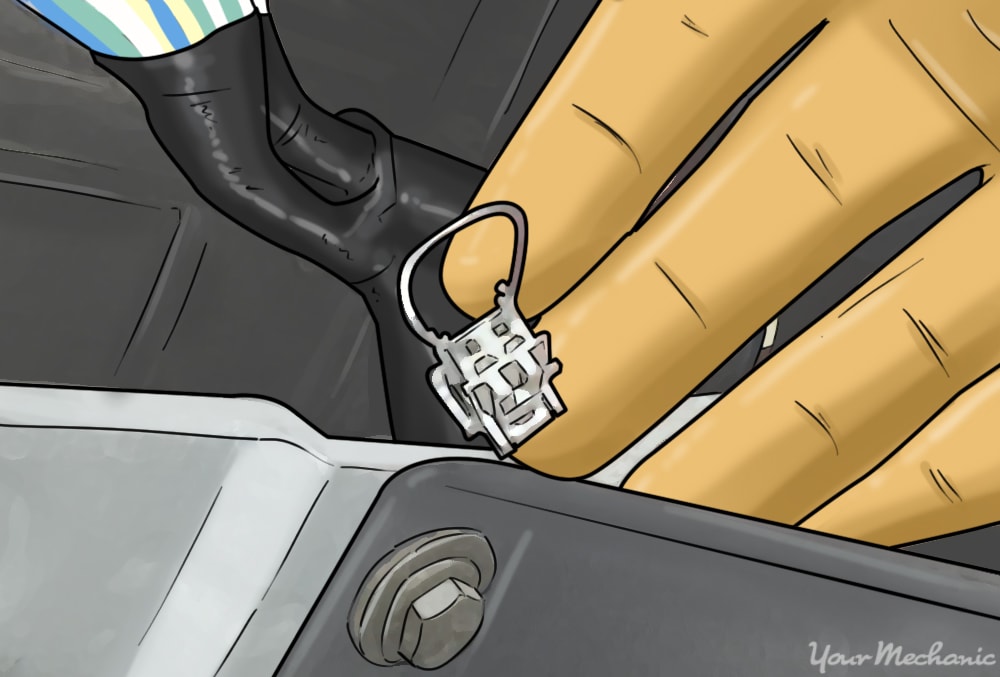
- Tip: Some vehicles require you to install a jumper wire on an electrical connector to short or break the connection with the vehicle’s computer so timing can be adjusted. If your vehicle has a computer, overlooking this step will prevent the computer from accepting the adjustments.
Step 2: Rotate the distributor. While using the timing light to look at the timing marks on the crank and timing cover, rotate the distributor to make the necessary adjustments.
- Note: Each vehicle may vary, but a general rule of thumb is, if the rotor inside the distributor spins clockwise with the engine running, rotating the distributor counterclockwise will advance ignition timing. Rotating the distributor clockwise will perform the opposite and retard ignition timing. Use a steady gloved hand to slightly rotate the distributor in either direction until the timing is within the manufacturer's specifications.
Step 3: Tighten the adjusting nut. Once timing has been set at idle, tighten the adjusting nut on the distributor.
Have a friend blip the throttle. This involves quickly pushing on the accelerator pedal to increase engine RPM and then releasing it, allowing the engine to fall back to idle, therefore confirming the timing is set to specifications.
Congratulations! You have just set your own ignition timing. In some cases ignition timing will be out of spec due to a stretched timing chain or belt. If, after setting timing, the vehicle is showing symptoms of untimed, it is recommended you consult a certified mechanic, such as one from YourMechanic, for further diagnostics. These professional technicians can set your ignition timing for you, as well as make sure your spark plugs are up to date.
