
Vinyl decals are an excellent way to customize your vehicle for your specific purpose. Some possible reasons to apply vinyl decals include:
- Displaying business information
- Displaying contact information
- Covering spots in rough condition
- Numbering of fleet vehicles
- Personalization
Vehicle customizers can apply all kinds of vinyl decals, from small emblems and images on your windows to whole vehicle wraps. They can be as small as a stick figure or as intricate and detailed as you can dream. The colors and patterns are endless, and decals can be applied to any kind of vehicle regardless of shape or size.
Vinyl decals stick to the glass or painted surface of your vehicle with a self-adhesive backing, much like the stickers children play with. The protective backing is left attached until the precise moment the vinyl decal is going to be applied. If the decal is not put in the correct place the first time and needs to be removed, it cannot be reapplied; a new decal has to be installed instead.
Custom-made decals are printed and cut with a sophisticated printer. A design is entered into a computer program that allows the user to modify and correct the image. Then, a vinyl sheet is put into the printer and the pattern and colors are plotted onto it. The printer intricately cuts the pattern out and lays the colors or graphic onto the vinyl. The decal is then ready to be installed.
One of the most attractive features of vinyl decals is that they are not permanent. You can decide in the future that you don’t want the decals on your vehicle anymore and remove them. If you no longer support the sports team you’ve emblazoned onto your truck windshield, you no longer operate the business you’ve got printed on your car, or you’re simply tired of the design you’ve got on your back window, it can be removed.
Method 1 of 2: Scraping a decal off of a car window
Materials Needed
- Foaming glass cleaner
- Clean cloth or paper towels
- Heat gun or hair dryer
- Plastic blades, razor blade, or razor scraper
- Residue remover
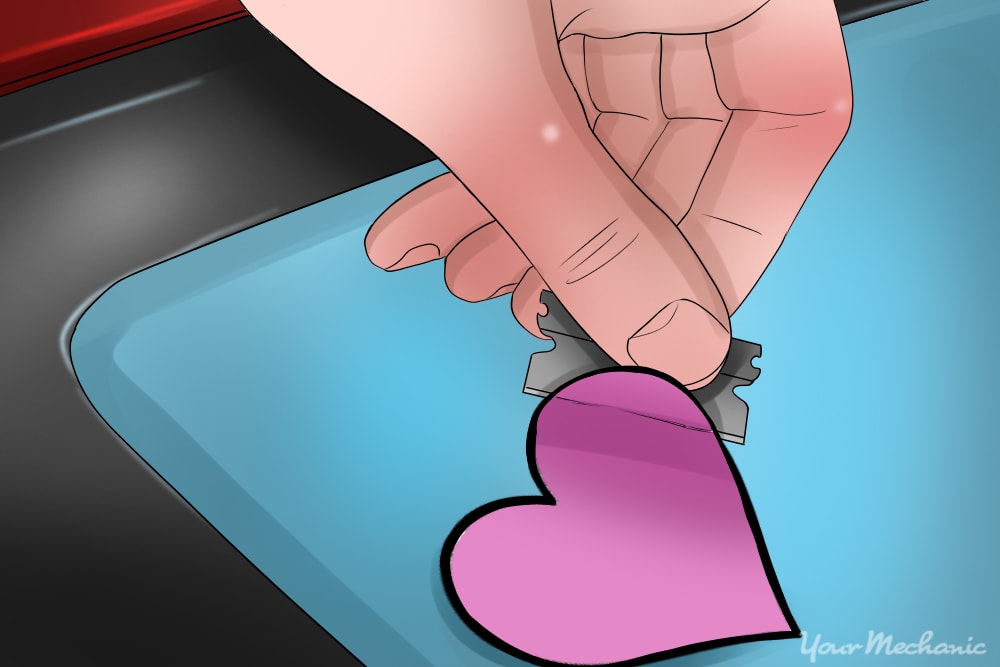
Step 1: Start to remove the decal with the razor scraper. Spray the decal with foaming glass cleaner. It acts as a lubricant to prevent the glass from getting easily scratched with the razor.
Holding your razor scraper at a 20-30 degree angle, get the corner of the blade under the edge of the decal and lift.
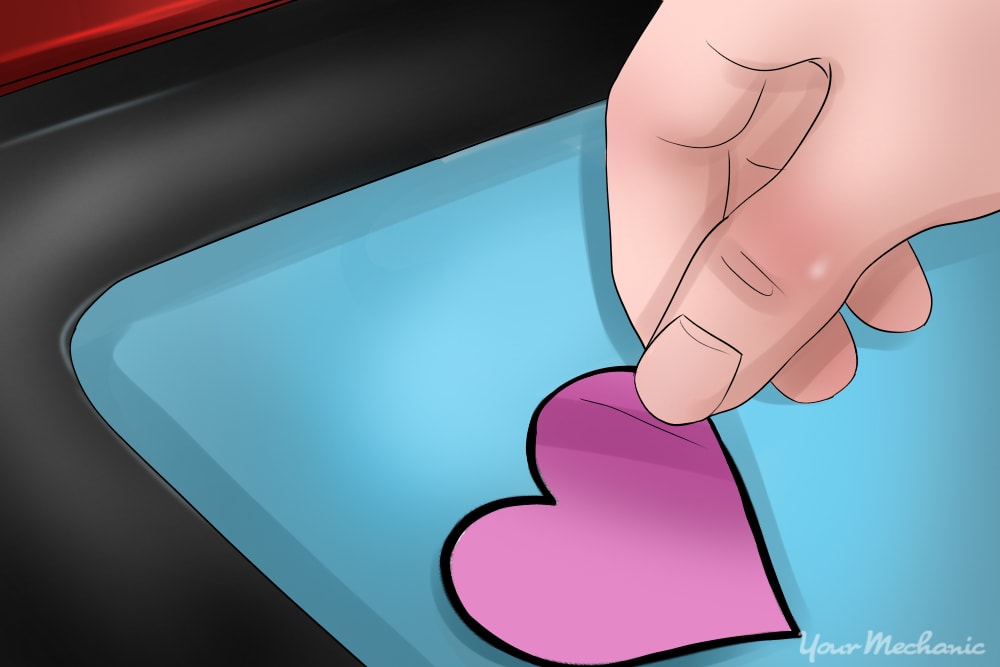
Step 2: Peel off the decal. Peel the decal across itself. If you have the upper right corner, peel the decal down and to the left, holding the vinyl decal close to the window.
An old decal will be dried on and the adhesive will be very difficult to remove in one piece. It will likely tear into smaller pieces, and you will need to repeat these first few steps multiple times to get the vinyl off the window.
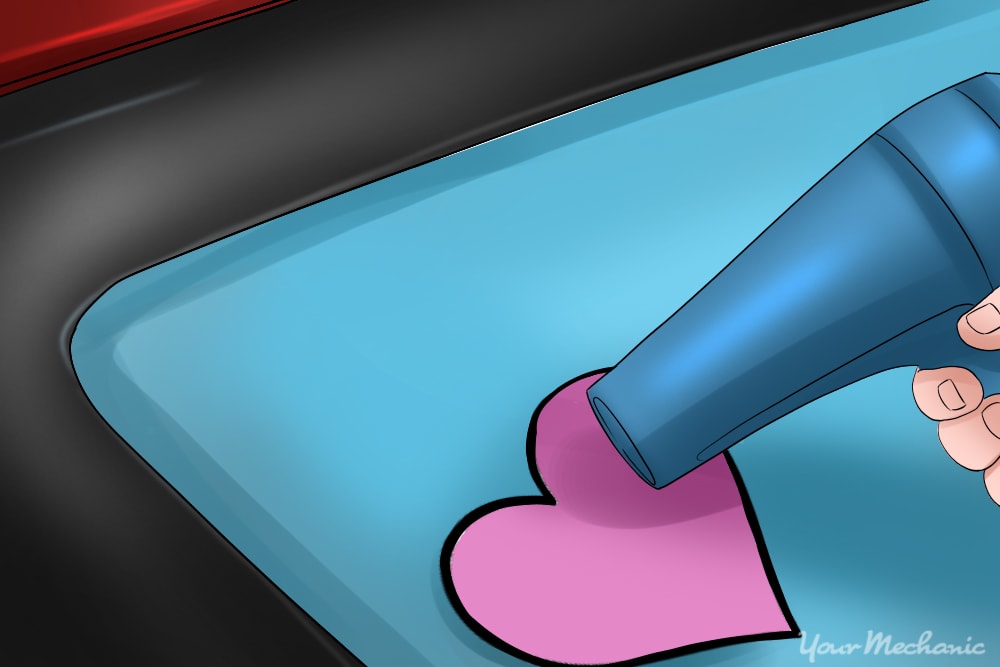
Step 3: Heat the adhesive if needed. Gently heating the decal with a heat gun or hair dryer can make the decal adhesive soft again so it’s easier to remove.
- Warning: Keep the heat gun moving over the decal and don’t heat the glass more than comfortably warm to the touch. Overheating the glass can cause it to shatter.
After removing the decal, you’ll be left with tacky vinyl adhesive — like sticker residue — on the window.
Step 4: Remove the residue from the window. If you have a spray residue remover, spray it directly onto the sticky residue.
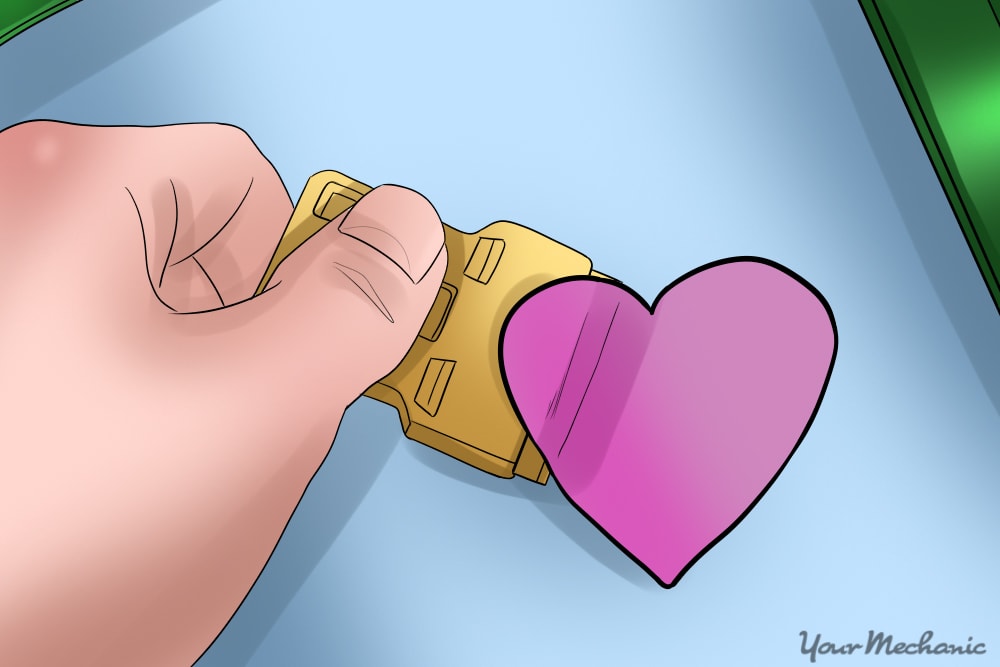
Use your plastic razor blade or razor scraper to work the residue loose from the window glass. It will form clumps as you work the razor over the glass.
Clean the residue clumps off the razor blade and glass with a clean cloth or paper towel.
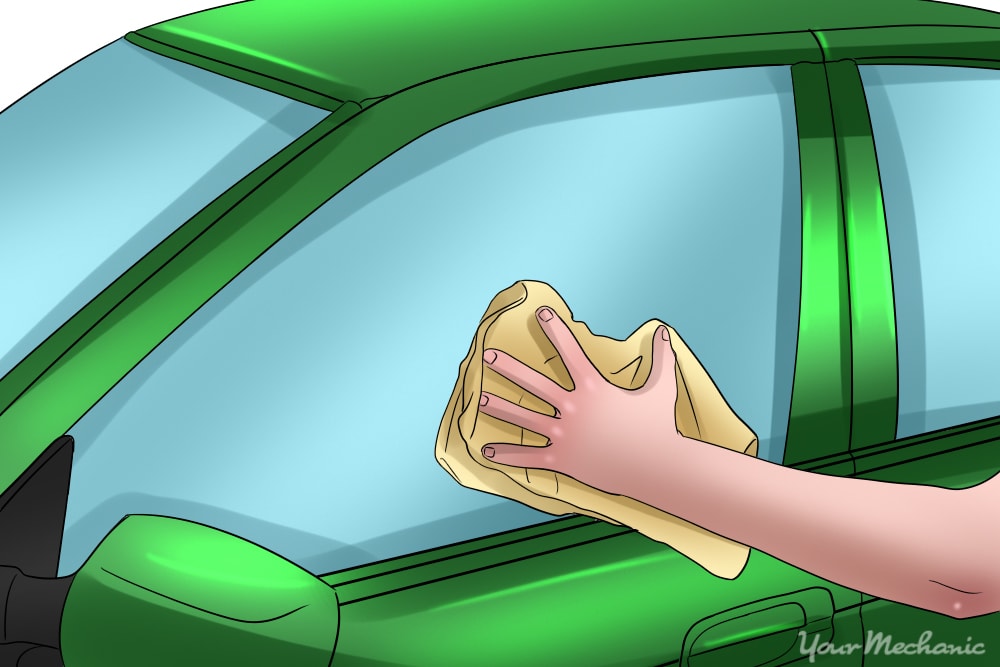
Step 5: Clean the window. The residue remover will leave a film on the glass. Use the glass cleaner with a clean cloth or paper towels and clean the whole window surface.
To do so, spray the glass cleaner on the window. Wipe the window with an up and down motion, then a side to side motion.
If your cloth sticks to any remnants of residue on the window, perform a spot clean with the residue remover on a tip of your cloth, then re-clean the window with glass cleaner.
Method 2 of 2: Using a pressure washer to get a decal off of a car window
- Warning: Only use the pressure washer method to remove decals from windows. Direct, close-range spray from pressure washers on painted surfaces can peel paint right off.
Materials Needed
- Glass cleaner
- Paper towels or clean cloth
- Plastic razor blade or razor scraper
- Pressure washer with fan tip
- Residue remover
- Water supply hose
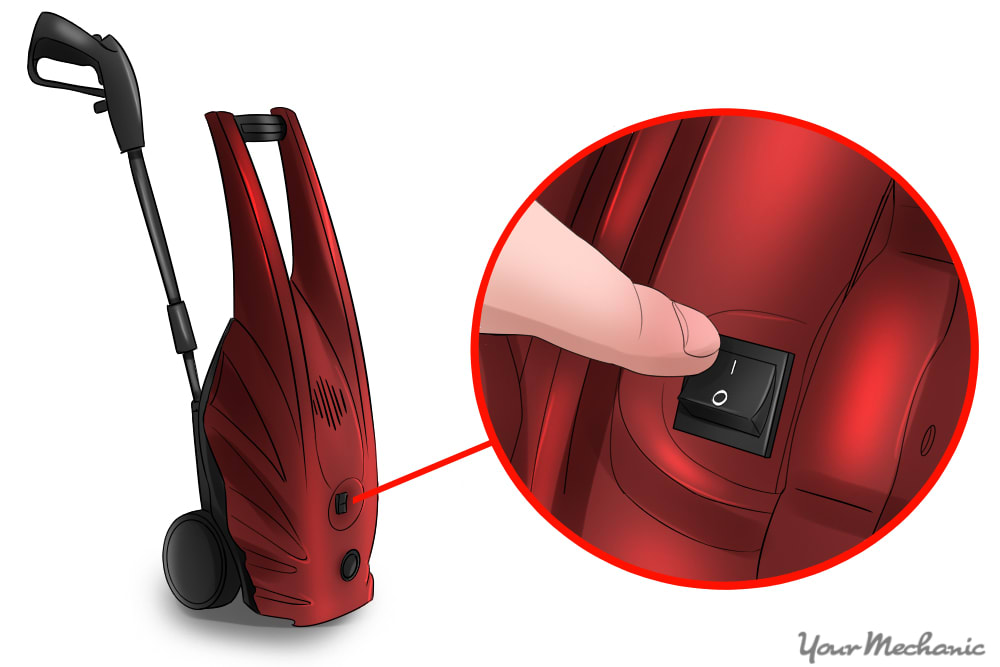
Step 1: Set up the pressure washer. Connect the hose to a water supply and turn it on. Make sure the pressure washer is equipped with a narrow fan-style spray nozzle or tip.
Turn on the pressure washer and let it pressurize if needed.
- Tip: Hold the pressure washer wand firmly with both hands to maintain control of its spray.
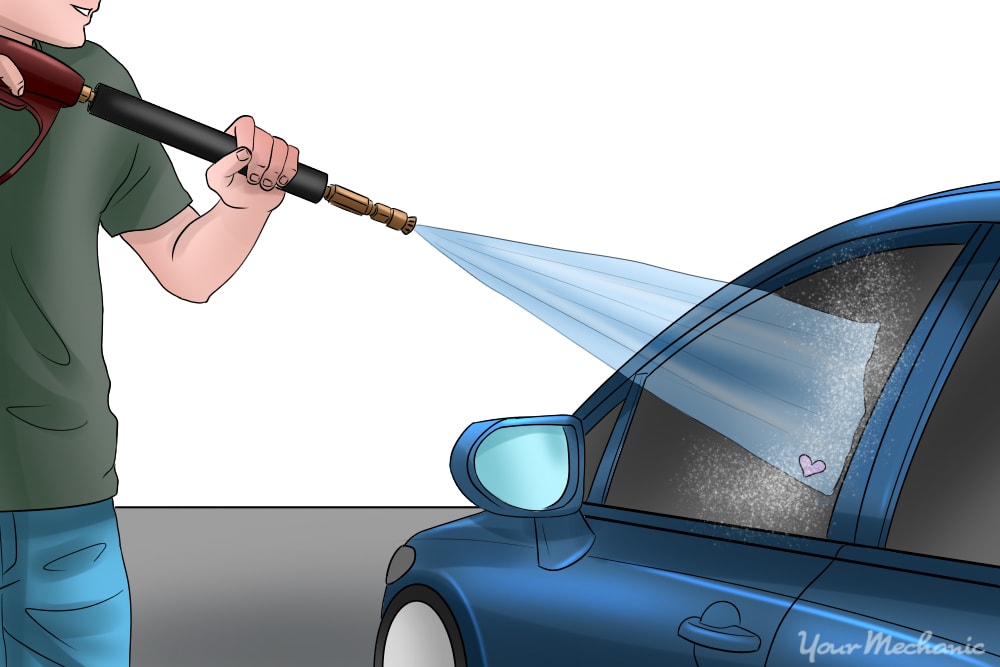
Step 2: Spray the decal with the washer. Hold the pressure washer wand at a horizontal angle to the glass approximately six inches from the window surface and pull the trigger.
Work the fan of water back and forth over the edge of the decal. You will notice the edge of the vinyl decal start to lift.
Continue spraying the decal with the pressure washer to peel the deal back further.
Step 3: Peel off the decal by hand if possible. Once you can get a hand-hold on the decal, release the trigger on the pressure washer and pull on the decal by hand.
Work the decal loose. If it breaks, use the pressure washer again to loosen the sticker from the window.
Repeat until the decal is removed from the glass altogether.
Step 4: Remove the sticker residue from the glass. If you have a spray-style residue remover, spray it directly on the remaining decal residue.
Scrape the residue with the plastic razor blade or razor scraper, then wipe it off with a paper towel or cloth.
Step 5: Clean the window. Clean the window with glass cleaner and a paper towel or clean cloth.
If you find any remaining stickiness from the residue, spot clean it with the residue remover and a clean paper towel or cloth, then clean the area with glass cleaner again.
Overall, removing vinyl car decals from your car windows is a pretty straightforward process. If you take the necessary precautions and follow the steps mentioned in this guide, you’ll have the old decal off in no time!
