The AC lines are one of the most important components in the AC system. They connect all the pieces together and help to carry both gas and liquid refrigerant through the system. The AC lines can fail over time, though and can leak or fail internally requiring replacement.
Many different reasons can be the cause of why the AC system to not blow cold air. This article only covers replacing the AC hose after it has been diagnosed as the cause of the air not blowing cold or a leak. There are high and low pressure lines and the replacement procedure for either will be the same.
- Warning: The EPA requires individuals or professions that handle refrigerant to to have a Section 608 License or a universal refrigerant handler’s license. Specialized machines are used when recovering refrigerant. If you are not certified or do not have the the tools, then the recovery, vacuum, and recharging are best left to the professionals.
Part 1 of 3: Recovery of the old refrigerant
Material Needed
- AC recovery machine
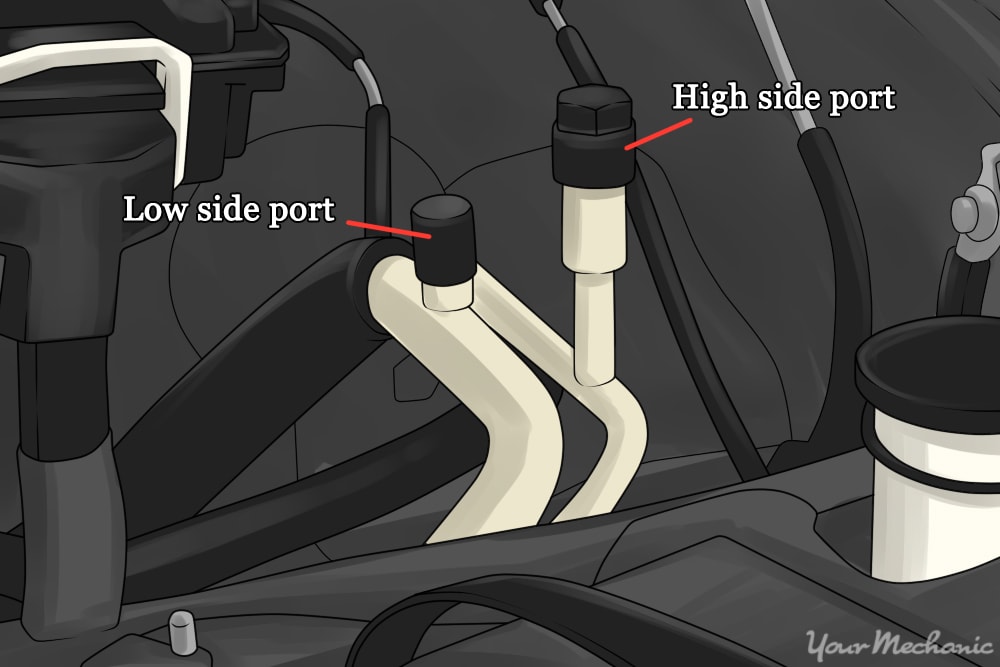
Step 1: Hook up the AC machine. The blue line will go to the low side port while the red line will attach to the high side port.
If not already done, hook the recovery machine’s yellow line up to an approved recovery tank.
Do not begin the process yet. Turn on the AC recovery machine and follow its prompts for the procedure for that machine
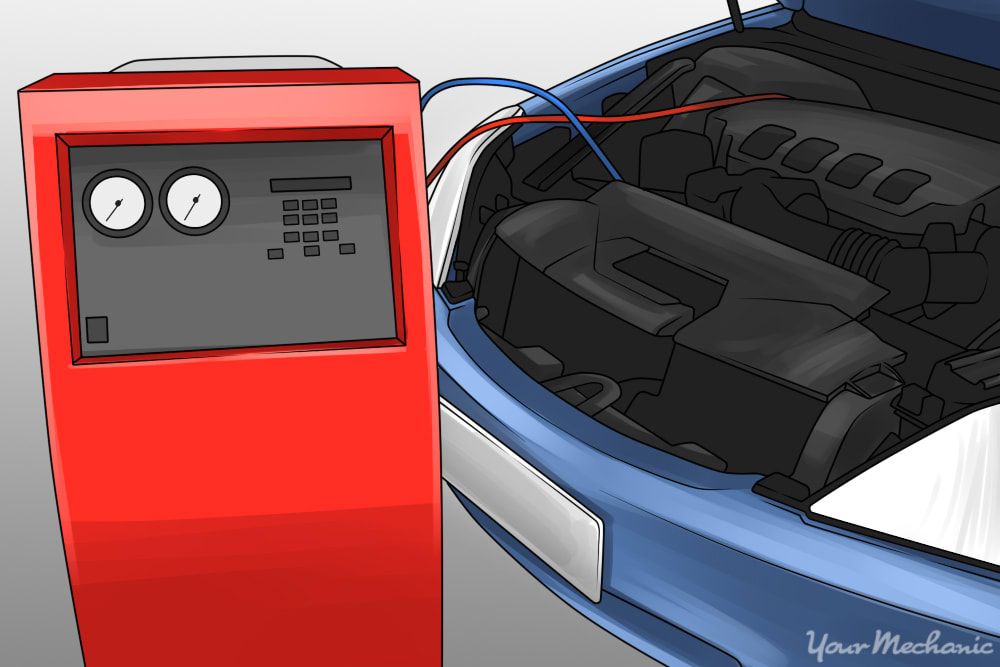
Step 2: Turn the AC machine on. Follow the steps for the individual machine.
The gauges for the high and low side should both read at least zero before the process is completed.
Part 2 of 3: Replacing the AC line
Materials Needed
- Basic socket set
- Eye protection
- Line O-ring
- Replacement AC line
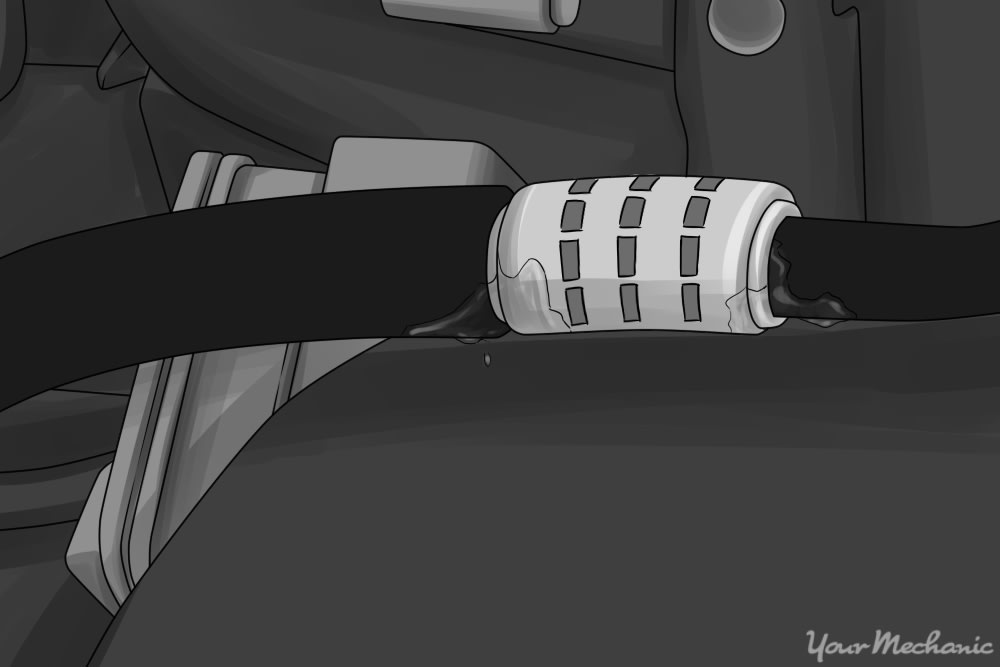
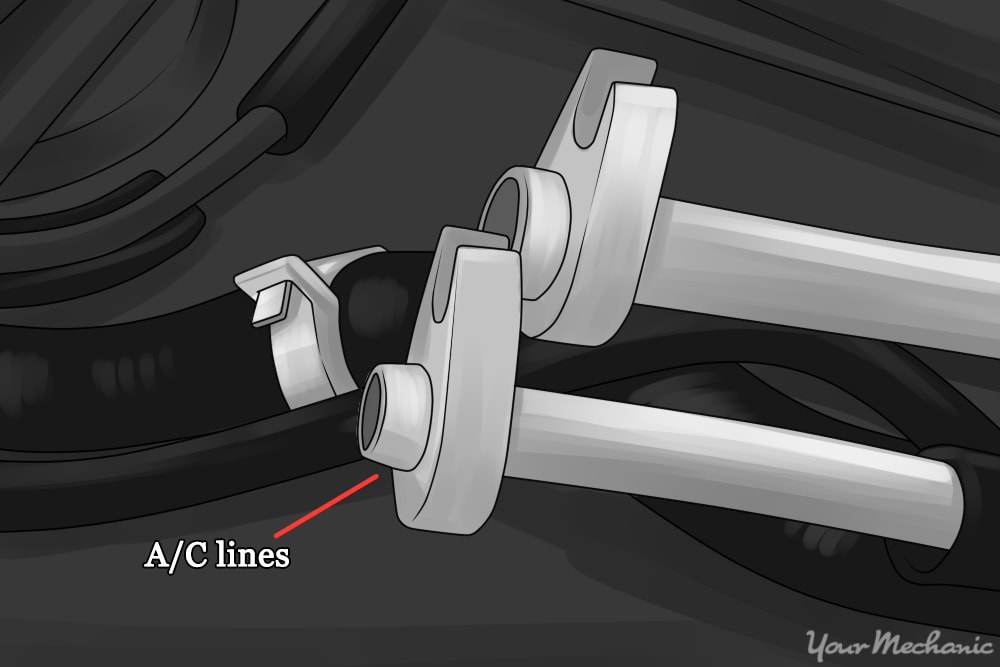
Step 1: Locate the failing line. Locate both ends for the line that will be replaced.
Make sure it matches the new line you have before any repairs begin. Note if the line is leaking and where it was leaking from if so.
In some cases, components must be removed to gain access to the AC line. If this is the case, now will be the time to remove these parts. Remove any parts needed to be able to work on the AC line.
Step 2: Remove the AC line. Put on your eye protection to ensure any refrigerant in the system does not get into your eyes when the line is disconnected.
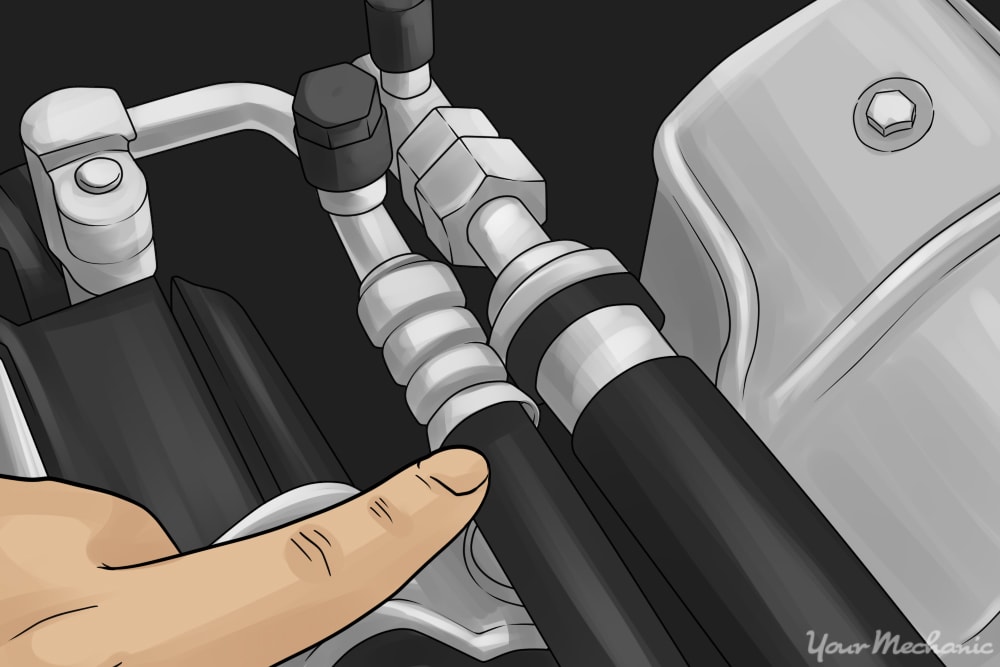
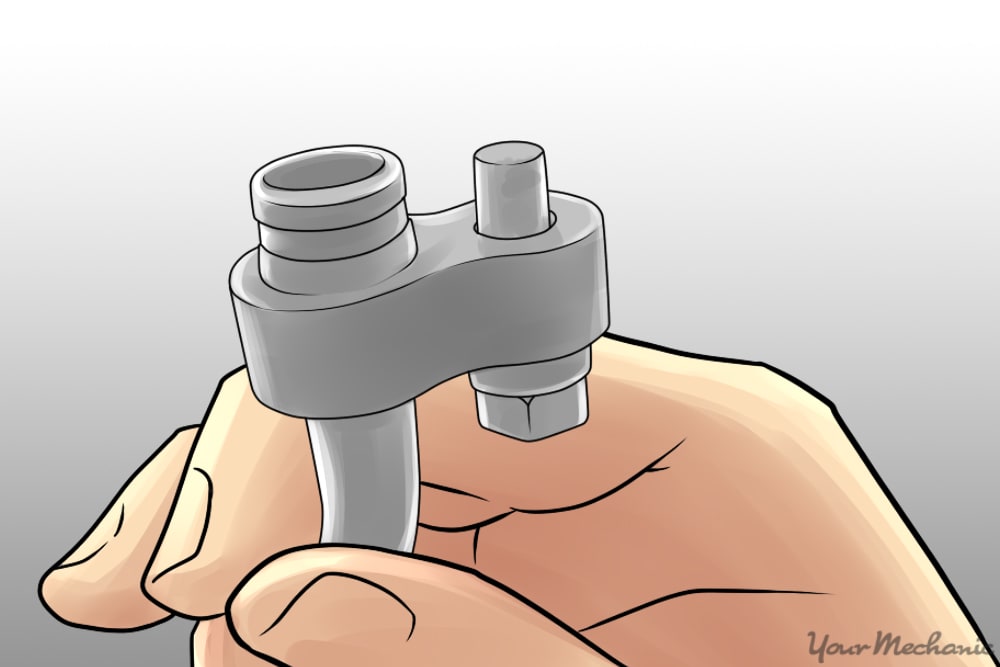
Begin by disconnecting the first end of the AC line to be replaced. There are a variety of different styles of line and each has its own method of removal. The most common are the threaded block with an o-ring fitting on one end as shown above.
In this style, the nut will be loosened and removed. The AC line then is able to pull out of the fitting. Repeat the procedure on the other end of the AC line and set the AC line aside.
Step 3: Replace the o-ring. Before the new line is installed, take a look at the old ac line.
You should see an o-ring on both ends. If you do not see an o-ring, then it may still be in the other end of the fitting. If you are unable to locate the old o-rings, make sure both fittings are clear before proceeding.
Some new AC lines may come with o-rings installed. Others the o-ring must be purchased separately. If your AC line did not come equipped with a new o-ring, install it now.
Lubricate the new o-ring before they are installed using an approved lubricant such as AC oil.
Step 4: Install the new line. Begin with one end and place it into the fitting.
It should go smoothly and be installed straight. Make sure the o-ring does not become pinched during assembly. The AC line nut can now be installed and tightened on this end. Repeat the same procedure on the other end of the AC line with care taken with the o-ring on this side as well.
Step 5: Install any parts removed to gain access. Now that you have installed the AC line, take a moment to double check your work.
Make sure the o-rings cannot be seen and that both end are tightened to specifications. Once the work is verified, install any parts removed to gain access to the AC line.
Part 3 of 3: Vacuum, recharge, and check AC system
Materials Needed
- AC recovery machine
- Owner's manual
- Refrigerant
Step 1: Hook up the AC machine. Install the blue line into the low pressure port and the red line into the high pressure port.
Step 2: Place the system in a vacuum. This procedure is done to remove any remains of refrigerant, clear moisture, and air from the AC system.
Using the AC machine, place the system in a vacuum for at least 30 minutes. Do this for longer if you are in a high altitude environment.
If the AC system is unable to go into vacuum, then there may be a leak or some other fault. If this occurs, the work will need to be checked and the vacuum procedure done again until the vehicle holds vacuum for 30 minutes.
Step 3: Recharge the AC refrigerant. This is done using the AC machine hooked up to the low side pressure port.
Disconnect the high side pressure fitting from the vehicle and place it back on the AC machine. Verify the amount and type refrigerant used to recharge the vehicle. This information can be found in the owner's manual or on a tag found under the hood.
Now set the AC machine to the proper amount of refrigerant and start the engine. Follow the machines prompts for recharging the system and make sure the operation completes properly.
Now that you have replaced your AC line, you can enjoy cool climate inside the vehicle once again. Not only is it an inconvenience to have a broken AC, but it is bad for the environment to have leaking refrigerant as well. If at any point during this procedure you run into a problem, Ask a Mechanic for some quick and helpful advice.
