Clutch cables begin to wear out as the vehicle gets aged. However, it is common to see clutch cables fail early due to overusing the clutch. Many operators of vehicles use the clutch every time the shifter is moved. Often, other operators operate clutches with a float method, which eliminates the use of depressing down on a clutch pedal.
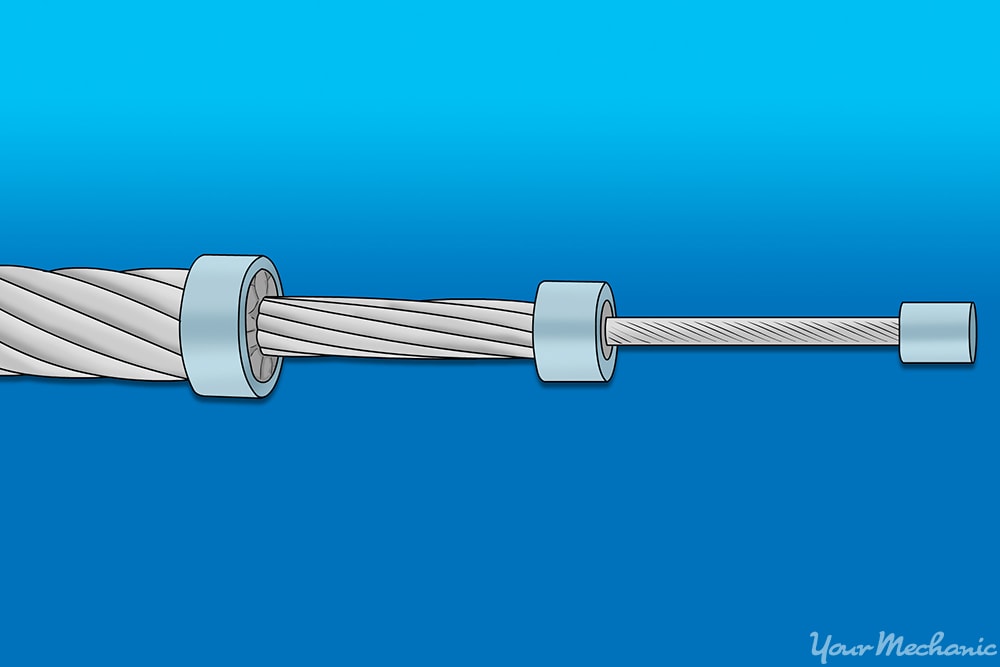
The clutch cable varies in each vehicle as to where they are located and to what they connect to. Most clutch cables are attached at the top of a clutch pedal and then routed to a clutch fork located on the bell housing of a manual transmission. Heavy duty vehicles may have more than one clutch cable, linking down to the clutch fork. Most new vehicles use hydraulic clutch systems rather than mechanical systems.
Part 1 of 5: Verify the clutch cable’s condition
Step 1: Try to put the vehicle in gear. Press down on the clutch pedal and try to put the vehicle in gear by moving the shifter to a gear selection of your choice.
Be sure to do this with the engine running and with plenty of room around the table. If you start to hear a grinding sound as you try to move the shifter, then this is an indication that the clutch cable is not functioning correctly.
- Note: If you start your vehicle and hear a loud clicking noise and notice that your clutch pedal is against the floor mats in the cab, turn off the engine immediately since the clutch fork is riding against the clutch springs.
Part 2 of 5: Replacing the clutch cable
Having all of the necessary tools and materials prior to starting the work will allow you to get the job done more efficiently.
Materials Needed
Step 1: Park your vehicle on a flat, hard surface. Make sure that the transmission is in neutral.
Step 2: Engage the parking brake to the rear wheels of the vehicle. Place wheel chocks around the rear wheels of the vehicle that will remain on the ground.
Step 3: Open the hood. This will allow you to access the engine.

Step 4: Raise the vehicle. Using a floor jack recommended for the weight of the vehicle, lift under the vehicle at its specified jacking points.
Do this until the wheels are completely off the ground.
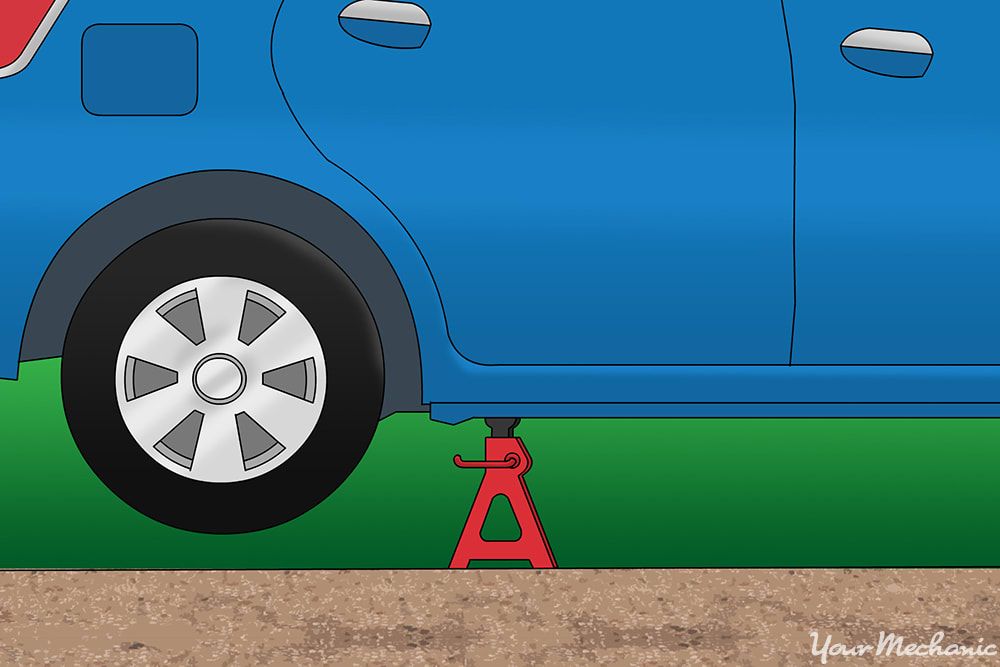
Step 5: Place the jack stands. The jack stands should go under the jacking point locations.
Then lower the vehicle onto the jack stands. For most modern cars, the jacking points for jack stands will be on the pinch weld just under the doors along the bottom of the car.
- Warning: Be sure to follow the vehicle’s owner’s manual for proper jacking locations.
Part 3 of 5: Replacing the clutch cable
Materials Needed
- Allen wrench set
- Ball pein hammer
- Boxed end wrenches
- Chisel
- Creeper
- Drift punch
- Drill bit set
- Electric drill
- Needle nose plyers
- Ratchet with metric and standard sockets
- Reverse tap
- Soft-faced hammer
- Torque wrench
- Torque bit set
Step 1: Grab your tools. Locate the clutch pedal in the driver side of the vehicle’s cab.
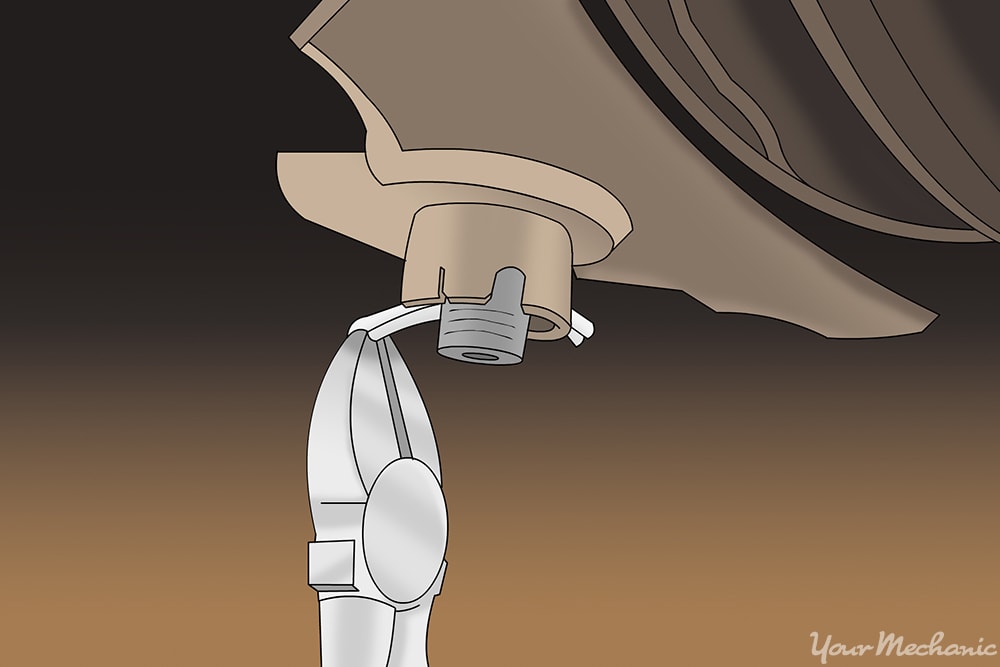
Step 2: Remove the cotter pin. Using your needle nose plyers, you will need to remove the cotter pin holding a slotted anchor pin in the cable end.
If your vehicle has a bolt holding on the cable end, then you would need to remove the bolt. Some vehicles may just have the cable fitting into a slot on the pedal. If this is the case, you need to use the needle nose plyers to pull out the cable enough to move it out of the slot.
Step 3: Remove brackets. Remove any bracket from the firewall inside the cab that may be securing the cable housing.
Step 4: Pull the cable. Pull the cable through the firewall into the engine compartment.
Keep in mind, there will be insulated cable clamps mounting the cable along the fender and frame of the vehicle. These insulated clamps may have torques bit or allen head screws or bolts holding them secured.
Sometimes these type of mounting fixtures tend to become stripped out as the wrong size of the tool is used. When that happens you will need to drill or chisel them out.
Step 5: Get your tools and creeper and go under the vehicle. Locate where the clutch fork is on the transmission bell housing.
For some vehicles, the exhaust may be in the way of the clutch fork.
If the exhaust is in the way of getting to the bolts that mount the cable to a bracket next to the clutch fork, you will need to lower or remove the exhaust pipe. Locate the nearest mounting points of the vehicle’s exhaust system.
- Note: Keep in mind that the bolts may break due to rust and being seized on hard. If the exhaust bolts break, then you will need to drill and tap out the bolts.

Step 6: Remove the clutch cable mounting bolts at the clutch fork bracket. Some brackets may be mounted on the transmission bell housing.
Other brackets may be mounted on the back of the engine, depending if the vehicle is front wheel drive or rear wheel drive.
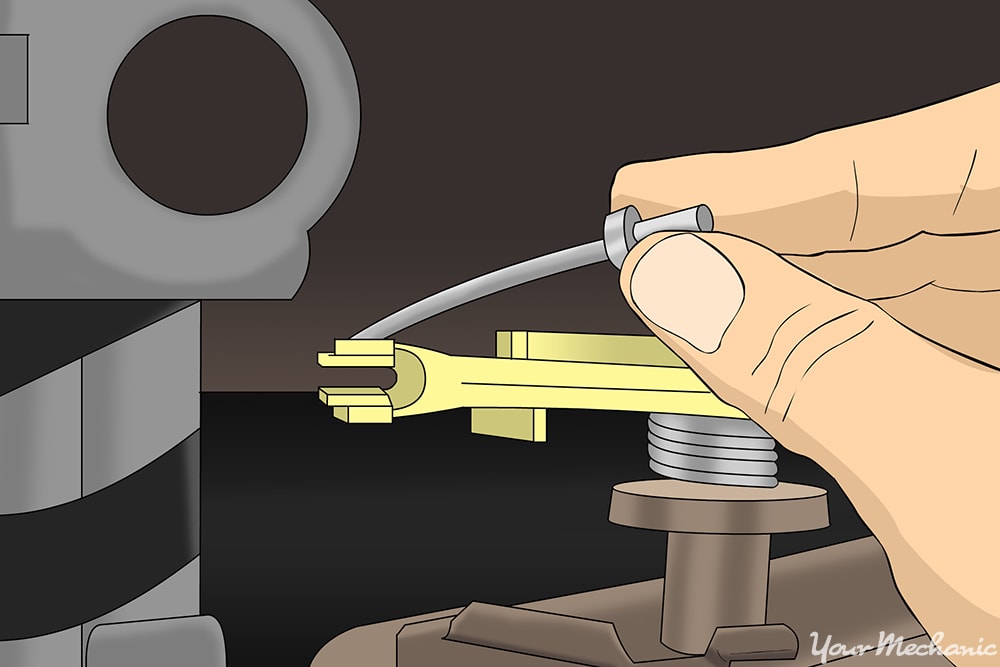
There may be an inline adjuster that has threaded nuts on both sides allowing the cable to move forward or back adjusting the cable. You will need to loosen the adjuster to help aiding the removal of the cable.
- Warning: Do not remember the settings for the adjuster for the old cable is stretched out.
Step 7: Slide the cable end through. Make sure it goes through the slot on the clutch fork.
Step 8: With the cable removed, inspect the clutch fork condition. Lube any grease zerks that are located on the clutch fork and bell housing.
Step 9: Put the cable end in the slot of the clutch fork. Mount the cable to the bracket near the clutch fork.
- Note: If the cable has a threaded adjuster, be sure to have the adjuster all the way loose with many threads showing.
Step 10: Route the cable through the engine compartment. Wrap the insulated mounting clamps around the cable housing and attach it to the locations where they came off.
Step 11: Feed the cable through the firewall of the engine compartment. This will allow the cable to enter the vehicle’s cab.
Step 12: Attach the end of the cable to the clutch pedal. Install the anchor pin to hold the cable in place.
Use a new cotter pin to lock the anchor pin in place.
- Warning: Do not use the old cotter pin due to work harden and fatigue. The old cotter pin could break prematurely.

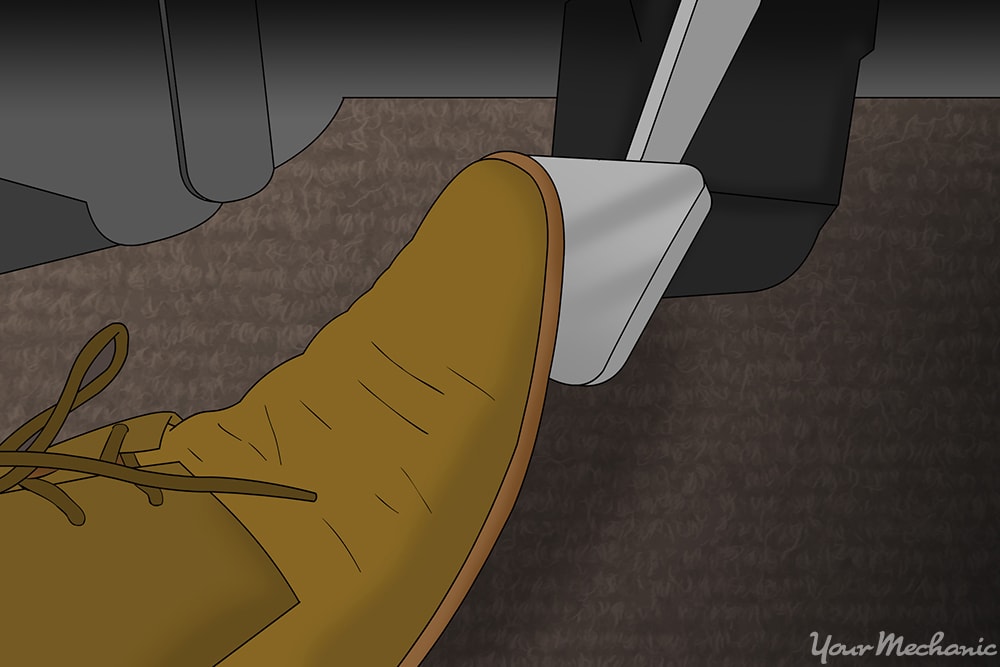
Step 13: Go under the vehicle and tighten up the adjusting nuts on the cable. Press down on the clutch pedal and measure the pedal from the pad to the floor.
The clutch pedal should have some movement if adjusted correctly. As a rule of thumb, most clutch pedal clearance is from 1/4 inch to 1/2 inch from the pedal pad to the floor. Recommendations are to view the owner’s manual for proper clutch pedal clearance.
Step 14: Go under the vehicle and tighten up the lock nut against the adjusting nut. This keeps the adjusting nut free from any movement.
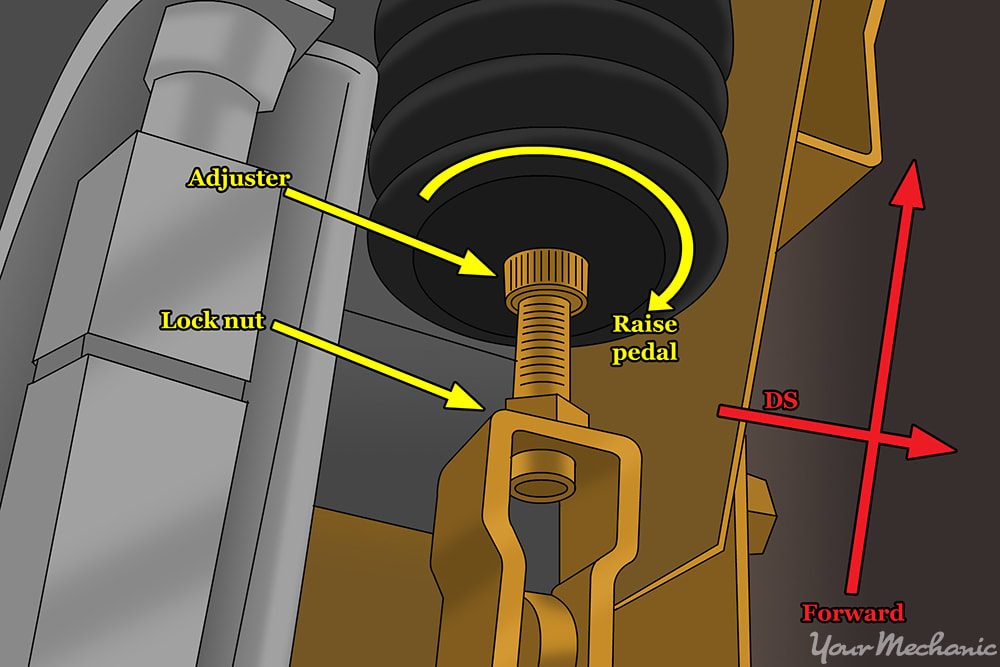
Step 15: Check the clutch pedal for an adjuster. The adjuster will have a threaded end and is separate from the cable.
It attaches to the pedal and cable. Rotate the adjuster clockwise to tighten the cable up. Rotate the adjuster counterclockwise to loosen the cable up.
Step 16: Tighten up the lock nut on the back of the adjuster. This keeps the adjuster tight from any movement.
Usually this type of clutch pedal adjuster is located on large vehicles like pickup trucks, motor homes, and four wheel drive vehicles.
- Note: Some vehicles have a constant-contact clutch release bearing and require no movement of the clutch pedal.
Step 17: Collect all tools and your creeper. Place them out of the way.
Step 18: Raise the vehicle. Using a floor jack, lift under the vehicle at its specified jacking points until the wheels are completely off the ground.
Step 19: Remove the jack stands.
Step 20: Lower the vehicle to where all four wheels are on the ground. Pull out the jack and put it aside.
Step 21: Remove the wheel chocks. Put them aside.
Part 4 of 5: Testing the assembled clutch cable
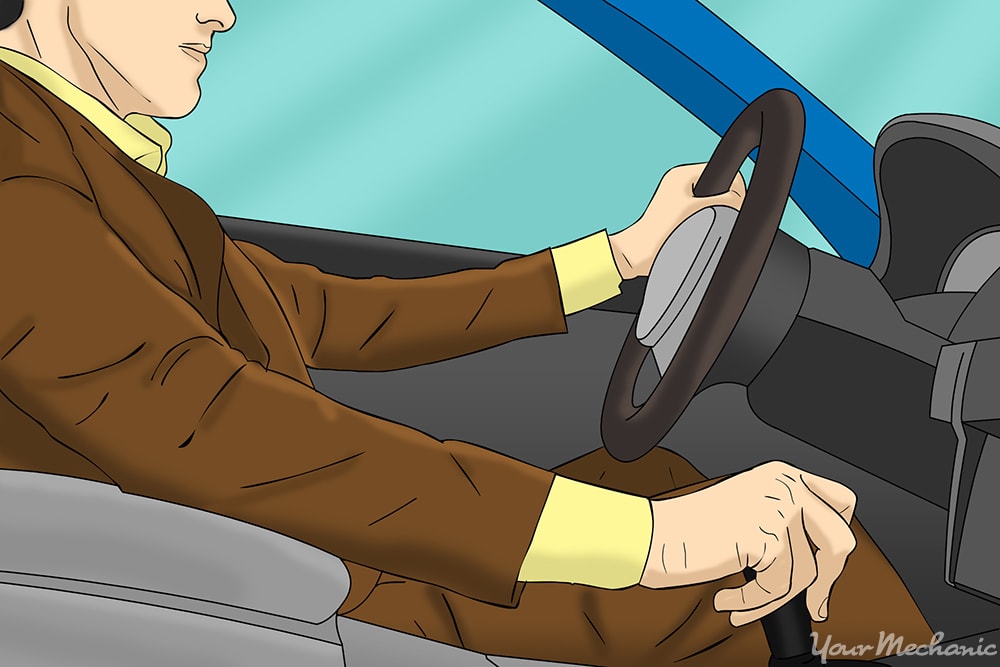
Step 1: Make sure that the transmission is in neutral. Turn on the ignition key and start the engine.
Step 2: Press down on the clutch pedal. Move the gear shifter to a selection of your choice.
The shifter should slide easily into the gear selected. Shut the engine off when you are done with the test.
Part 5 of 5: Test driving the vehicle
Step 1: Drive the vehicle around the block.
- Note: During the test drive change gears from first gear to the top gear one at a time.
Step 2: Press the clutch pedal down. Do this when moving from the selected gear to neutral.
Step 3: Press the clutch pedal down. Do this when moving from the neutral position to another gear selection.
This is process is called double clutching. This insures that the transmission has little to no power from the engine with the clutch disengaged properly. The process is to prevent clutch damage and transmission gear damage.
If you do not hear any grinding and the shifting feels smooth from one gear to another, then the clutch cable has been fixed correctly.
If the clutch grinding noise comes back or if the clutch pedal feels too loose or too tight, then you may need to readjust the cable for fixing its stretch. If the clutch cable was replaced but you hear a grinding noise on startup, there may be further diagnosis of the transmission clutch release bearing and clutch fork or possible transmission failure. If the problem persists, then you should seek out help from one of our certified mechanics that can inspect the clutch and transmission and diagnosis the problem.
