Air ride suspensions are incredibly diverse suspension systems that are chosen for many different vehicles. Trucks and SUVs that haul heavy loads often use variable air ride struts to help balance the load and maintain the correct ride height when weighed down. Air ride suspensions are also used in custom cars that are looking to lower the vehicle at will but still maintain a normal ride height. They can even be used in the average car to give it a softer ride.
All types of air suspensions are fairly similar even with the wide range of vehicles they are used in. These air systems usually contain a height sensor, an air bag and air strut, a compressor, and air lines.
This article will cover the installation of the type of air ride system that is most often used.
Part 1 of 2: Removing the old components
Materials Needed
- Basic tool set
- Sockets and ratchet
- Air ride suspension kit
- Eye protection
- Jack
Warning: Air ride systems use high pressure air. Always wear the proper eye protection and protective gear when working with air ride systems.
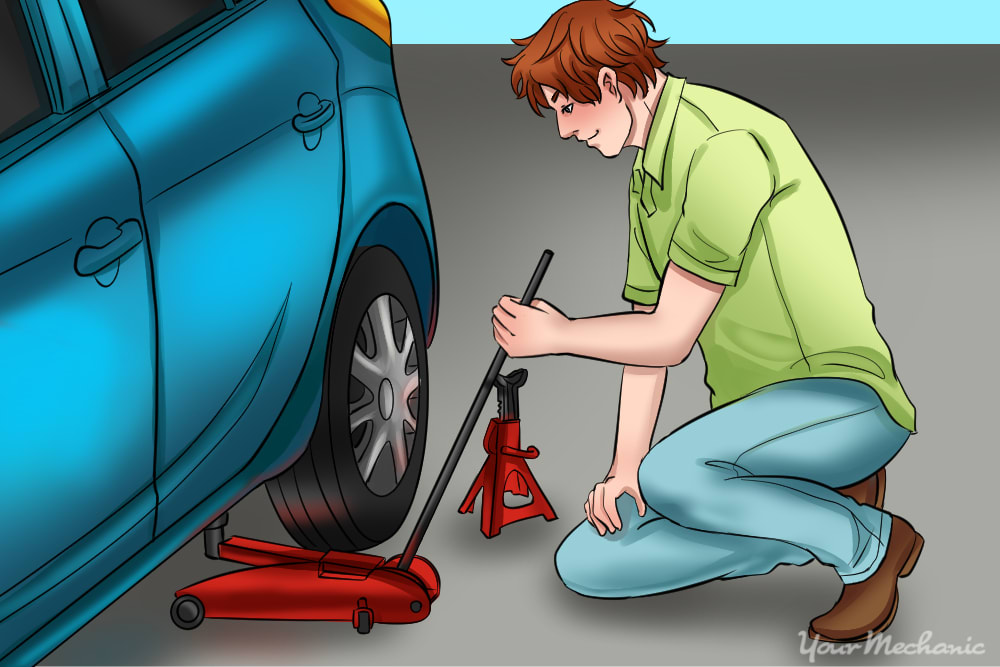
Step 1: Prepare the vehicle. Wearing eye protection, use the jack to lift the vehicle and secure it on jack stands. Then remove the tires.
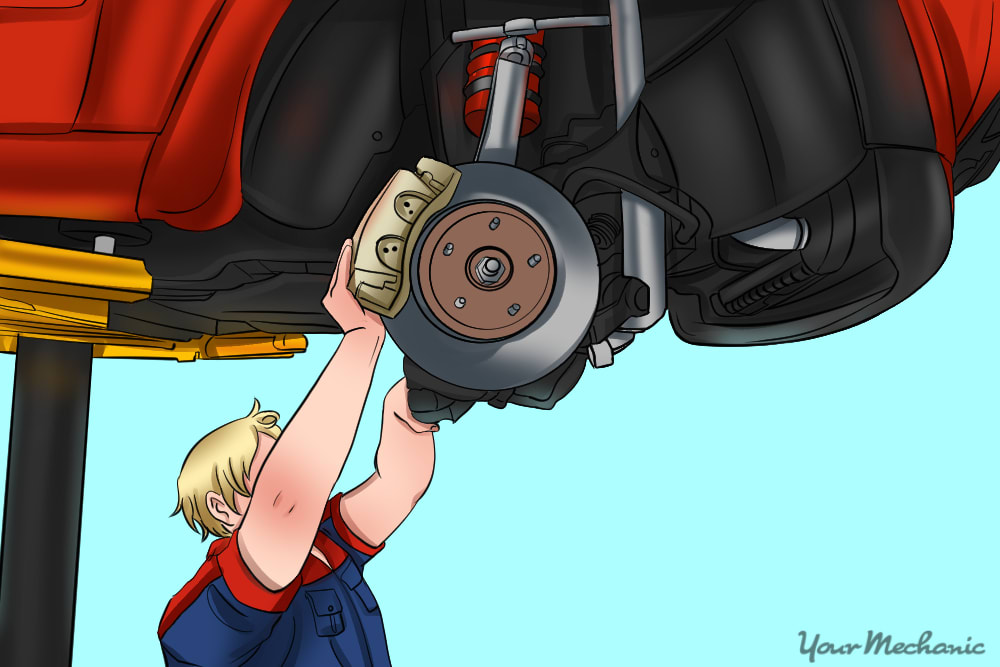
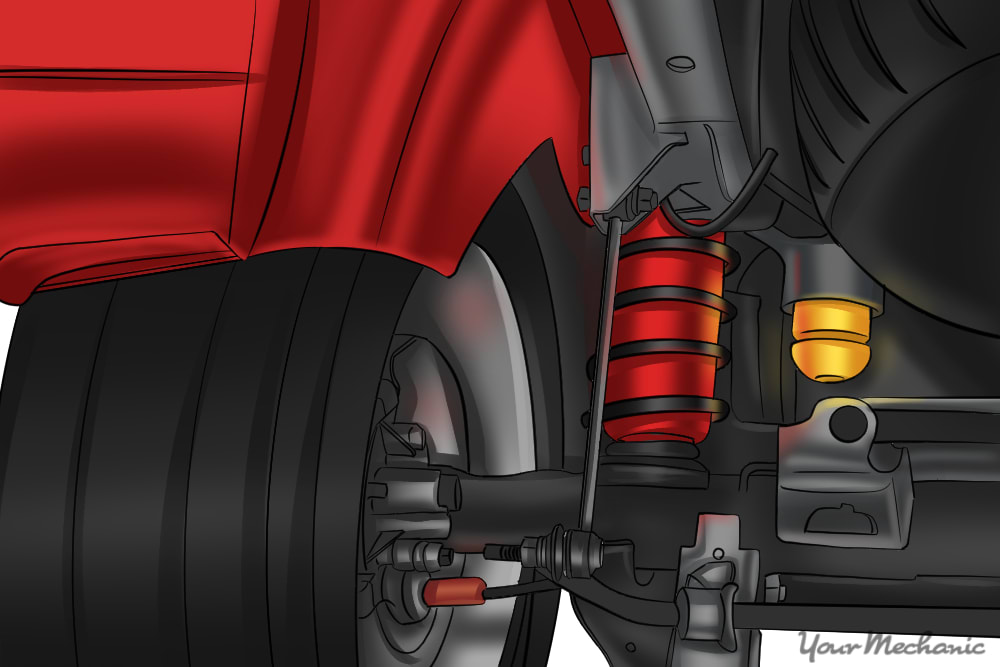
Step 2: Remove the coil spring and front struts. Determine whether the air suspension is just going to be in the rear or if the kit is for the front and rear.
If the front is going to be addressed, remove the front struts from the vehicle as per the kit instructions.
Rear coil springs should be removed if rear air springs are going to be installed.
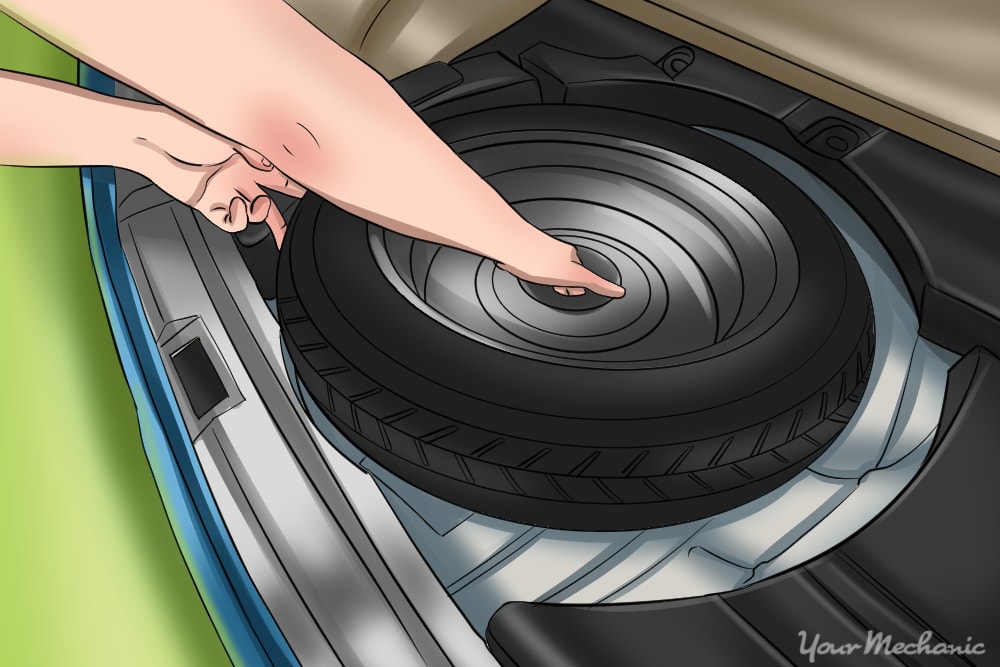
Step 3: Prepare to install the air suspension. If the kit being installed uses a compressor, the most common place to install this is in the spare tire well.
Remove the spare tire and any interior panels required to make room for the compressor to sit in the trunk.
Part 2 of 2: Installing the air suspension
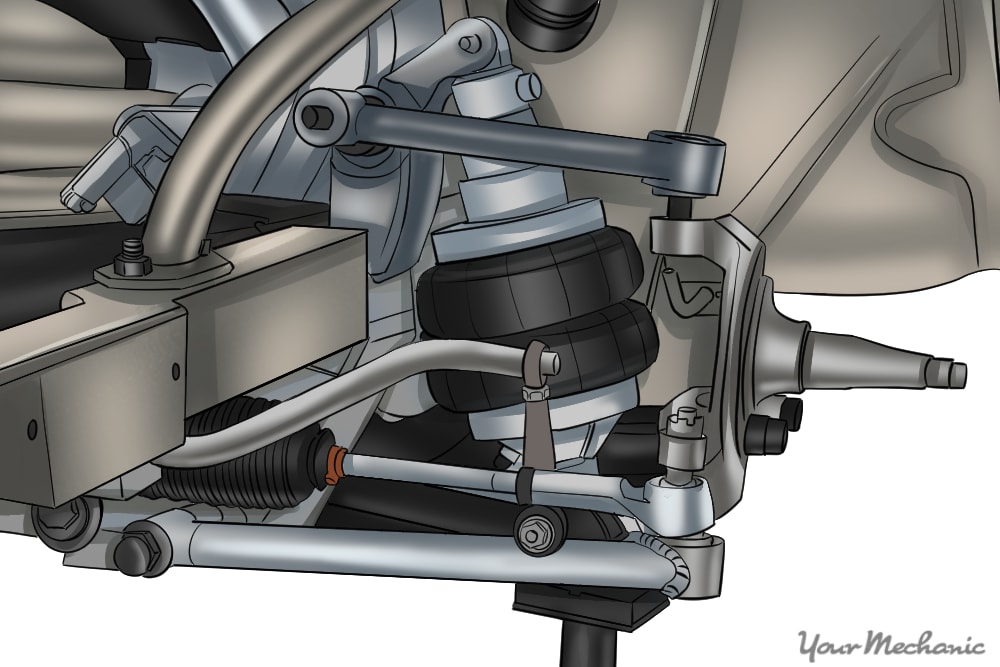
Step 1: Install the rear air spring. Install the rear air spring, or rear coil, in place of the previous spring.
The air spring will support the weight of the vehicle once installation is finished.
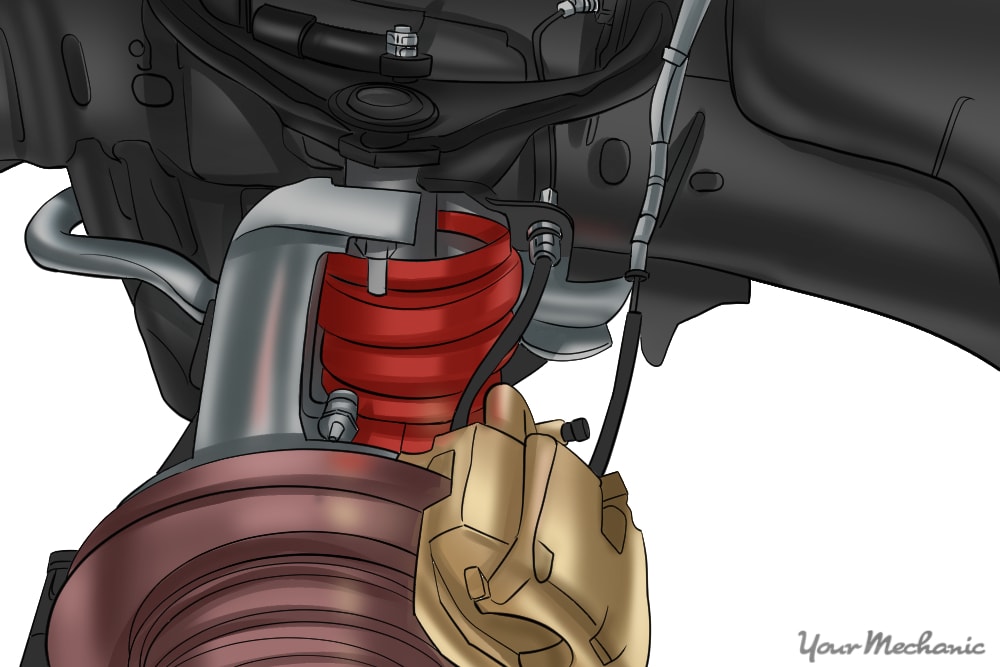
Step 2: Install the front air struts. The front air struts will be installed in place of the previous front air struts.
These will support the weight of the front of the vehicle once the installation is finished.
- Note: There are many different styles and fitments for front air struts depending on make, model, and suspension type.
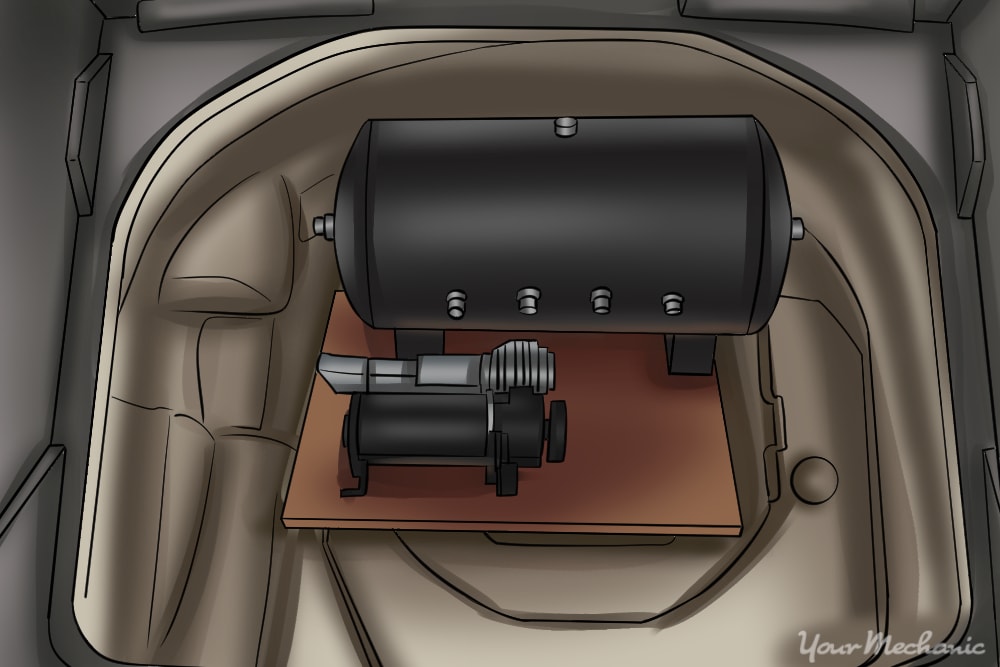
Step 3: Install the air compressor and air tank. The air compressor and the air tank are usually installed into the vehicle’s spare tire well.
Each air suspension kit will have specific instructions on where to install these.
- Note: The compressor fills the air tank with compressed air which allows the lowering and raising of the air suspension. The compressor holds various amounts of air, usually three to five gallons depending on the vehicle size and weight.
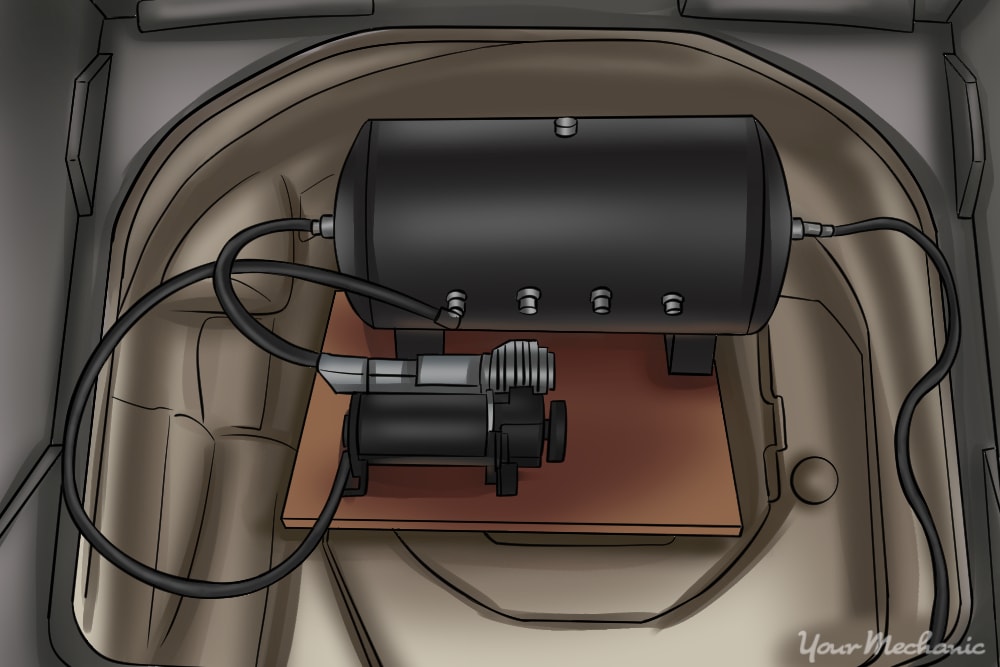
Step 4: Wire the compressor for air and power. The air compressor will need power to operate.
Generally this wiring is routed through a relay and fuse, then to battery power.
Each corner of the vehicle will need its own airline that is then run to the compressor. These air lines must be tucked under the vehicle so they do not bend and break when driving. The lines are attached to the compressor so the air suspension can be controlled.
Step 5: Do a final check of the installation and setup. Look over the installation and make sure all components are tight.
Most air systems will also need to be cycled a few times and checked for proper operation. Each kit has a slightly different setup and test procedures, so be sure to follow your manual’s specific instructions.
Operate the air suspension to confirm that the vehicle attains the proper ride height. This may require some adjustment.
Lastly, the air suspension should be checked for any leaks before it is driven.
- Warning: Air suspension systems will require extra maintenance and repairs as needed. Altering the suspension in any way may affect driving characteristics of the vehicle and void any warranty.
Air suspension can be a helpful addition to your vehicle, whether it is to help carry a load or to improve how a vehicle rides. If at any time during the installation process any questions arise, you can always Ask a Mechanic to recieve quick, detailed advice. If you do not feel entirely comfortable working on this yourself, qualified technicians at YourMechanic can help you with any repairs, replacements, or other services concerning your suspension.
