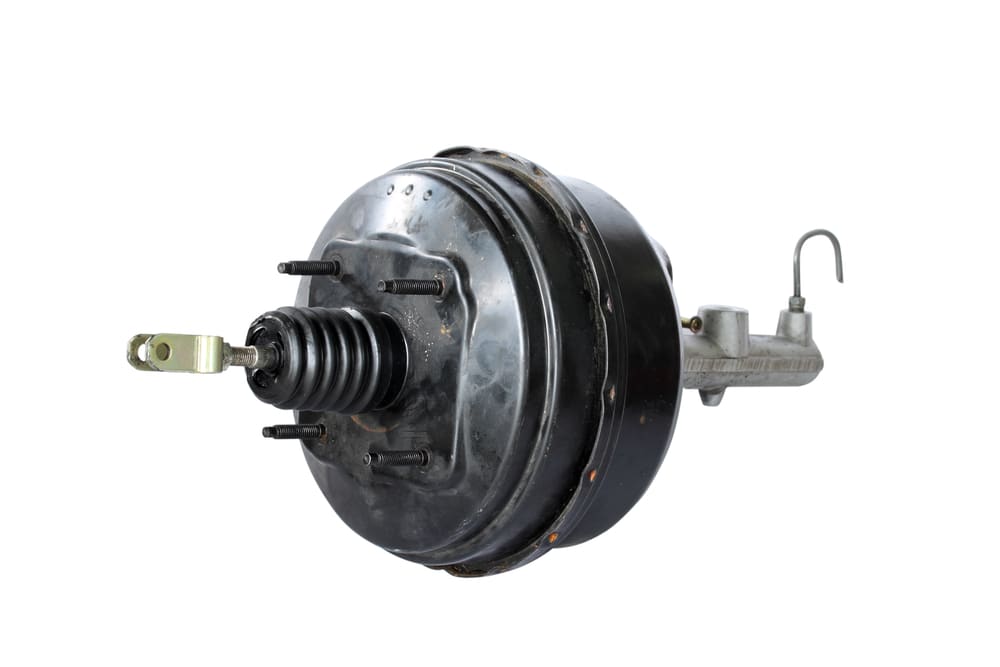
Your vehicle’s brake booster provides power assistance during braking. Traditional brake boosters are vacuum operated. However, this design does not work on diesel engines that do not create manifold vacuum. In cases like this, a hydraulic brake booster, or hydro-boost unit, is used.
In the hydro-boost system, power steering fluid pressure is used instead of engine vacuum. The hydro-boost brake booster contains a valve which regulates the amount of pump pressure when the brakes are applied. There is a lever inside that controls the position of the valve and a boost piston that applies pressure to the master cylinder.
Replacing this unit is a major undertaking, but it can be done if you follow this step-by-step guide.
Part 1 of 2: Removing the old hydro-boost unit
In order to safely and efficiently replace your hydro-boost unit, you will need a couple of basic tools.
Materials Needed
- Jack
- Jack stands
- Flare nut wrenches
- Funnel
- Power steering fluid
- Protective gloves
- Ratchet with extension
- Repair manuals (optional); you can purchase these from Chilton, or Autozone provides them online for free for certain makes and models
- Safety glasses
- Small screwdriver or pick
Step 1: Locate the hydro-boost unit. The hydro-boost unit can be found mounted to the firewall on the driver’s side.
Step 2: Disconnect the negative battery cable. To cut power to the vehicle, disconnect the negative battery cable and set it aside.
Step 3: Remove the pressure from the accumulator. Before servicing the system, remove pressure from the accumulator by pumping the brake pedal with the engine off until you feel no change in the hardness of the pedal.
Step 4: Remove the master cylinder from the hydro-boost unit. Unbolt the master cylinder from the hydro-boost unit. On most cars, the brake lines are long enough that the master cylinder can be removed from the booster without disconnecting the lines.
Step 5: Disconnect the hydraulic lines. Disconnect the hydraulic lines using a flare nut wrench to avoid rounding off the fittings.
Step 6: Disconnect the pushrod from the brake pedal. Remove the brake booster pushrod from the brake pedal under the dash by removing the retaining clip.
You can remove the clip using a small screwdriver or pick.
Step 7: Remove the hydro-boost unit fasteners. Remove the nuts or bolts securing the booster to the bulkhead. These are usually located under the dash, and you may need a ratchet with an extension to access it.
Step 8: Remove the old hydro-boost unit. Once the fasteners have been removed, you can take the old booster unit out.
Part 2 of 2: Installing the new hydro-boost unit
Step 1: Position the new hydro-boost unit. Put the new unit in place of the old unit and orient it the same way.
Step 2: Reinstall the fasteners. Reinstall the hydro-boost unit fasteners and tighten them down.
Step 3: Reconnect the pushrod to the brake pedal. Reconnect the pushrod to the brake pedal and put the retaining clip back on.
Step 4: Reconnect the hydraulic lines. Reconnect the hydraulic lines and tighten them down using a flare nut wrench.
Step 5: Reinstall the master cylinder. Reinstall the master cylinder and tighten down the mounting bolts.
Step 6: Top off the power steering fluid. Using the appropriate fluid for your vehicle and a funnel, add to the power steering reservoir to top it off.
Step 7: Pump the brakes. Start the vehicle and pump the brakes several times.
Step 8: Raise and secure the vehicle. Jack up the vehicle and support it with jack stands.
Step 9: Bleed the system. Bleed the system by pumping the brakes and turning the steering wheel until both power steering and power brakes return.
Step 10: Lower the vehicle. Jack up the vehicle, remove the jack stands, and then lower the vehicle to the ground.
Step 11: Check the power steering fluid. Check the power steering fluid and top it off again as needed.
Step 12: Reconnect the negative battery cable. Reconnect the negative battery cable and tighten it down.
Replacing a hydro-boost unit is a big job. If this seems like something you’d rather leave to a professional, you can always Ask a Mechanic to get quick, detailed advice from one of the certified technicians at YourMechanic.
