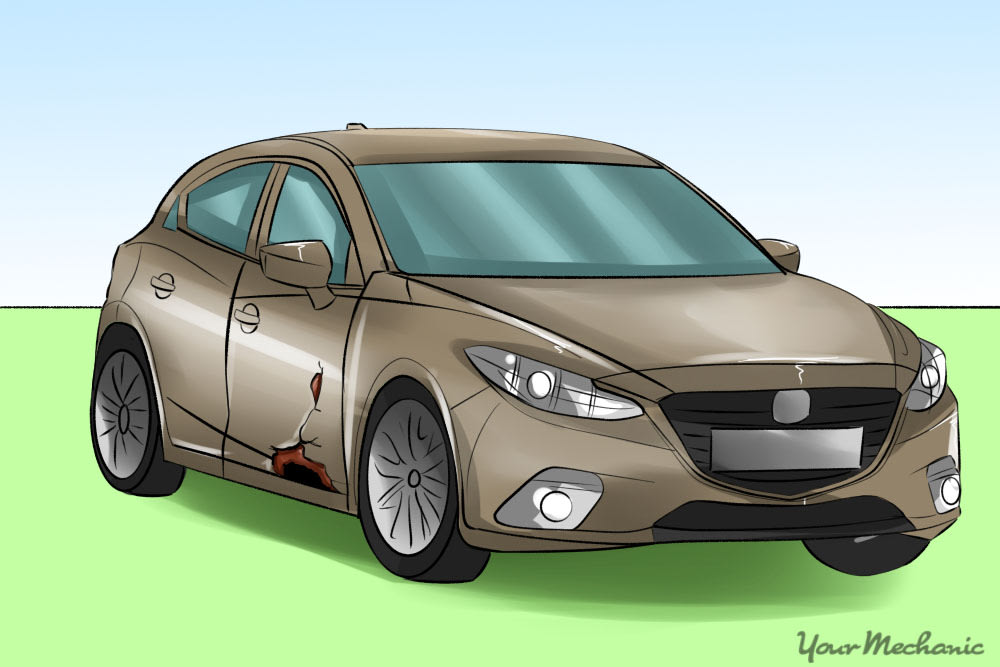
Rust: if your car has it, you’re probably not happy about it. At the very least, it’s unsightly and reduces your car’s value; if left unchecked a rust spot can quickly grow until it causes a structural problem. In many states a car with rust holes in the body won’t pass inspection, regardless where the spots are located or how serious they are. For these and other reasons, if your car has body rust it’s best to deal with the problem, because it’s certainly not going to go away on its own.
While patching a hole caused by rust is not too difficult, it does take some patience, especially if you want to repaint the vehicle yourself.
If the hole caused by rust is not in a load-bearing area of the car, such as the chassis, it is possible to repair it with glass fiber or body filler. This will make your vehicle look whole again and prevent the rust damage from spreading.
- Note: This guide is for fixing small-to-medium-sized holes in body panels only. If your car has rust on structural components — basically, anything that supports weight or is part of the car’s suspension or it’s supporting structure — then you’re strongly advised to get help from a qualified mechanic or body shop.
With that in mind, here’s what you’ll need to do to remove a rust spot and patch it up nicely.
Method 1 of 2: Using a body filler kit to repair the hole
Materials Needed
- Body filler kit
- Breathing mask
- Electric drill with wire brush or sanding disc attachment
- Goggles
- Hammer, ball peen
- Paint primer
- Paint
- Protective goggles
- Rust resistant primer
Sandpaper, 180-grit
Note: Chemical rust remove is not necessary, but can help ensure that you’ve gotten all the rust, which is absolutely necessary if you don’t want it to return. It’s also possible to use this instead of a grinder, if your rust isn’t extensive; follow the manufacturer’s directions.
Note: Matching your paint color is a tricky task that takes experience and care, but getting an approximate match isn’t impossible. Your parts store can help you find the right paint for your car.
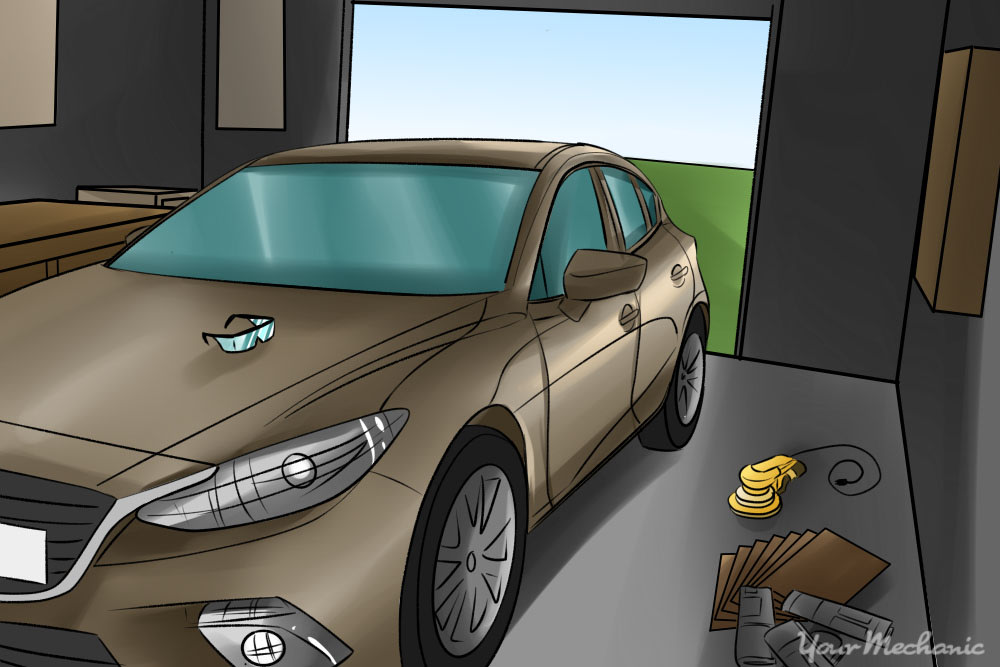
Step 1: Prepare your workspace. You’ll need an appropriate space to do the work, which ideally means a garage or similar structure, as you won’t want to be outside once the painting begins.
The garage should be well lit and well ventilated, and anything that can’t get dirty should be removed, as what’s coming is not a clean process.
Step 2: Prepare your tools. Rust removal can be done by hand, but it’s much easier if you have available an electric orbital sander and an orbital grinder.
If you don’t own these tools, you can rent them at many large hardware stores. Be sure to get sanding discs (80-grit is best for metal, 120- or 150-grit for removing paint and shaping patches) and a grinding wheel too.
Step 3: Prepare your safety gear:
Eye protection: Just about every do-it-yourself article advises eye protection, even for apparently simple tasks. Well, for this repair the need is serious. You’re going to be throwing sparks around with your grinder, and you must protect your eyes, so get some safety goggles. If you wear eyeglasses, that’s not enough — get enclosed goggles that fit over them.
Lung protection: At the very minimum, get some surgical-style breathing masks. This repair involves a lot of airborne dust, which can do serious damage to your lungs. Even better would be to buy or rent a respirator, because you’ll also be working with quite a few toxic chemicals.
Other clothing: Long pants and a long-sleeved shirt are a good idea for this repair, even in hot weather. The sparks thrown by the grinder won’t kill you but they won’t be comfortable against bare skin either. You’ll want a good pair of work gloves, which will help you avoid cutting yourself on the sharp edges of the panel and will protect your skin from the not-so-nice chemicals you’ll be working with.
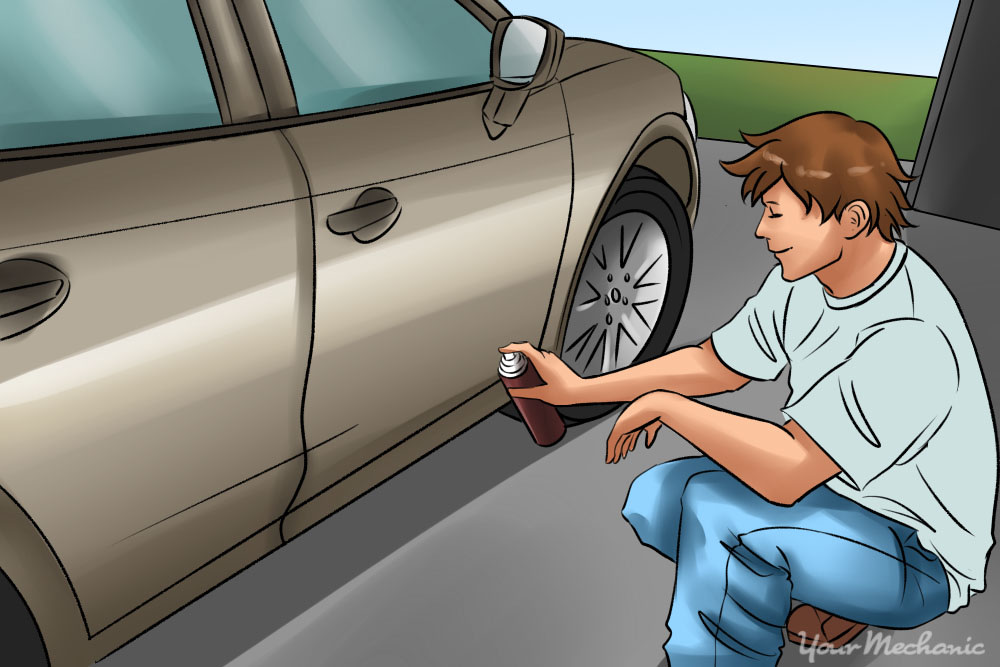
Step 4: Prepare your car. You’ll want to mask everything that won’t get painted, so get some masking paper (newspaper is fine) and masking tape and start taping.
If you’ll just be using primer, mask as much as possible, leaving only a few inches to each side of the rust spot.
On the other hand, if you’ll be painting to match your body color, painting an entire panel may produce a cleaner result, as it’s very hard to match paint within a body panel; which approach to take depends on the size of the panel you’re painting.
Even if you’re not planning on priming, it’s best to mask nearby panels because flying sparks can damage your paint.
Be sure to cover other parts of the car, including nearby tires, glass, and chrome. If you’ll be working near any delicate part of the car, such as a tire, do more than mask that part — cover it with something robust enough to protect it from your grinder in case you slip. A heavy drop cloth will do; if all you have is newspaper, use many sheets to form a thick protective layer.
Now that you’re prepped all your materials and your work space, it’s time to get to work.
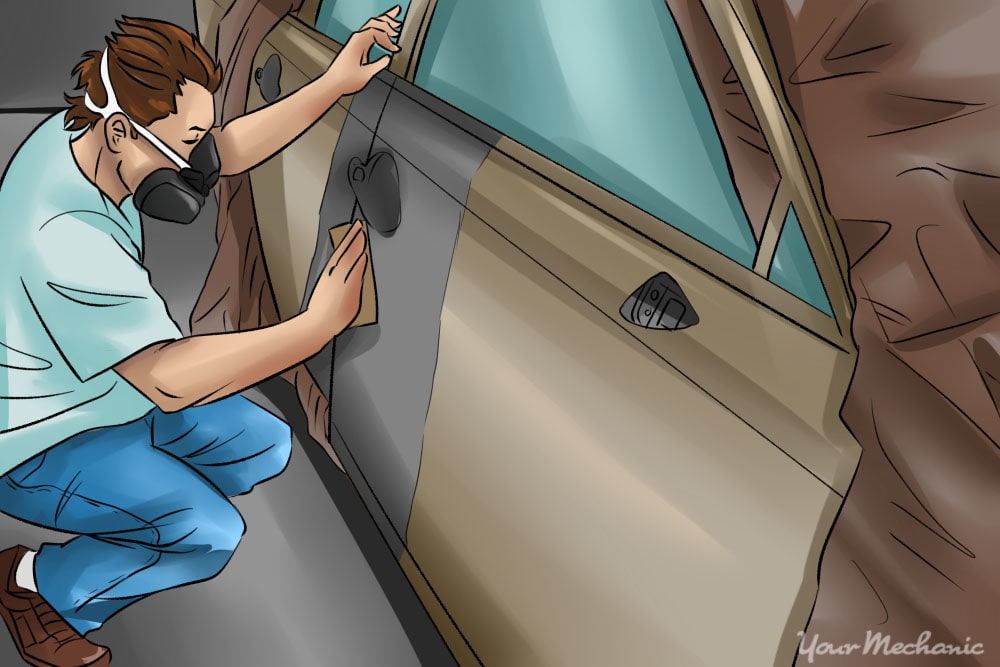
Step 5: Sand off the nearby paint. You want to get down to bare metal or rust, which means removing the paint covering, and near, the rust spot.
Anywhere from 80 down to 150 grit sandpaper works fine for this, preferably with a sanding block or, of course, a mechanical sander.
Don’t stop until you’ve cleared the paint from the entire rust spot, and back far enough that you can be sure you haven’t missed anything.
Step 6: Grind away the rust. Now switch to the grinder, if you have one, and grind away all the rust.
It is absolutely critical that you leave no rust, so don’t stop until you’re down to bare, shiny metal at every edge.
Don’t worry too much about breaking through, even if the rust spot wasn’t all the way through to begin with, as you’ll be fixing that with your patching kit.
- Warning: Be sure to wear protective goggles to protect your eyes from flying metal and paint dust.
Step 7: Make sure you remove all the rust. Once you can see bare metal everywhere, use your rust remover if you have it to make very sure you’ve removed all the rust.
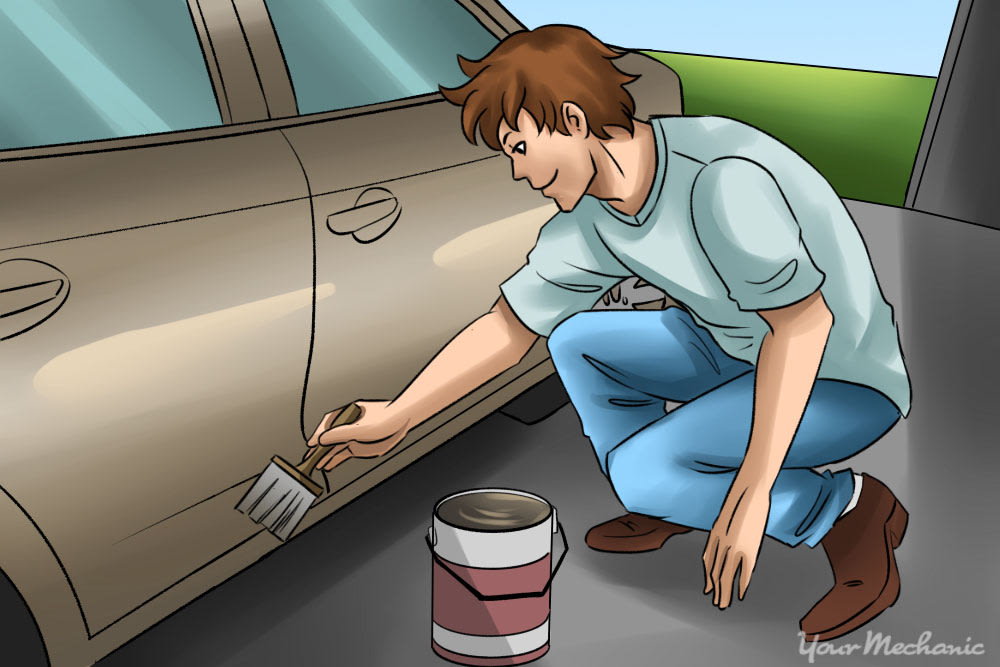
Step 8: Apply rust primer. Paint the border of the hole you have created with a rust resistant primer or rust converter.
A rust converter will convert rust into a polymeric coating that protects the metal and acts as a primer. The protective coating seals the surface against any new moisture which helps prevent further rust.
These products are available as a spray or brush on. Apply per the manufacturer's instructions and wait the recommended amount of time before moving on to the next step.
Step 9: Even out the edges of the hole. If necessary, tap the edges of the hole inwards with a small ball-peen hammer down to the level of the body panel.
The hole should now be ready to be filled with body filler.
Step 10: Prepare the body filler. Mix the body filler paste with the hardener as per the filler kit instructions.
Follow the directions carefully - adding too much hardener can cause the mixture to harden too quickly.
Body filler can be purchased as a kit at any auto supply store. Most kits contain a body filler paste, a hardener and a piece of expanded zinc metal, or fiberglass cloth which is used to support the filler while patching the hole.
Step 11: Insert the metal mesh behind the rust hole. Hold the zinc metal piece behind the hole and attach it to the body of the vehicle behind the hole with small amounts of filler. It will act as a stabilizer for the body filler paste.
Step 12: Apply body filler. Use the plastic applicator that comes with the kit to apply the body filler to the hole.
Continue to add filler until the hole is completely filled.
Contour the paste to the vehicle body.
Step 13: Allow the filler to dry per manufacturer's instructions.
Step 14: Sand with 180-grit sandpaper until smooth.
Step 15: Sand it down. After the patch is dry, you’ll want to sand it down flat with the rest of the body panel.
For that you’ll want finer sandpaper or wheels than before — 120- or 150-grit is about right to start, then finer to get a smoother surface. Go slowly and carefully, as you don’t want to take off too much of the body panel.
Step 16: Fine sand the surface. If you’re applying primer (and you should if you don’t want the rust to return), you’ll want a smooth surface, so use finer-grit sandpaper, down to 240- or so. It’s best to forego the electric sander from here on, unless you’re very careful.
Step 17: Make sure surface is clean and dry. Make sure the surface is completely free of dust before painting, and completely dry.
Step 18: Spray the primer. Now, spray on a thin layer of primer. Don’t worry about applying enough, because you’ll be doing at least two and ideally three coats.
Step 19: Let the primer dry. Let the primer dry completely, and sand it to smoothness.
Step 20: Clean and apply a second layer. Clean the surface well (it must be free of dust), and apply the second layer of primer. Then sand once again.
Step 21: Decide if you want to paint. After your final (second or third) coat of primer, you can call it quits or move on to the painting step.
Step 22: Sand it smooth. If you’re painting, sand the surface to even greater smoothness — 400-grit sandpaper is right, with a flexible sanding block; don’t do this with an electric sander.
Step 23: Paint your car. Once the surface is smooth, dust-free, and dry, it’s time for the paint. Try to use long, even strokes, overlapping slightly but avoiding excessive thickness or drips. You’re going for a thin, even coat; don’t try to do this in one go.
Step 24: Dry and sand again. Now, sand again with 400-grit sandpaper. Be sure to sand down any drips or thick spots.
Step 25: Clean, dry, and repeat. Clean and dry the repair and then repeat the process twice more (sanding in between), until you’ve done three coats.
Step 26: Wet sand a final time. Do a final sanding, this time with wet (water only) 400-grit sandpaper.
Step 27: Apply the clear coat. The final layer will be a clear coat, this will help preserve the other layers on your car and give it a smooth glossy look. Use the same long even strokes and the same technique you used for your regular coat.
Step 28: Clean up. Clean up everything, return any borrowed or rented tools, and go show off your completed repair.
- Note: Painting a vehicle can be difficult. If you want a high quality finish, it may be best to have a professional repaint the vehicle.
Method 2 of 2: Using a fiberglass repair kit to repair the hole
Materials Needed
- Fiberglass repair kit
- Electric drill with wire brush or sanding disc attachment
- Hammer, ball peen
- Paint primer
- Paint, automotive
- Protective goggles
- Rust resistant primer
- Sandpaper, 180-grit
A fiberglass kit is very similar to body filler but it does require putting on a few layers of fiberglass and doing a little sanding in-between.
Step 1: Remove all of the rust until you get to solid body. This can be done using a tin snips or an electric drill with a wire brush, flap wheel or sanding disc attached.
- Warning: Be sure to wear protective goggles to protect your eyes from flying metal, and paint dust.
Step 2: Apply rust primer. Paint the border of the hole you have created with a rust resistant primer or rust converter.
A rust converter will convert rust into a polymeric coating that protects the metal and acts as a primer. The protective coating seals the surface against any new moisture which helps prevent further rust.
These products are available as a spray or brush on. Apply per the manufacturer's instructions and wait the recommended amount of time before moving on to the next step.
Step 3: Even out the edges of the hole. If necessary, tap the edges of the hole inwards with a small ball-peen hammer down to the level of the body panel.
The hole should now be ready to be filled with fiberglass filler.
Step 4: Prepare your fiberglass resin repair kit. Mix the resin and the hardener per the instructions that came with the kit.
Cut a piece of fiberglass cloth so that the cloth isy are just slightly larger than the rust hole you are filling.
Most kits contain fiberglass resin, liquid hardener, fiberglass cloth, a plastic spreader, mixing tray and mixing stick.
- Warning: Glass fiber can irritate the skin, so it is best to wear rubber gloves when using these kits.
Step 5: Apply a layer of fiberglass mat. Put a layer of fiberglass mat across the hole, from behind the hole.
Use a paintbrush to apply the resin mixture to the matting.
This will be a stabilizer for the fiberglass resin.
Step 6: Apply the fiberglass resin. Use the plastic applicator that comes with the kit to apply the fiberglass resin to the matting.
Allow the layer to dry per the manufacturer's instructions.
Step 7: Sand the layer with 180-grit sandpaper until smooth. Then apply another layer of resin and repeat until the rusty spot is filled and the fiberglass resin is even with the vehicle body.
Step 8: Sand the final layer with 180-grit sandpaper until smooth.
Step 9: Apply a layer of spray on primer over the spot.
Step 10: Paint the spot using an identical paint color to the rest of the car. Paint should be applied with a spray gun.
- Note: Painting a vehicle can be difficult. If you want a high quality finish, it may be best to have a professional repaint the vehicle.
The hole caused by rust on your vehicle should now be repaired. If you have difficulty with these methods, or are uncomfortable doing involved body work on your car, you may want to have a professional body shop assess the rust damage.
