
From time to time, some parts on your car may need to be replaced, and that includes the bulbs in the headlights.
While you may perform regular checkups and maintenance on your car’s engine, brakes and tires, you may not remember to check the headlights unless one or both of the bulbs stop working. This can result in lower visibility when driving at night and may result in your getting pulled over by the police.
Replacing a burned out or dim headlight isn’t very difficult on most vehicles and new headlight bulbs are usually inexpensive.
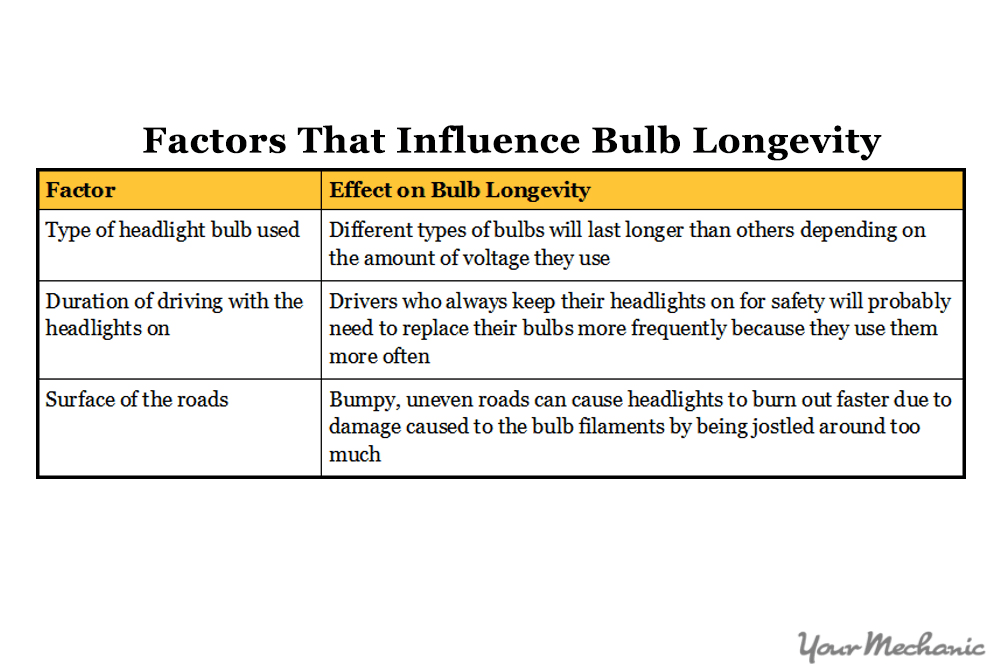
You may need to replace your bulbs at intervals depending upon the following factors:
Regardless of how often the bulbs need replacing, it’s a good idea to know how to do it yourself.
You can fix a burned out headlight on your car by performing the following steps:
Part 1 of 5: Identify the type of bulb you need
Material Needed
- Owner’s manual
Step 1: Know what size bulb you need. Check the owner’s manual of your car for the type of bulb you need for the headlights. If you do not have an owners manual then consult a local parts store for the correct bulb to use.
There are several types of bulbs on the market which are identified by a number. For example, your car may use an H1 bulb or an H7 bulb. You can also see a list of common headlight bulbs to see what type you may need. Some bulbs may look alike but are for different vehicles.
Tip: Some cars require different bulbs for the low beam and highbeam lights. Be sure to check your manual for these specifications.
Tip: You can also call an autoparts store and give them the make and model of your car, and they will be able to tell you what size of bulb you will need.
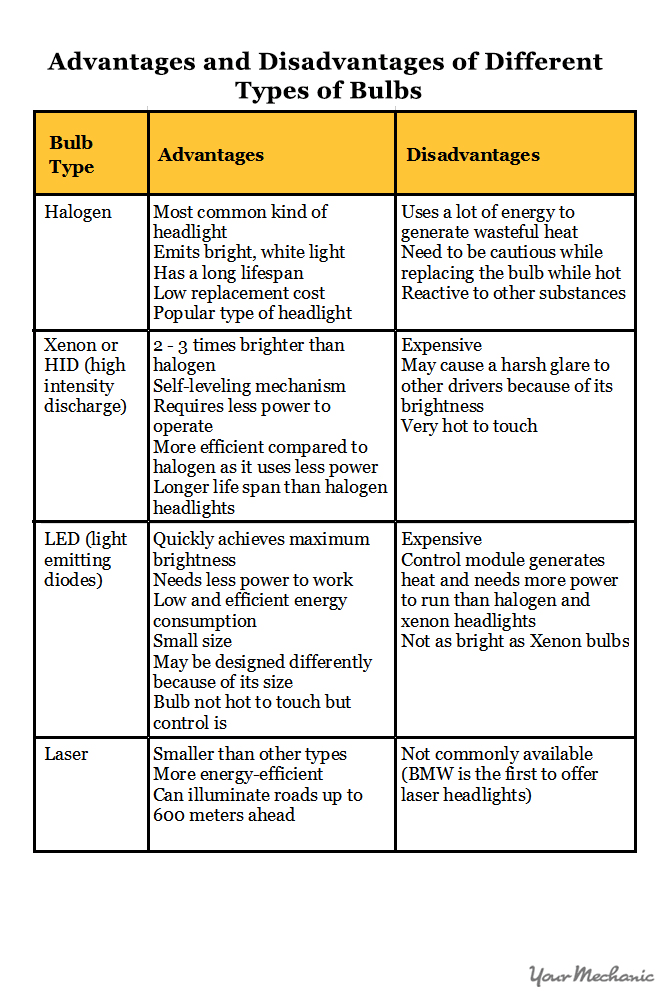
Step 2: Know what kind of bulb you need. Apart from choosing the right size bulb for your car, you will also need to decide whether you want to use a halogen, LED or Xenon bulb.
See the table below for advantages and disadvantages of each type of bulb.
- Warning: Using the wrong type or size of bulb can result in overheating and cause damage to the headlamp and possible melting of the wire connection.
Part 2 of 5: Purchase new bulbs
You can order headlight bulbs online or buy them at most local car parts stores.
- Tip: If you can’t figure out what type of bulb you need, take the burned out bulb with you to a local auto store so that a store employee can help you find a matching bulb.
Part 3 of 5: Remove the headlight bulb
Removing the bulb is a necessary step in fixing a burned-out headlight.
In older cars, the entire headlight lamp needed to be removed and fixed. However, in most cars today, headlight bulbs plug into a fixture behind the headlamp which is accessible through the engine compartment.
Step 1: Open the hood. You can pop the hood by pulling on a lever beneath your dashboard. Unlatch the lever holding the hood to your car and prop it open.
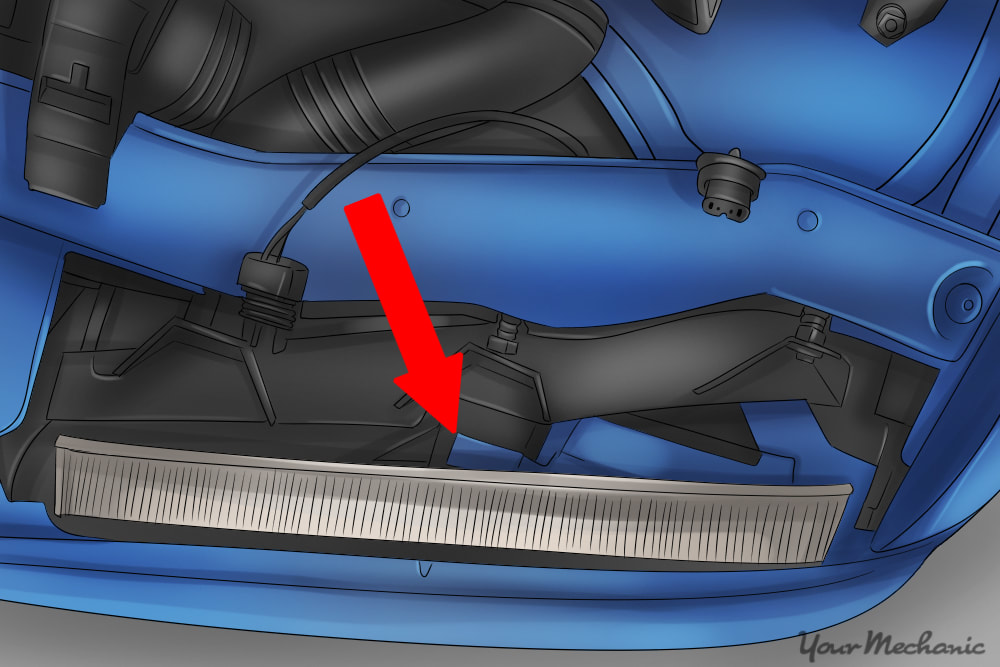
Step 2: Locate the headlight compartments. Locate the headlight compartments in the front of the engine bay. They should line up exactly where the headlights appear in the front of the car. The headlight bulb will be attached to a plastic bulb connector with a few wires in it.
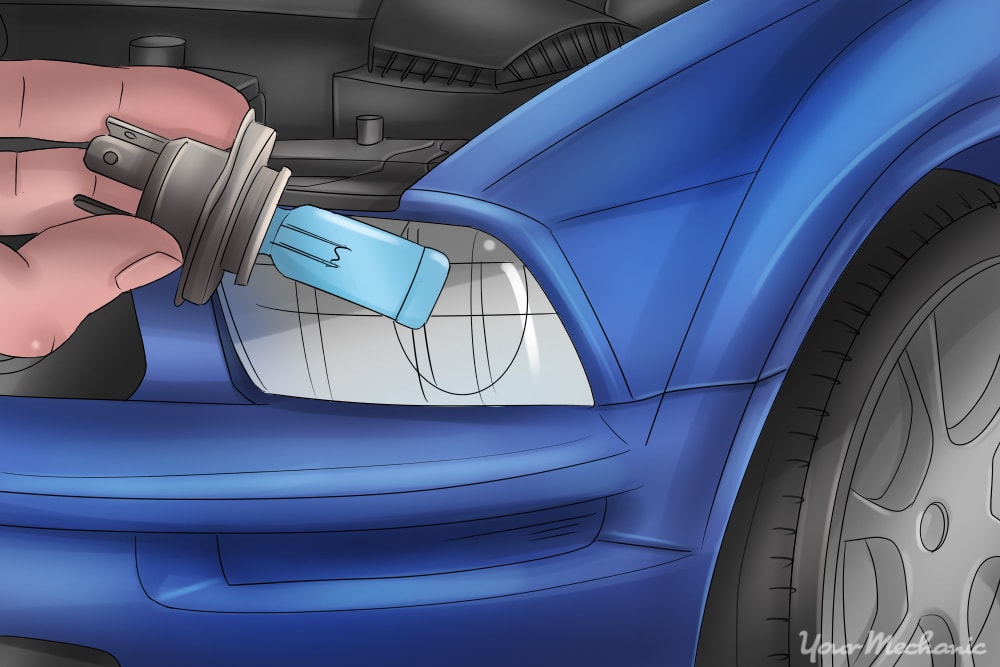
Step 3: Remove the bulb and connector. Slightly turn the bulb and connector counterclockwise and remove it from the housing. It should pop out easily once you’ve turned it.
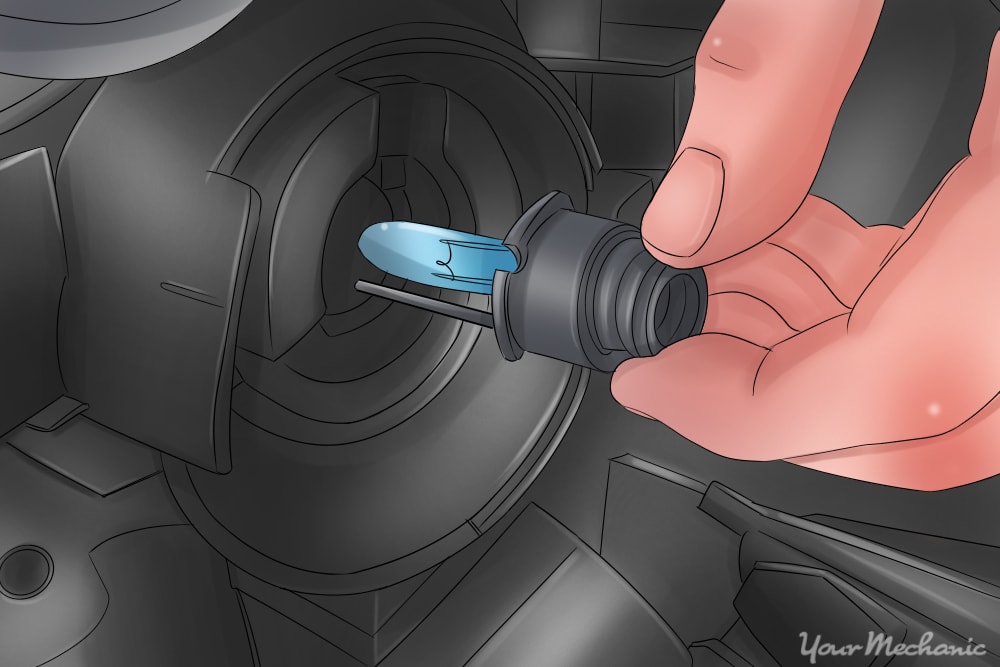
Step 4: Remove the bulb. Remove the bulb from the bulb connector socket. It should easily pull out of the bulb by lifting or pushing in the locking tab.
Part 4 of 5: Replace the bulb
After purchasing a new bulb, insert it into the headlamp bulb socket in the engine bay.
Materials Needed
- Headlamp bulb
- Rubber gloves (optional)
Step 1: Take the new bulb. Remove the new bulb from the packaging and be very careful not to touch the glass of the bulb. Oil from your hands may get onto the glass and cause the bulb to overheat or crack after only a couple uses.
Wear a pair of rubber gloves to prevent oils and moisture from getting on the new bulb.
- Tip: If you’ve accidentally touched the glass of the bulb or the headlight cover when fixing the headlight, clean it with rubbing alcohol before completing the installation.
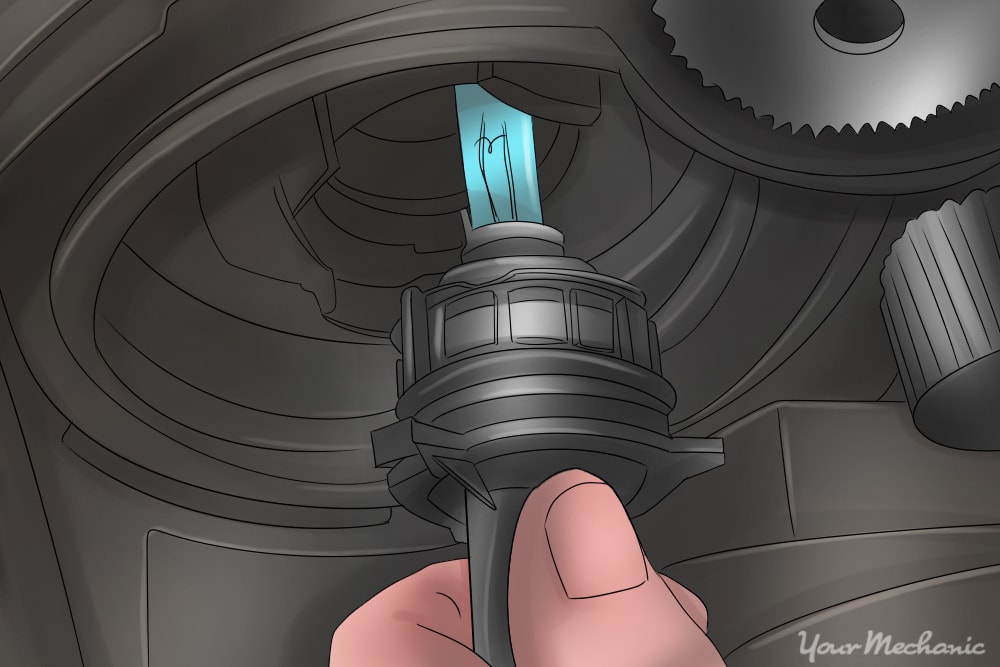
Step 2: Fit the bulb into the connector. Fit the base of the bulb into the bulb connector. Look for sensors or prongs that need to line up. Ensure that the bulb is securely attached to the bulb connector. You should hear or feel a click when the bulb is in place.
Step 3: Reposition the connector. Slide the connector, bulb-first, into the housing unit.
Step 4: Tighten the connector. Turn the connector about 30 degrees clockwise until it is secure.
Part 5 of 5: Test the new bulb
After replacing the bulb, turn your headlights on to check if the newly replaced headlight is working. Walk to the front of your car and look at the headlights to make sure they’re both working properly.
- Tip: Make sure you have the same type of bulbs in both headlights so that one is not brighter than the other. Replacing both bulbs at the same time is a good practice to have equal brightness on both sides.
If the new bulb doesn't work, the headlight may have a wiring problem. If you suspect that your headlights are not working or if you want a professional to replace the headlights, contact a professional car mechanic, such as one from YourMechanic, who can come out to your location and get your headlights back up and shining brightly.


