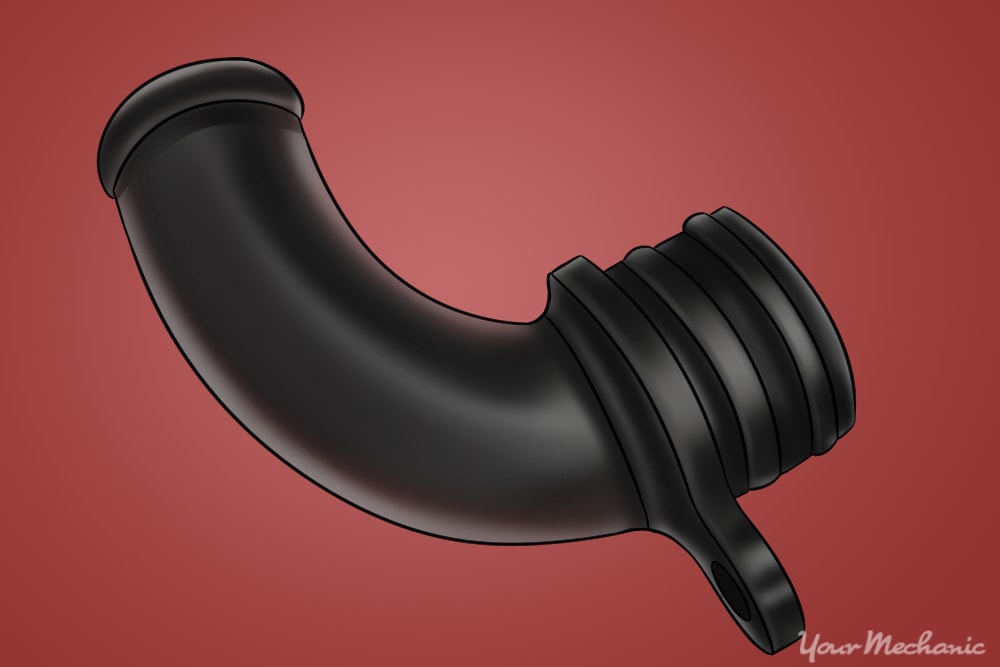
One of the individual components that are a part of today's cooling system is the coolant bypass tube. The coolant tube is a customized piece of cooling hose that serves as coolant inlets or outlets linking the radiator to the engine block. They are made out of rubber, plastic or metal and are typically constructed to be changed out during routine service. Since they are a part of the cooling system, they are susceptible to wear and tear as other hoses and tubes. When a coolant bypass tube develops a leak, you'll have to know the correct procedures for replacing them.
There are two specific types of coolant tubes used in most cars, trucks and SUV's in the United States. The smaller coolant tube runs alongside the engines intake manifold can cools the upper intake manifold, while the larger and more common coolant bypass tube is often attached to the water pump and is connected to the engine block. There are also heater bypass coolant tubes that break off the primary coolant lines and circulate hot coolant to the vehicles heater systems.
Within each of the coolant bypass tubes, there are three individual components: the coolant tube itself, the reinforcement tube, and the cover. The cover is typically a mesh material that acts as a heat shield of sorts. We'll focus on the process of replacing the primary coolant bypass tube on many vehicles sold today.
- Note: Since each vehicle is unique, there may be other instructions or steps for removing equipment in the way of the bypass tube. Please consult your vehicle's service manual for any additional steps needed to replace the bypass hose.
Part 1 of 3: Diagnosing a problem with the coolant bypass tube
If a problem occurs with engine heating or overheating, there are several potential culprits. For the most part, the overheating is caused by a lack of coolant inside the engine while it is running under stressful situations. The issue may be due to air pockets inside the coolant chamber or tubes, a leak in the coolant system, or the thermostat improperly activating. Due to the diversity in potential problems, properly diagnosing the precise cause is extremely important before attempting any mechanical replacement.
Listed below are a few of the common symptoms that indicate that the overheating issue may be due to a faulty or broken coolant tube in need of replacement.
Low coolant levels: If the coolant tube or bypass tube is broken, more often than not it will leak coolant and reduce the level of coolant inside the radiator. This activates the low coolant sensor located at the top of the radiator and alerts you that your coolant level is lower than it should be.
This is also a problem when you look at the overflow coolant reservoir and notice that it is dry. If your coolant level is low, add fluid to keep the engine protected, then check to see if the coolant bypass tube is leaking coolant under the vehicle.
Visible leak under the engine: The most common cause of engine coolant leaks is when one of the coolant tubes develops a small hole or cracks due to age and exposure to the harsh environment under the engine. If you notice that radiator coolant is dripping under your motor, it's a good warning sign that a problem exists with one of the coolant tubes.
The engine is overheating: As we stated above, the most common cause of engine overheating issues is low coolant inside the motor. When any of the coolant tubes are pinched or cracked, they leak coolant and reduce the amount of coolant available to keep the engine as it should. When the engine overheats, check the coolant bypass tubes to verify they are not damaged.
- Note: Since all vehicles are unique, it's important to understand that the guidelines and instructions listed below are general instructions. Make sure to verify specific instructions with your vehicle’s manufacturer’s service manual before proceeding.
Part 2 of 3: Remove and replace the coolant temperature sensor
The bypass hose replacement is a medium-level job, meaning that it should be okay for someone with general automotive knowledge. However, there may be steps in this process that require the removal of other mechanical components including, water pumps, alternators, AC compressors and others.
This job will also require you to drain and refill your radiator with coolant. If you don't feel comfortable with draining and replacing the coolant back in the radiator (including priming the radiator and cooling system if required), please do not attempt this replacement.
Materials Needed
- Drain pan
- Floor Jack
- Jack stands
- New coolant bypass hose
- Pliers
- Recommended coolant
- Screwdriver set
- Shop rags
Wrenches and sockets
Tip: This job should only be completed when the engine is cold and has not been running for a minimum of one hour. The potential of having coolant splash on you is high. As a result, it is a good idea to wear a safety shield to protect your face. Make sure you wear safety glasses and gloves to protect your hands from hot coolant if the engine is not cold.
Step 1: Jack up the vehicle. Make sure your vehicle is on a level working area; anytime you jack up a vehicle, it's critical that you only do so on a flat surface.
Do not jack up a vehicle on a driveway or incline.
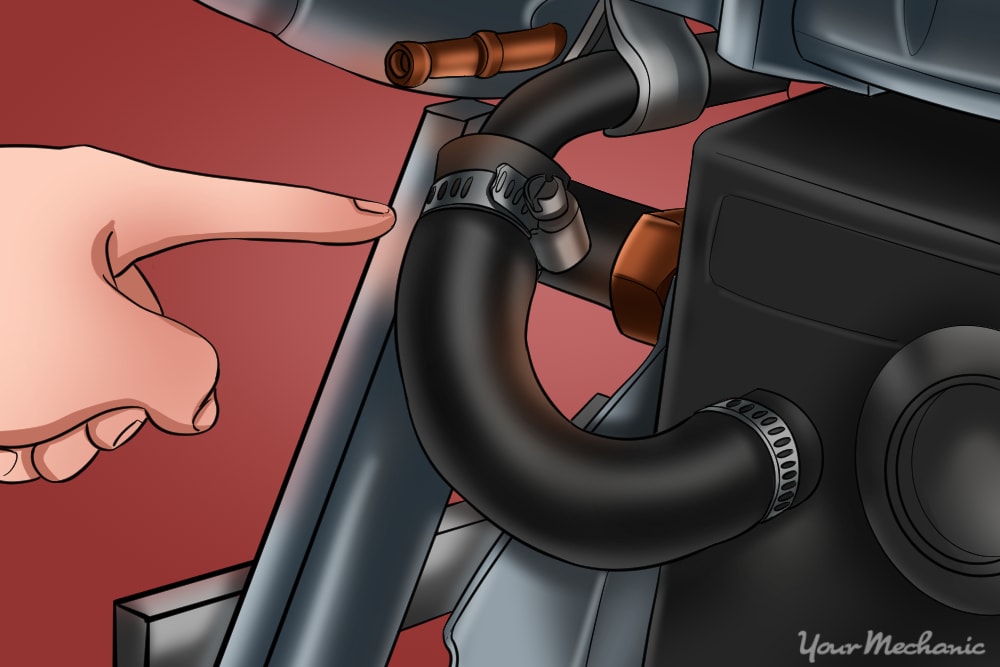
Step 2: Locate the bypass hose. Locate the coolant bypass hose(s) you need to replace. In many cases the coolant tube is underneath the alternator, AC compressor, or water pump, which requires you to remove those components.
Make sure you consult with your manufacturer or purchase a service manual for the make and model of your vehicle for precise location and instructions.
Step 3: Jack the front end for clearance. The initial step is to jack up your vehicle
Step 4: Remove radiator cap and overflow cap. Removing the radiator cap and coolant reservoir cap allows any vacuum pressure inside the coolant system to be removed.
This allows you to drain the radiator fluid, so you can replace the coolant temperature sensor.
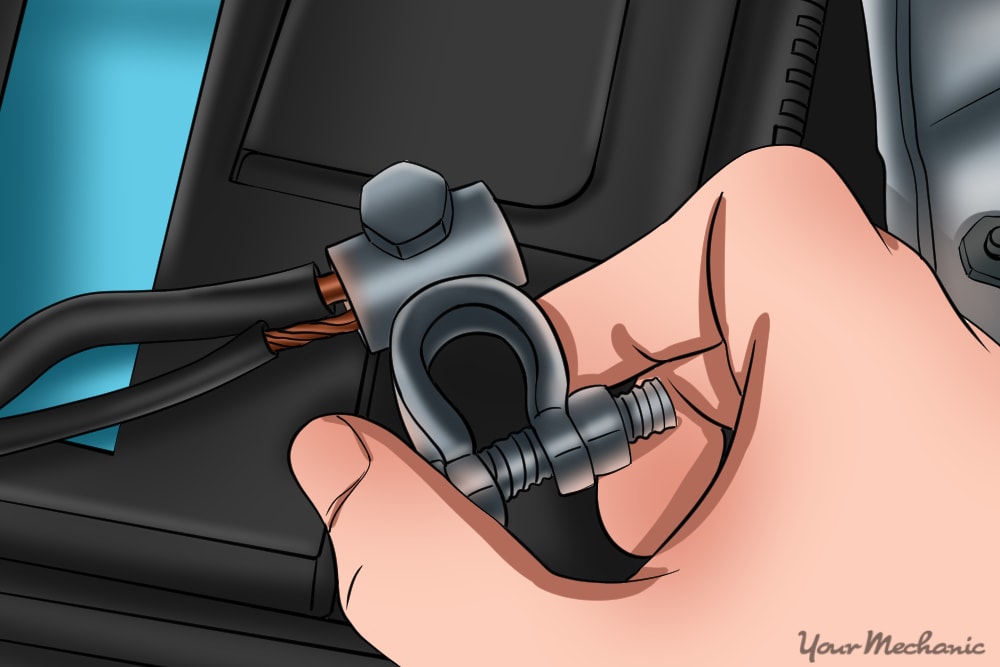
Step 5: Remove battery cables. Anytime you work with coolant and replacing parts that are attached to the engine block, remove the battery cables so there is no power available.
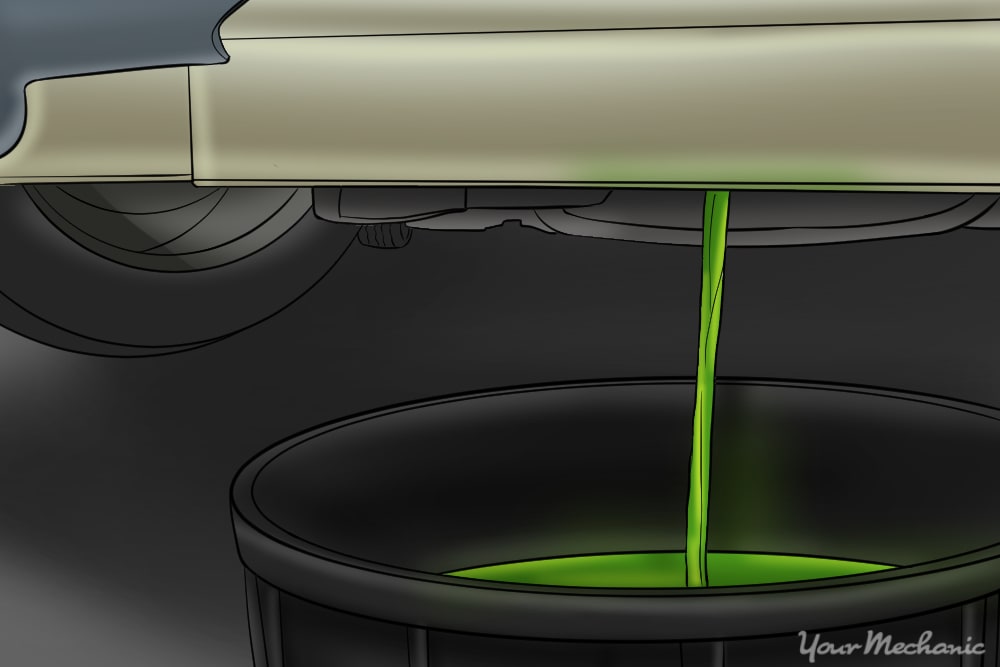
Step 6: Drain the radiator. There are many mechanics who suggest draining the radiator only to the level of the bypass tube.
However, they forget about the coolant inside the tubes. To be safe, drain the radiator completely, which gives you a clean slate to add fresh fluid after the coolant tube replacement has been finished.
- Note: There are many vehicles that require you to remove major components like alternators in order to get to the coolant tubes. These precise steps are unique for each vehicle and are not listed below. Make sure to contact your vehicle manufacturer or purchase a service manual for your vehicle before proceeding.
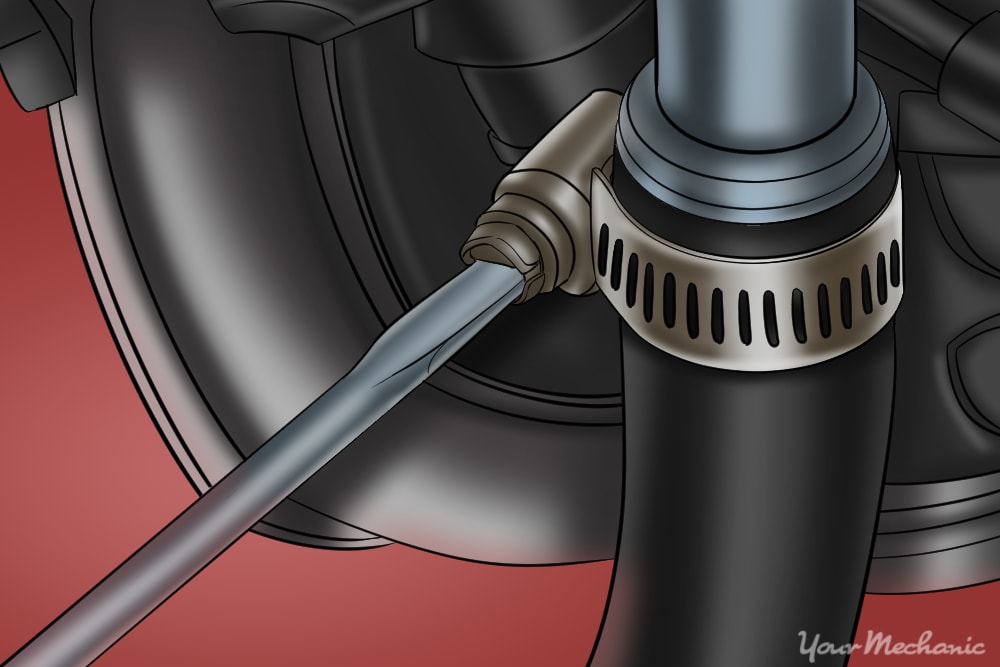
Step 7: Loosen clamps on the bypass hose. The bypass hoses are attached via clamps, usually with screwdriver fittings.
Loosen the screws and slide the clamps behind the coolant tubes where it attaches to the engine block and water pump (in most cases).
Step 8: Remove the coolant tube. Using a flat blade screwdriver, carefully pry the tube off the male fitting attached to the engine block and the water pump.
Take one side off first, then remove the other side.
- Tip: It's a good idea to have a lot of shop rags with you as you remove the coolant tube as excess coolant will spill onto the engine and the ground. Clean up any excess coolant after removing the old coolant tube on any engine components; especially any wires or electrical pieces.
Step 9: Add new clamps onto the bypass hose. Anytime you replace the coolant tubes, it's recommended that you replace the clamps that attach them to the engine or other component.
You'll want to slide the new clamps on before adding the new tubes. Place them about 3" from the outsides on both sides and make sure not to tighten them too much.
Step 10: Lubricate the inside of the coolant tube with radiator coolant. Lubricate the inside of both ends of the tube with a liberal amount of radiator coolant.
This will help the tube slide on the male fitting easier and resist tearing.
Step 11: Attach the bypass tubes. Slide both ends onto the male fittings, one at a time. Start with the water pump side then attach the engine side.
Step 12: Slide clamps onto the fitting. Once both tubes are attached, slide the loose clamps onto the male fitting about ½" from the edge of the coolant tube.
Make sure that the coolant tube is fully secured to the male endings before tightening the clamps.
Step 13: Tighten radiator caps or petcock fitting. Make sure that your radiator drain plug or petcock is tightened and that no radiator fluid is still draining.
Step 14: Add coolant to the radiator. Using new coolant, fill the radiator to the top slowly, letting any bubbles come to the top, continuing with this process until the radiator is completely full.
Once it's full, place the radiator cap on top and secure.
Step 15: Add coolant to the overflow reservoir. It's also important to add coolant to the overflow reservoir before starting your engine.
Make sure to add the recommended ratio of distilled water to radiator coolant when adding new coolant.
Part 3 of 3: Starting the engine and test driving the vehicle
After you replace the coolant tubes, you need to start the engine, check for leaks, and refill the radiator fluid in most cases before you test drive the vehicle. Before you head out on a road test, you need to bring the vehicle to operating temperature, verify the thermostat and fan engage, and make sure radiator is topped off.
Step 1: Start the vehicle and let it warm up to operating temperature. Run the engine until you hear the fan turn on.
This is a sign that the thermostat is working and coolant is flowing through your entire engine.
Step 2: Check for any leaks. Look for leaks from the radiator drain plug, petcock, or the coolant tube that you just replaced.
Step 3: Check to see if the check engine or low coolant level light is illuminated. If it is, turn off the engine and check the coolant level inside the reservoir.
If the light is on, the coolant reservoir should be empty. Fill with coolant and restart the engine to ensure the light comes off.
Step 4: Check the coolant level. Shut off the vehicle, letting it cool for about an hour, and recheck the coolant level inside the radiator.
If it's low, top off the coolant and refill the overflow reservoir.
Step 5: Test drive the vehicle. Make sure to drive the vehicle until you hear the radiator fan come on.
Once you do, return home while keeping an eye on the thermostat or engine temperature.
Step 6: Check coolant level. Once the vehicle has cooled for a minimum of one hour, recheck the coolant level inside the reservoir and fill if needed.
Replacing a coolant tube is very simple, as long as you can get to it safely. With most vehicles manufactured after 2000, the engine compartments are extremely tight, making it very difficult to reach and safely replace the coolant tubes. If you are not 100 percent confident in completing this job on your own, contact one of YourMechanic’s certified technicians to come to your home and replace the coolant tubes for you at an affordable rate.