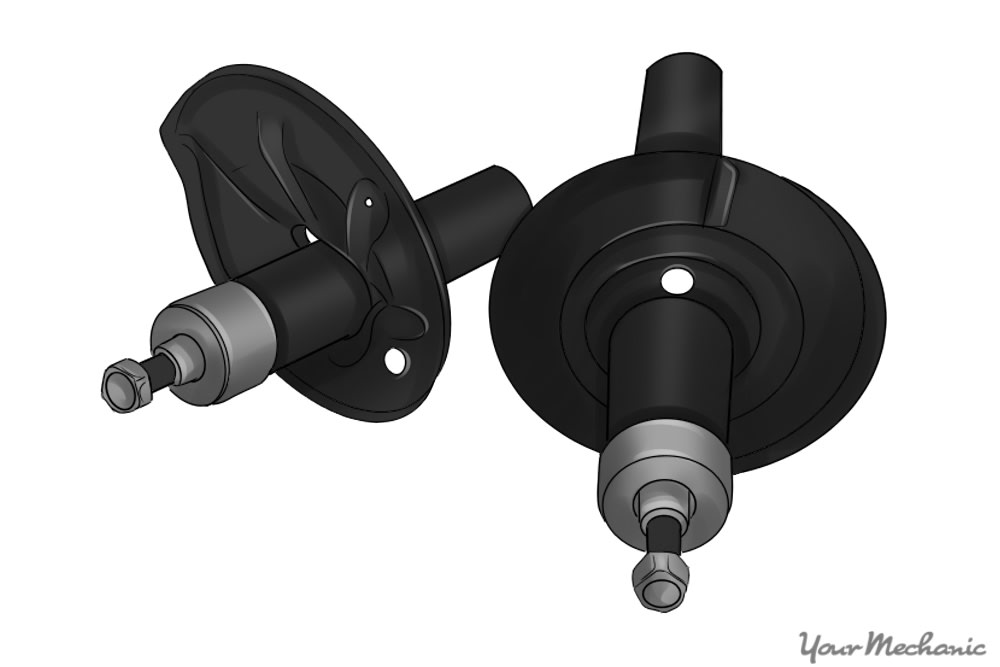
Whether you have an extremely rough ride in your car, or the ride feels like you are floating on a cloud, you may need new struts. The suspension struts on your car are designed to control the oscillations, or the bouncing, of the springs on the vehicle. This means as the vehicle starts to bounce the struts keep that bouncing under control. The strut does this by using pressurized gas and hydraulic fluid to react with an internal piston to provide resistance and control to the vehicle bouncing.
Though there is not a specific maintenance period for struts, they do need to be changed as they fail and cause problems. Putting off changing your struts for too long can make your vehicle unstable to drive and it can even make it unsafe. Knowing some of the initial signs of failure can help you to determine if you need struts and can keep you from having a more costly repair down the road.
Part 1 of 3: Determine what type of struts you have
Step 1: Figure the strut assembly in your car. When you replace your struts it is important to decide what type of strut assembly you have and what type of replacement that you want.
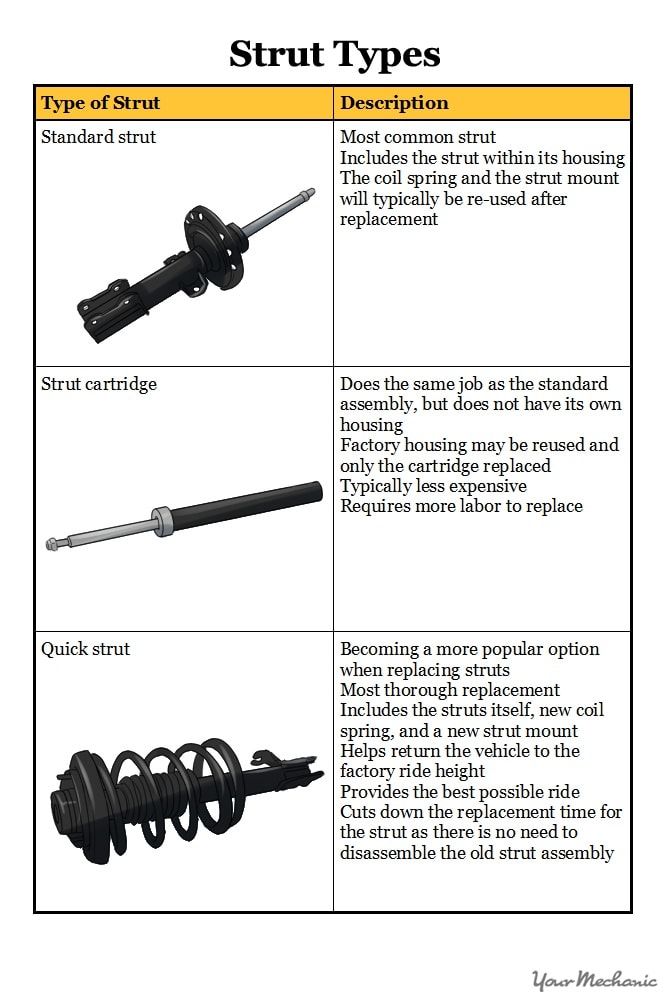
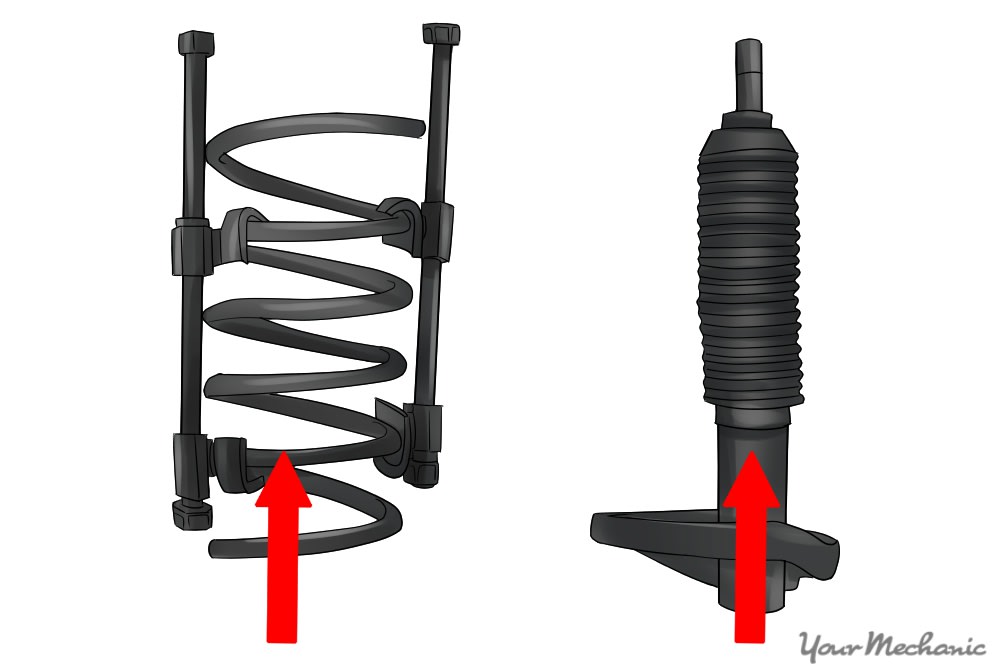
There are three general types of strut assemblies that you may be able to use on your car depending on its design. Here is a table to help you make this determination:
- Tip: When you purchase struts, you get what you pay for. Going with a less expensive struts can result in a poor ride, noise, and premature failure.
Part 2 of 3: Diagnose bad struts
When a strut is bad, it allows the wheel and tire assembly to bounce more than it should, and it can allow the vehicle to sway more than usual. Over time this can cause premature tire wear undo stress on many of your suspension and steering parts.
Not replacing a bad strut will end up costing you more in the long term. Knowing what to look for when inspecting your struts can keep you from needing to purchase unnecessary parts.

Step 1: Look for cupped tire wear. When the struts are failing, the tires bounces more on the road, creating flat spots known as cupped tire wear.
Cupped tire wear looks like multiple high and low spots; the wear on the tire will be very uneven. If this occurs, then the tires will need to be replaced once the struts are repaired.
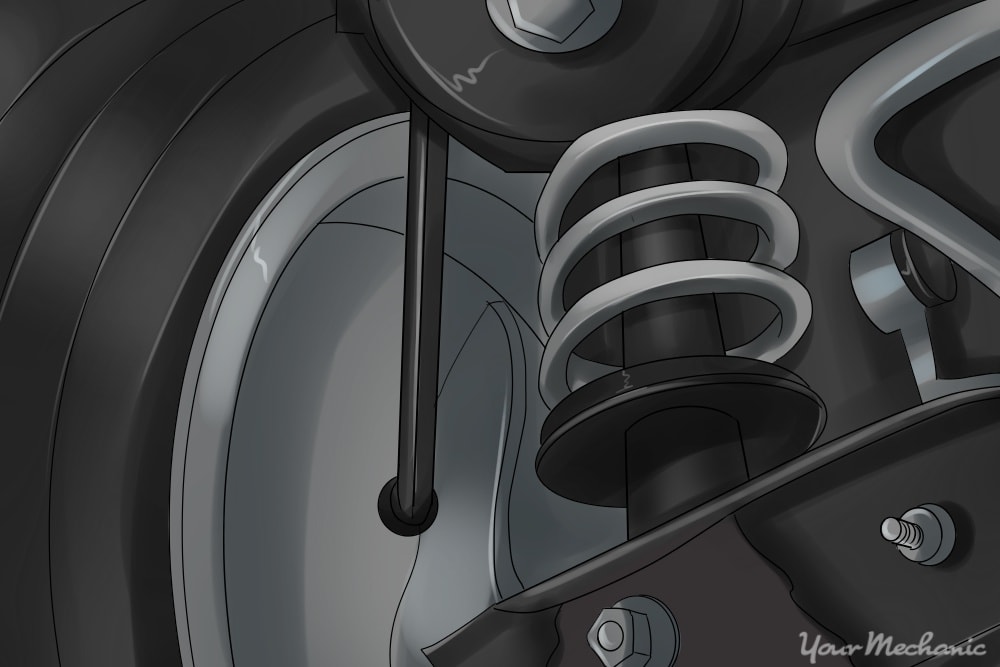
Step 2: Search for leaking struts. When the seals on the strut fail they will begin to leak.
This leakage allows the compressed gas and fluid to come out around the piston onto the strut. Wetness around the piston or on the housing indicates a failure in the strut.
Step 3: Perform a bounce test. If your car seems to bounce excessively while driving then you need to perform a bounce test:
Choose a corner of the vehicle and press up and down on it until you get the vehicle bouncing.
Stop pressing on the vehicle and allow the vehicle to stop bouncing on its own.
If the vehicle continues bouncing more than two times then the struts may be bad.
Step 4: Look for a harsh ride. If the vehicle rides extremely hard, then there may be a strut that has seized.
If you push up and down on the vehicle and it will not move, then you may have a seized strut that needs to be replaced.
Step 5: Listen for noise. If you hear knocking or squeaking noises when going over imperfections in the road, then you may need new struts.
Once the rest of the suspension is inspected for any worn parts, and none are found, then the struts may be the source of the noise.
Part 3 of 3: Replacing your struts
Materials Needed
- Box-end metric and standard wrenches
- Coil spring compressor
- Hydraulic floor jack
- Jack stands
- Pliers
- Ratchet with metric and standard sockets
- Replacement struts
- Torque wrench
- Wheel chocks
Step 1: Park your vehicle on a level, hard, and flat surface. Ensure that your vehicle is in a space that is level, hard, and flat so the job goes smoothly.
Step 2: Open the hood. Open the hood of the car to provide greater access.
- Note: If you are doing the rear struts you need to locate where they mount to the body. Most of the time the upper mount of the rear struts can be accessed through the trunk and in other cases the rear seat needs to be removed to access it.
Step 3: Loosen the lug nuts. Using your ratchet and sockets, loosen the lug nuts about ¼ turn on the wheels that are going to be removed.
Step 4: Position the wheel chocks. Place your wheel chocks around the wheels that are to remain on the ground.
- Tip: If you are doing the front struts place the wheel chocks around the rear tires, and if you are doing the rear struts place the wheel chocks around the front tires.
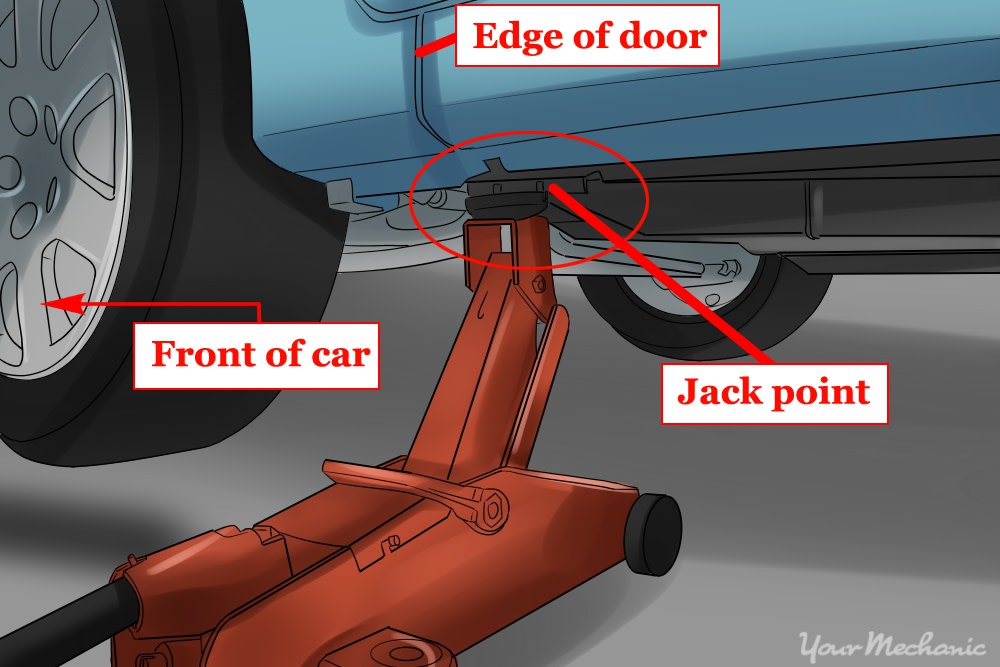
Step 5: Lift the vehicle with jack. Using the floor jack, lift the vehicle using the factory jacking points, one side at a time.
Step 6: Position the vehicle on jack stand. Place the jack stand under the jacking point of the vehicle and lower the floor jack until the vehicle sits on the jack stand.
Step 7: Remove lug nuts and wheels. Remove the lug nuts and remove the wheels from your vehicle.

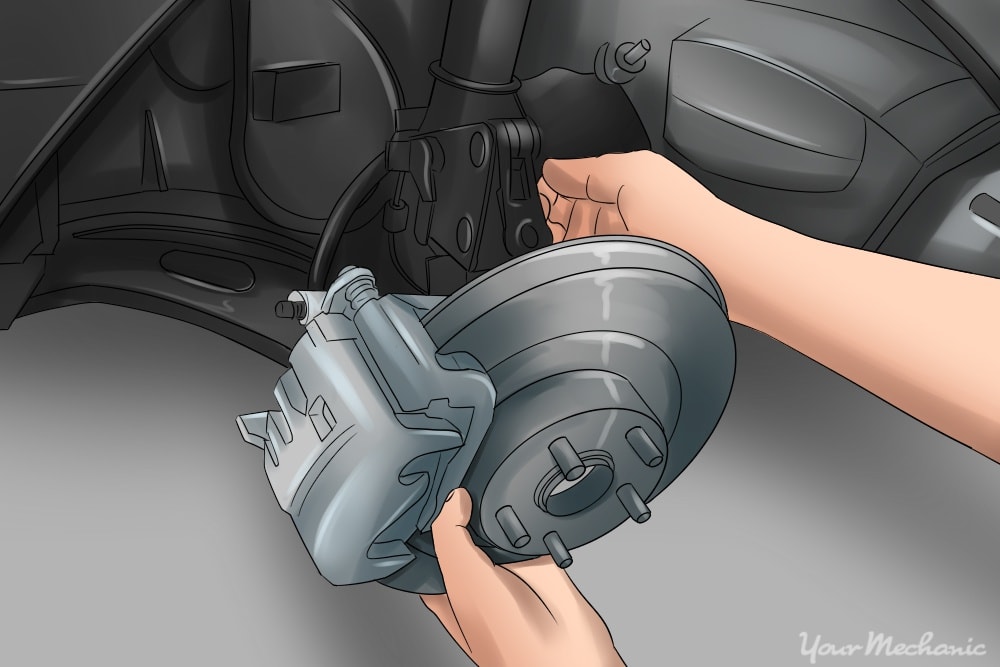
Step 8: Disconnect brake hoses. Using the ratchet and the right size socket, disconnect any brake hoses or sway bar connections from the struts.
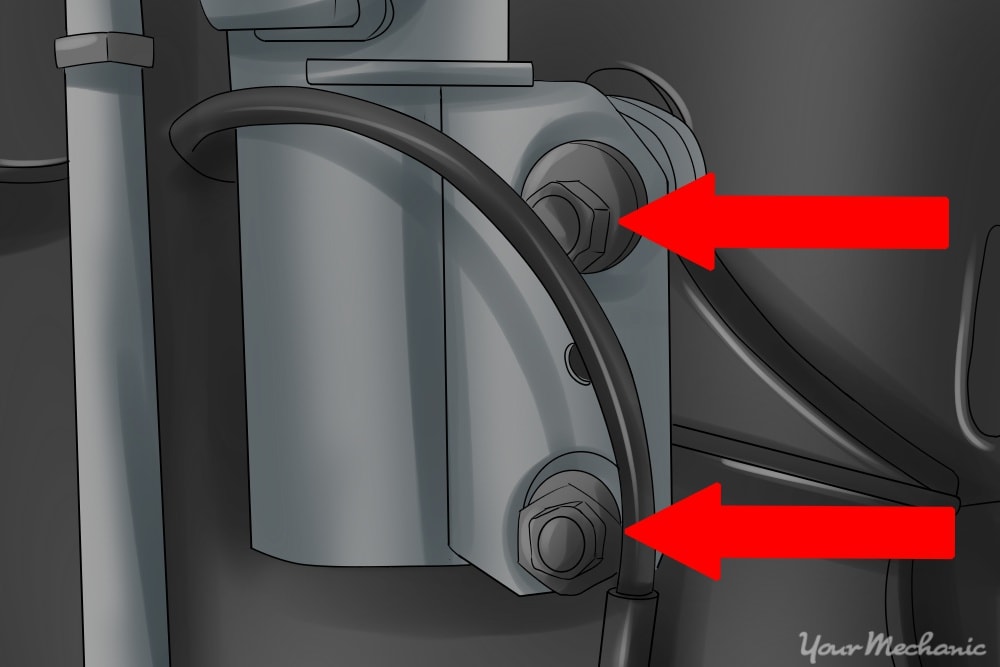
Step 9: Remove bolts. Remove the bolts that mount the strut to the steering knuckle.
Step 10: Mount upper strut. With the lower end of the strut disconnected, mount to the upper mount.
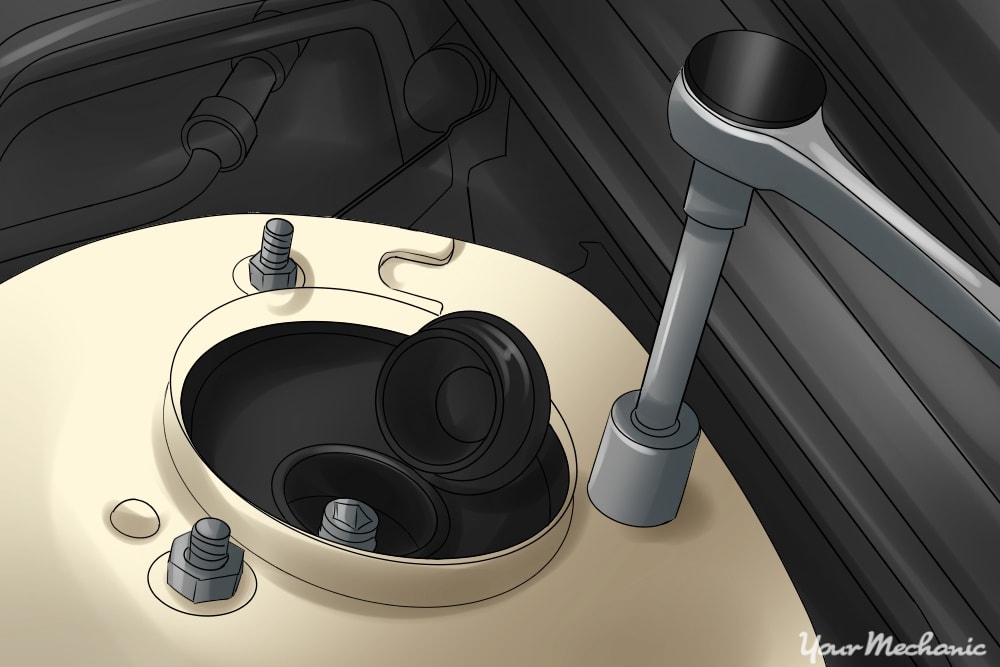
Step 11: Remove upper mounting bolts. Remove the upper mounting bolts that hold the top of the struts to the body.
- Tip: Before removing the final bolt, you should attempt to hold the strut in place or have an assistant do this. If the strut it allowed to fall it can damage other parts of the vehicle.
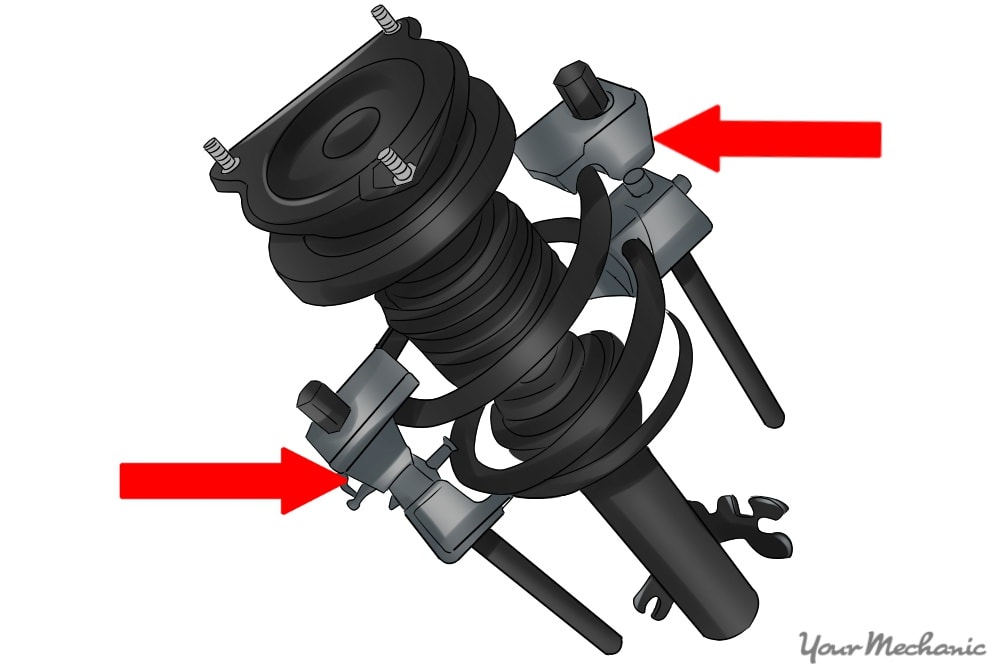
Step 12: Mount the compressor to the coil spring. Following the instructions for the spring compressor, mount the compressor to the coil spring.
- Note: If you are using Quick Struts proceed to Step 24.
Step 13: Tighten the spring compressor. Tighten the spring compressor, alternating between sides, until the strut is loosened from the spring.
- Warning: It is very important that you follow the coil spring compressor instructions. Failure to exercise precaution when changing struts can cause the coil spring to come loose and can cause serious injury or death.
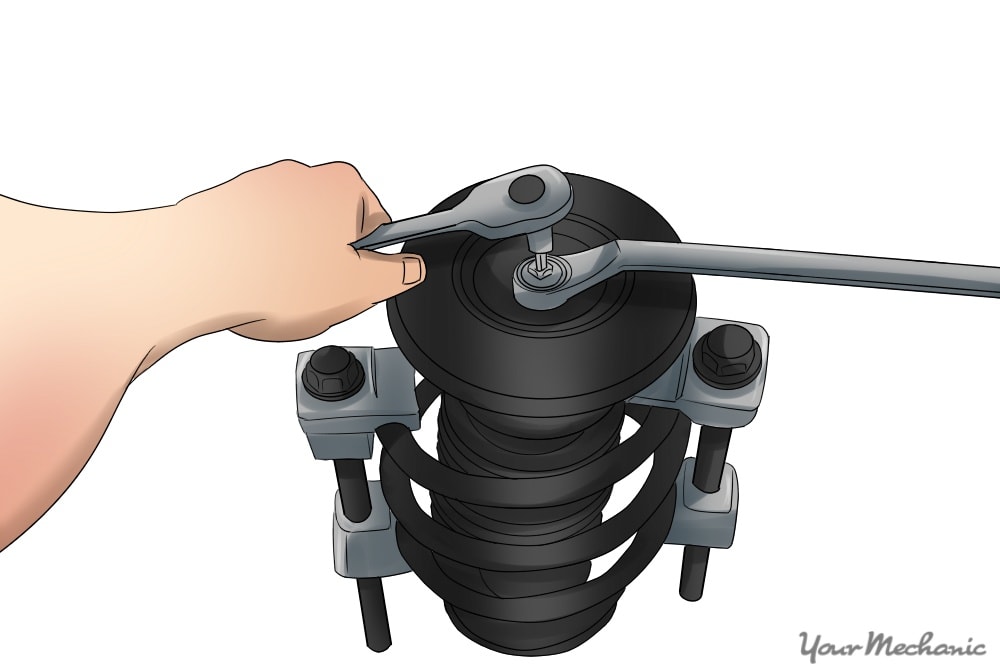
Step 14: Remove top mounting nut. Remove the top mounting nut on the strut.
Step 15: Separate strut and coil spring. Remove the strut assembly from the coil spring.
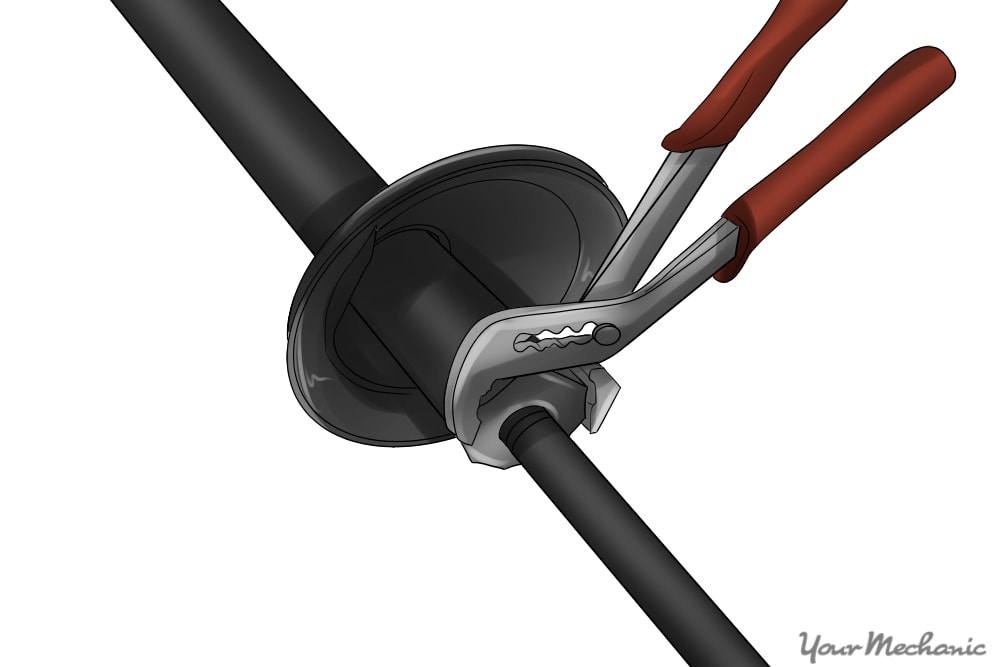
Step 16: Remove large nut on strut housing. Using the adjustable pliers, remove the large nut on the top of the strut housing that secures the cartridge into the housing.
- Note: If you are replacing the strut assembly proceed to step 20.
Step 17: Pull out strut cartridge. Remove the strut cartridge from the housing by pulling it straight out.
- Note: A large amount of oil will come out of the housing. Drain it completely out.
Step 18: Pour engine oil into housing. Pour two ounces of engine oil into the strut housing so the strut cartridge will remain cool.
Step 19: Install strut cartridge. Install the new strut cartridge into the housing, being sure to tighten down the nut until it is snug.
- Tip: Some cartridges require a spacer placed between it and the nut. Follow the strut manufacturer instructions during installation.
Step 20: Return strut assembly to coil assembly. Install the strut assembly back into the coil assembly.
- Tip: Make sure that the coil spring end sits in the indentation in the strut housing seat.
Step 21: Install the strut piston nut. Install the strut piston nut on the top of the strut and torque it to manufacturers specifications, from a repair manual, with the torque wrench.
Step 22: Loosen coil spring compressors. Loosen the coil spring compressors alternating sides to allow the coil spring to mount evenly.
Step 23: Remove the coil spring compressor. Remove the coil spring compressor from the strut assembly.
Step 24: Install strut assembly into vehicle. Install the strut assembly into the vehicle by holding the strut into the wheel well and install the mounting nuts by hand.
Step 25: Tighten strut mounting nuts. Using your torque wrench, tighten the strut mounting nuts and tighten them to manufacturer specifications from your repair manual.
Step 26: Install bolts. Install the bolts that attach the strut to the steering knuckle and tighten them to specifications.
Step 27: Be sure all components are installed. Install any other suspension components or brake parts that were previously disconnected from the strut.
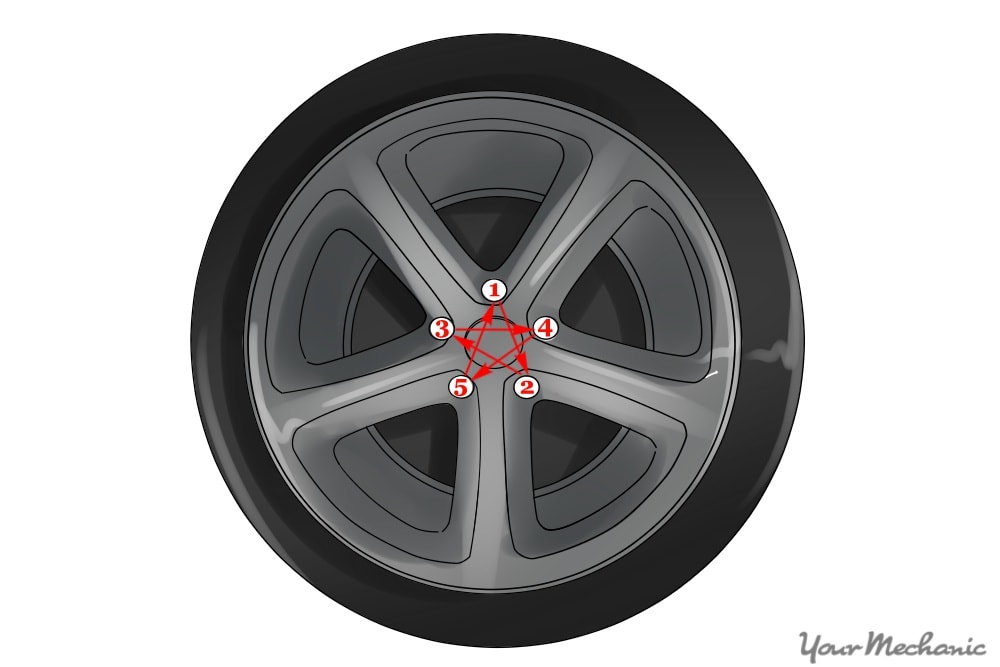
Step 28: Re-attach the wheel. Install the wheel and tighten the wheel down in a star pattern until it is snug.
Step 29: Lower the vehicle. Lower the vehicle to the ground by lifting it with the floor jack and removing the jack stand.
Step 30: Finishing tightening lug nuts. Tighten the lug nuts to specifications using the same star pattern.
- Note: Once the new struts are installed the vehicle will need a wheel alignment. If you do not have the vehicle aligned after replacing the struts you will end up having uneven tire wear problems.
Replacing your struts can help to improve your ride and can prolong the life of many of the parts on your vehicle. This is an important part of keeping your car in a good condition and prolonging its life. When doing the job it is important to note the dangers of working with coil springs, so make sure you are following every precaution. Some vehicles will also have air springs that must first be deflated prior to replacing the struts. If replacing your struts seems to be beyond your ability then you should seek out one of our certified mechanics to replace your struts for you.