
Engine oil is the lifeblood of any engine. Without oil, the moving parts in the engine would make contact with each other, causing premature wear. In no time at all, the parts would wear themselves out and the engine would lock up. Beyond just creating lubrication, it can aid with cooling. It also picks up particles that are created in the engine during run cycles and deposits them in the filter, thus keeping the engine clean and extending the life of the engine.
A bad low oil light sensor will not alert you to the low oil level in your engine, meaning that the engine will be accumulating wear and damage as you drive. Even though there are several different types of oil systems, almost all will use a type of low oil level sensor that is mounted to the oil pan.
Method 1 of 1: Replacing the low oil level sensor
Materials Needed
- Drain pan (recommended)
- Hydraulic jack
- Shop towels/rags
- Socket set
- Wheel chocks
- Wrench set
-
Warning: Always be sure jacks and jack stands are set on solid ground. Setting either on soft ground can lead to injury.
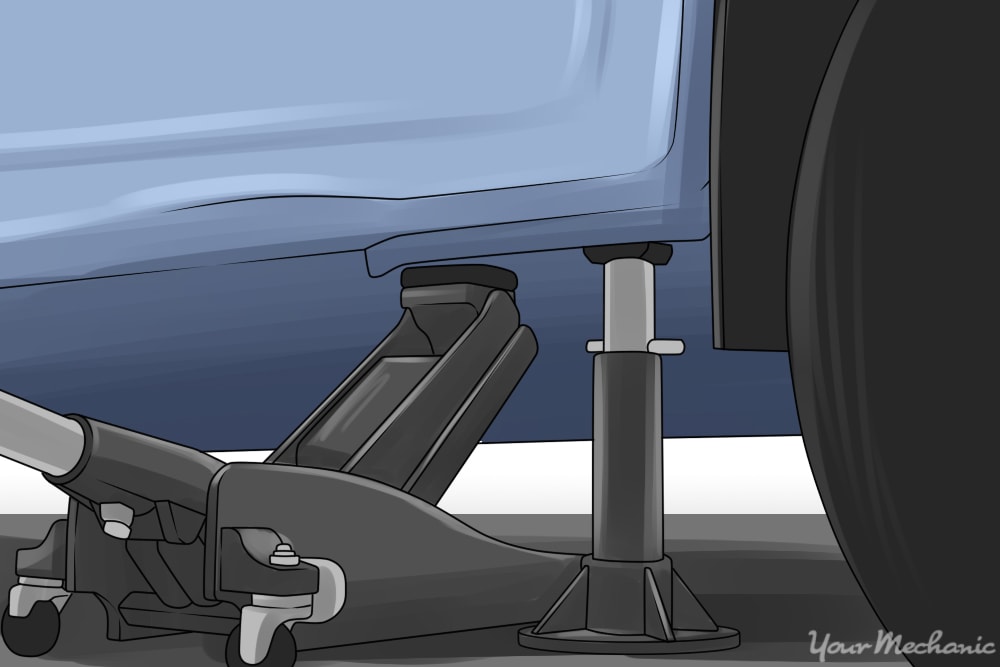
Step 1: Jack up the vehicle and set the jack stands. Jack up the vehicle and set jack stands using the factory recommended jacking and stand points.
-
Warning: Never leave the weight of the vehicle on the jack. Always let the jack down and place the weight of the vehicle on the jack stands. Jack stands are designed to handle the weight of a vehicle for an extended period of time, whereas a jack is only meant to support this type of weight for a short period.
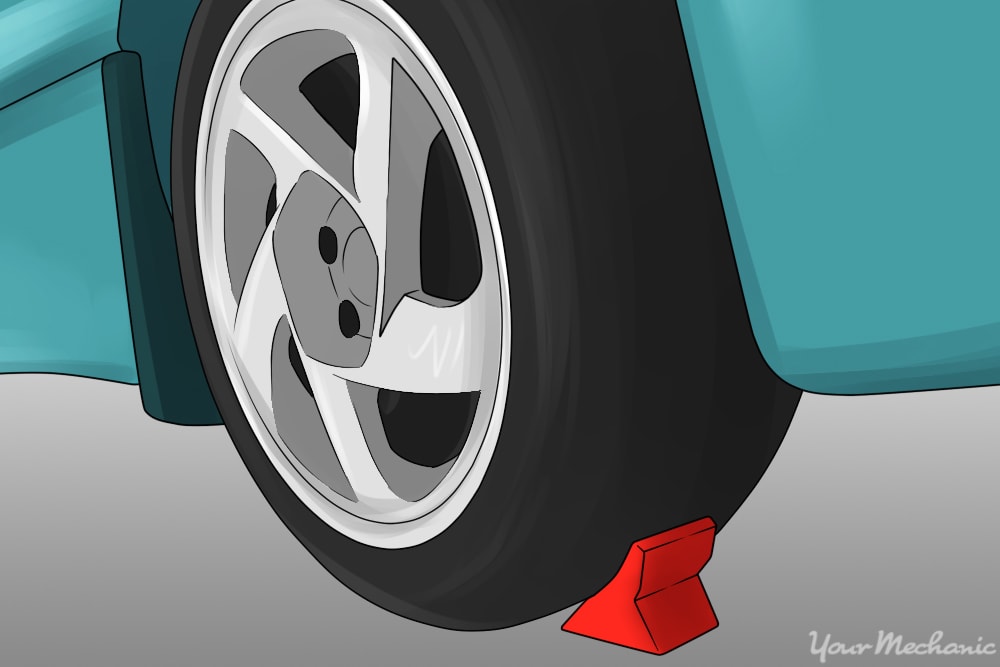
Step 2: Place wheel chocks on both sides of the wheels still on the ground. Place wheel chocks on both sides of the wheels that are still on the ground.
This will lessen the likelihood of the vehicle rolling forward or backward, and falling off of the jack stands.
Step 3: Locate the low oil level sensor. With the vehicle correctly raised and supported, look under the vehicle and locate the low oil level sensor.
It is almost always mounted on the side of the oil pan and has an electrical connector coming out of it.
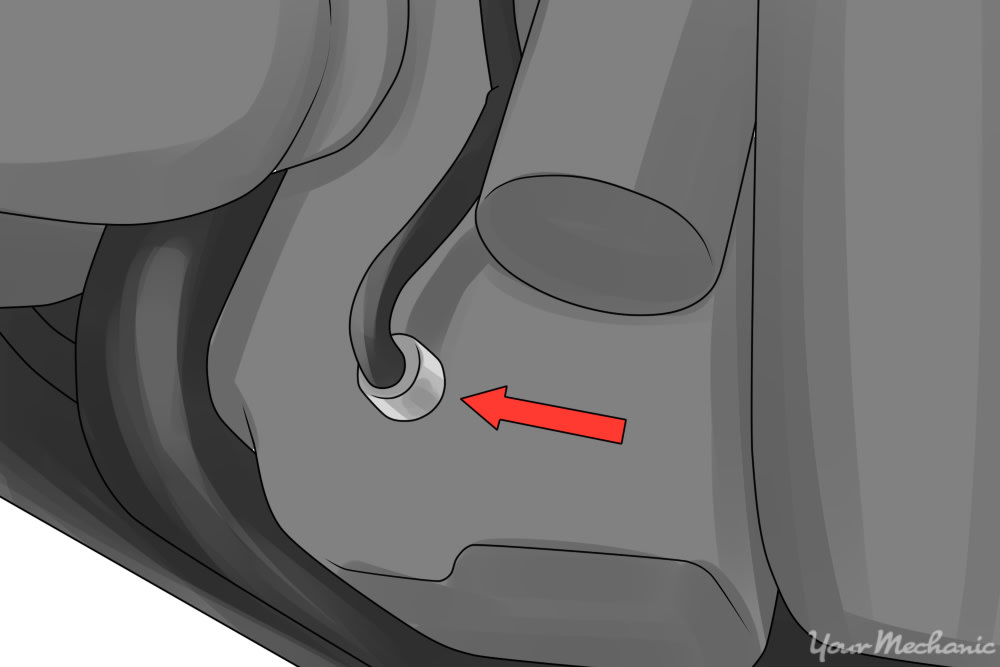
Step 4: Unplug the electrical connector. Unplug the electrical connector from the low oil level sensor.
It may be necessary to push in and out on the connector a few times in order to get the connector to release.
Dirt and debris can build up from exposure to the elements while driving. It may be necessary to use a small screwdriver to gently pry the connector from the sensor. Just be certain the retainer is fully disengaged before prying on it or damage can occur.
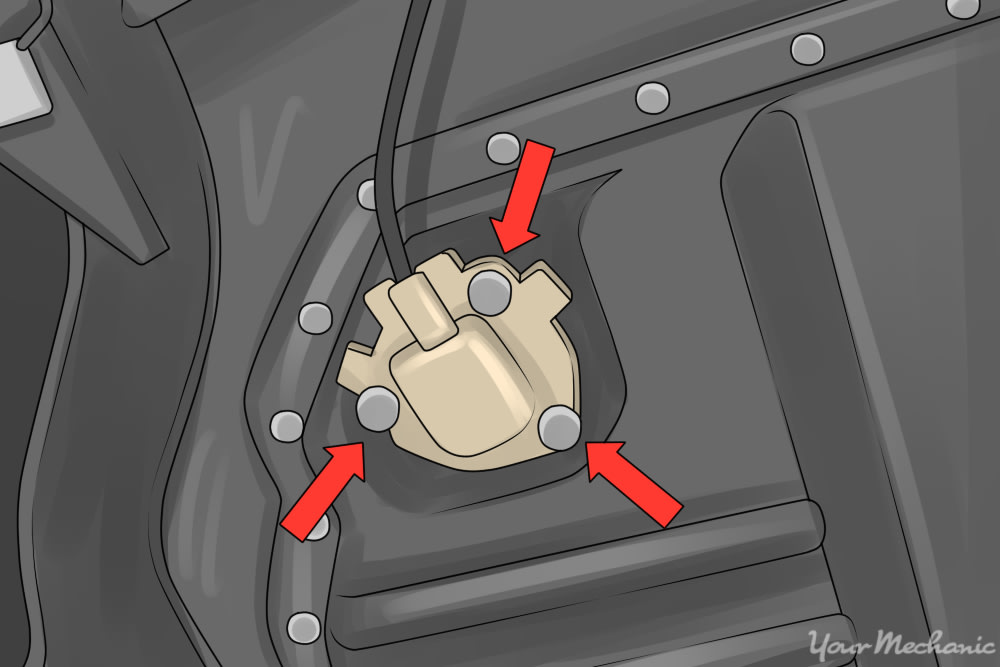
Step 5: Remove the low oil level sensor. Remove the oil level sensor. Some will thread directly into the oil pan and all that is needed to remove it is a wrench. Others, as in the picture above, will require the removal of any number of fasteners. This can be screws, nuts, bolts, or clips.
Be sure that any gaskets or o-rings that seal the sensor to the pan are also removed.
- Warning: Some oil may be lost during the replacement process. It is a good idea to place a drain pan of some type directly below the area where the oil level sensor is being removed. For sensors that are mounted in the bottom of the pan, facing upward, it may be necessary to drain the oil before replacement.
Step 6: Compare the replacement low oil level sensor to the one removed. Compare the replacement low oil level sensor to the one that was removed. Look at them side by side to ensure that they are the same dimensions, have the same attachment type, and that the electrical connectors are the same.
Step 7: Clean the area around the sensor mount. With a shop towel, clean the area that the sensor mounts to.
Wipe away any oil, dirt, and debris that will keep the sensor from sealing to the oil pan, and therefore cause an oil leak.
Step 8: Install the replacement low oil level sensor. Install the replacement oil level sensor. Thread the replacement into place and tighten with a wrench, or install the replacement and reinstall the retaining hardware.
Remember that it only needs to be tightened just enough to hold it in place so it can’t come loose. There is no actual load being placed on the sensor, so do not overtighten and take a chance of breaking something.
Step 9: Reconnect the electrical connector. Once the low oil level sensor has been reinstalled and tightened, go ahead and reconnect the electrical connector.
Be sure to push it in far enough that the retaining clip engages.
- Note: When changing the low oil level sensor, disturbing parts in the oil pan can cause sediment to break free and float around in the oil. This is the perfect time to go ahead and do an oil change procedure while you have the car jacked up, to catch any particulates
Step 10: Remove the jack stands. Once everything is reinstalled, jack the vehicle back up and remove the jack stands.
Be sure to remove any drain pans from underneath the vehicle before letting the car back down.
Step 11: Refill the engine oil. Check the engine oil level to be sure that it is within the operating range specified by the manufacturer.
The above illustration shows how the oil dipstick has two dots. The dot towards the end of the dipstick is the lowest acceptable level, according to the manufacturer, while the one above it is the highest level.
There is normally about a one quart difference between the two marks.
Step 12: Confirm the oil level and check for leaks. With the oil at acceptable levels, start the engine and let it run for a few minutes.
This will allow the oil to disperse throughout the engine and also put enough pressure on the system to check for leaks.
Be sure to verify that the low oil level warning has shut off. After a couple of minutes, shut the engine back off. Let the engine sit for a minute or two and then recheck the level on the dipstick.
Having a low oil warning sensor that functions correctly is very important. A malfunctioning sensor can be a problem in two obvious ways. If it does not turn the warning light on the instrument cluster on, you will not know that there is a problem and could run out of oil. The low oil level sensor alerts you before catastrophic damage occurs. Also, if a malfunctioning sensor causes the warning indicator to come on without a problem present, the driver will get used to seeing the light and begin to ignore it. Either of these situations can easily lead to a very costly repair.
If at any point you feel you could use a hand with replacing a low oil level sensor in your vehicle, contact a professional technician, such as those available at YourMechanic. YourMechanic has trained and certified repair professionals that can come to your home or place of business and perform the repairs for you.
