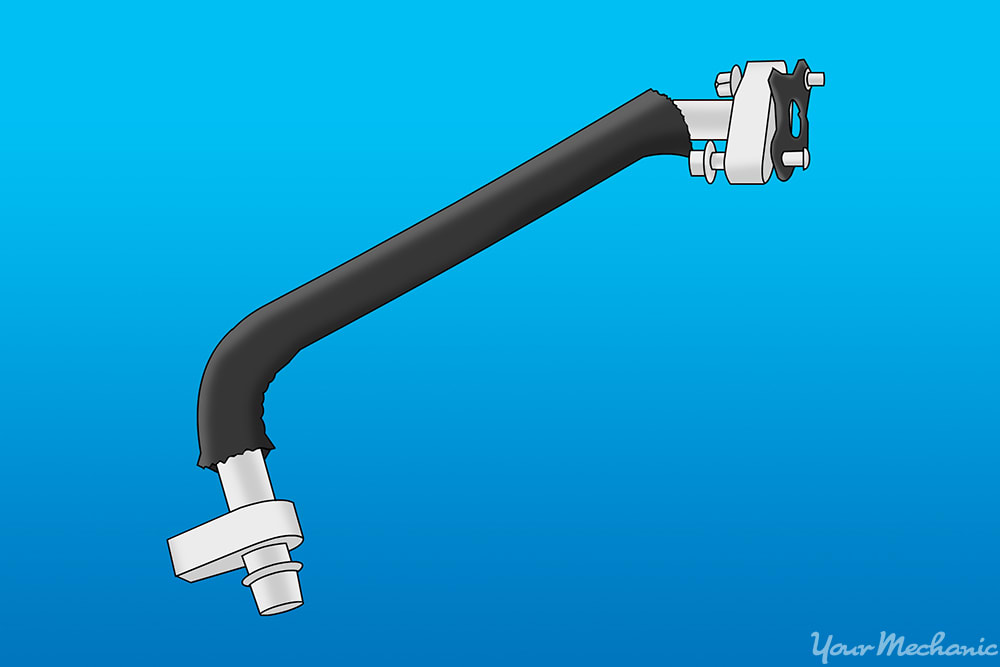
In the 1960's, the automotive industry experienced a renaissance with the invention and introduction of the exhaust gas recirculation (EGR) system. The intent of this system, which was launched in 1966, was to find a way to reduce the particulate matter or “smog” that would flow from vehicle exhaust pipes. Smog is essentially nitric oxides, or unburnt fuel in the form of NoX. The EGR system is able to take unburnt fuel that comes from the exhaust manifold and recirculate the molecules into the intake manifold. This allows the engine to consume less "new fuel" which increases fuel economy and also significantly reduces vehicle emissions. The component that distributes these unburnt fuel molecules to the intake is known as the EGR tube.
The EGR tube itself is designed to last a very long time. In fact, there are vehicles on the road today with the same EGR tubes that were installed by the factory in the 1960's. However, due to its location and the fact that hot exhaust gases flow through it frequently, it can wear out or develop cracks or holes which renders the EGR system useless. To avoid system failure, many mechanics recommend having the EGR system cleaned every 50,000 miles. This process is often referred to as "carbon cleaning" as the process cleans the EGR valve and any supporting connections, including the EGR tube. It removes excessive carbon buildup, which is the root element found in fuels.
On most vehicles manufactured after 1991, there are multiple sensors that monitor the effectiveness of the EGR system. If a problem is discovered by these sensors, it will trigger an error code to be stored in the engine control module (ECM) of the vehicle. In most cases, an OBD-II diagnostic code of P-0401 indicates a lack of EGR pressure which may be caused by a leaking EGR tube. It may also be caused by leaking vacuum lines, damaged solenoids, or other obstructions in the EGR flow. Usually, a problem with the EGR system will illuminate the Check Engine Light on the dashboard.
If the vehicle does not have an onboard computer that stores these codes, you'll have to do some manual diagnostic work to determine whether a problem with the EGR tube exists. There are a few warning signs that can alert the vehicle owner. Some of the symptoms you should look for before making the decision to replace the EGR tube include some of the following:
It is difficult to start the engine cold. When there is a leak in the EGR system, it typically sends false information to the ECM which then adjusts the flow of hydrocarbon emissions to the intake manifold accordingly. If the ratio of emissions is inconsistent because of this false information, it may impact start up engine performance including idle, which can also cause rough idling, engine misfiring, or low engine RPM.
The Check Engine Light is triggered. In newer vehicles, the EGR system is connected to a series of sensors that periodically adjust the flow of emissions. If a leak or any problem with the EGR system is detected, the Check Engine Light will illuminate. In order to fix this issue, you'll have to replace the EGR tube and reset the error codes with a diagnostic scanner before testing the repair.
There are rattling sounds coming from the engine. When the EGR tube is loose, it will often rattle and cause a loud vibration to occur under the hood of the vehicle. A loose fitting EGR tube can be repaired if it's caught early enough. Acceleration will exacerbate this symptom.
The vehicle fails emissions testing. When the EGR tube is leaking, it may increase vehicle emissions of particulate matter or carbon monoxide emissions, levels of which are important for passing emissions standards in all 50 U.S. states. If the vehicle fails an emissions test, you'll have to determine the exact cause, but it could be the result of a bad EGR tube.
The EGR tube is an important component of the EGR system. When it is damaged, leaking, has become loose, or has become disconnected, it will cause the vehicle to operate inefficiently. Proper diagnostic checks should be completed to determine the exact cause of the symptoms.
- Note: Due to the fact that all EGR systems are unique and customized for each vehicle, the steps described below are general instructions for replacing several EGR tubes. The materials various EGR tubes are made from and their routes of connection will vary. Keep in mind that there may be several components that need to be removed to gain access to this part. It's recommended to purchase a service manual for your specific vehicle and review the precise instructions and materials you'll need to complete this job.
Part 1 of 2: Replacing the EGR tube
After you've completed the right diagnostic inspections and have determined that the EGR tube is damaged and needs to be replaced, you will need to prepare to complete this job as efficiently as possible. The first step is to secure the right parts and materials for your specific vehicle. It's recommended that anyone performing this repair, regardless of experience or resources, purchase a vehicle service manual for the particular make, model, and year of the vehicle being worked on. This will provide you with the exact steps needed to remove the old EGR tube and replace it with a new one.
By taking the time to fully research ALL the steps required to replace the EGR tube on your specific vehicle, you'll be better prepared to complete the job. However, if you review all the required steps and still don't feel fully confident replacing this component yourself, contact a certified mechanic, such as one from YourMechanic, to complete the job for you.
Materials Needed
- Boxed end wrench(s) or ratchet wrench set(s)
- Carburetor cleaner
- Clean shop rags
- Container for coolant (if applicable)
- Flashlight or droplight
- OBD-II code scanner
- Penetrating oil
- Replacement EGR tube & appropriate gaskets as applicable
- Safety equipment (safety glasses, protective gloves, etc.)
- Service manual specific to your vehicle
Steel wool
Note: According to most service manuals, this job will take about 3 to 5 hours to complete. Be sure to set aside the appropriate time and work space to complete it. Make sure to complete a physical inspection of the old part and match it with new part before you begin removing components.
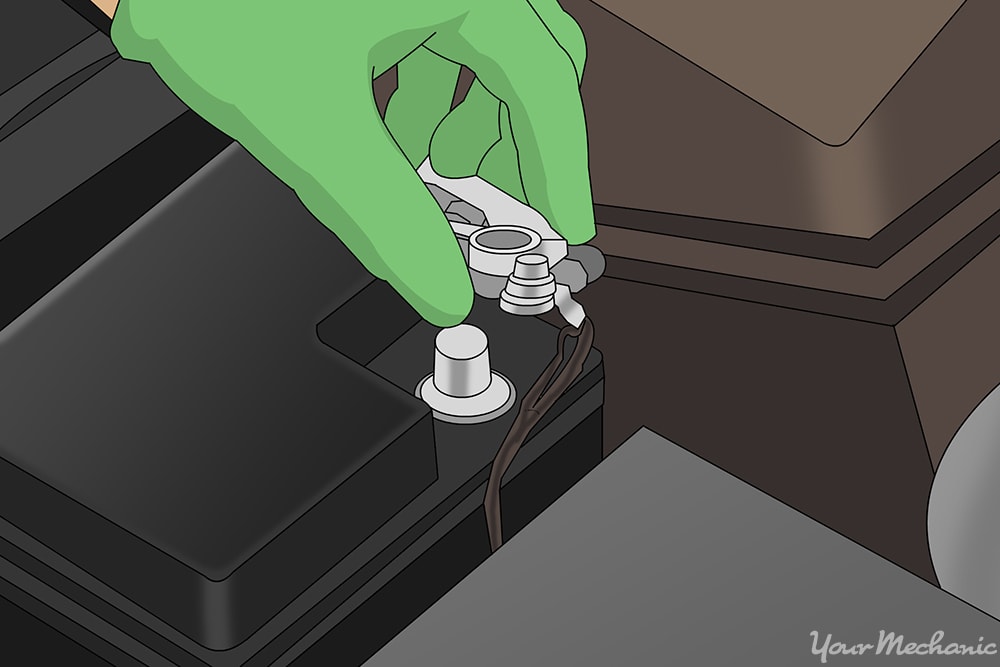
Step 1: Disconnect the vehicle's battery. Regardless of what part you are replacing on a vehicle, it's recommended that you remove the battery cables from the battery before completing any service.
Remove the positive and negative cables from the battery to disconnect power to all electronic components.
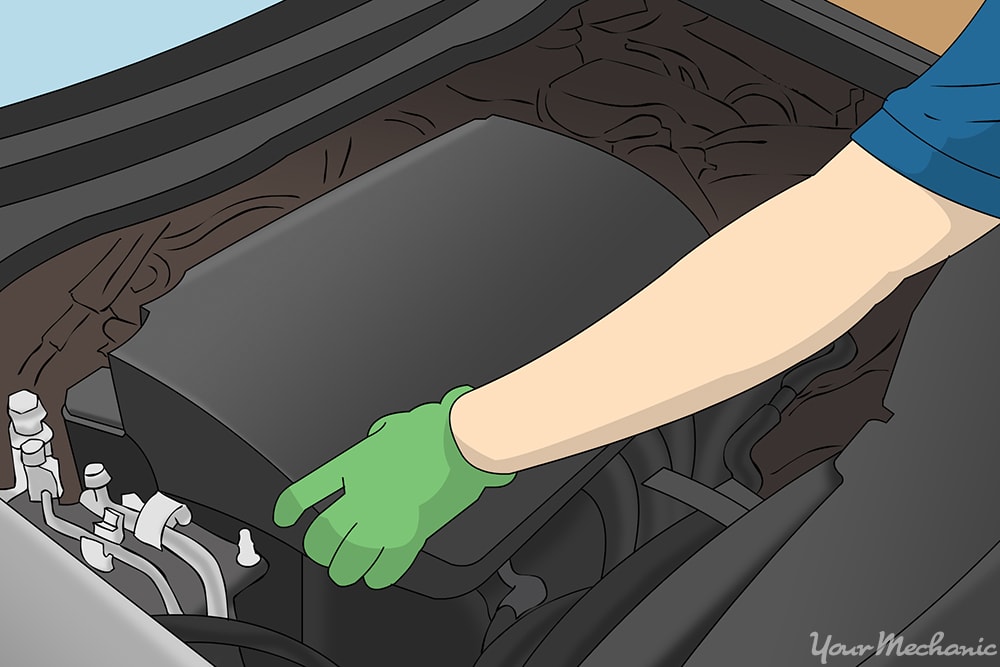
Step 2: Remove the engine cover. In order to gain access to the EGR tube, you'll have to remove the engine cover.
There are usually three or four bolts that secure the engine cover to the top of the engine.
Using a ratchet extension and the correct sized socket, remove the bolts and then remove the engine cover.
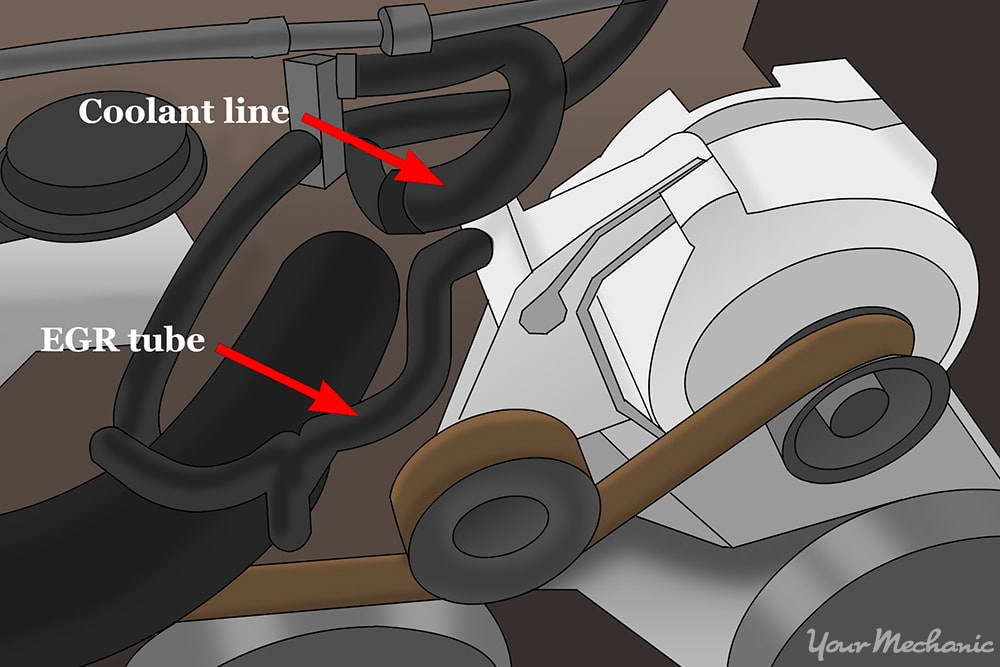
Step 3: Remove any air filter and coolant lines as needed. On most domestic and foreign cars, trucks, and SUVs, the air filter will have a series of tubes that connect to the intake manifold, and these may obstruct the EGR tube.
Sometimes the coolant lines will be blocking the EGR tube as well.
Remove any of these lines as needed using the instructions in your vehicle's service manual. If you have coolant lines on top of the engine, make sure you drain the coolant in the radiator below the coolant tube before removing the coolant lines. Use your designated coolant container to hold the coolant while you continue the repair.

Step 4: Locate the EGR valve and remove the electrical harness. After you've removed all of the engine covers any parts that are in the way, locate the EGR valve and remove the electrical harness and any other sensor connections attached to the EGR tube.
On some modern vehicles (post-2004), there might be several individual sensors on the EGR tube attachments that connect to individual cylinders. If this is the case on your vehicle, mark the location of each sensor with tape or some other identification method to ensure you can correctly reinstall the sensors later.
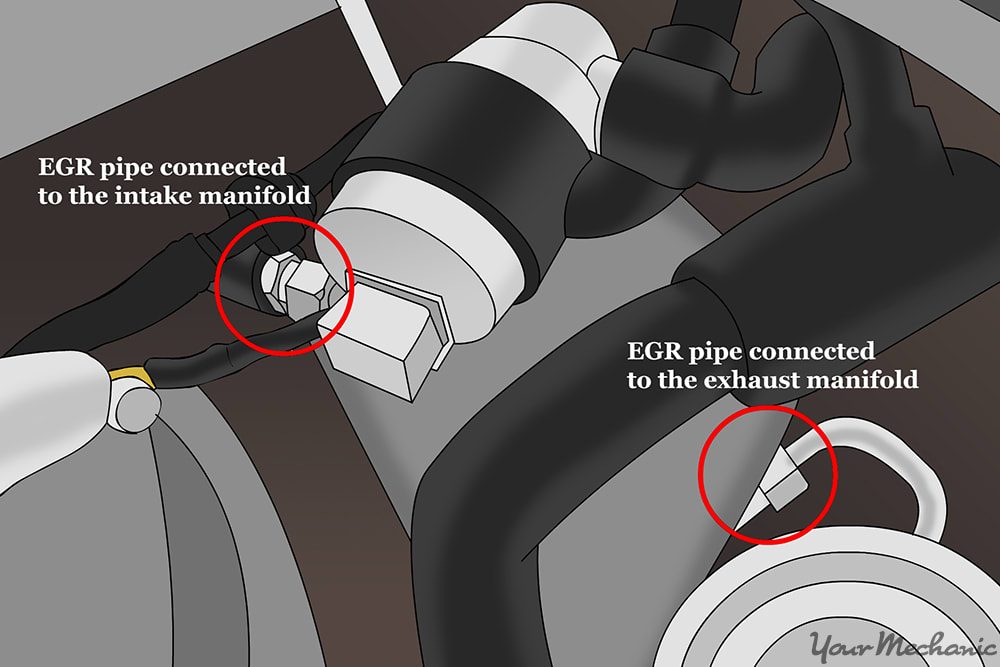
Step 5: Spray the connections on the EGR valve and intake manifold with penetrating oil. After all electrical lines have been removed, spray some penetrating oil onto the nuts and bolts that connect the EGR tube to the EGR valve and the intake manifold.
This will loosen them and permit you to remove the tube without stripping the nuts or bolts.
Step 6: Disconnect the EGR tube from the intake. After the bolts have soaked for about 5 minutes, remove the bolts that connect the EGR tube to the intake manifold.
Depending on the vehicle you are working on, there will be either one connection to a single intake port or several connections to multiple individual intake ports.
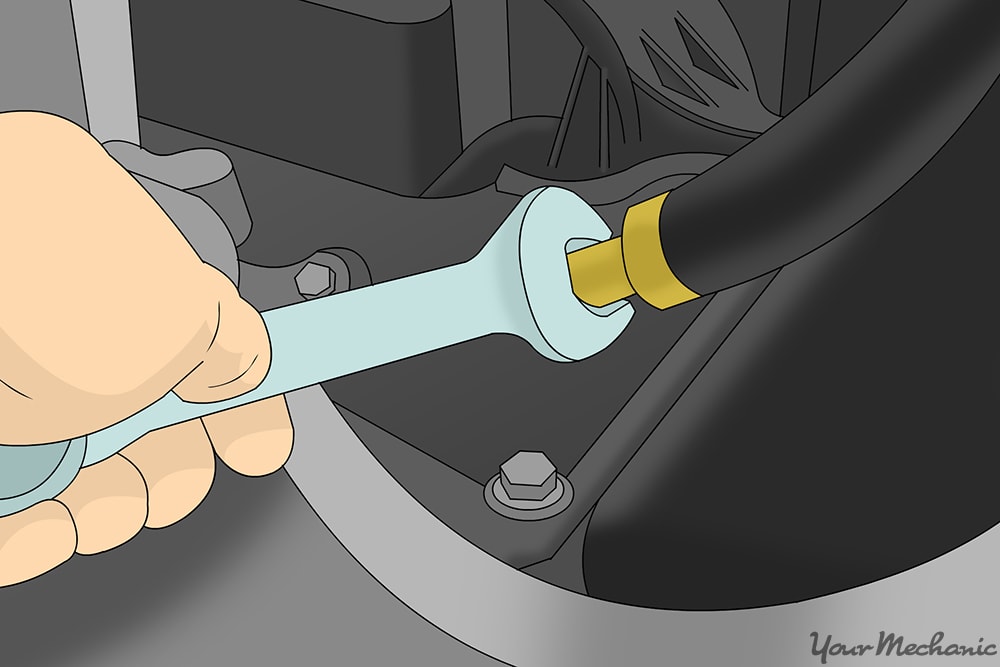
Loosen these bolts using an open end wrench.
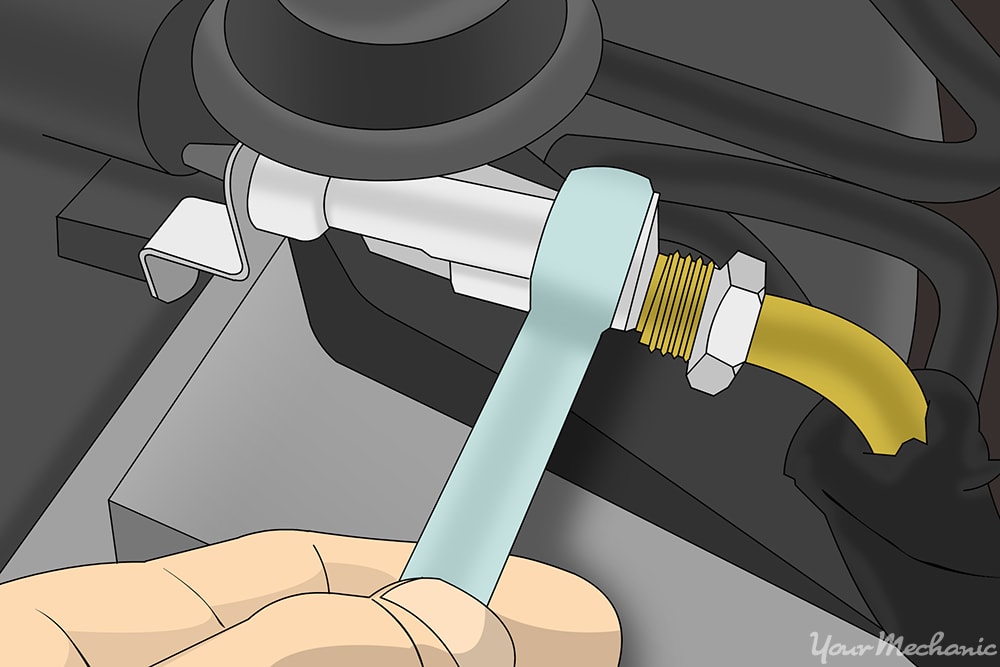
Step 7: Disconnect the EGR tube from the EGR valve and remove the tube. Once you've disconnected the EGR tube from the intake, you’ll need to then disconnect it from the EGR valve.
Use a boxed end wrench to loosen the nuts connected to the EGR valve and then remove the old EGR tube from the vehicle.
Step 8: Clean the EGR valve. Using carburetor cleaner, soak a shop rag and clean the port on the EGR valve that connects to the EGR tube.
There will probably be a tremendous buildup of carbon inside this port, so it's recommended to clean it before installing the new tube.
Step 9: Install any new gaskets onto the EGR tube as applicable. Some vehicles require that a gasket be installed on the new EGR tube before installation.
- Note: If this is the case for your vehicle, apply the new gaskets using the recommended process in your vehicle service manual.
Step 10: Attach the new EGR tube to the EGR valve. To install the new EGR tube, first connect it to the EGR valve and tighten down the connecting nuts.
Step 11: Attach the new EGR tube to the intake. Once the new tube is securely attached to the EGR valve, connect the other end to the intake and tighten down the bolts.
Step 12: Reattach the electrical harness and/or other sensor connections. With the new tube now in place, plug the electrical connector and any other sensors that were previously removed back into the EGR tube and EGR valve.
Step 13: Clean the EGR tube connections with carburetor cleaner. If you previously sprayed penetrating oil on the connecting bolts to loosen them up, you should now spray them with carburetor cleaner and wipe them clean with a clean, dry shop rag.
This will remove any residual oil from the bolts and reduce the potential of them burning when the engine starts up again.
Step 14: Reattach the engine cover and any coolant lines, air filters, or other ancillary parts. Now that you have replaced the EGR tube, you can reinstall the engine cover along with any other lines or parts that were removed to gain access to the EGR valve and tube.
Be sure to also refill the radiator with the recommended coolant if you had to remove any coolant lines.
Step 15: Reattach the battery cables. Once everything else is complete, reattach the battery cables to the car battery in order to return power to the vehicle.
Part 2 of 2: Testing the repair
In many cases, you'll instantly be able to tell if the EGR tube replacement was successful. After using a diagnostic scanner to clear the previous error codes from the computer, start your vehicle with the engine hood open so you can complete the following steps.
Step 1: Listen for symptoms of a bad component. Pay attention for any sounds that may indicate a malfunctioning EGR tube.
Step 2: Watch for leaks. Look for any leaks or gases escaping from the connections of the EGR tube.
Step 3: Check for warning lights or codes. Watch for any warning lights or error codes that appear on the dashboard or diagnostic scanner after you start the engine.
Step 4: Test drive the car. As an added measure, it is a good idea to road test the vehicle.
Close the hood and drive for a bit with the radio off to listen for any road or excessive noise coming from the engine compartment.
Depending on the make and model of your vehicle, the actual replacement of this component is rather simple. However, if you've read these instructions and still don't feel 100% comfortable completing this repair yourself, or if during the pre-installation inspection you determine that removing additional engine components is beyond your skill level, you can always contact one of the certified mechanics from YourMechanic to replace your EGR tube for you.