The replacing of any air conditioning component requires recovery, internal drying, leak testing, and recharging the system. Recovery is the first step in the servicing of any and all the components. Once the failed component is replaced, the system should be placed into a vacuum to remove any acid-causing moisture from the system, followed by recharging the system with the specified refrigerant for your vehicle.
A common symptom of a failing accumulator is rattling noises when one of its internal components come loose or visibly leaking refrigerant. You may also notice a moldy smell since moisture will build up when the accumulator is broken.
There are several different kinds of equipment available for servicing an A/C system. The design of the system may differ from the ones in this article, but all will recover, evacuate, and recharge an A/C system.
Part 1 of 5: Recovering the refrigerant from the system
Material Needed
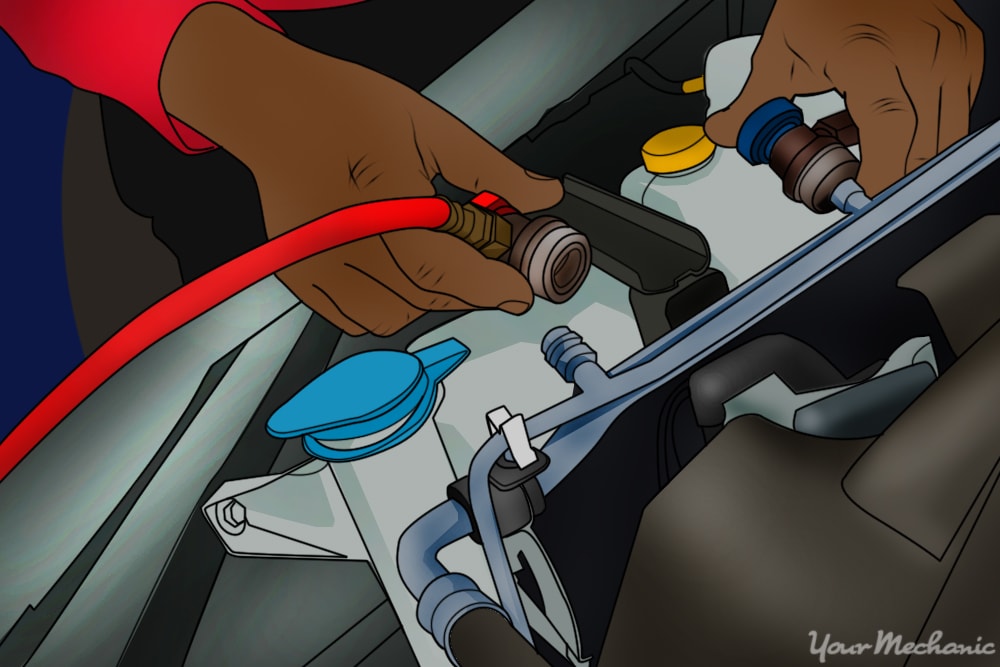
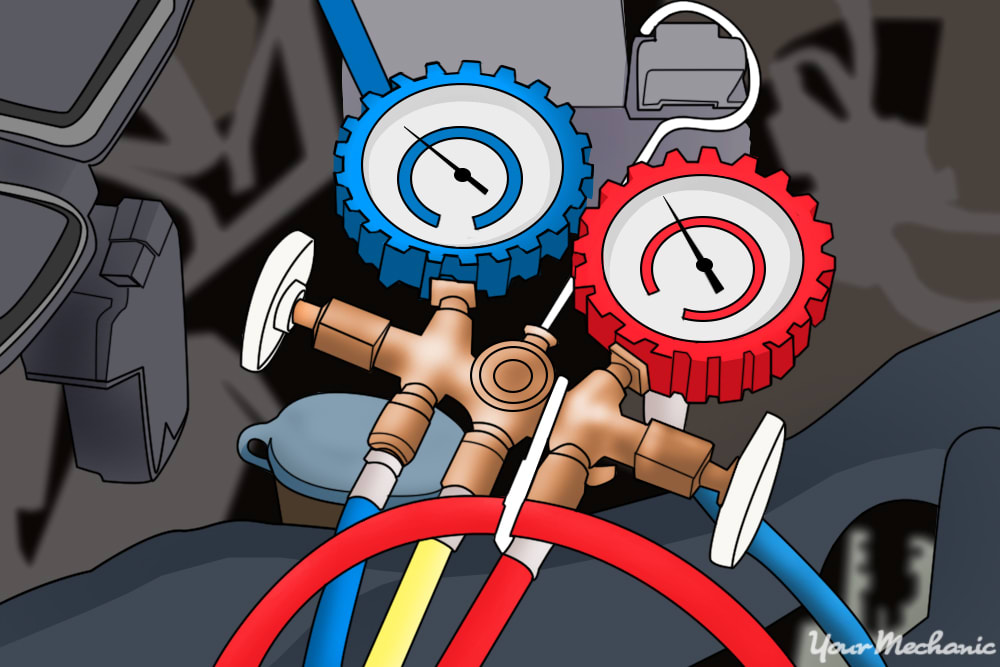
Step 1: Connect the refrigerant recovery machine. Connect the red, high side hose to the smaller service port and the blue, low side connector to the larger service port.
- Tip: There are a couple of different designs of service hose connectors. Whichever one you are using, make sure it is depressing the schrader valve of the service port on the car. If it does not depress the schrader valve, you will not be able to service the A/C system.
Step 2: Turn on the A/C recovery machine and begin recovery. Refer to your owner's manual for your specific recovery system instructions.
This will depend on the system you have available to you.
Step 3: Measure the amount of oil recovered from the system. You will need to fill the system with the same amount of oil recovered from the system.
This will be about one to four ounces, but it varies depending on the size of the system.
Step 4: Disconnect the recovery machine from the car. Be sure to follow the procedure as laid out by the manufacturer of the recovery system you are using.
Part 2 of 5: Removing the accumulator
Materials Needed
- Ratchet
- Sockets
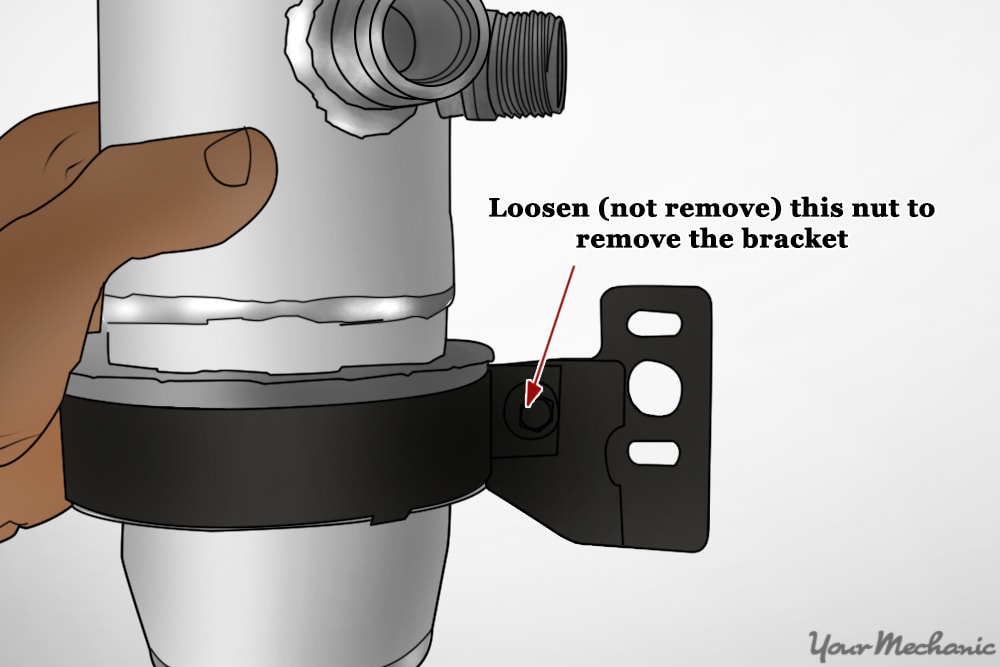
Step 1: Remove the lines connecting the accumulator to the rest of the A/C system. You want to remove the lines before you remove the accumulator bracket.
The bracket will give you leverage when removing the lines.
Step 2: Remove the accumulator from the bracket and the vehicle. Often, the lines get stuck in the accumulator.
If this is the case, use some spray penetrant and a twisting action to free the accumulator from the lines.
Step 3: Remove the old rubber o-rings from the lines. These will need to be replaced with new ones.
Part 3 of 5: Installing the accumulator
Materials Needed
- Accumulator with o-rings
- Large, open-end wrenches
- Ratchet
- Sockets
Step 1: Install new rubber o-rings onto the accumulator lines. Be sure to lubricate the new o-rings to keep it from breaking when installing the accumulator.
Applying a lubricant also helps to keep the o-ring from drying out, shrinking, and cracking over time.
Step 2: Install the accumulator and bracket onto the car. Guide the lines into the accumulator and start the threads before securing the accumulator.
Securing the accumulator before starting the threads can lead to cross threading.
Step 3: Secure the accumulator to the car with the accumulator bracket. Be sure to secure the bracket before tightening the lines for the last time.
As with the bracket impeding your ability to start the threads, tightening the lines will impede you from aligning the bracket bolt or bolts to the car.
Step 4: Tighten the lines that connect to the accumulator. Once the bracket has been secured, you can now tighten the accumulator lines for the final time.
Part 4 of 5: Evacuate the system of all moisture
Materials Needed
Step 1: Place the system into a vacuum. Connect the vacuum pump to the high and low side connectors on the car and begin the evacuation of moisture from the A/C system.
Putting the system into the vacuum evaporates the moisture in the system. If moisture is left in the system it will react with the refrigerant and create an acid, corroding all the components of the A/C system internally, eventually creating leaks and other component failures.
Step 2: Allow the vacuum pump to run for a minimum of five minutes. Most manufacturers suggest an evacuation time of at least an hour.
Sometimes this is necessary, but more often than not, five minutes is sufficient. This depends on how long the system has been open to atmosphere and how humid the atmosphere is in your area.
Step 3: Allow the system to sit in a vacuum for five minutes. Turn off the vacuum pump and wait five minutes.
This is testing for any leaks in the system. If the vacuum in the systems bleeds off, you have a leak in the system.
- Tip: It is normal for a system to bleed off a little. If it loses more than 10 percent of its lowest vacuum, then you need to find the leak and repair it.
Step 4: Remove the vacuum pump from the A/C system. Disconnect the high and low connection from your car's A/C system.
Step 5: Inject oil into the system with the oil injector. Connect the injector to the low side connections.
Inject the same amount of oil into the system as was recovered during the refrigerant recovery process.
Part 5 of 5: Recharge your A/C system
Materials Needed
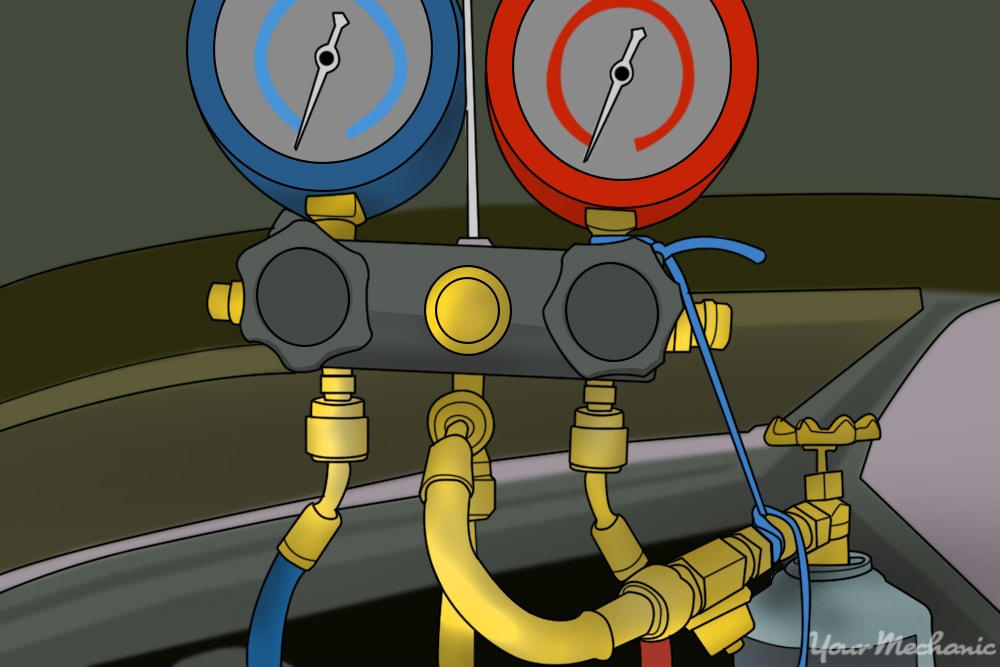
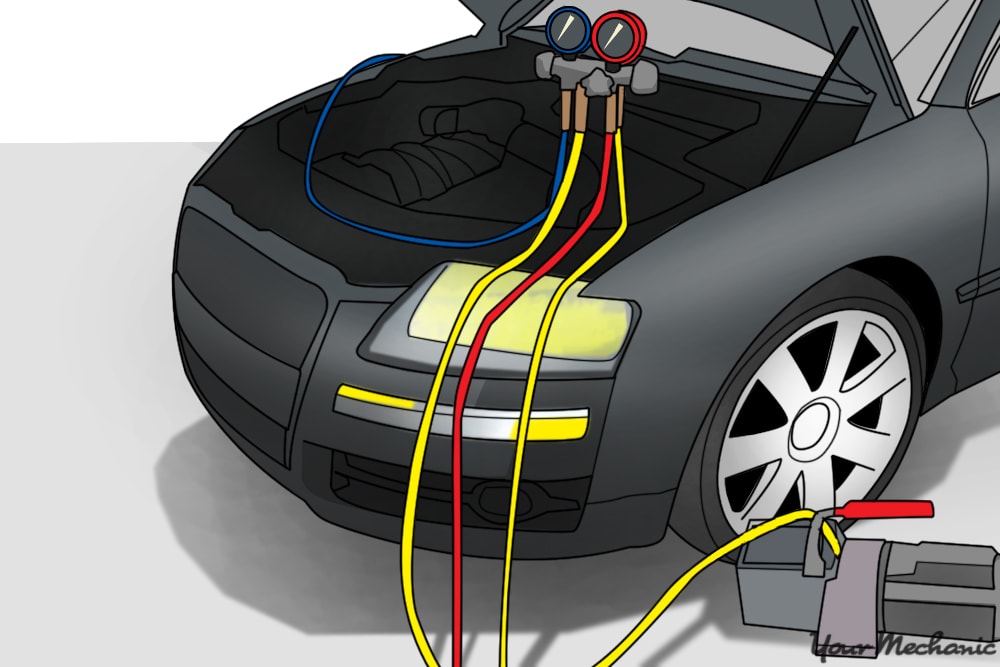
Step 1: Connect the manifold gauges to your A/C system. Connect the high and low side lines to your vehicle's service ports and connect the yellow line to the supply tank.
Step 2: Place the supply tank onto the scale. Place the supply tank onto the scale and open the valve on the top of the tank.
Step 3: Charge the system with refrigerant. Open the high and low side valves and allow refrigerant to enter the system.
Note: Charging an A/C system requires the supply tank to have a higher pressure in it than the system you are charging. If, once the system reaches equilibrium, it hasn’t taken enough refrigerant, you will need to start the car and use the A/C compressor to create lower pressure that will allow more refrigerant to enter the system.
Warning: When doing this, it is vitally important to close the high side valve. The A/C system creates enough pressure to potentially rupture the supply tank. You will finish filling the system through the low side valve.
Step 4: Sit in the car and check the temperature out the vents. Ideally, you need a thermometer to check the air temperature coming out your vents.
The rule of thumb is the temperature should be thirty to forty degrees below the ambient temperature.
Replacing an air conditioning accumulator is essential if you want to have a properly functioning A/C system and a pleasant riding experience. If you are not completely certain about completing the above steps, have one of YourMechanic’s certified technicians perform an A/C accumulator replacement.