Transmissions are designed to help move a vehicle with little effort from the engine. Transmissions are the most complex object in a vehicle other than the computer system. Keeping a transmission clean and operating correctly ensures a longer life.
There are three types of transmissions: manual, automatic, and electric. The manual and automatic transmissions both have service intervals. Electric transmissions do not have service intervals as they are a sealed unit.
There are 6 ways to improve automatic transmission performance and reliability. These are servicing the transmission, changing driving habits, driving with lower gears when loaded, maintaining engine performance, having proper alignment of tires, and having the correct tire size.
Part 1 of 8: Verifying the condition of the automatic transmission
Material Needed
- Flashlight
Step 1: Open the hood to the vehicle and check the transmission fluid. Most vehicles have a dipstick to check the transmission fluid.
Some vehicles have a plug on the top of the transmission to remove and check the fluid. Other vehicles may be considered non-serviceable, which means you are unable to service the transmissions.
Step 2: Drive the vehicle around the block. Pay attention to the transmission’s shifting through all of the gears.
Make sure that there is no lag time in shifting. This could result in a failing transmission.
Step 3: Check for leaking fluid. After the road test, grab a flashlight and look under the hood or under the vehicle at the transmission.
Verify that there is no leaking fluid from the transmission in any location.
Part 2 of 8: Servicing the automatic transmission
Materials Needed
- Creeper
- Disposable gloves
- Drip pan
- Flashlight
- Safety glasses
- SAE and Metric wrench set
- SAE and Metric socket set
- Small funnel
- Protective clothing
- Floor jack
- Torque wrench
- Jack stands
- Wheel chocks
Step 1: Park your vehicle on a flat, hard surface. Make sure that the transmission is in park (for automatics) or in 1st gear (for manuals).
Step 2: Place wheel chocks around the rear tires. Engage the parking brake to lock the rear tires from moving.
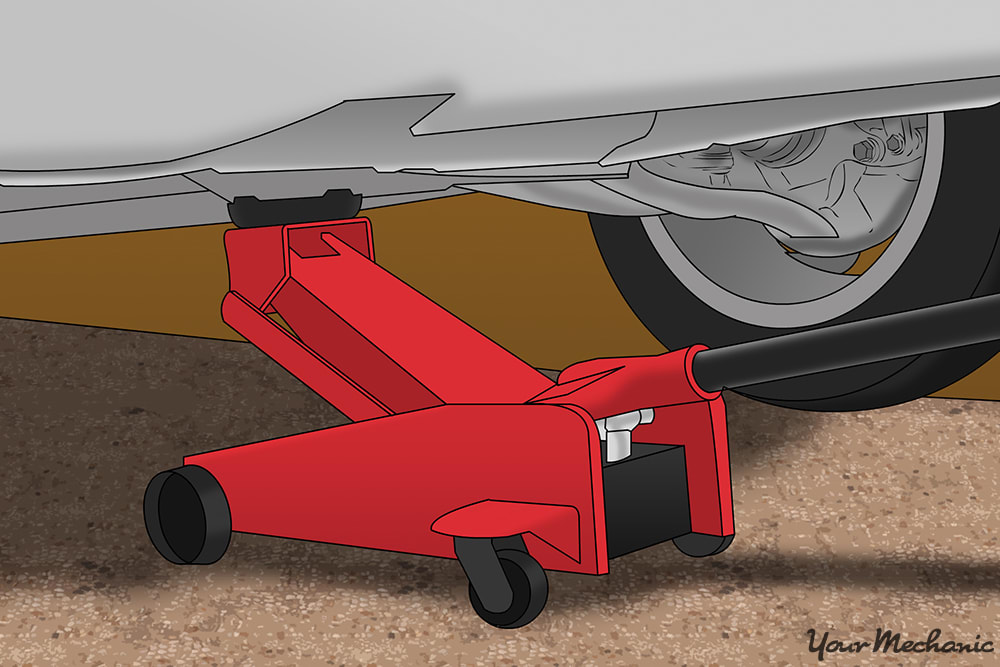
Step 3: Raise the vehicle. Using a floor jack, lift under the vehicle at its specified jacking points until the wheels are completely off the ground.
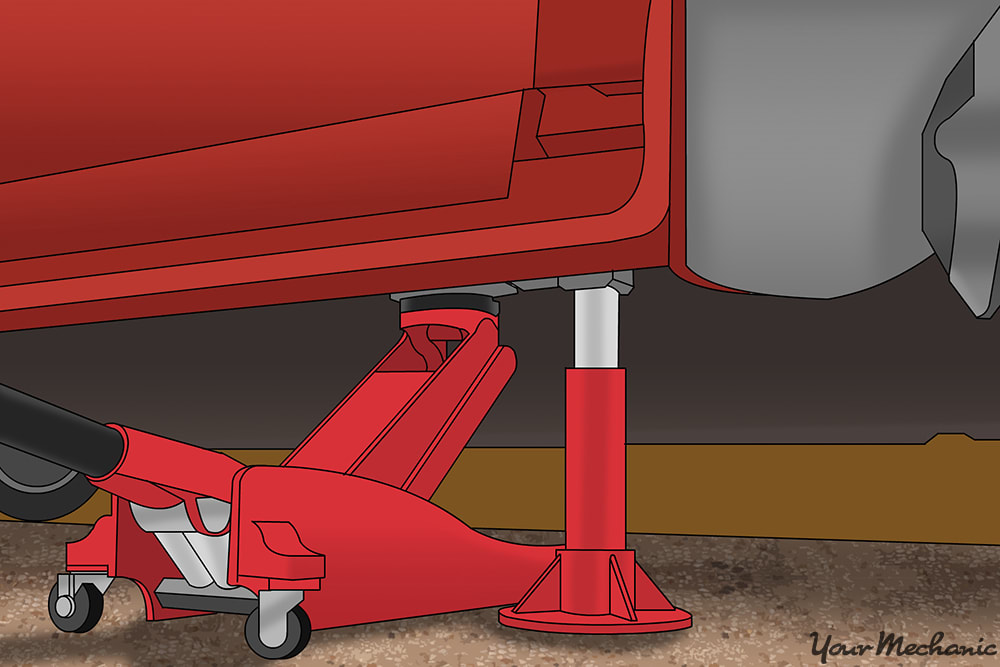
Step 4: Place the jack stands. The jack stands should go under the jacking point locations.
Then, lower the vehicle onto the jack stands. For most modern cars, the jacking points for jack stands are on the pinch weld just under the doors along the bottom of the car.
Step 5: Grab a creeper and go under the vehicle. Locate the transmission oil pan.
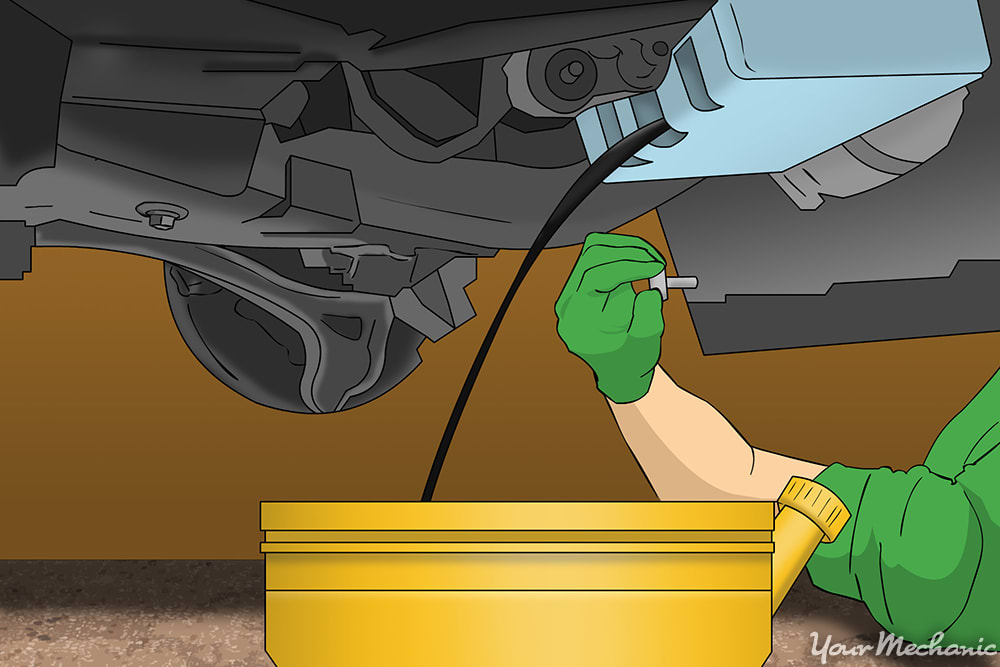
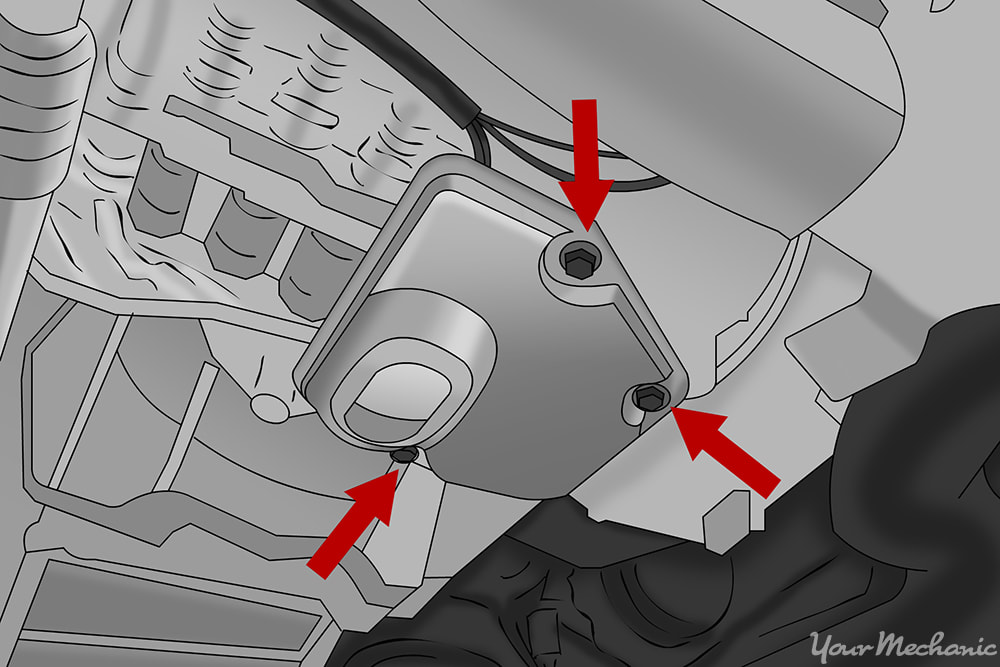
Step 6: Place a drain pan underneath the transmission oil pan. Some transmissions may have a drain plug on the oil pan.
You can remove the oil pan plug to drain the fluid out.
Step 7: Remove the bolts to the transmission oil pan. If the oil pan does not have a drain plug, leave a bolt in the front and rear of the oil pan.
Remove the rear bolt from the oil pan slowly and drain the fluid out and slowly remove the front bolt allowing the rest of the fluid to drain out of the pan. Remove the transmission oil pan.
Step 8: Remove the transmission oil filter. Grab the new filter and place it into the transmission.
- Note: If the filter came with a rubber grommet, make sure you install the new grommet. This prevents internal leakage at the pump inlet.
Step 9: Scrape off the old gasket from the transmission case and oil pan. Put the new gasket onto the oil pan and install it onto the transmission with 2 bolts finger tight.
Put the rest of the bolts in finger tight.

Step 10: Using a torque wrench, tighten the bolts from the inside of the pan to the outside of the pan. Torque to the bolts to 8 foot pounds.
Then re-torque the bolts to 12 foot pounds to ensure a good seal.
- Note: Do not over-torque the bolts to the transmission pan. This will result in a oil pan leak.
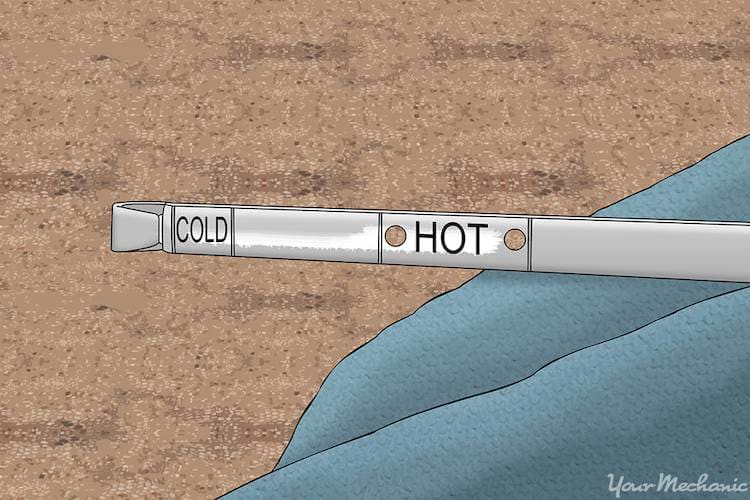
Step 11: Fill the transmission. Remove the dipstick or plug to the transmission.
Put a funnel on the open port and fill up the transmission. If there is a dipstick, be sure to fill to the cold line. If you have a plug, fill up the transmission to knuckle depth.
Step 12: Start the engine. With the foot on the brake, put the transmission in gear.
After a few seconds put the transmission in neutral and then put the transmission in reverse. Now, put the transmission in neutral and then into park. This prevents any damage if the tires spin through the brakes.
Step 13: With the engine still running, check the transmission oil level. Top off the oil to the cold mark on the dipstick or knuckle deep on a plug.
Close off the transmission plug or put in the dipstick. Shut the engine off.
Step 14: Raise the vehicle. Using a floor jack, lift under the vehicle at its specified jacking points until the wheels are completely off the ground.
Step 15: Remove the jack stands.
Step 16: Lower the vehicle to where all four wheels are on the ground. Pull out the jack and put it aside.
Step 17: Remove the wheel chocks.
Part 3 of 8: Changing driving habits
Step 1: Start the vehicle up and take it for a test drive with a helper. Have the helper monitor the dash gauges while you operate the vehicle.
Have the helper write down when the the transmission shifts and at what RPM the transmission shifted. Most vehicles have an RPM gauge, but if there is no gauge, then have the helper write down the speed at which the transmission shifted.
Step 2: After the road test, analyze the data recorded. Look to see what RPM or speed the shifting was performed at.
Step 3: Take the vehicle out for another test drive. Make an effort to change when you shift the transmission.
This would be either speeding up or slowing down in relation to how much you step on the throttle pedal.
It is best to drive a half tank of fuel from the full line to the half line. Then when you need to fill up, check to see how many miles you drove. Fill up the fuel again and drive the vehicle around until the the half line. This time, use the alternative patterns that you and your helper came up with. You will likely find that the vehicle has better stability and you’ve driven more miles.
Part 4 of 8: Drive with lower gears when loaded or town driving

Step 1: When operating a vehicle without a load or highway driving, put the transmission in overdrive selection.
Step 2: Use the correct transmission setting. When operating a vehicle with a load or town driving, put the transmission in drive selection.
Do not put the transmission in overdrive. Putting the transmission in overdrive during town driving or when the vehicle is overloaded puts too much stress onto the gears and internal clutches, causing slippage.
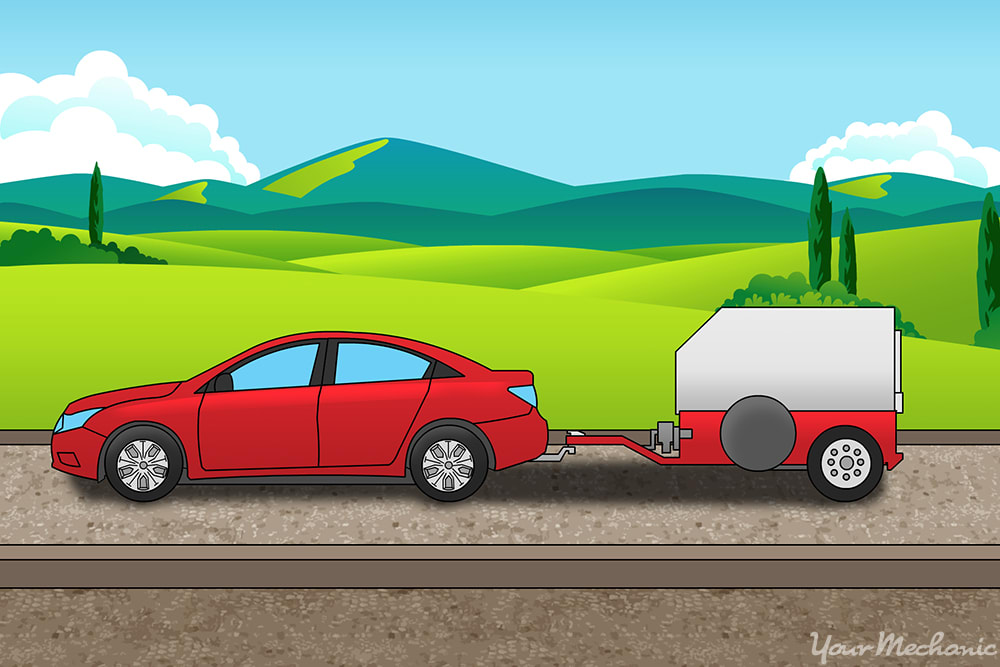
Step 3: Use the correct transmission while towing. If you are towing a trailer, put the transmission in second selection and manually shift as speed increases.
This helps prevent prematurely failure to the transmission and make it last a long time.
Part 5 of 8: Maintaining engine performance
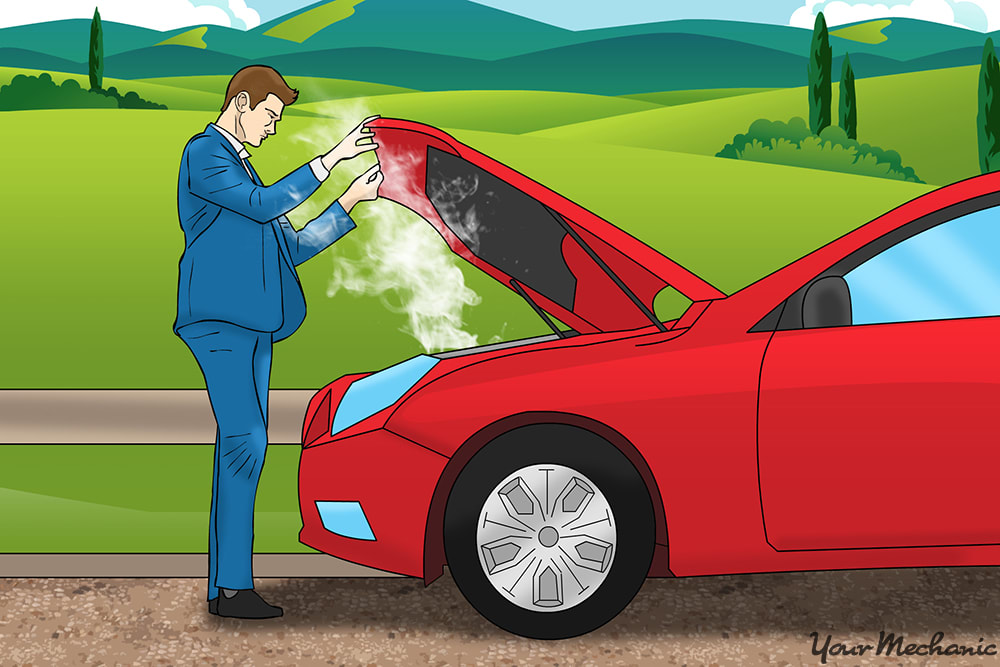
Transmissions are often neglected. When an engine overheats, the coolant in the radiator boils, causing the transmission fluid to varnish within the radiator heat exchanger. Mechanics repair the engine’s overheating, but they forget that the overheating burns the additives out of the transmission oil. When the transmission oil is varnished, it no longer cleans and protects the transmission.
If the engine is experiencing overheating or is misfiring, fix the issue with the engine before working on the transmission. Once you have repaired the engine, then you can address the transmission. If the engine overheated, perform service on the transmission.
When the engine misfires and makes the engine slow down, the transmission oil pump slows down causing the oil pressure to drop inside the transmission. When the oil pressure drops, the clutches begin to slip inside the transmission. Eventually, the clutches wear out enough to keep the transmission from going into gear.
Part 6 of 8: Having proper alignment of tires
The alignment of the tires can make a big difference in how the transmission operates during driving conditions. You could adjust the toe alignment on your own without having any special equipment.
Materials Needed
- Disposable gloves
- Flashlight
- Floor jack
- Pipe wrench
- Protective clothing
- Jack stands
- SAE and Metric socket set
- SAE and Metric wrench set
- Safety glasses
- Tape measure
- Wheel chocks
Step 1: Park your vehicle on a flat, hard surface. Make sure that the transmission is in park (for automatics) or in 1st gear (for manuals).
Step 2: Put on disposable gloves and place wheel chocks around the rear tires. Engage the parking brake to lock the rear tires from moving.
Step 3: Raise the vehicle. Using a floor jack, lift under the vehicle at its specified jacking points until the wheels are completely off the ground.
Step 4: Place the jack stands. The jack stands should go under the jacking point locations.
Then, lower the vehicle onto the jack stands. For most modern cars, the jacking points for jack stands are on the pinch weld just under the doors along the bottom of the car.
Step 5: Get a helper to assist you with the alignment. Put on safety glasses and grab a tape measure.
Measure the front wheels from the front of the tires and from the rear of the tires. Be sure to measure from the center of the tires as well.
- Note: You may need a flashlight to see the lock nuts or sleeve mounting bolts.
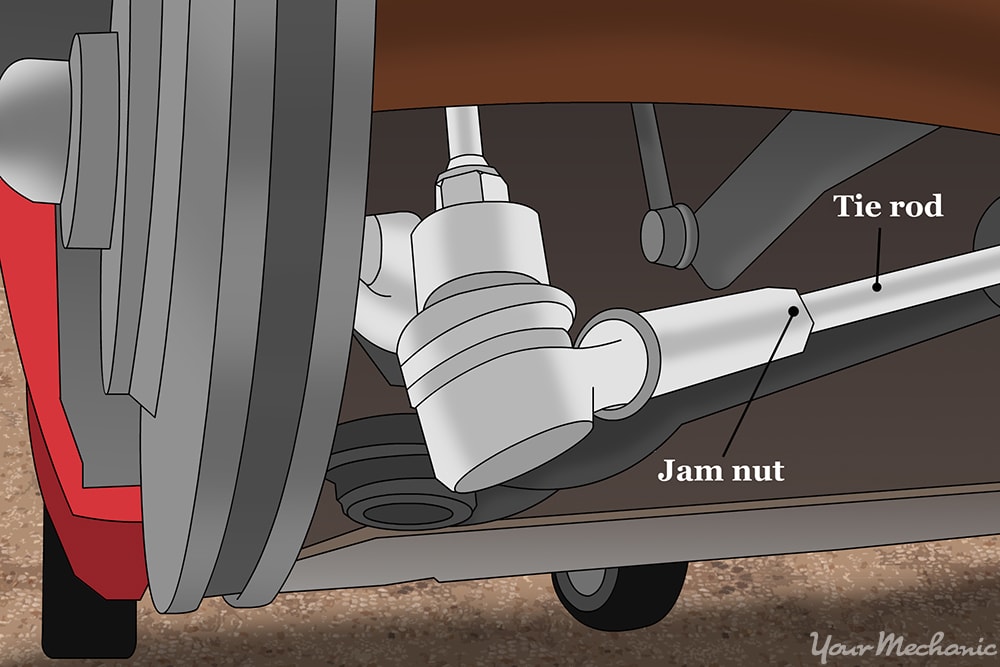
Step 6: Loosen lock nuts. If you need to make adjustments, loosen the lock nuts on the outer steering ball joints on a rack and pinion system or the sleeve on a steering box system.
Have your helper hold the steering wheel before making any adjustments. Use a wrench or pipe wrench to turn the steering shaft or sleeve. Threads going in towards the engine bring the front of the tires in and the back of the tires out. Threads going out towards the tire bring the front of the tires out and back of the tires in.
- Note: Most modern vehicles today have a toe setting at 1/16 of an inch. The 1/16 inch extra is measured on the back side of the tires. Older vehicles have a toe setting at 1/8 of an inch. The 1/8 inch extra is measured on the back side of the tires.
Step 7: Tighten the lock nuts or sleeves. Re-measure the distances in the front of the tires and the rear of the tires to ensure that you have the right measurements.
Step 8: Raise the vehicle. Using a floor jack, lift under the vehicle at its specified jacking points until the wheels are completely off the ground.
Step 9: Remove the jack stands.
Step 10: Lower the vehicle to where all four wheels are on the ground. Pull out the jack and put it aside.
Step 11: Remove the wheel chocks.
Part 7 of 8: Checking the correct tire size
Tires give rise to wear and tear on transmission systems; they wear out transmissions with either overloading or overspeeding, depending on the tire size.
Materials Needed
- Disposable gloves
- Large flathead screwdriver
- Tire iron
- Torque wrench
- Protective clothing
- Safety glasses
- Wheel chocks
Step 1: Park your vehicle on a flat, hard surface. Make sure that the transmission is in park (for automatics) or in 1st gear (for manuals).
Step 2: Put on disposable gloves and place wheel chocks around the rear tires. Engage the parking brake to the lock the rear tires from moving.
Step 3: Raise the vehicle. Using a floor jack, lift under the vehicle at its specified jacking points until the wheels are completely off the ground.
Step 4: Place the jack stands. The jack stands should go under the jacking point locations.
Then, lower the vehicle onto the jack stands. For most modern cars, the jacking points for jack stands are on the pinch weld just under the doors along the bottom of the car.
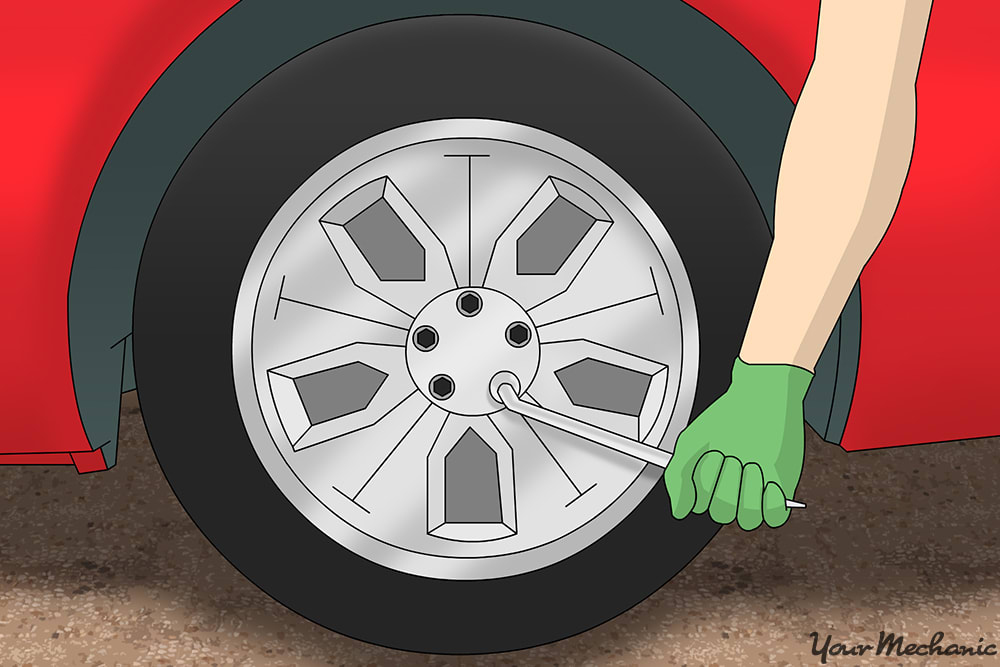
Step 5: Use the tire iron to remove the lug nuts from the tires. Take the tires off the wheel studs.
- Note: Use the tire iron to loosen the lug nuts to the tires. Do not remove the lug nuts. You may have to remove hubcaps to get to the lug nuts. If you do, use a large flat tip screwdriver and pop off the hubcaps.
Step 6: Get the other tires that will be going on the vehicle. Put the tires onto the wheel studs.
Step 7: Install the lug nuts and tighten them up hand tight with the tire iron. Use a torque wrench to torque the lug nuts down.
Torque the lug nuts in a star pattern to prevent wheel wobble or runout.
Wheel lug nut torque values:
4 cylinder and V-6 engine vehicles: 80 to 90 foot pounds
V-8 engines on cars and vans: 90 to 110 foot pounds
Large vans, trucks, and trailers: 100 to 120 foot pounds
One ton and 3/4 ton vehicles: 120 to 135 foot pounds
Step 8: Raise the vehicle. Using a floor jack, lift under the vehicle at its specified jacking points until the wheels are completely off the ground.
Step 9: Remove the jack stands.
Step 10: Lower the vehicle to where all four wheels are on the ground. Pull out the jack and put it aside.
Step 11: Remove the wheel chocks.
Part 8 of 8: Test driving the vehicle
Materials Needed
- Flashlight
- SAE and Metric socket set
- SAE and Metric wrench set
Step 1: Drive the vehicle around the block. Listen for any unusual noises or vibrations that could harm the transmission.
Step 2: Look for the same conditions as before. When you return from the road test, check out the conditions that you were experiencing before.
If you had to service the transmission, check to see if any fluid is leaking out. If you had to adjust the engine performance, then check the engine to make sure that the problem has been solved.
If you had to perform an alignment, get a flashlight and your tools and check the mounting nuts to the sleeves and lock nuts for tightness. If you had to remove the tires, get your torque wrench and recheck the lug nuts for any looseness.
The lug nuts should be the same torque value as before. Use a flashlight and visually check to see if there was any damage to the wheels or wheel studs.
If your vehicle continues to have transmission problems after replacing the transmission oil and filter, or if you don’t notice any improvements after changing your driving habits and inspecting your vehicle, then there may be further service of the transmission needed. If the problem persists, then you should seek out help from one of YourMechanic’s certified mechanics who can diagnose the problem.
