The automatic timing advance unit plays a key part in keeping the engine running smoothly and in time with all the components on an engine. The automatic advance timing unit is a part of the timing system located inside the front cover of the engine and on distributors. A majority of new vehicles have this type of timing system.
When it comes time to replace an automatic timing advance unit, there is likely a problem with the way your vehicle is running, such as fuel consumption, sluggishness, no power, and, in some cases, internal part failure. You may notice engine knocking and even black smoke as well.
This service in most cases can only be diagnosed through drivability issues and diagnostics. Your vehicle may have a vacuum-driven automatic advance timing unit or operate mechanically. Most vacuum-driven units are attached to the distributor, and mechanically driven nits are attached to the front engine cover or valve cover. The directions given here are for gasoline engines only.
Part 1 of 2: Replacing a vacuum-driven automatic timing advance unit
Materials Needed
- ¼ inch torque wrench
- ¼ inch Socket set metric and standard
- ⅜ inch Socket set metric and standard
- ¼ inch ratchet
- ⅜ inch ratchet
- Automatic advance timing unit
- Brake cleaner
- Screwdriver, Phillips and slotted
- Small pry bar
- Towels or rags
Step 1: Disconnect the battery. When disconnecting the battery, use either a 8mm, 10mm or a 13mm to loosen the battery terminals.
Once the terminal is loose, twist the terminal side to side to break loose, lift, and remove. Do this to both the positive and negative and move, wedge, or hold down with a bungie cord to prevent the cable from falling back into place on the terminal.
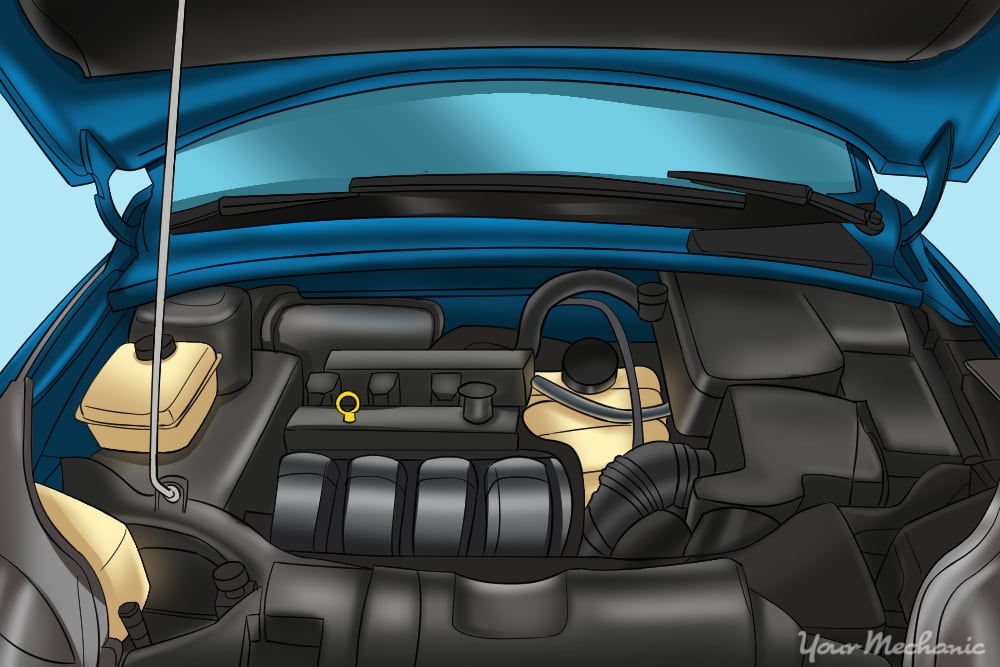
Step 2: Remove the distributor cap. The distributor is located either in the rear of the engine or the side of the engine.
- Note: Your ignition wires go from the distributor to the spark plugs.
Step 3: Remove the vacuum line from the automatic timing advance unit. The vacuum line is attached to automatic timing advance unit.
The line goes into the unit itself; the line feeds into the front of the round silver piece on the distributor.
Step 4: Remove the mounting screws. These are holding the distributor cap to the distributor.
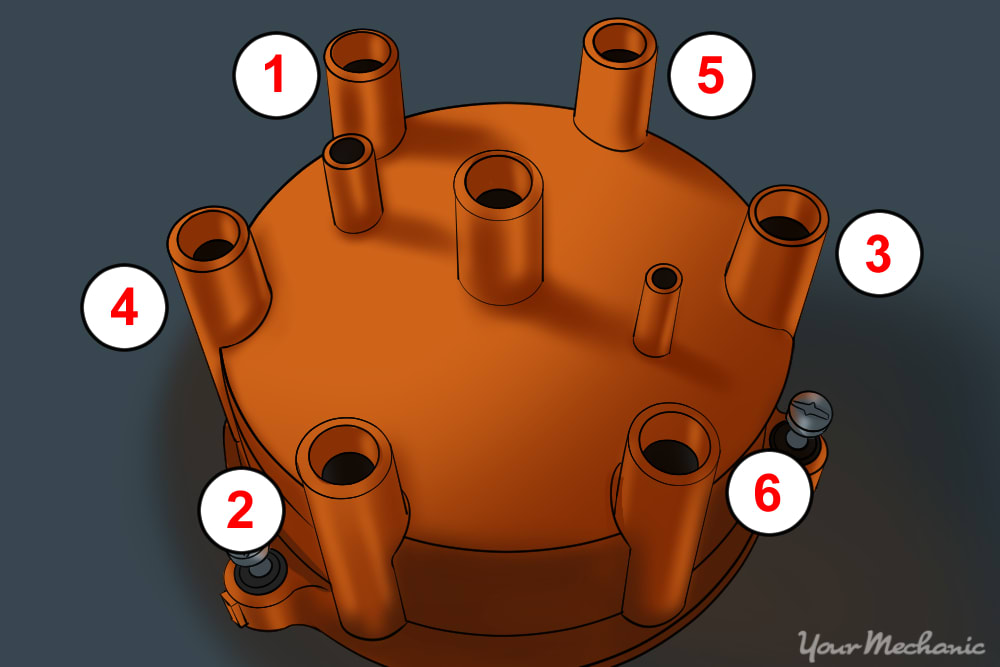
Step 5: Mark ignition wires if they need to be removed. These do not usually need to be removed, but if so, mark the wires and the distributor cap so you can install them correctly.
You can use a permanent marker and masking tape for this.
Step 6: Remove the the Automatic timing advance unit. The Automatic Timing Advance Unit should be easy to see once the distributor cap has been removed.
From this point you should be able to see the mounting screws holding the Automatic Timing Advance Unit, which you should remove.
Step 7: Place new unit into the mounting position. Start the mounting screws.
Step 8: Torque mounting screws to specification.
Step 9: Install the distributor cap. Install the cap and two mounting screws and tighten.
The distributor cap is plastic so don't over tighten.
Step 10: Install the vacuum line to automatic timing advance unit. The vacuum line just slips over the nipple, so a clamp is not required.
The line will be snug when installed.
Step 11: Install the ignition wires. Do this as per the numbering so you won't mix the wire up.
Mixing the ignition wires will lead to vehicle misfiring or not starting.
Step 12: Reconnect the battery. Install the negative battery clamp and the positive battery clamp and tighten up the battery terminal snugly tight.
You do not want to over tighten because it could ruin the battery terminal and may cause a bad electrical connection.
Part 2 of 2: Replacing a mechanical automatic timing advance unit sensor
Step 1: Disconnect the battery. Do this by loosening both battery terminals and removing the terminals by twisting side to side and pulling up.
Move cables to the side and be sure they can't fall back into place and energize the vehicle. You can use a bungee cord to restrain the battery cables.
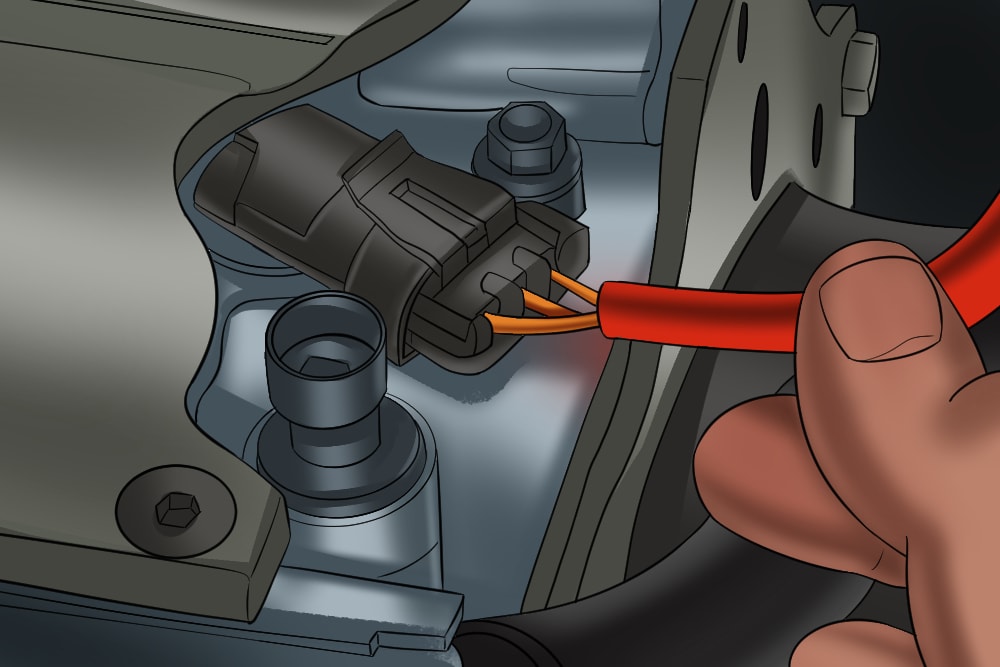
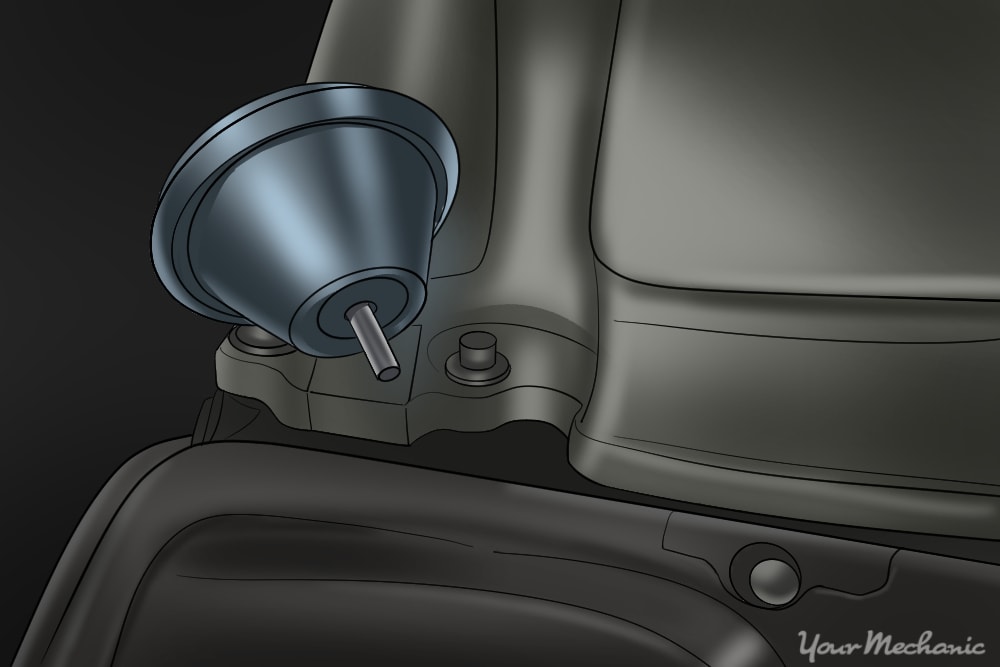
Step 2: Locate the signal sensor (cam position sensor). It is located on the front of the valve cover or on the front of the engine cover.
The sensor in the image below shown is mounted to the front engine cover. In older vehicles, they are sometimes located on the distributor underneath the distributor cap.
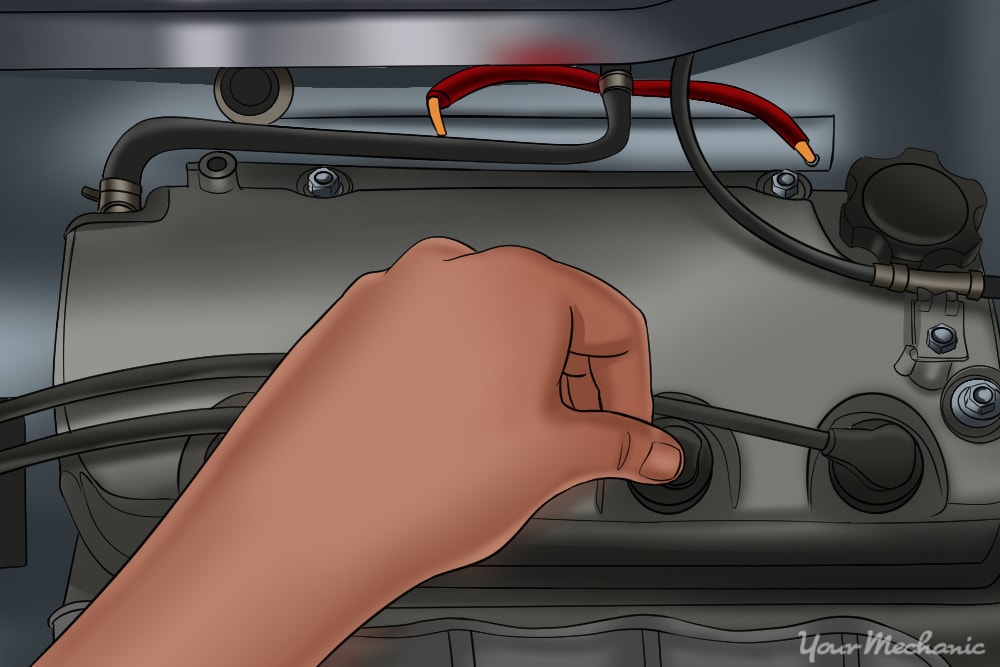
Step 3: Disconnect the electrical connector and move to the side. Most connectors have a lock that prevents them from easily being removed.
These locks are disengaged by sliding the lock back; it will stop sliding when fully disengaged.
Step 4: Remove the sensor. Locate and remove the mounting screws to the sensor.
Lightly turn the sensor side to side and pull it out.
Step 5: Install the new sensor. Inspect the seal/ oring to make sure it has no tears and to make sure there is a seal in place.
Take a couple drops of engine oil and coat the seal.
Step 6: Start the mounting screws and torque to specification. It doesn't take a whole lot to tighten.
Step 7: Reconnect the electrical connector. An easy push back together and a click assures you it is in place.
Reengage connector lock by sliding it forward into place.
Step 8: Reconnect the battery. Tighten the battery terminals and reassemble anything that was removed or disconnected to access the sensor.
The automatic timing advance unit is a very important component in the engine's ability to run properly. These components give or receive very important data that tells the engine what it need to do to run its very best. If replacing your automatic advance unit replacement is something you would rather leave to a professional, have one of YourMechanic’s certified technicians perform a replacement.