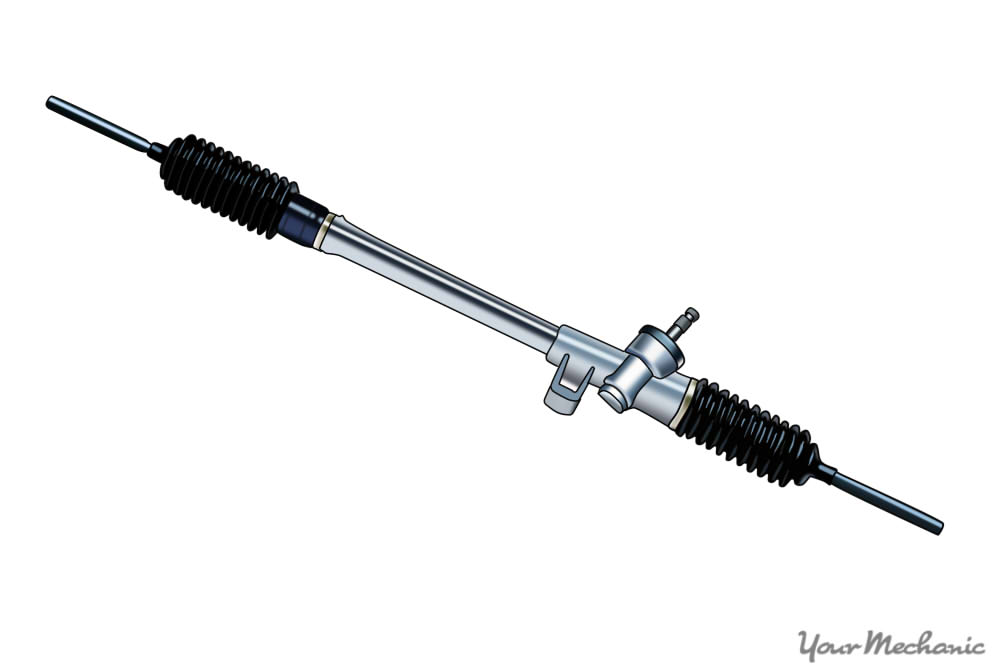
Most of the trucks, SUVs and passenger cars that are on the road today utilize a rack and pinion steering system. This is a single component that also includes the power steering systems. Many people call this component the steering rack gearbox, and it's often found on front-wheel drive vehicles and those that utilize part-time four wheel drive systems. This component is designed to last the lifespan of the vehicle; however, the steering rack gearbox may fail because it has been damaged in some way. Some of the common symptoms you'll notice when the steering rack gearbox begins to fail include a clunking sound when you turn, excessive vibration while steering, or a low groaning noise when the steering wheel is turned all the way.
Part 1 of 1: Replacing the steering rack gearbox
Materials Needed
- Ball-peen hammer
- Boxed end wrench or ratchet wrench
- Flashlight
- Hydraulic line wrenches
- Impact wrench/air lines
- Jack and jack stands or hydraulic lift
- Penetrating oil (WD-40 or PB Blaster)
- Replacement steering rack bushings and supporting hardware
- Replacement steering rack gearbox
- Safety equipment (safety glasses & gloves)
- Steel wool
Step 1: Raise the vehicle on a hydraulic lift or jack stands. This job is best completed if you have access to a hydraulic lift. If you don't, you'll have to raise the front end of the vehicle with jack stands. Make sure to use wheel chocks behind and in front of a rear wheel for safety.
Step 2: Disconnect the vehicle's battery. Locate the vehicle's battery and disconnect the positive and negative battery cables before proceeding.
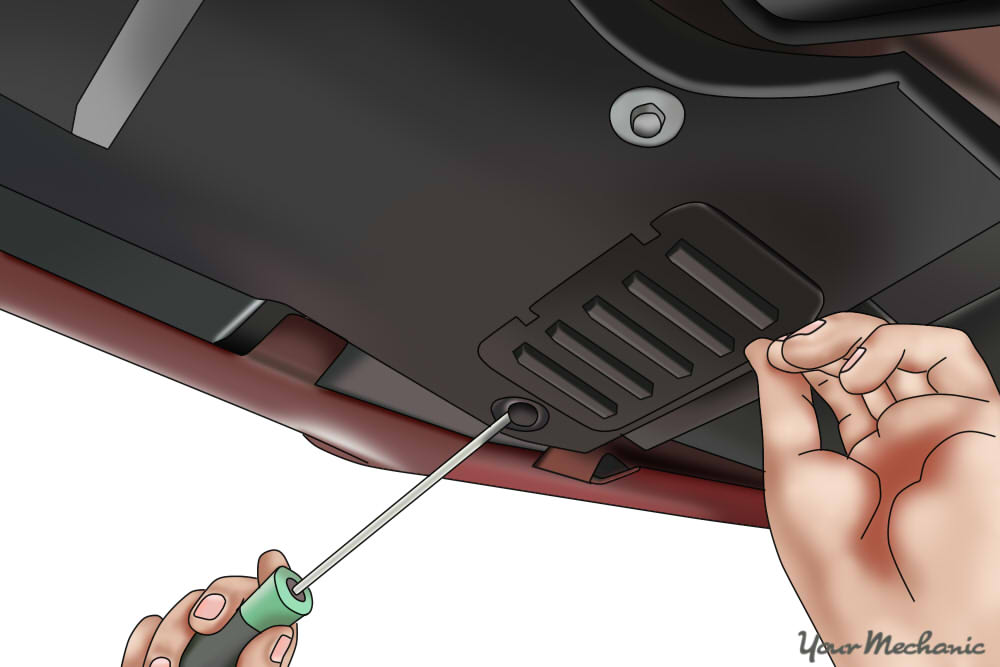
Step 3: Remove the lower belly pans/skid plates. In order to have clear access to the steering rack gearbox, you'll need to remove the lower belly pans (engine covers) and skid plates located underneath the vehicle. On many vehicles, you'll also have to remove a cross member that runs perpendicular to the engine. Always refer to your vehicle service manual for exact instructions on how to complete this step for your individual vehicle.
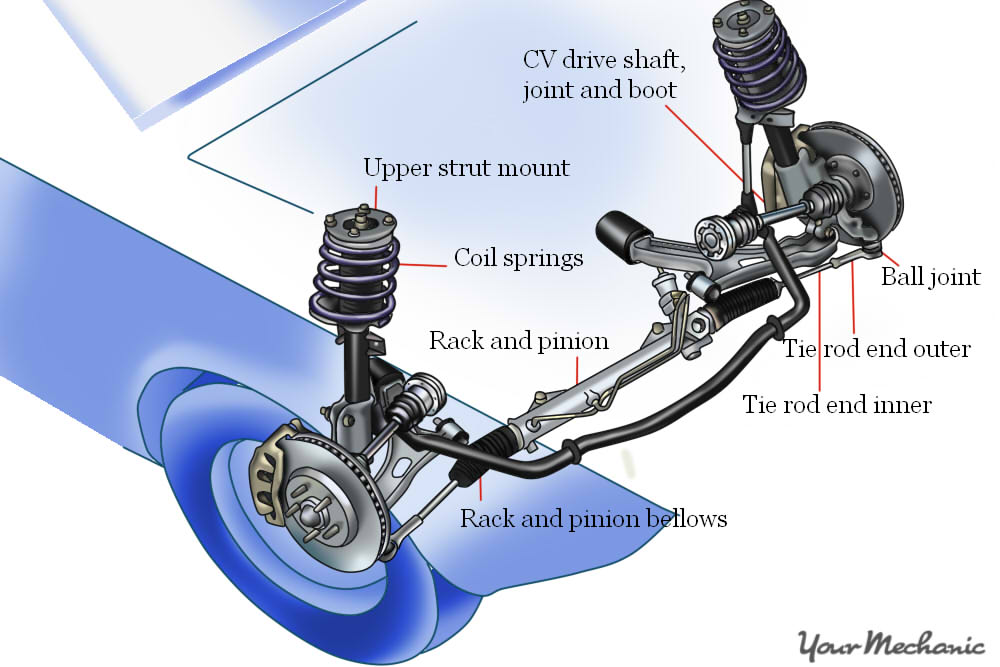
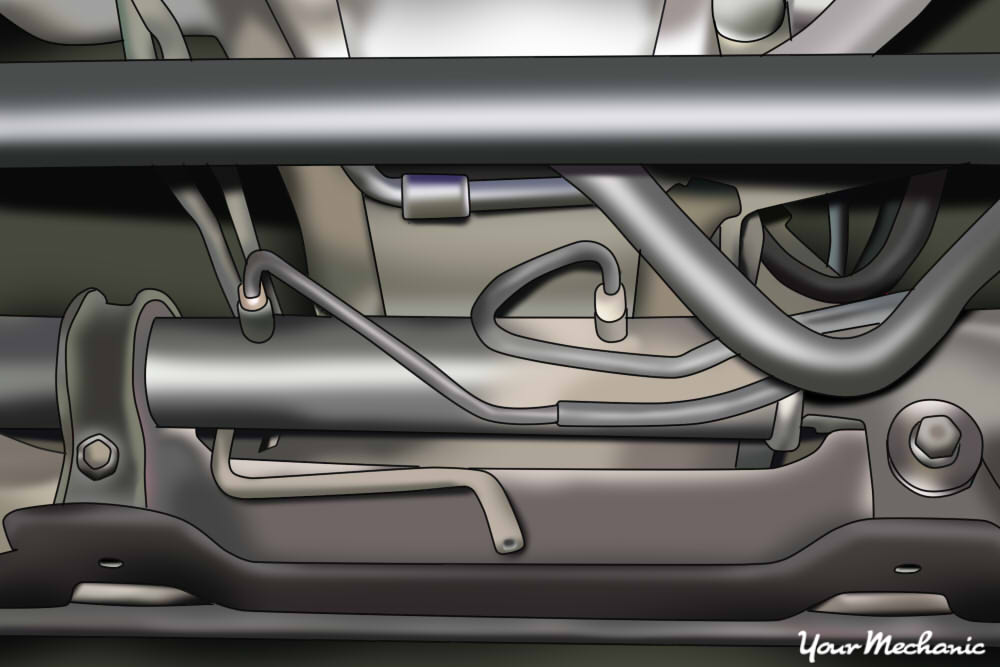
Step 4: Remove multiple front end components. The steering rack gearbox is connected to the wheels and tires, the steering rack bushings and brackets and other components on the vehicle.
In order to remove this component, you'll have to first remove the ancillary parts connected to the steering rack gearbox.
Because every vehicle model, make and year has a unique set up for the steering rack gearbox, you need to refer to your specific service manual for detailed instructions on which components need to be removed. The image above shows a few of the connections that must be removed in order to replace the old steering rack gearbox with a new unit.
In general, the following components typically must be removed before you can take off the steering rack:
- Front wheels
- Hydraulic lines connected to the steering rack gearbox
- Tie rod end cotter pins and castle nuts
- Tie rod ends from the upper control arm
- Front stabilizer bars
- Ball joints
- Steering rack input shaft/steering column connection
- Exhaust pipes/catalytic converter
Step 5: Use metal wire to support exhaust components unless you are removing them completely. Most mechanics will simply loosen the exhaust components such as the exhaust mid-pipe and catalytic converter and move them aside when they are replacing the steering rack gearbox. If you chose to do this, use thin metal wire to tie the exhaust parts to other parts of the undercarriage.
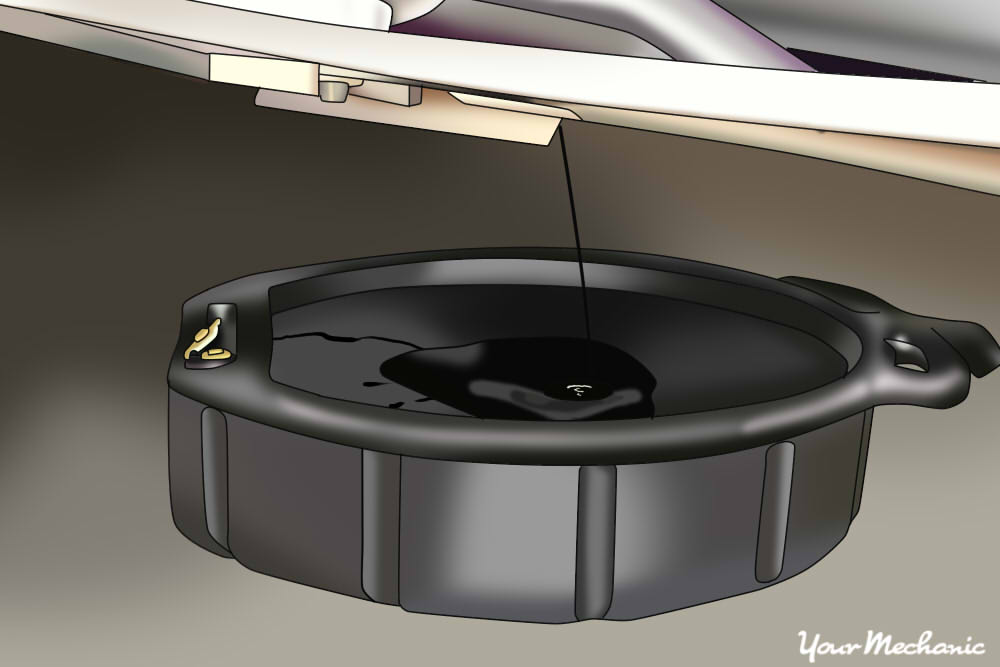
Step 6: Remove the power steering pressure and return lines from the steering rack gearbox. After you've removed the components in the way of the steering rack gearbox, you'll be ready to remove the supporting parts and pieces attached to the steering rack. The first item is to remove the power steering supply and return lines from the steering rack gearbox connections.
First, place a drain pan underneath the area. Disconnect the power steering supply and return lines using a line wrench and let them drain into the drip pan below the vehicle. Once the two lines have been disconnected, let the oil drain completely from the steering rack gearbox.
Step 7: Remove the driver and passenger side brackets. After the connections to the steering rack gearbox have been removed, you'll be ready to remove the steering rack from the vehicle. The first step is to detach the steering rack from the brackets and bushings on the driver and passenger side of the vehicle. In most cases, it's recommended to remove the bracket on the driver side first.
First, spray all of the steering rack mount bolts with penetrating oil like WD-40 or PB Blaster. Let it soak in for a few minutes.
Insert the impact wrench (or socket wrench) on the nut facing towards you, while you place the boxed end wrench on the bolt behind the mount. Remove the nut with the impact wrench while holding pressure on the end wrench.
Once the nut has been removed, use a hammer to hit the end of the bolt through the mount. Pull the bolt from the bushing and mount once it is loose. Once the bolt has been removed, pull the steering rack gearbox free from the bushing/mount and let it hang until you remove the other mounts and bushings.
Proceed to remove the passenger side bushings and brackets. The passenger side should be a clamp style bracket, but as always, refer to your service manual for detailed instructions. Once all of the brackets have been removed, you can remove the steering rack gearbox from the vehicle.
Step 8: Remove the old bushings from both mounts. Move the old rack out of the way and remove the old bushings from the two (or three if you have a center mount) mounts. There are two generally accepted methods for removing the old bushings. One is to use the ball end of a ball-peen hammer. The other is to use a torch to heat up the bushings and press or pull out with a pair of vice grips.
As always, refer to your service manual for the vehicle manufacturer's recommended steps for this process.

Step 9: Clean the mounting brackets with steel wool. By taking the time to clean the old brackets before you install the new bushings, you will ensure that the new bushings will fit easier and will secure the steering rack better as it will be free of debris. The image above shows you how the bushing mount should look before you install new bushings for the steering rack gearbox.
Step 10: Install the new bushings. On most vehicles, the driver side mount will be round. The passenger side mount will consist of two brackets with bushings in the middle. Refer to your vehicle’s service manual for the exact recommended steps on how to properly install the steering rack bushings for your vehicle.
Step 11: Install the new steering rack gearbox. Once the steering rack bushings have been replaced, you need to install the new steering rack gearbox under the vehicle. The best way to complete this step is to install the rack in the reverse order of the way you removed the rack.
Follow these general steps but also follow your manufacturer's service manual instructions.
Install the passenger side mount: Place the mounting bushings on the steering rack and insert the bottom bolt first. Once the bottom bolt is securing the steering rack, insert the top bolt. After both bolts are inserted in the mounts, secure the nuts on both bolts, but do not fully tighten them yet.
Install the driver side mount: After the passenger side is secured, install the driver side steering rack mount. Again, insert the bolt and slowly guide the nut onto the bolt.
Once both sides are installed and the nuts and bolts are connected, tighten them to the manufacturer's recommended torque settings. This will be found in the service manual.
Reconnect the power steering hydraulic lines, return lines and supply lines. Tighten them to the recommended pressure.
Step 12: Connect the steering rack gearbox to the steering column input shaft. Connect the steering rack gearbox to the tie rod ends. Attach the tie rod ends to the upper control arm and front stabilizer bars. Connect the steering rack to the ball joints.
Reattach and torque the tires and wheels. Reattach the exhaust components. Reinstall the electrical harness connections that were removed. Install the belly pan, skid plate and cross member.
As always, the exact steps will be unique for your vehicle, so verify these steps with your service manual.
Step 13: Reconnect the battery cables. Reattach the positive and negative terminals to the battery.
Step 14: Refill the power steering fluid. Add power steering fluid to the reservoir. Start the engine and steer the vehicle to the left and right multiple times. Occasionally look underneath for any drips or leaking fluids. If you see any fluids leaking, shut off the vehicle and tighten the connections. With the engine off, check the fluid level and fill as needed. Repeat this until you no longer need to fill the reservoir with power steering fluid.
Step 15: Have the front end professionally aligned. Although many mechanics will argue that it's rather simple to set up the suspension alignment after replacing the steering rack gearbox, the reality is that this should be completed by a professional alignment shop. Proper suspension alignment will not only help keep the tires directionally solid, but will reduce tire wear and keep the vehicle driving safe.
Once you've completed the initial installation of the new steering rack gearbox, the suspension should be rather close, especially if you've followed your manufacturer's service manual instructions for removing and reinstalling the tie rod ends.
Replacing the steering rack gearbox is not very difficult, especially if you have the right tools and access to a hydraulic lift. If you've read these instructions and don't feel 100% confident in completing this repair, please contact one of the local ASE certified mechanics from YourMechanic to complete the steering rack gearbox replacement job for you.