A lot of manufacturers use cooling fan resistors in order to offer multiple fan speeds on a single fan assembly or to control dual fans. By employing the resistor, different amounts of voltage can be supplied to a motor, thus changing the speed of the fan.
Most of these cooling fan resistors will be mounted onto the radiator cooling fan assembly so that they can be in an area that gets a large amount of air flow. It is designed to be in a heavy air flow area. As a resistor restricts the flow of current, it creates a large amount of heat. Thus, being in a large airflow area makes sense not only to extend the life of the resistor, but also to keep from causing thermal meltdown of the components involved.
There are several reasons that a cooling fan can stop working and a cooling fan resistor is just one possibility. If the engine is overheating or the cooling fan does not operated at all possible speeds, there may be an issue with the resistor. If the resistor is broken, the cooling fan may never turn off.
Part 1 of 1: Replace the cooling fan resistor
Materials Needed
- Cooling fan resistor
- Crimping pliers
- Electrical crimp connector assortment - butt style
- Screwdrivers
- Socket set
Wrench set
Note: Consult your manual for the cooling fan resistor specific to your vehicle.
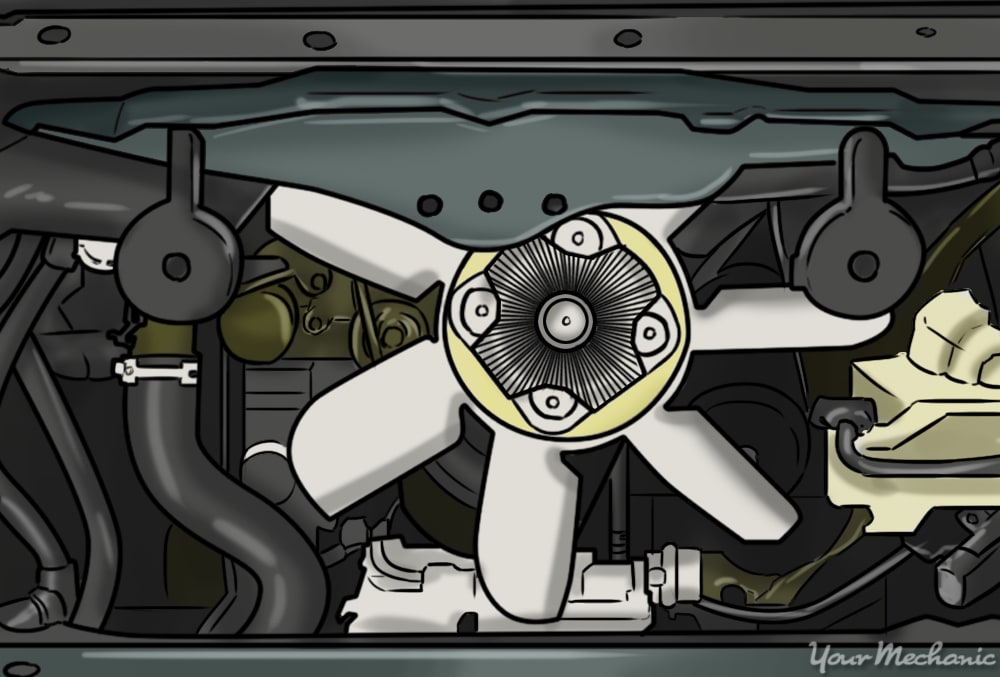
Step 1: Locate the cooling fan resistor. Visually inspect the area on and around the radiator cooling fan assembly.
While most manufacturers mount the cooling fan resistor directly to the cooling fan assembly, not all do. It can also be mounted to the front side of the radiator assembly, the radiator core support, a bracket on the inner fender, or any other place that will get a lot of air flow.
Note: For help identifying the cooling fan resistor, consult an approved repair manual or contact a skilled professional.
Warning: The cooling fan is capable of operating with the ignition key in the off/park position. Also, the cooling fan relay typically has battery voltage supplied to it. For both of these reasons, it is highly recommended that the vehicle battery be disconnected for your safety.
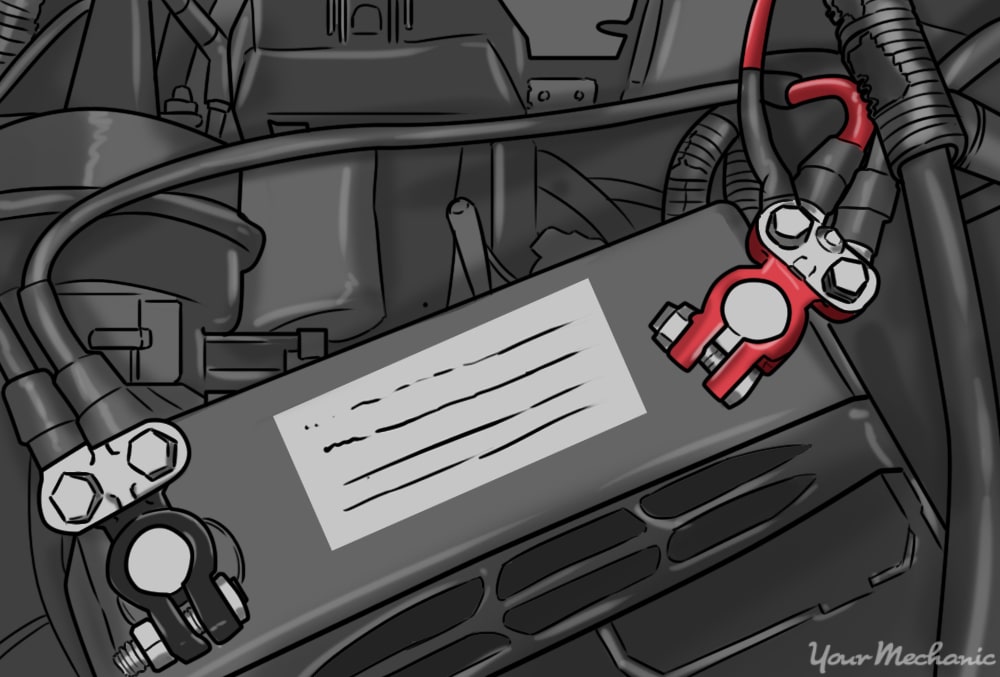
Step 2: Locate the vehicle battery and disconnect terminals. Locate the battery in the vehicle and disconnect the terminals.
Always disconnect the negative (-) battery cable first and then the positive (+) cable. The positive battery cables and terminals are color-coded with red and the negative are black.
Step 3: Remove cooling fan resistor. The resistor for the cooling fan motor can be held in place by any combination of clips, screws, or bolts.
Remove the hardware that is holding the resistor into place and unplug the electrical connector.
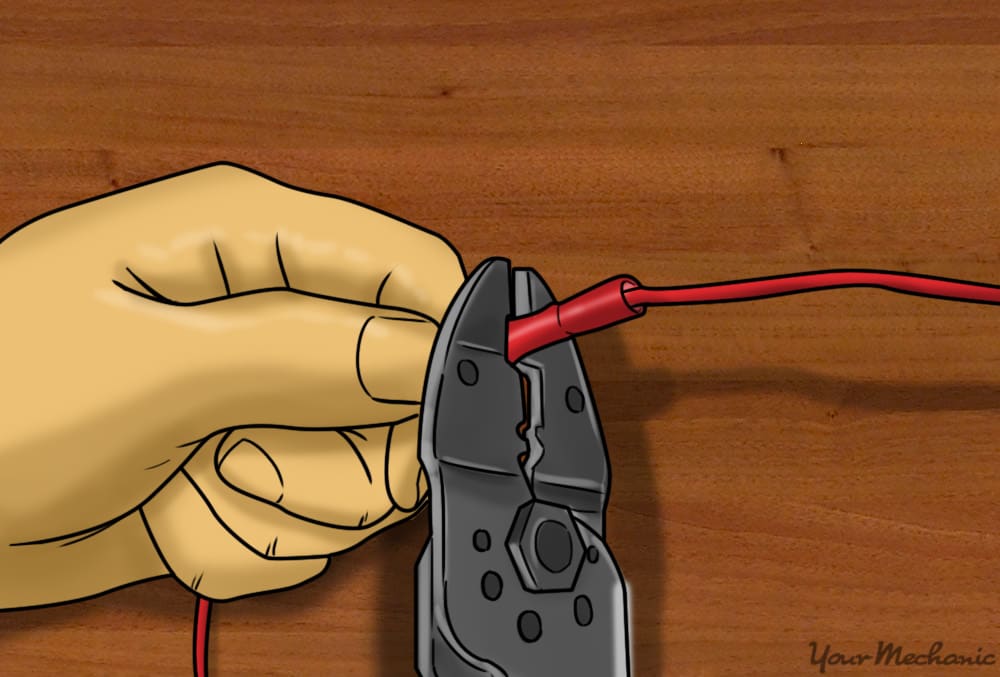
- Note: Some manufacturers will use a crimp style electrical connector to attach the wiring to the cooling fan resistor. For these applications, cut the wire to the resistor and, using the butt style crimp connector, crimp the replacement into position. Be sure to leave enough wire to allow the cooling fan resistor to be remounted.
Step 4: Compare replacement cooling fan resistor to the one being replaced. Visually inspect the replacement cooling fan resistor, comparing it to the one that was removed.
Verify that it is the same general dimension and the same number of wires, that the wires are color-coded the same, that the connecter is the same type, and so on.
Step 5: Install the replacement cooling fan resistor. Reconnect the electrical connector(s) to the replacement cooling fan resistor.
If you are using the crimp style connector and you are unfamiliar or uncomfortable with using this type of electrical connector, consult an experienced technician.
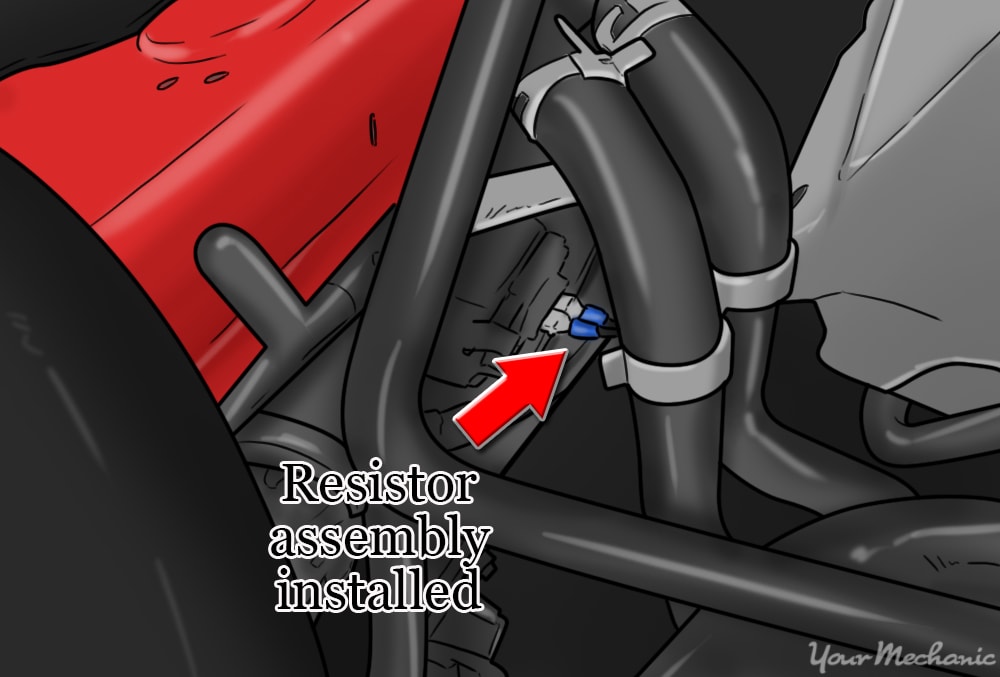
Step 6: Remount cooling fan resistor. Remount the cooling fan resistor back into position.
Be careful that any wiring that was disturbed in the replacement process is not in a place that it can become pinched, entangled, or cut by moving parts once the car is in operation.
Step 7: Reconnect vehicle battery. Once all replacement parts have been installed, go ahead and reconnect the battery in the vehicle.
When reconnecting the battery, reverse the disconnect procedure. In other words, when reconnecting the battery, you will connect the positive (+) cable first and then the negative (-) cable.
Step 8: Verify operation of replacement cooling fan resistor. At this point, start the vehicle and allow it to come up to operating temperature.
Observe the engine temperature and verify that the cooling fan is operating at the correct speeds and at the correct temperatures.
Replacing the cooling fan resistor can help get your vehicle back in top shape, ensuring that the cooling system in your vehicle is functioning properly. If at any point you feel you could use a hand with replacing a cooling fan resistor, contact one of YourMechanic’s certified technicians.