CV joints by design do not need regular servicing unless a CV boot has become ripped. Many times it is more cost effective to replace the entire CV axle due to the amount of labor involved. If the CV boot has been ripped for some time and the CV joint has become dry and or road debris has entered into the joint, the entire axle should be replaced. A simple greasing of the joint will not repair the damage that will have occurred.
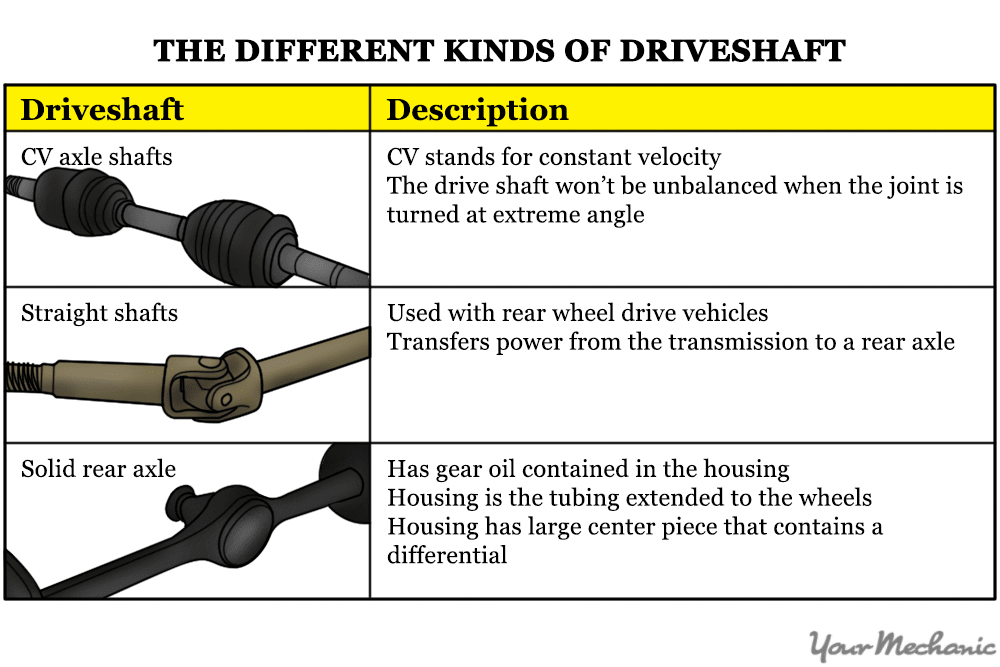
Part 1 of 6: Know the different types of driveshafts
Driveshafts come in several designs depending on the use of the vehicle it is built for. The following is a list to help you distinguish between the different types.
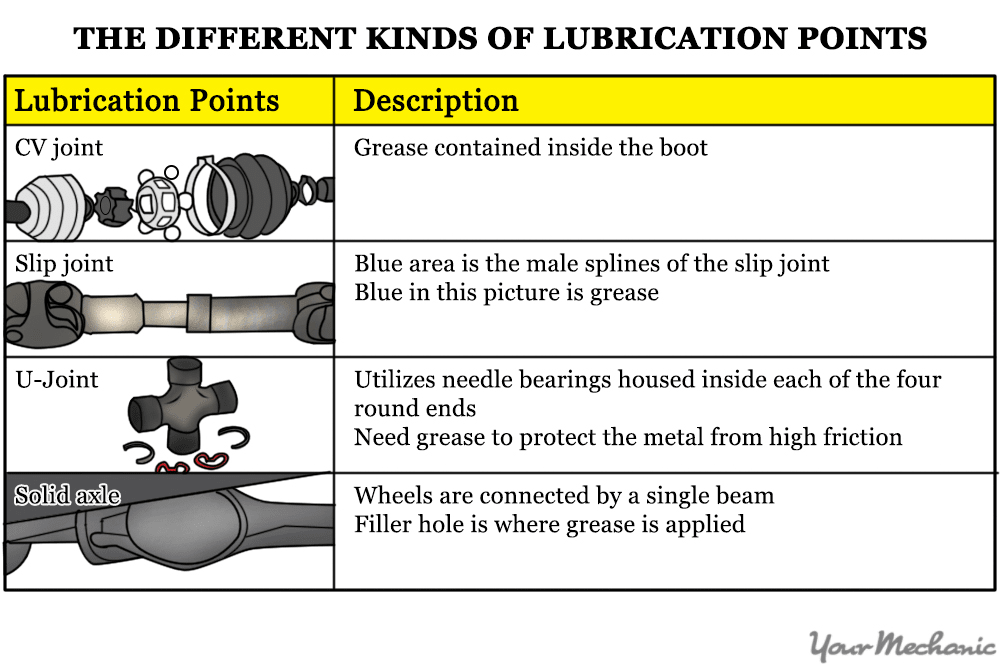
Part 2 of 6: Know the various lubrication points
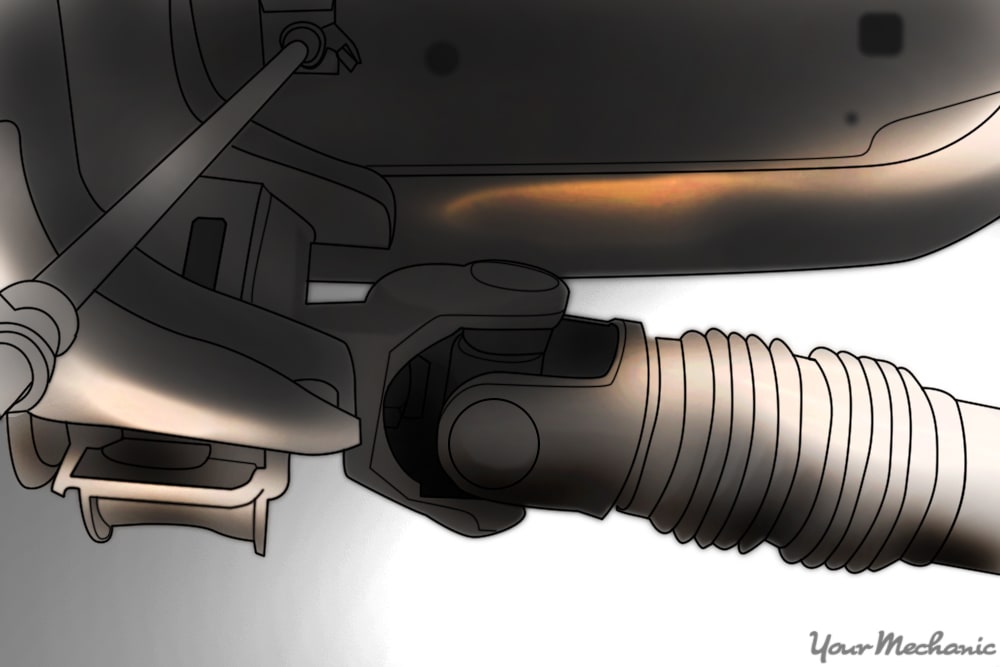
Drive axles utilize a number of articulating joints systems to accomplish the necessary bend in the drive shaft. The type of joint used is a design necessity dictated by the intended use of the vehicle.
Part 3 of 6: Lubricating a CV joint
Materials Needed
- Bearing grease
- CV boot kit
- CV clamp tool
- Gear oil
- Grease gun
- Nitrile rubber gloves
Wrenches
Note: The CV boot kit you use will depend on your vehicle.
Step 1: Remove the correct wheel. This will be the wheel that the CV axle drives.
Step 2: Disconnect the lower ball joint and tie rod end from the steering knuckle. The disconnecting of the ball joint and tie rod end will vary between manufacturers.
Refer to your repair manual for this step.
Step 3: Remove the axle from the vehicle. If you are only replacing the boot on the outer CV joint, then you will not need to completely remove the axle.
However, if you need to replace the inner CV boot, you will need to remove the axle from the car.
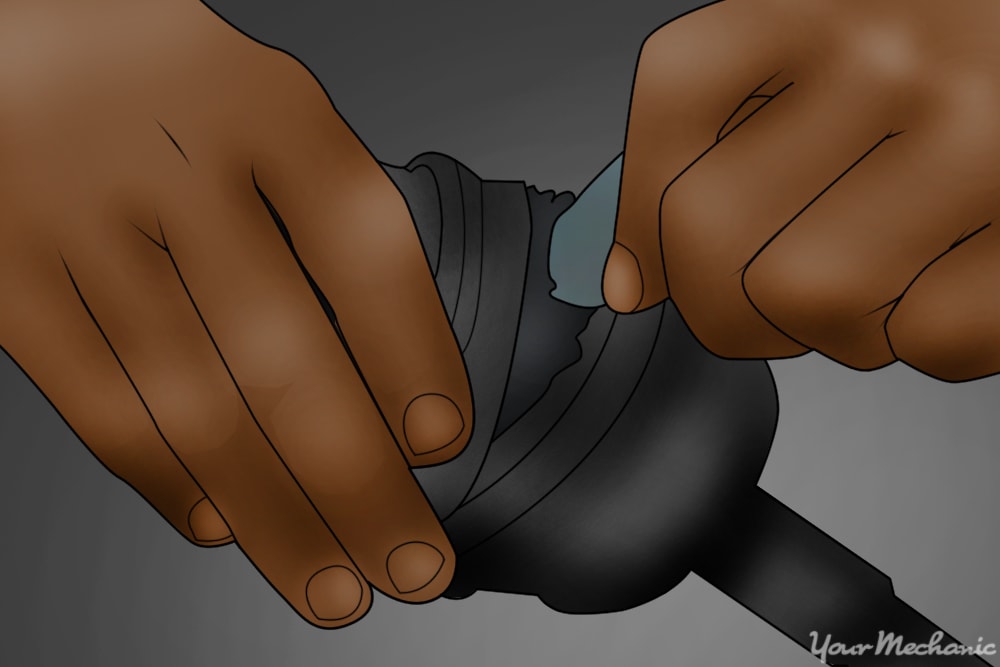
Step 4: Cut off the CV boot straps. The straps hold the CV boot in place around the axle joint.
Step 5: Pull the CV joint apart and remove the CV boot. Be careful the ball bearings don’t fall out of their housing during this process.
If they do, clean them up and put them back. It’s best if they stay in the slot they have always been in.

Step 6: Remove the old CV boot from the axle. The boot can be easily knocked off the axle.
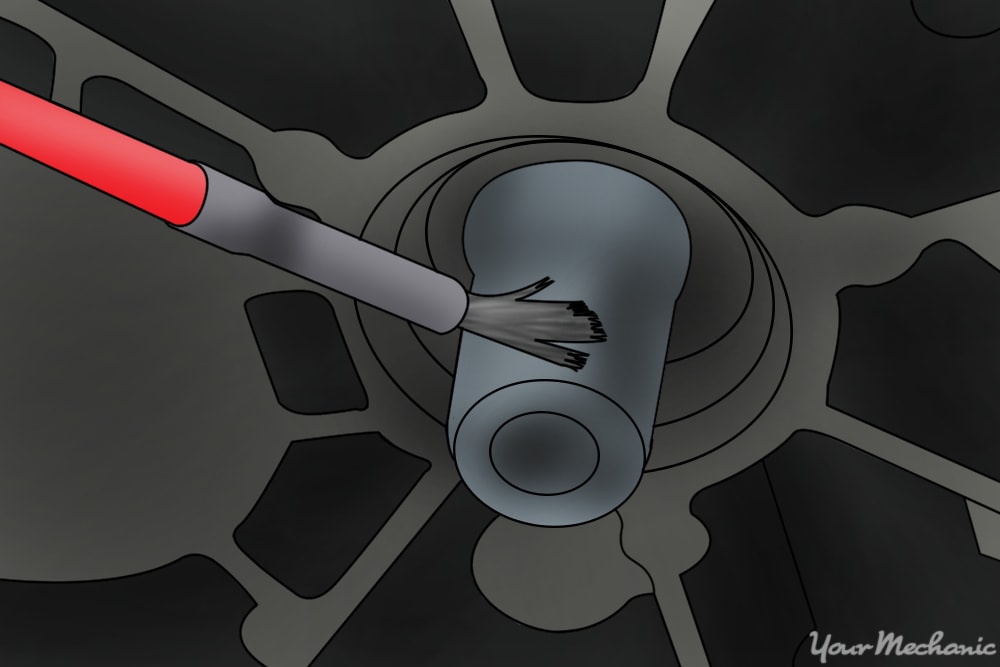
Step 7: Clean out the joint of most of the old grease. Make sure there isn’t any debris in the joint.
The joint doesn’t need to be spotlessly cleaned, just clean it enough so the new grease will be the majority when you pack the joint.
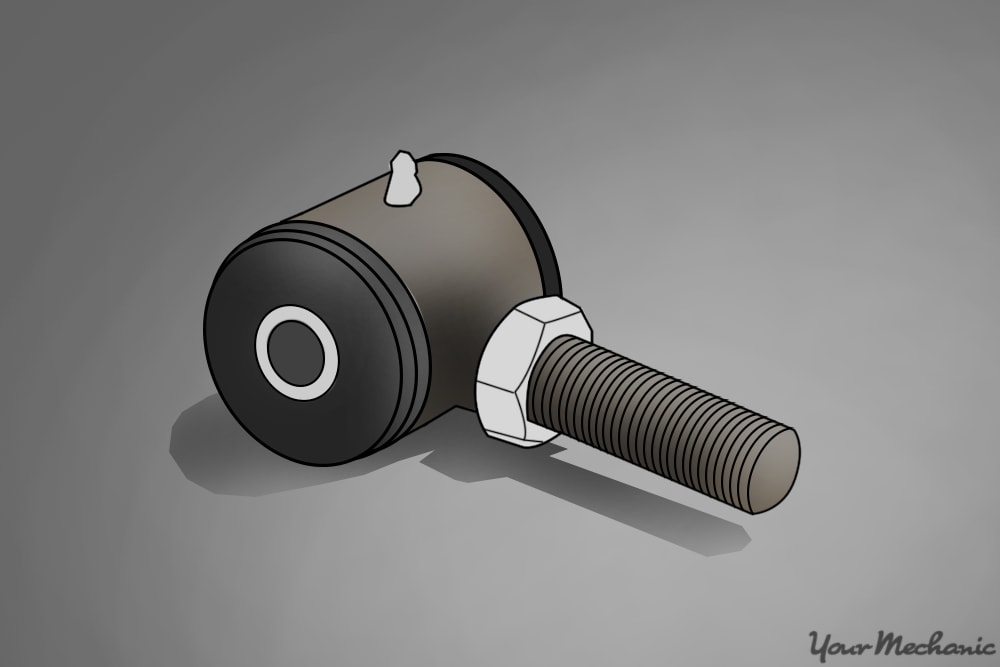
Step 8: Install the small CV boot clamp. Put the small CV boot clamp onto the shaft first.
Step 9: Install the new CV boot over the shaft. Go with the small end of the CV boot here.
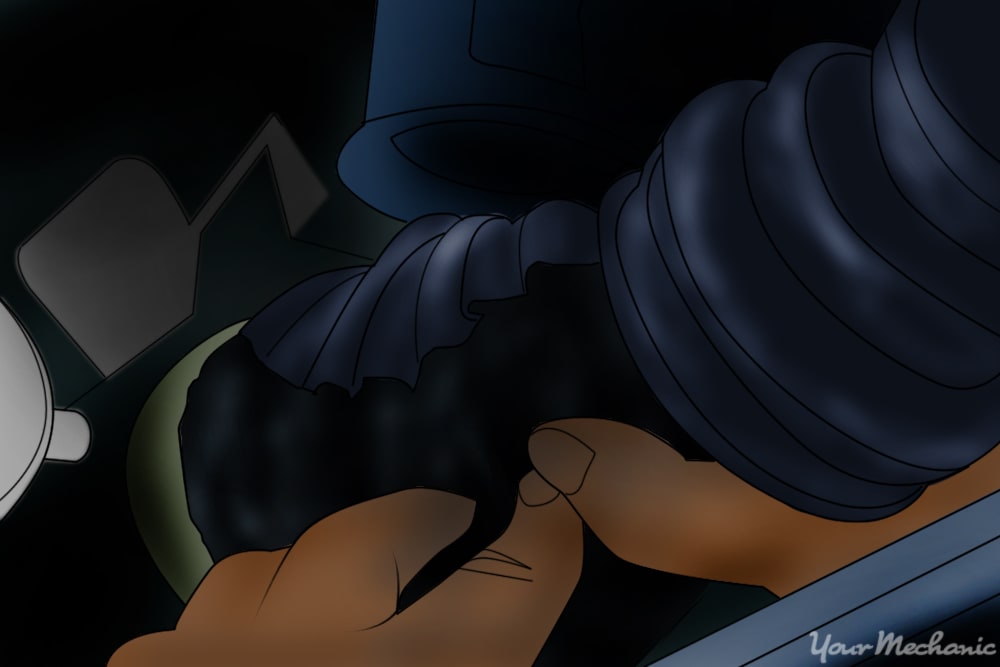
Step 10: Pack the joint by forcing the grease into the ball bearings with your hand. You just need to be sure the grease has begun to enter the bearing joint.
When it begins to turn, it will suck the grease in further.
Step 11: Apply grease to CV boot. Squeeze the remainder of the grease into the CV boot.
Step 12: Reassemble the CV joint. Make sure to assemble this properly as it was.
Step 13: Slip the CV boot over the small and large ends. You will need to slide the boot ends into the slots on the CV end and the shaft end.
Step 14: Secure the CV clamps. With the boot ends in place in the slots, place the clamps over the ends and secure the clamps.
Step 15: Reinstall the CV axle. Of course, only do this if you removed it.
Part 4 of 6: Lubricating a slip joint
Slip joints are designed to allow a drive shaft to lengthen and shorten as the suspension moves up and down. Without a slip joint, there would be binding in the driveline that would break several components.
- Bearing grease
- Gear oil
- Grease gun
- Nitrile rubber gloves
- Small brush
- Wrenches
Step 1: Check for a zerk fitting. If there is a zerk fitting, then greasing a slip joint is very easy.
Simply use your grease gun to inject the grease into the joint. The use of a grease gun is fairly self explanatory.
- Note: If there is a zerk fitting present, it’s your lucky day, you can stop here. You are done.
Step 2: Remove the axle. Only remove the axle if the slip joint doesn’t have a zerk fitting.
- Tip: Slip joints will be installed in a large variety of axle designs. Lacking a zerk fitting, you will most often need to remove the axle to lubricate the slip joint. Often there are shortcuts, so before you remove the axle, think about it.
Step 3: Clean out the old grease. Remove any old grease from the female and male splines.
Step 4: Apply new grease with a brush to thoroughly cover all the splines. It is most important to make sure the male splines are completely covered.
Once you slide the male end back in it will also lubricate the female splines.
Step 5: Reinstall the drive shaft. Do this in reverse order.
Part 5 of 6: Lubricating a U-joint
Step 1: Check for a zerk fitting. If there is one, use the grease gun to squirt grease into the u-joint.
Continue squeezing grease in until grease begins to extrude out the u-joint bearing caps.
- Note: If the u-joints don’t have zerk fittings and they are dry, they will need to be replaced. Replacing u-joints is a very different process to lubrication and should only be performed by an experienced mechanic.
Step 2: Remove the drive shaft and install new u-joints. Most u-joints have zerk fittings but many newer vehicles do not; when these u-joints need lubing, they will need to be replaced.
Part 6 of 6: Solid axle lubrication
- Gear oil
- Nitrile rubber gloves
- Wrenches
A solid rear axle houses drive shafts inside the tube housing. Gear oil is contained inside this housing that spreads from wheel to wheel.
Step 1: Inspect the solid axle for fluid leaks. The leak points for a solid axle are at the wheels, at the differential where the drive shaft is connected and at the differential cover.
If you see any leaks at any of these points, it should be repaired.
Tip: When expecting for rear axle leaks at the wheels, you will need to be able to differentiate between brake fluid and gear oil. Gear oil is much thicker than brake fluid and will have a very strong pungent smell.
Tip: If there aren’t any leaks, lubricating a solid axle will simply be changing the gear oil. If there are leaks, you will be adding gear oil to make sure it is full until you can locate and repair the leak. Gear oil will not be low if there aren’t any leaks.
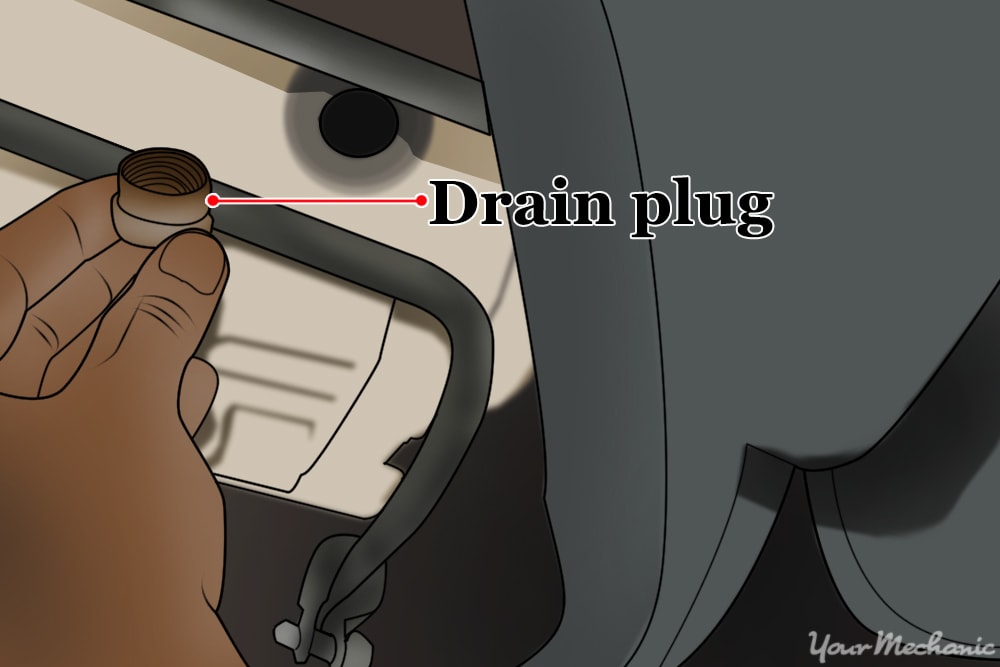
Step 2: Remove the gear oil level plug from the differential. This plug will be much like a drain plug for a motor, but will be mounted approximately half way up the differential.
- Note: There will be a similar plug on the bottom of the differential. This is the drain plug. Do not remove it to check the fluid level in a rear axle. Removing it will drain all the oil out.
Step 3: Check the oil level. With the filler or level plug removed and on flat ground, the level of the gear oil should be even with the bottom threads of the hole that the filler plug screws into.
- Note: If a little bit of gear oil runs out, this is normal. The level does not have to be exact. As long as you can insert your finger slightly into the hole and touch gear oil, it is fine.
Step 4: Drain the rear end. If it is determined that you need to replace the gear oil, remove the drain plug and allow it to drain into a drain pan.
Step 5: Fill with oil. Install the drain plug and fill until gear oil runs out the filler hole.
Step 6: Install the filler hole plug. Once you install the filler hole plug, you are done.
Drive shafts come in many shapes, sizes and designs. Not all drive shafts require lubrication. You will need to determine the requirements of your particular vehicle either by direct inspection or by referring to your repair manual. For the most part, drive shafts are very low maintenance, but when it's time to service them, it can be very easy or very hard depending on the system you vehicle has. If you have any questions about your particular system, be sure to Ask a Mechanic for some quick and helpful advice.