Vehicles that are equipped with a clutch and manual transmission require more attention than a vehicle that has an automatic transmission. As the vehicle ages so does the clutch system.
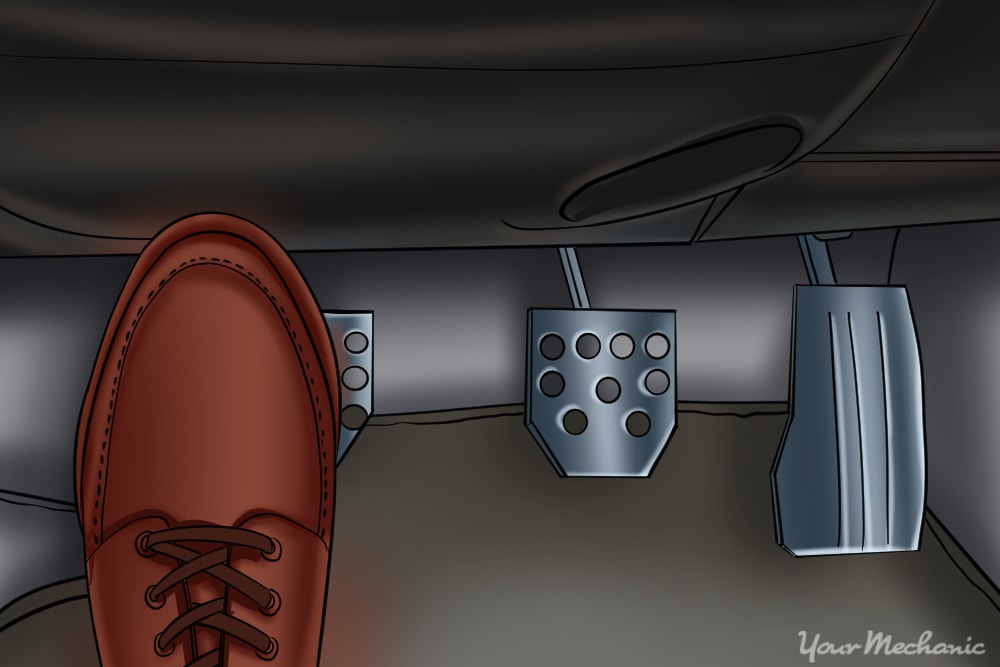
The clutch is designed to engage the transmission to the engine and also to release power from the engine to slow down the input shaft on a transmission to switch gears. A clutch pedal is made for the driver to release the clutch and engage the clutch. Clutch pedals that go from the rest position to full engagement, but stay on the floor and don't spring back up, indicate a problem.
There are four components that can cause the clutch pedal go all the way to the floor:
- Failed clutch release bearing
- Failed slave cylinder
- Failed clutch master cylinder
Broken clutch linkage
Warning: Do not attempt to start the engine and drive the vehicle with the clutch pedal stuck all the way to the floor. You could damage the clutch, the clutch fork, or the transmission.
Part 1 of 4: Diagnosing a clutch pedal on the floor due to failed release bearing
Preparing the vehicle to check the clutch pedal for a failed release bearing
Materials Needed
- Creeper
- Flashlight
- Jack
- Jack stands
- SAE/metric socket set
- Safety glasses
- Wheel chocks
Step 1: Park your vehicle on a flat, hard surface. Make sure that the transmission is in park (for automatics) or in first gear (for manuals).
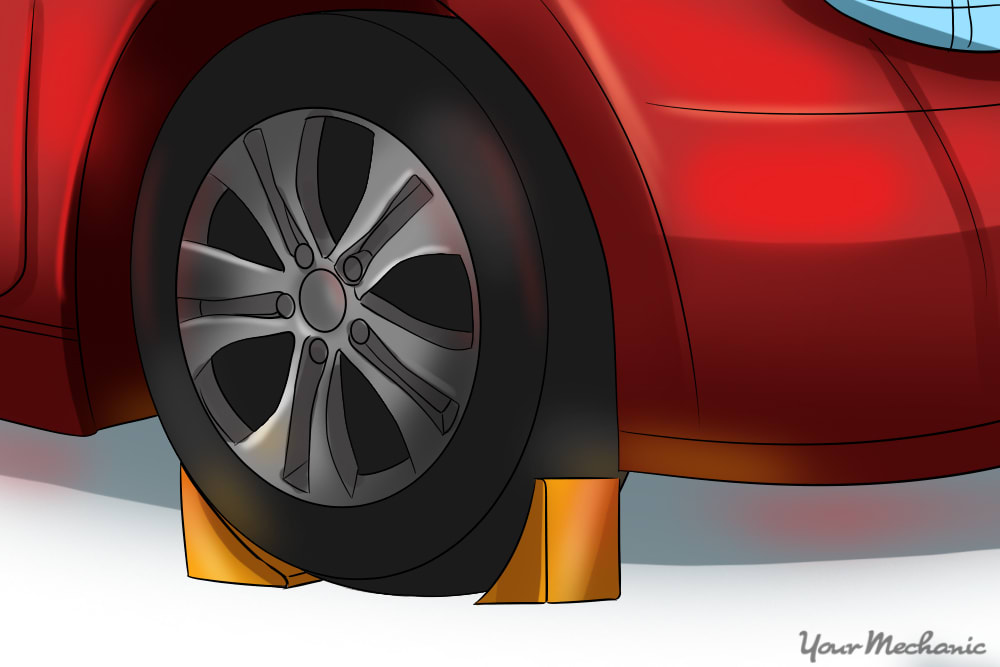
Step 2: Place wheel chocks around the rear tires that will be remaining on the ground. Engage the parking brake to the lock the rear tires from moving.
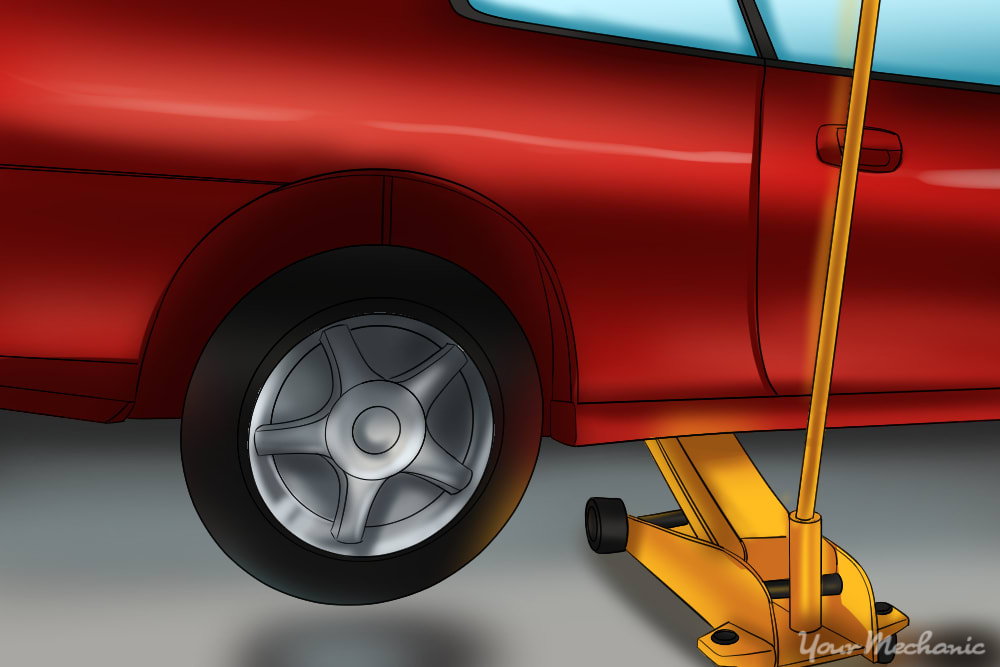
Step 3: Raise the vehicle. Using a floor jack that is recommended for the weight of the vehicle, lift under the vehicle at its specified jacking points until the wheels are completely off the ground.
Step 4: Place the jack stands. The jack stands should go under the jacking point locations. Then lower the vehicle onto the jack stands. For most modern cars, the jacking points for jack stands will be on the pinch weld just under the doors along the bottom of the car.
Checking the condition of the clutch pedal engagement
Step 1: Put on your safety glasses, grab your flashlight, and grab your creeper. Go under the vehicle and check the condition of the clutch cable or hydraulic lines. Make sure that the cable is tight. If you have a hydraulic line, make sure that there are no leaks.
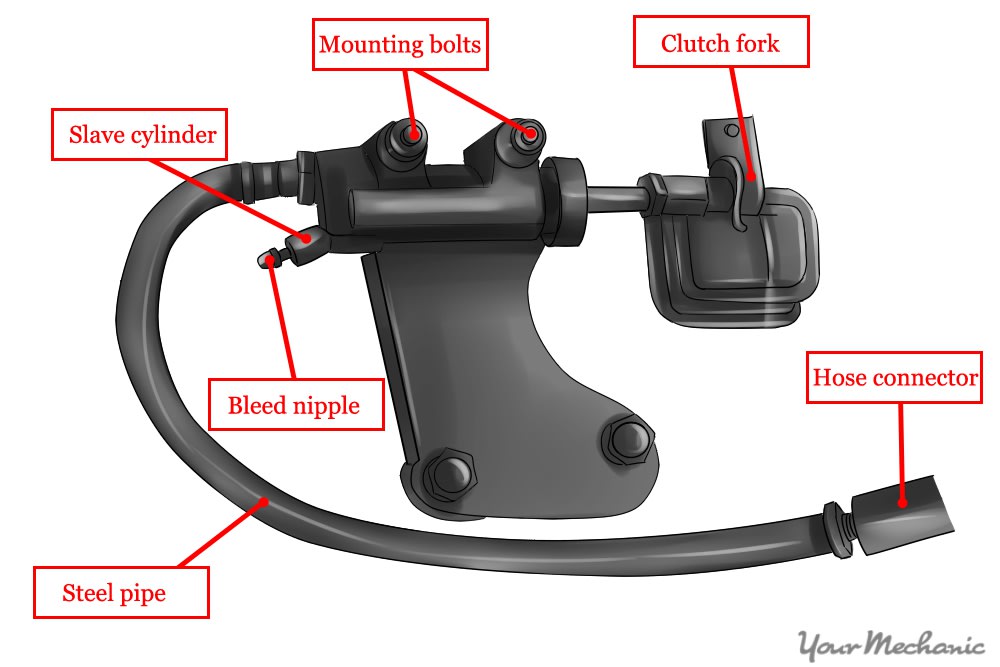
Step 2: Check the slave cylinder if your vehicle has a hydraulic clutch pedal. Make sure that the slave cylinder is not leaking.
Step 3: Remove the inspection cover, if there is any, to the bell housing of the transmission. Use your flashlight to look up in the clutch area to see the position of the fork.
If the fork is all the way engaged but the slave cylinder or cable is not engaged, then the clutch release bearing has failed or the clutch fork has broke.
Lowering the vehicle after performing the diagnosis
Step 1: Collect all tools and your creeper and place them out of the way.
Step 2: Raise the vehicle. Using a floor jack that is recommended for the weight of the vehicle, lift under the vehicle at its specified jacking points until the wheels are completely off the ground.
Step 3: Remove the jack stands and keep them far away from the vehicle.
Step 4: Lower the vehicle to where all four wheels are on the ground. Pull out the jack and put it aside.
Step 5: Remove the wheel chocks from the rear wheels and put the aside.
Have a mechanic inspect your failed clutch release bearing.
Part 2 of 4: Diagnosing a clutch pedal for a failed slave cylinder
Preparing the vehicle to check the clutch pedal on the floor for failed slave cylinder
Materials Needed
- Creeper
- Flashlight
- Jack
- Jack stands
- Safety glasses
- Wheel chocks
Step 1: Park your vehicle on a flat, hard surface. Make sure that the transmission is in park (for automatics) or in first gear (for manuals).
Step 2: Place wheel chocks around the rear tires that will be remaining on the ground. Engage the parking brake to the lock the rear tires from moving.
Step 3: Raise the vehicle. Using a floor jack that is recommended for the weight of the vehicle, lift under the vehicle at its specified jacking points until the wheels are completely off the ground.
Step 4: Place the jack stands. The jack stands should go under the jacking point locations. Then lower the vehicle onto the jack stands. For most modern cars, the jacking points for jack stands will be on the pinch weld just under the doors along the bottom of the car.
Checking the condition of the clutch pedal engagement
Step 1: Put on your safety glasses, grab your flashlight, and grab your creeper. Go under the vehicle and check the condition of the clutch cable or hydraulic lines. Make sure that the cable is tight. If you have a hydraulic line, make sure that there are no leaks.
Step 2: Check the slave cylinder if your vehicle has a hydraulic clutch pedal. Pull back on the boot to the slave cylinder to see if there is any fluid leaking out. Look for any external damage to the slave cylinder.
Check the pin to see if it is broken or damaged. Check to see if the bleeder screw is in place and tight. Check to see if the return spring is attached to the slave cylinder and that it is functional.
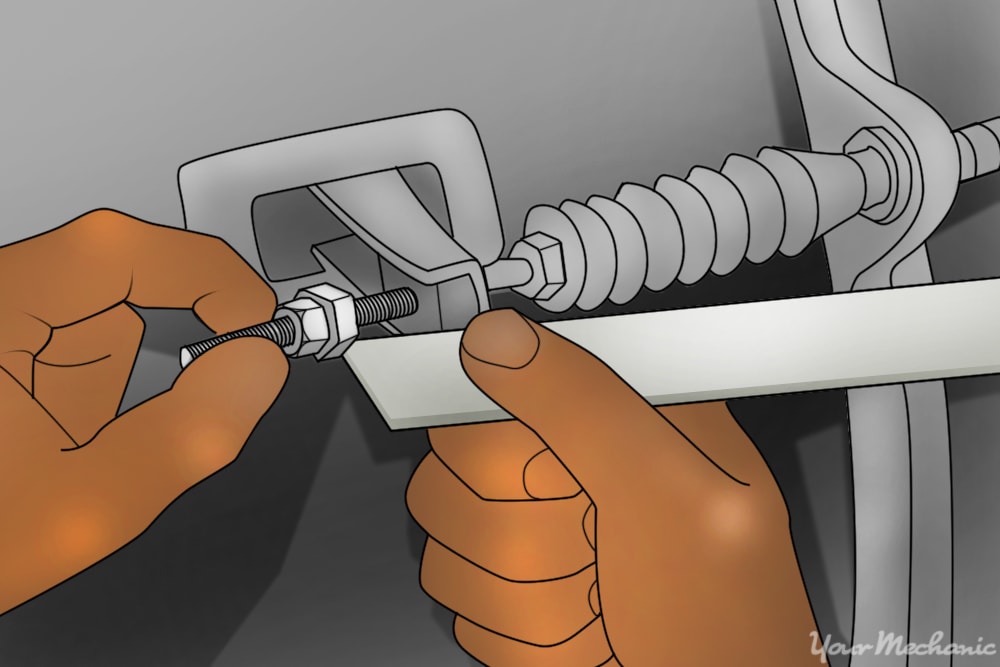
Step 3: Grab a pry bar and push the slave cylinder pin back into its rest position The clutch pedal should return to its rest position as well. Push down on the clutch pedal and see if will return. If the pedal stays on the floor, then the slave cylinder may have an internal leak if there is no external leakage.
Lowering the vehicle after performing the diagnosis
Step 1: Collect all tools and your creeper and place them out of the way.
Step 2: Raise the vehicle. Using a floor jack that is recommended for the weight of the vehicle, lift under the vehicle at its specified jacking points until the wheels are completely off the ground.
Step 3: Remove the jack stands and keep them far away from the vehicle.
Step 4: Lower the vehicle to where all four wheels are on the ground. Pull out the jack and put it aside.
Step 5: Remove the wheel chocks from the rear wheels and put the aside.
If the problem needs attention now, you will need to perform a repair of the failed slave cylinder.
Part 3 of 4: Diagnosing a clutch pedal on the floor for a failed clutch master cylinder
Preparing the vehicle to check the clutch pedal for a failed clutch master cylinder
Materials Needed
- Flashlight
- Safety glasses
- Wheel chocks
Step 1: Park your vehicle on a flat, hard surface. Make sure that the transmission is in park (for automatics) or in 1st gear (for manuals).
Step 2: Place wheel chocks around the rear tires that will be remaining on the ground. Engage the parking brake to the lock the rear tires from moving.
Checking the condition of the clutch pedal engagement
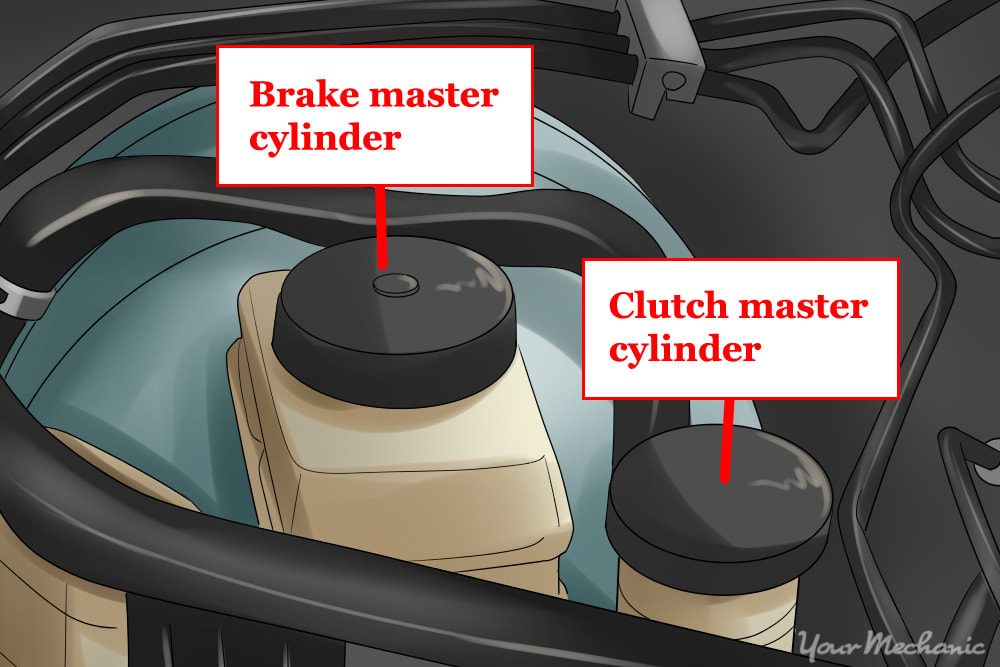
Step 1: Put on your safety glasses and grab your flashlight Open the hood to the engine compartment and locate the clutch master cylinder.
Step 2: Check the condition of the clutch master cylinder and see if there is any leaking fluid. Remove the cap to the reservoir and make sure that there is fluid inside the reservoir.
Put the cap back on and check the shaft in the back of the clutch master cylinder for any breakage or damage.
Step 3: Go into the cab and check the return springs for the clutch pedal. Make sure that the return spring is attached to the clutch pedal and is functional.
Cleaning up after performing the diagnosis
Step 1: Collect all tools and place them out of the way. Remove the wheel chocks from the rear wheels and put the aside.
If the problem of the vehicle needs attention now, you will need to perform a repair of the failed clutch master cylinder.
Part 4 of 4: Diagnosing a clutch pedal on the floor for a broken clutch linkage
Preparing the vehicle to check the clutch pedal for a broken clutch linkage
Materials Needed
- Creeper
- Flashlight
- Jack
- Jack stands
- Needle nose pliers
- SAE/metric wrench set
- Safety glasses
- Wheel chocks
Step 1: Park your vehicle on a flat, hard surface. Make sure that the transmission is in park (for automatics) or in first gear (for manuals).
Step 2: Place wheel chocks around the rear tires that will be remaining on the ground. Engage the parking brake to the lock the rear tires from moving.
Step 3: Raise the vehicle. Using a floor jack that is recommended for the weight of the vehicle, lift under the vehicle at its specified jacking points until the wheels are completely off the ground.
Step 4: Place the jack stands. The jack stands should go under the jacking point locations. Then lower the vehicle onto the jack stands. For most modern cars, the jacking points for jack stands will be on the pinch weld just under the doors along the bottom of the car.
Checking the condition of the clutch pedal engagement
Step 1: Put on your safety glasses, grab your flashlight, and grab your creeper. Go under the vehicle and check the condition of the clutch linkage.
Step 2: Look to see if the clutch linkage or cable is bent, broken, or damaged. Remove the linkage from the clutch fork. You may need to remove a bolt with wrenches or a cotter pin with needle nose pliers to remove the linkage or cable.
Push on the linkage or cable and see if the pedal will move. If the pedal does not move, then the linkage or cable could be damaged and preventing it from moving. Reconnect the linkage or cable back onto the clutch fork.
Lowering the vehicle after performing the diagnosis
Step 1: Collect all tools and your creeper and place them out of the way.
Step 2: Raise the vehicle. Using a floor jack that is recommended for the weight of the vehicle, lift under the vehicle at its specified jacking points until the wheels are completely off the ground.
Step 3: Remove the jack stands and keep them far away from the vehicle.
Step 4: Lower the vehicle to where all four wheels are on the ground. Pull out the jack and put it aside.
Step 5: Remove the wheel chocks from the rear wheels and put the aside.
Have a professional mechanic inspect a broken clutch linkage if necessary.
Fixing the clutch pedal that is on the floor can help improve the drivability of the vehicle and prevent any damage to the clutch or transmission.