When your vehicle's tail lights burn out, it is time for them to be replaced. Tail lights are important safety features that allow other drivers to see your vehicles intentions while driving. Legally, working tail lights are required when driving.
As vehicles age it’s not uncommon to have one or more tail light bulb burn out. The tail light system includes the running light or tail light bulb, the brake light, and the turn signals. Sometimes tail light repair but if the tail light assemblies may have moisture or are broken. For these a new tail light assembly will be required. Various model years may have slightly different steps but the basic premise is the same.
This article will aid in the removal of the tail light, the inspection of the taillight, and bulb replacement.
Part 1 of 3: Removal of the tail light
Part one will go over all the tools and steps required to remove the tail light assembly.
Materials Needed
- Latex Gloves
- Pair of pliers
- Rag or towel
- Screwdriver

Step 1: Locate the components. Confirm which side taillight is out.
This may require a partner to look while you hit the brakes, turn signals, hazards and headlights.
Once it is known what tail light is burned out open the tailgate and look for a pair of black plastic push pins.

Step 2: Removal of push pins. The push pins are made up of 2 parts an inner pin and the outer pin which holds the assembly in place.
A screwdriver will be used to gently pry under the inner pin. Then the pliers will be used to lightly grasp the inner pin and pull it gently till it loosens.

Push pins should be able to be removed completely now and set aside in a safe place to be reinstalled later. If the pins are broken during removal they are a common item at many parts locations and should be replaced.

Step 3: Remove the tail light assembly. With the push pins removed the tail light assembly should be loose.
The tail light will be on a hook and will need to be removed from the hooks clip. Pull back gently and maneuver as needed to pull the tail light assembly from its location.

Step 4: Disconnecting wiring. Set a rag or towel on the back edge the tail light opening and set the housing against the rag.
There will be a safety tab on the wiring. Slide the red lock tab and pull back the tab.
Now the connector will be able to be removed. On connector there will be a release tab, press it gently and pull back on the connector to remove it.
Set the tail light assembly in a safe location.
Part 2 of 3: Bulb replacement

Step 1: Removing the bulbs. The bulb holders will be clipped in. Some years may be slightly different.
Push in the release tabs located on the sides of the bulb holder and pull outwards gently. The bulbs will pull straight out of the holder.
Certain years may require the bulb holder to be twisted, or unclipped to be removed.
- Warning: Bulbs should not be touched with bare hands due to oil that will contaminate them.

Step 2: Inspect the bulb. The location and which bulbs are bad should have been noted in previous steps.
Burnt out bulbs will have a broken filament, in some cases the bulb may have a darkened burnt look. Inspect all bulbs as necessary.
- Tip: Care should be taken to wear latex gloves when handling bulbs. The oil on our skin can damage bulbs and cause them to prematurely fail.
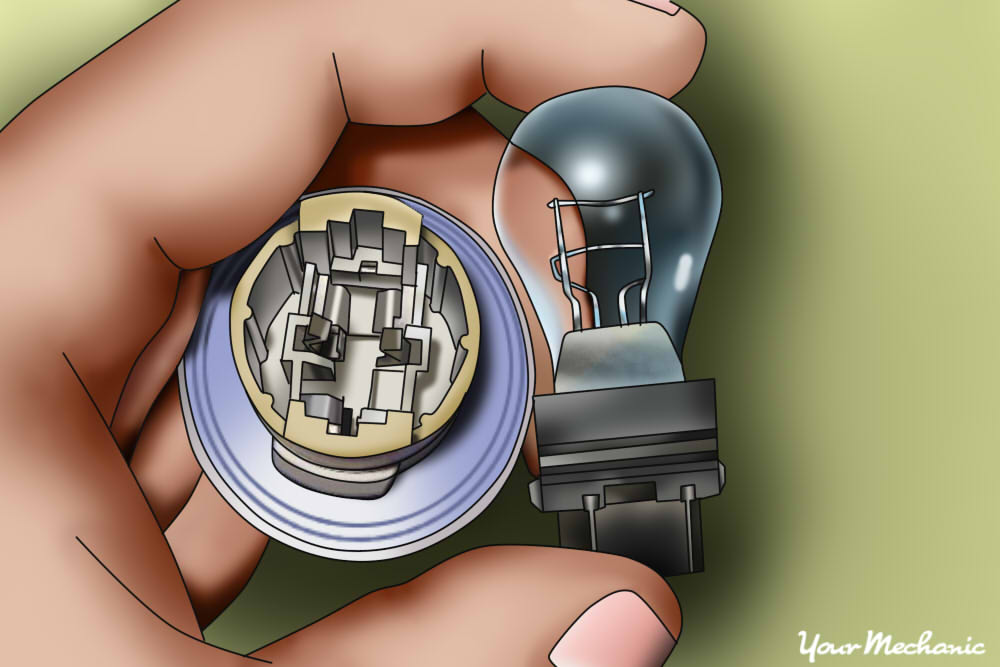
Step 3: Replace the bulb. Once the bulbs that need replaced are found they will be removed from the holders and the replacement bulb put in its place.
Make sure the bulb is secured all the way into the bulb holder and reinstall bulb holder into tail light assembly.
In cases where a new assembly was needed the bulb holders will be swapped into the new assembly.
Part 3 of 3: Tail light installation

Step 1: Install the wiring. Insert connector back on to the tail light housing socket.
Make sure connection is locked in place and does not pull out.
Hook up the red safety and lock it back in place to make sure the connector does not move once installed.

Step 2: Reinstall the housing. Hook tail light housing tab back into its proper slot.
Gently place the housing back into its slot, it may fit slightly loose at this point.
Then push the loosely install the push pins from earlier.
Do not lock them into place yet.
Now test the tail light assembly for proper operation again with a partner if needed making sure all the bulbs light up as designed.

Step 3: Final installation. Securely fasten the push pins by applying light pressure to the center section until it is locked into place.
Inspect tail light and make sure the assembly is sitting properly. A wet cloth can be used to wipe any dust off the tail light assembly.
At any point if any of these steps make you feel uneasy do not hesitate to reach out to a professional mechanic for assistance.
Replacing a tail light on a van, SUV or hatchback can be a simple operation as long as care is taken and a little elbow grease. Remember to avoid touching bulbs with bare hands. A do it yourself repair such as replacing the tail light can be a fun time and allow you to learn more about your vehicle. In the case where any of these steps are uncomfortable do not hesitate to call a professional service such as the certified technicians at YourMechanic to replace your tail light bulb for you.