The heater control valve is a device used to allow or block the flow of heated engine coolant into the passenger compartment. The control valve can be mechanically or electronically activated and is commanded by user input. If the valve is leaking, you may see dried residue close to the color of the system coolant. These are the remnants of some of the dyes and chemicals used in the engine coolant.
The heater control valve is part of the vehicle's cooling system as coolant does flow through this valve. Engine operation generates a lot of heat and this heat gets transferred from the engine assembly to the liquid coolant in the cooling system to be cooled by air flowing across the radiator. The radiator cooling fan, generally found at the front of the vehicle, pulls or blows cool air across the radiator which transfers the heat to the air and the cooled liquid coolant inside the system returns to the engine.
The heater control valve exists in a part of the system after the engine, but before the radiator so the coolant in this part of the system has been heated when it arrives to the valve. Once the valve is activated, the heated coolant can flow into the passenger compartment and fill the heater core. Air is blown across the heater core which removes heat from the coolant and the heat is transferred to the air that flows through the vents in the passenger compartment.
-
Note: The heater core inside the passenger compartment can act as a mini-radiator. The process of creating heat for the passengers cools the liquid coolant flowing through the heater core. In the event of the vehicle overheating, sometimes the heat in the vehicle can be activated to assist in cooling until the vehicle is moved to a safe stopping location. Never drive an overheating vehicle or an extended period of time.
Typically, the mechanical heater control valve is replaced because it is leaking. The mechanical unit can leak coolant or the vacuum diaphragm can rupture causing a vacuum leak which will stop control valve operation. The cooling system is pressurized so a coolant leak at the control valve can cause the coolant level to become very low and cause the engine to overheat.
-
Warning: Do not use stop leak on any type of vehicle with a coolant leak. The radiator and heater cores have very narrow passages for the coolant to flow through and it is very easy for the stop leak to block the passage altogether which can decrease the efficiency of the cooling system.
Electronic valves may short out, lose their function and require replacement because of the electrical fault. This occurrence may cause a trouble code to be stored in one of the vehicle's control modules to be displayed by the check engine light or a warning indicator on the climate control screen(if applicable to your vehicle).
Part 1 of 1: Replacing a heater control valve
Materials Needed
- Basic mechanics tool set
- Channellock pliers
- Coolant recovery container
- Flashlight
- Gloves
- Hose pick tool
- New Coolant
- Safety Goggles or Glasses
- Silicone Spray Lubricant
- Spring clamp removal tool
- Temperature gun
Vehicle service manual
Warning: Never perform cooling system services on a hot vehicle. The system may be under pressure and contain coolant at scalding temperatures. Let the vehicle sit for at least 2 hours if it has been driven recently.
Step 1: Prepare your work area. Safety is #1 so put on your safety goggles, gloves and set your drain pan underneath the vehicle.
- Tip: The vehicle service manual is a very handy tool. This document lays out very important service information specific to your year model. Follow the steps in the service manual to drain the cooling system. Draining the system can prevent large spills. Remember to capture the old coolant in a container and dispose at a local service facility.
Step 2: Prepare the vehicle for service. Pump brake pedal to relieve system vacuum (for a vacuum-operated HCV). If you are working on an electronic HCV, it may be necessary to disconnect the battery.
Step 3: Drain the cooling system. Find the radiator petcock or disconnect the lower radiator hose to empty the cooling system. Try to contain all of the fluid.
- Tip: When the fluid stops dripping, close the drain or reattach the lower radiator hose now. Make sure the parts are secure now. If you forget this step, you may end up wasting new coolant!
Step 4: Gain access to control valve. Follow the directions laid out in the service manual to access the heater control valve. Some are out in the open while others may be hidden behind a panel.
Step 5: Add some lubrication. Use silicone spray to lubricate the hoses clamp surfaces. This will make it a bit easier to navigate the clamps along the rubber hose section.
Warning: Do not use oil or any petroleum based lubricant on the rubber components. This will cause the rubber to swell and possibly leak over time.
Note: Notice the way all parts are mounted and the direction of the hoses going to and from the control valve. You will want to mount the new control valve exactly the same and have the hoses connected properly so the coolant flows through the valve in the proper direction.
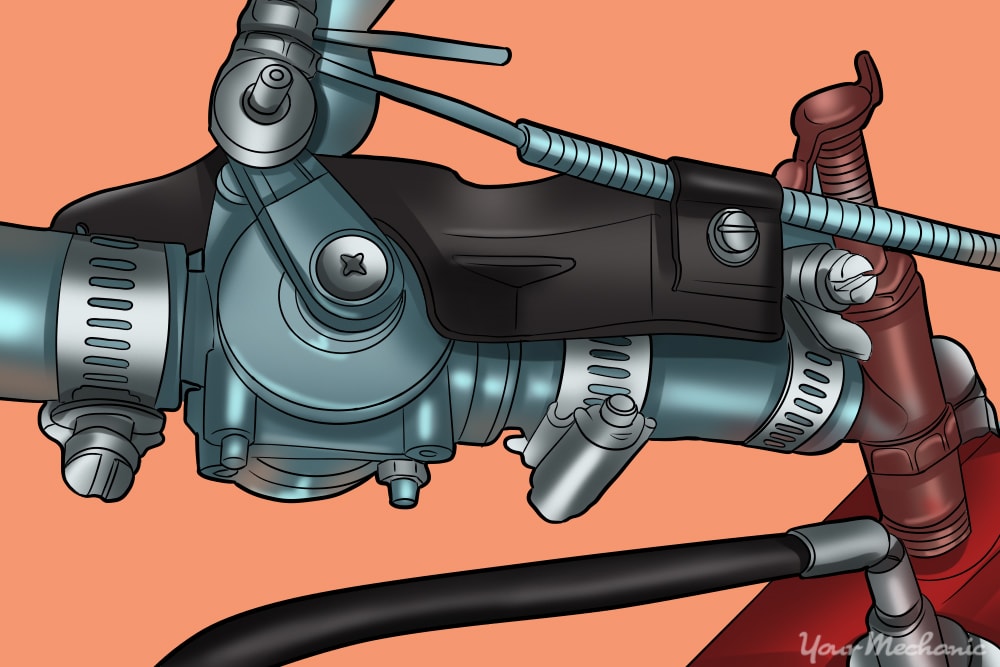
Step 6: Remove the hose clamps. With the clamp removed, you may notice the hose is still sealed to the control valve fairly tightly. Here are a couple of ways to release the rubber hose from the control valve.
Add more silicone pray to the area and grab a pair of channellock pliers. Adjust the pliers so that you can grip the hose without crushing the assembly and gently rock the hose back and forth until you feel it break free. You should be able to twist the hose with your hand and pull it off.
- Another way to release the hose with a hose pick tool. This tool has a pointed end that you can slip under the hose to create a gap between the hose and valve. Slide the pick tool under the rubber hose and move the tool along the area of the hose to pry the rubber hose from the control valve. Silicone spray can be used again here for a little extra lubrication.
Step 7: Inspect and compare new and old parts. Inspect the new and old devices to make sure they seem to match in form and function before attempting to install the new device.
- Note: If your vehicle is equipped with spring style hose clamps, now is the best time to replace them with a screw clamp. The spring clamp is designed to be used once. When you remove the spring clamp, it will lose some of it’s tension each time it is compressed and can cause a leak later on. Spring clamps cannot be adjusted like screw clamps can.
Step 8: Inspect surrounding or adjoining components. Take a look at the heater hoses before putting everything together as well. If the hoses feel stiff or crunchy, this would be a great time to replace them. If the hoses are swollen as if they were oil soaked, this may be a sign of a much larger issue within the cooling system and a block test must be performed in the event of a head gasket leak.
Step 9: Reassembly Reverse the removal instructions and assemble the heater control valve and hoses in the proper configuration. Remember to close the radiator drain or fasten the lower radiator hose to avoid spilling new coolant.
Step 10: Refill the system with coolant. Fill the radiator or expansion tank with the proper mix of engine coolant until the reservoir is full. Start the engine and allow it to come up to operating temperature. You will see bubbles as air escapes from the system.
Tip: While waiting, command max heat from the climate control and turn the fan speed to the highest setting. This will open the heater control valve and allow coolant to flow through the heater core to remove and air from the system. The air from the vent should be coming out very hot once the heater core is full.
You can use your temperature gun to observe cooling system function. If the control valve is open, the hoses on each side of the valve should be about the same temperature. The opposite hose coming from the heater core should be cooler than the hose with coolant going in. This is a sign of a well functioning heater core.
For many vehicles, the replacement of the heater control valve is fairly straightforward if the valve is right out in the open. Otherwise make sure to adhere to the procedures in the service manual to avoid damaging other components. Contain your used engine coolant and take it to a local repair facility to be recycled. If used or new coolant is spilled, try to clean it up. Do not use a water hose to wash the chemicals into a storm drain as this is bad for the environment.