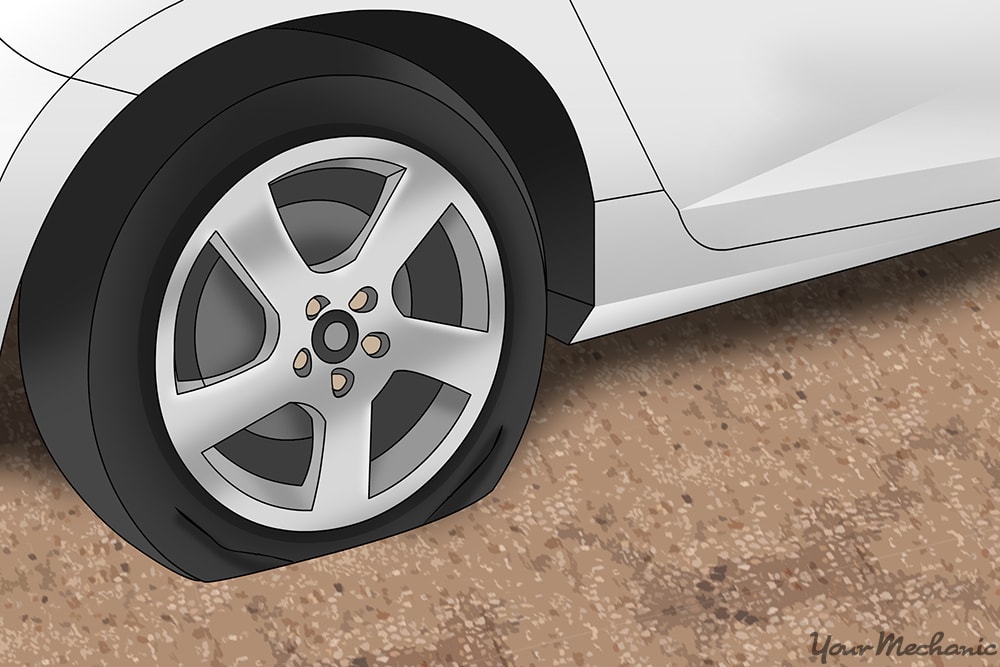
Getting a flat tire is one of the most inconvenient and potentially dangerous situations to find yourself in, especially if you’re on the freeway surrounded by other cars. Luckily, you have a few different options at hand to change or fix the tire. Each option requires only a few simple tools and is temporary until you can take the tire into a shop to have it fixed or changed by a professional. In the situation where there is damage to the sidewall of the tire, you will most likely have to purchase a new tire. In any case, follow the information below to learn how to change or repair your flat tire.
Method 1 of 2: Changing your flat tire if you’re on the road
Getting a flat tire on the road is a huge inconvenience that is also dangerous, even when you’re parked on the shoulder with traffic driving by. Most cars are equipped with a spare tire, and a lot of cars have a full-size spare that is exactly the same size of the other tires on the car.
If, for some reason, your car does not have a spare tire, it is recommended that you purchase one immediately in order to avoid being stranded on the road for what could be a very long time, depending on where you get a flat tire, and how long it takes roadside assistance to get to you.
Materials Needed
- Flashlight
- Floor jack
- Jack stands (optional)
- Lug wrench
- Screwdriver (optional)
- Spare tire
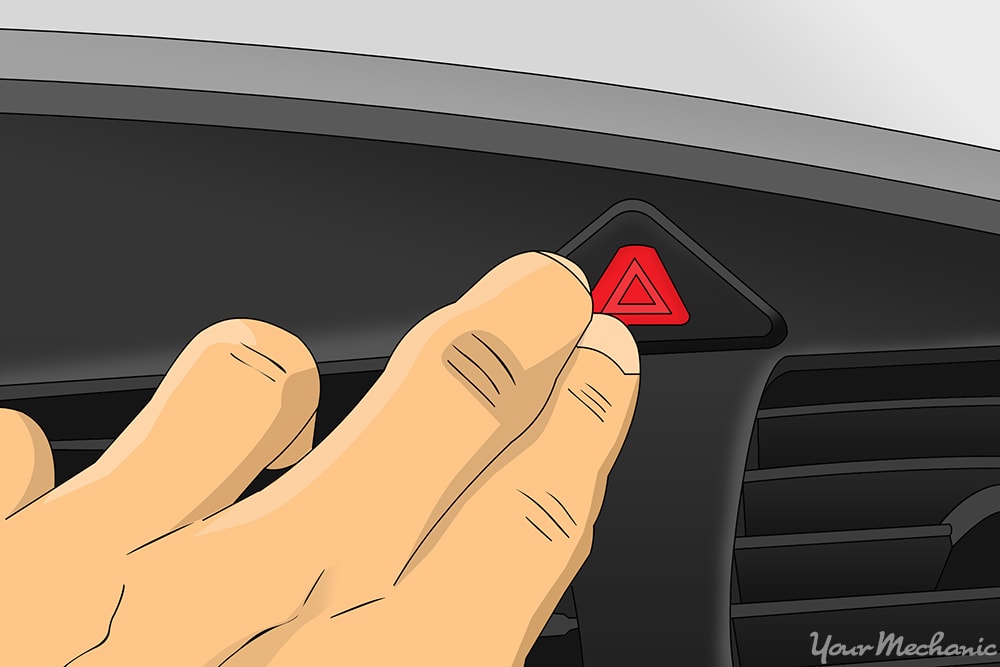
Step 1: Pull over immediately and park safely. If you notice you have a flat tire while driving, pull your vehicle off the road as soon as possible, and try to find a safe place to park it.
Activate the emergency lights to make your vehicle more visible to oncoming traffic (always do this, but especially at night) and open the hood of the vehicle to indicate to other vehicles you are in distress.
- Warning: If you drive your vehicle with a flat tire, not only are you severely damaging the tire beyond repair, but you might be causing irreparable damage to the wheel and even the axle. It’s very important to pull-over as soon as you realize a flat tire to avoid costly damages that can put your car in the shop for an extended period of time.
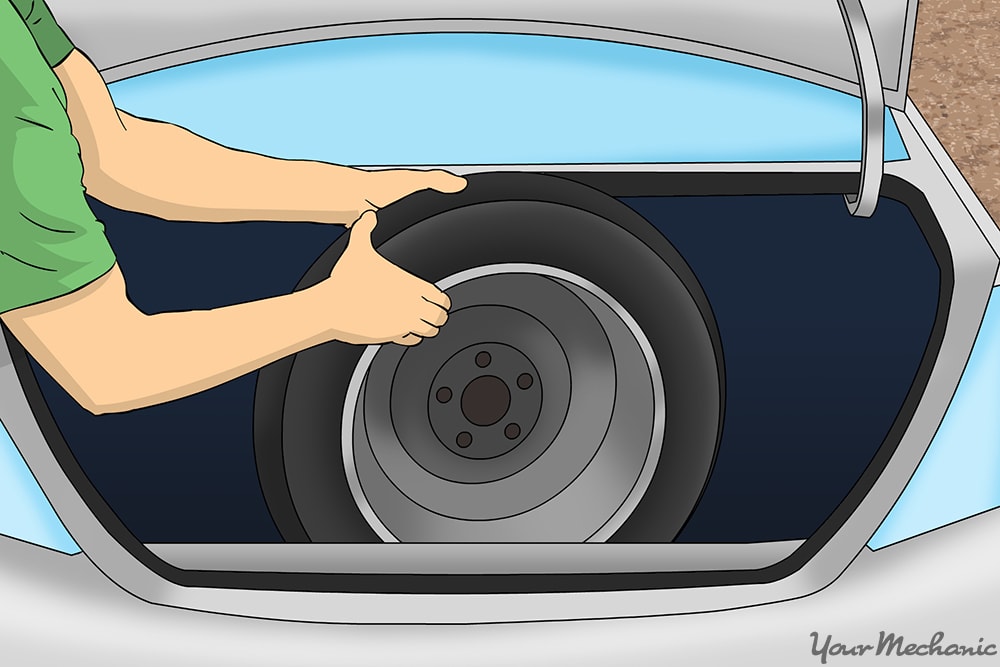
Step 2: Prepare your tools and spare. Access the spare tire, which is usually in the trunk with the rest of the tools you need.
Take it out and rest it near the tire that needs changing. If you have a full-size spare tire, you can replace it with any tire on the vehicle. If you only have a small spare tire, or what is also known as a “donut” spare, you can only replace it with a tire that is non-driven.
This means that if you have rear-wheel drive and you have a flat tire at the back of the vehicle, you will have to remove a tire from the front of the car and replace that full-size tire with the flat tire at the rear. You can then attach the “donut” spare to the front end.
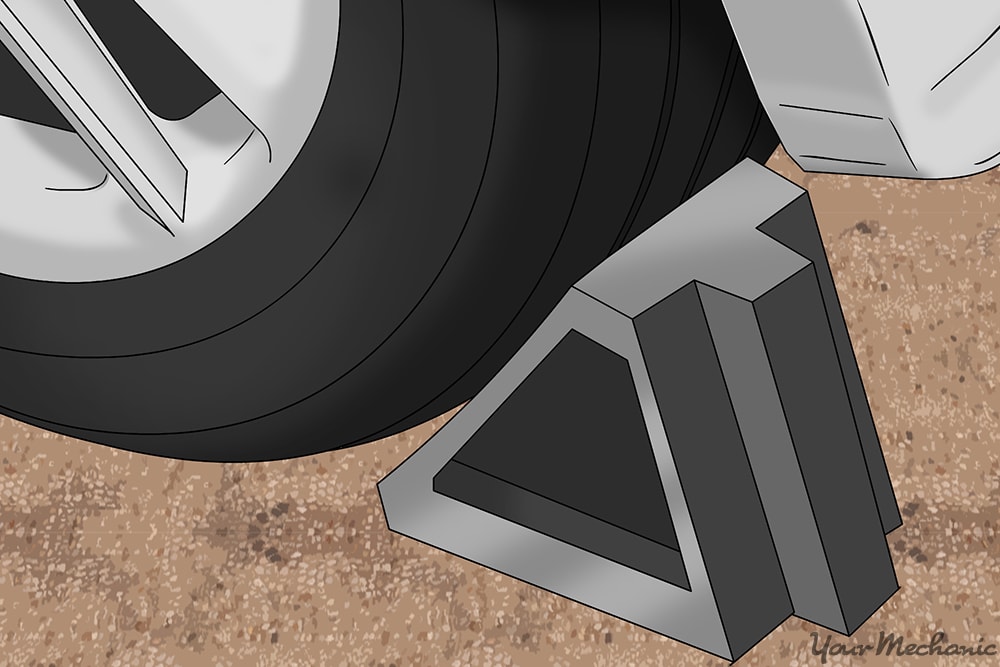
Step 3: Chock the wheels. When you’re ready to use the floor jack, chock the tires at the opposite end of the vehicle (if possible).
Engage the parking brake so your vehicle remains steady while you’re using the floor jack.
- Warning: You must have secured wheels that are unable to roll before you use the floor jack, or you could risk severe injury. You must also have a solid, flat ground, like cement, under which to operate the floor jack or you risk the floor jack tilting the vehicle falling.
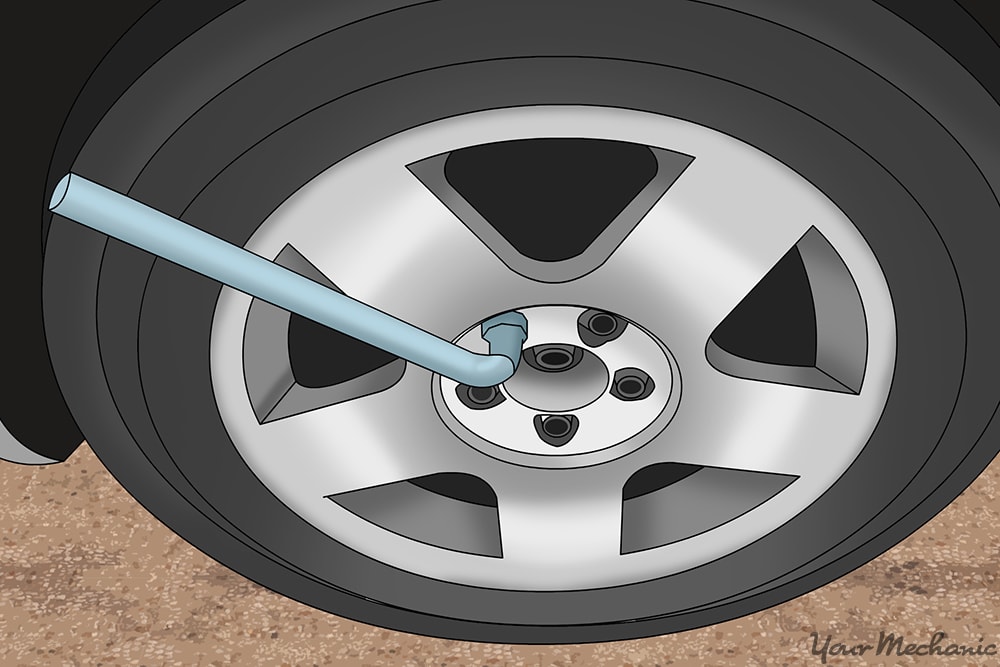
Step 4: Loosen the lugs or bolts. You might need a screwdriver to remove part of the wheel or hubcap that covers the lug nuts or bolts.
Before you raise the vehicle, take the lug wrench and loosen the lugs nuts or bolts fixing the wheel to the axle. Do not remove the lug nuts or bolts, only loosen them so they can be easily removed once the vehicle is lifted.

Step 5: Raise the vehicle with the floor jack. Use the floor jack to raise the vehicle after you’ve loosened the lug nuts or bolts.
Make sure you place the floor jack underneath a solid spot beneath the chassis that is designed to be strong enough to withstand the weight of the vehicle. These are called “jack points” and they are usually outlined in the owner’s manual.
Raise the vehicle slowly and pay attention to anything that seems wrong. If the jack begins to tilt or the base begins to come off the ground, lower the vehicle immediately, rearrange the jack, and start over.
Step 6: Remove the lug nuts or bolts. Once you’ve raised the vehicle, remove the lug nuts or bolts completely and store them in a safe place.
Step 7: Remove the flat tire and set it aside. Carefully remove the tire and place it somewhere secure.
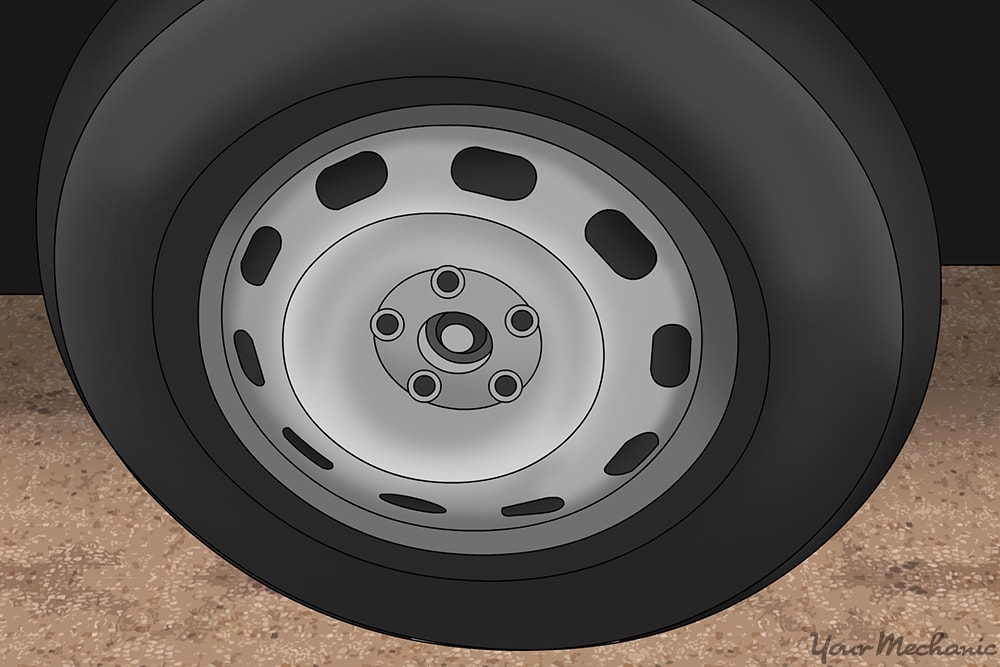
Step 8: Attach the spare tire to the axle. You might have to raise the vehicle a bit more to fit the spare tire if it is a little bigger than the flat tire.
Place the wheel on the axle, and begin to refit the lug nuts until they are hand tight. Do not tighten them completely.
Step 9: Lower the vehicle a little bit. This is so that some of the vehicle’s weight rests on the spare.
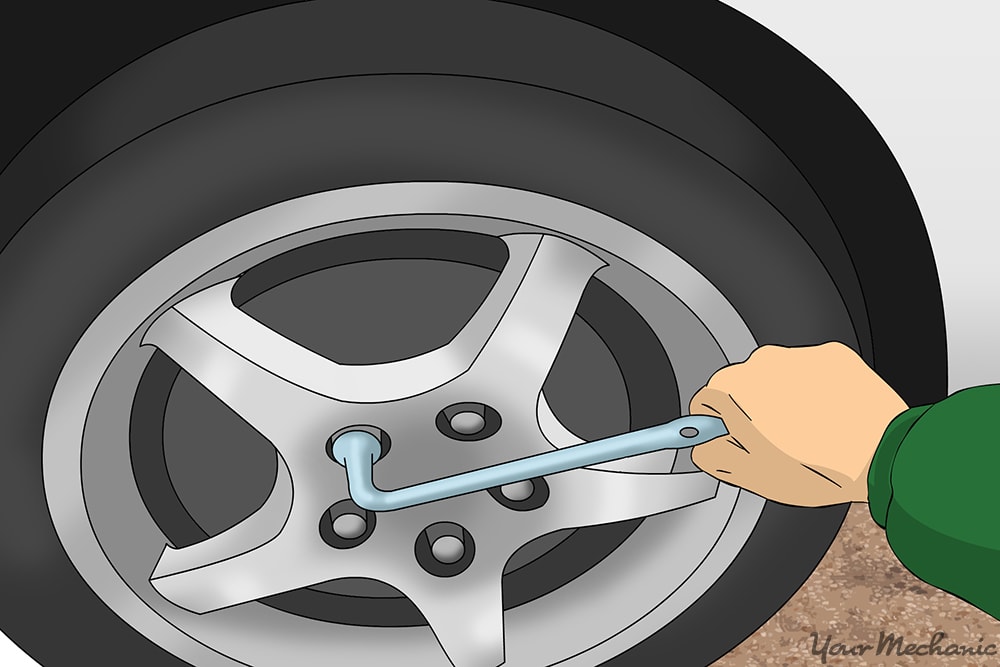
Step 10: Tighten the lug nuts completely. Tighten the lug nuts with the lug wrench by tightening one and then tightening the next one directly across from it.
This pattern (somewhat like drawing a star on paper in one single stroke) ensures there is equal tightness on each lug nut.
Step 11: Lower the vehicle completely and clean up. You can now lower the vehicle completely and remove the floor jack.
Check the tightness of the lug nuts a second or third time to be completely sure they’re secure. Clean up all your equipment and put the flat tire in the trunk where the spare had been. Take your flat tire to a repair shop to have it repaired by a professional.
Method 2 of 2: Fix your flat tire with a plug kit
If you notice a flat tire is flat while you’re at home or at a gas station, you can repair it with a plug kit rather than changing the tire. A plug kit can be purchased from most auto part shops, and they are very inexpensive. It is recommended that you keep a plug kit in the trunk with your other tools.
Tire plugs are used for punctures that are up to ¼” in diameter, and are best used as a temporary repair for the tread part of the tire only, not the sidewall. It is recommended that after a tire is plugged, you take it to a repair shop to be fixed by a professional for a full, long-term repair.
Materials Needed
- Air compressor/pump
- Floor jack
- Jack stands (optional)
- Lug wrench
- Needle nose pliers
- Screwdriver (optional)
- Tire plug kit
Step 1: Chock the tires before you lift the vehicle. Chock the tires at the opposite end of the vehicle to ensure they don’t roll.
Engage the parking brake so your vehicle remains steady while you’re using the floor jack.
-
Warning: You must have secured wheels that are unable to roll before you use the floor jack, or you could risk severe injury. You must also have a solid, flat ground, like cement, under which to operate the floor jack or you risk the floor jack tilting and the vehicle falling.
Step 2: Loosen the lugs or bolts. You might need a screwdriver to remove part of the wheel or hubcap that covers the lug nuts or bolts.
Before you raise the vehicle, take the lug wrench and loosen the lugs nuts or bolts fixing the wheel to the axle. Do not remove the lug nuts or bolts, only loosen them so they can be easily removed once the vehicle is lifted.
Step 3: Raise the vehicle with the floor jack. Use the floor jack to raise the vehicle after you’ve loosened the lug nuts or bolts.
Make sure you place the floor jack underneath a solid spot underneath the chassis that is designed to be strong enough to withstand the weight of the vehicle.
Raise the vehicle slowly and pay attention to anything that seems wrong. If the jack begins to tilt or the base begins to come off the ground, lower the vehicle immediately, rearrange the jack and start over.
Step 4: Remove the lug nuts or bolts and the tire. Remove the lug nuts or bolts completely and store them in a safe place so they do not get lost.
Step 5: Remove the flat tire. Take the tire off the axle, locate the puncture, and set it aside to be fixed.
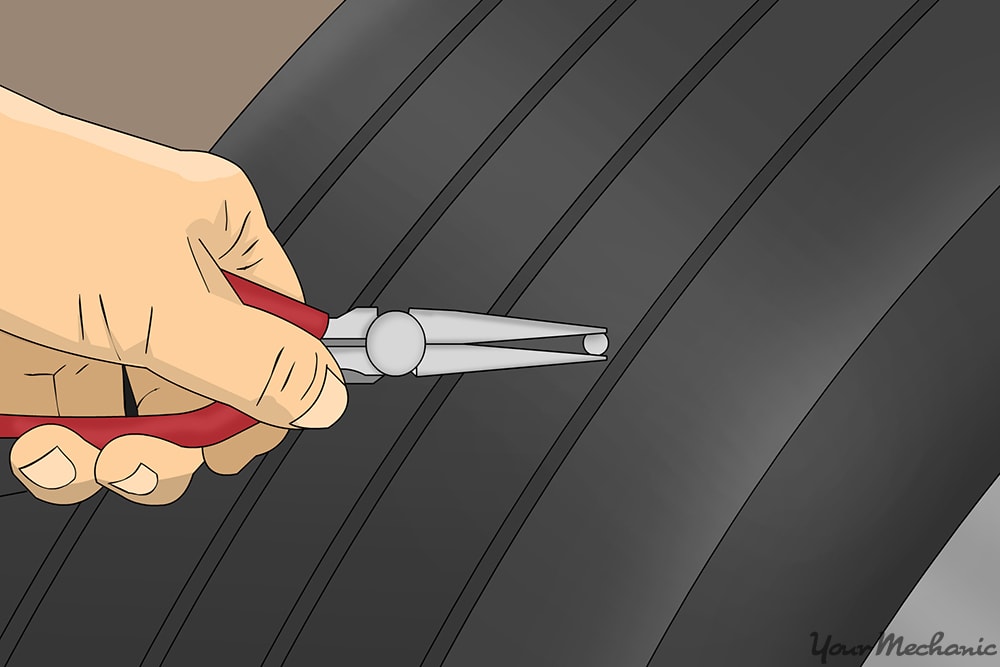
Step 6: Locate the object and remove it. You might notice an object sticking out of the tire; this is the culprit that caused the puncture, like a screw, a nail, or some other object.
Use the needle nose pliers to remove the object completely. This might take some strength.
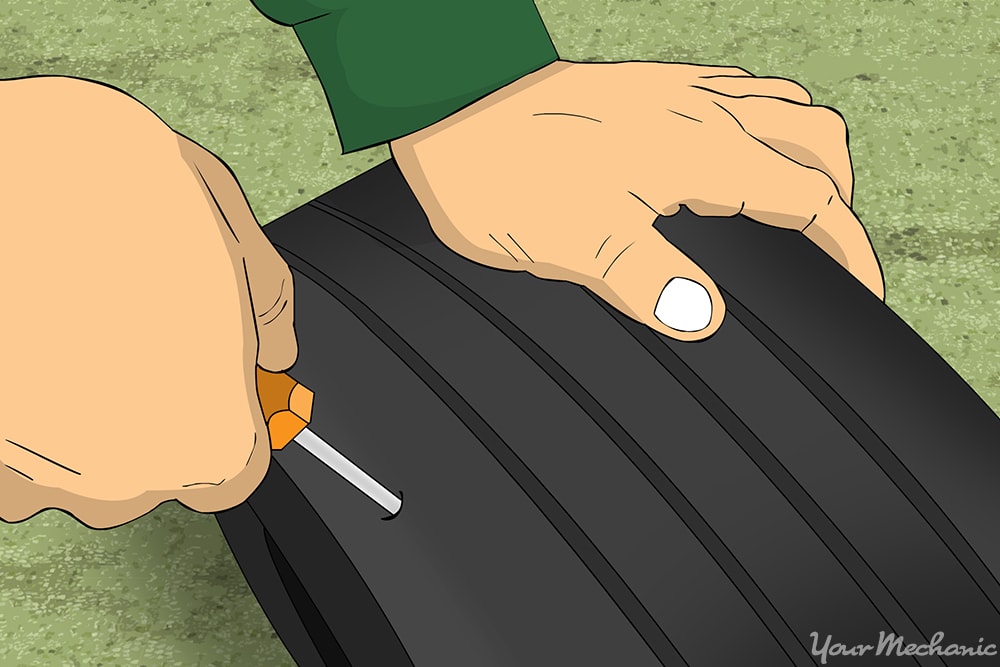
Step 7: Use the rasp tool to clean the puncture. The plug kit will come with a rasp tool, which is similar to a file and is used to clean dirt, grease or other contaminants.
The rasp tool also smooths out the puncture. Place the rasp inside the puncture and draw it back and forth many times and from all sides, until the puncture hole is clean and ready for the plug.

Step 8: Plug the puncture hole with the thread. The plug kit contains a long cord coated in a sticky substance like tar, and it might come with adhesive and a threading tool.
Use the threading tool and thread the cord into the eye of the tool to about half way, according to the instructions. If the plug kit comes with adhesive, apply the adhesive before you thread the cord.
Force the threading tool into the puncture hole with the cord attached to it. Force it straight down – do not twist – until it is about 2/3 of the way in with some length of the thread still protruding from the hole. Force the threading tool straight back out to set the plug. This may also take some serious arm strength. Let any adhesive dry for a few minutes before proceeding to the next step.

Step 9: Remove the threading tool and cut the plug. Remove the threading tool from the plug after the plug is set, and cut the excess plug until it is about flush with the tire tread.
Use more adhesive to cover the plug before you reflate the tire with air.
Step 10: Reflate the tire. Reflate the tire with air according to the specifications on the wall of the tire, or on the plaque inside the door jamb on the driver’s side of the vehicle.
Do not exceed the tire pressure specifications, and check the tire pressure with a pressure gauge multiple times to confirm the proper tire pressure.
Step 11: Remount the tire on the vehicle. Place the wheel on the axle, and begin to refit the lug nuts until they are hand tight.
Do not tighten them completely. Lower the vehicle a little bit so that some of the vehicle’s weight rests on the tire.
Step 12: Tighten the lug nuts completely. Tighten the lug nuts with the lug wrench or tire iron by tightening one and then tightening the next one directly across from it.
This pattern (somewhat like drawing a star on paper in one single stroke) ensures there is equal tightness on each lug nut.
Step 13: Lower the vehicle completely. You can now lower the vehicle completely and remove the floor jack.
Check the tightness of the lug nuts a second or third time to be completely sure they’re secure. Take your tire to a repair shop to have it repaired by a professional.
Changing a flat tire is not for everyone. It takes a decent amount of strength and effort, but can be done if you are careful and determined. If you have any questions about the process, Ask a Mechanic for some helpful advice, and if you notice your tires have uneven wear, have one of YourMechanic’s certified mechanics perform an inspection.