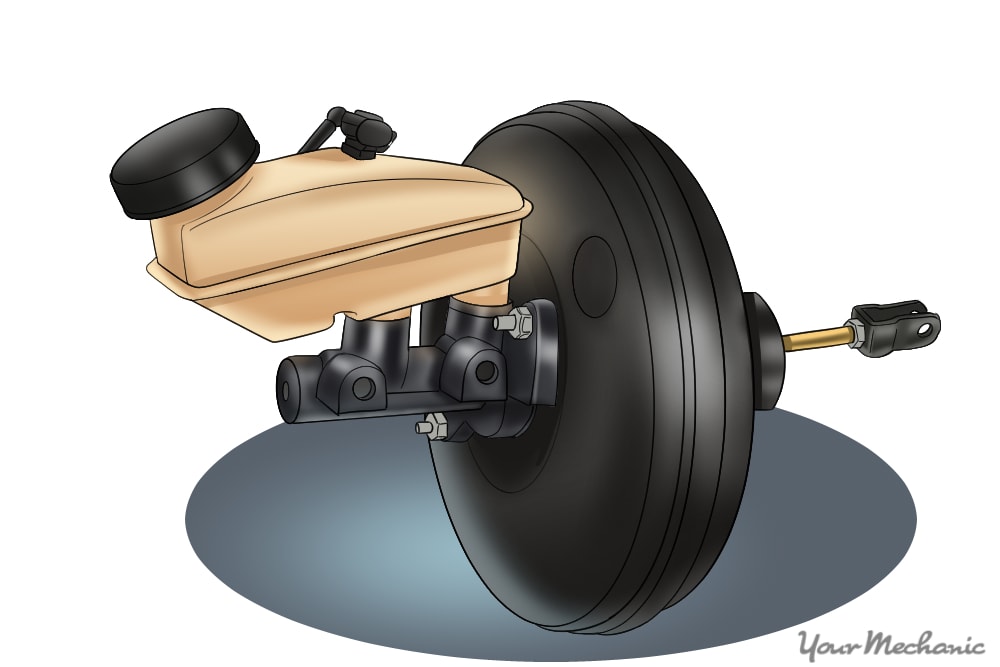
The vacuum brake booster is located between the brake master cylinder and the firewall. Replacing the booster involves removing the brake master cylinder, so if you suspect that the brake master isn’t up to par, this is also a good time to replace that as well.
If your vacuum brake booster is failing, you may notice that it takes a little more leg energy to bring the car to a stop than it used to. If the problem is getting worse, the engine may want to shut off when you come to a stop. Pay attention to these warnings. You can drive with a bad brake booster in normal traffic, but when something unexpected happens and you really need to bring the car to a stop in a hurry, if the brake booster is not in good condition you’ll be in trouble.
Part 1 of 3: Removing the booster
Materials Needed
- Brake bleeder wrench
- Brake fluid
- Caps for the brake lines (1/8")
- Catch bottle with clear plastic tube
- Combination wrench set
- Jack and jack stands
- Light source
- Line wrenches
- Lug wrench
- Needle nosed pliers
- Pushrod measuring tool
- Rubber plugs for the line openings in the master cylinder
- Safety glasses
- Screwdrivers, Phillips and straight
- Socket wrench set with extensions and swivels
- Turkey baster
- Workshop manual

Step 1: Draw out the brake fluid. Using a turkey baster, suck the fluid out of the master cylinder into a container. This fluid will not be re-used, so dispose of it properly.
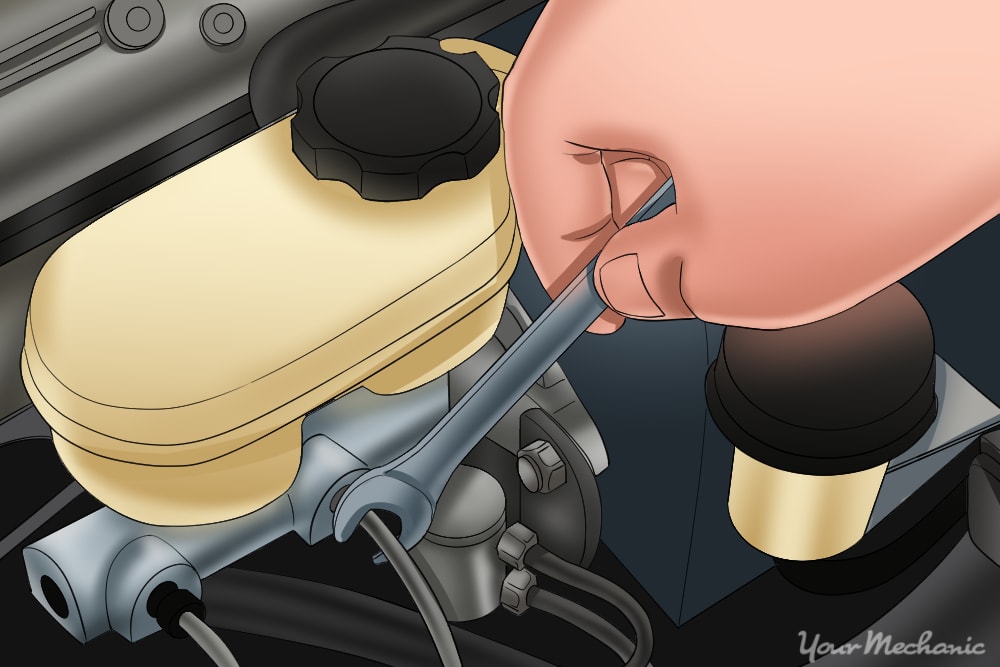
Step 2: Loosen the brake lines. You may not want to remove the brake lines at this point, because they will start dripping fluid as soon as they are disconnected. But it’s best to break the lines loose from the master cylinder before any of the bolts holding it to the car are loosened.
Use your line wrench to loosen the lines, then just screw them back on lightly until you are ready to take the master cylinder off.
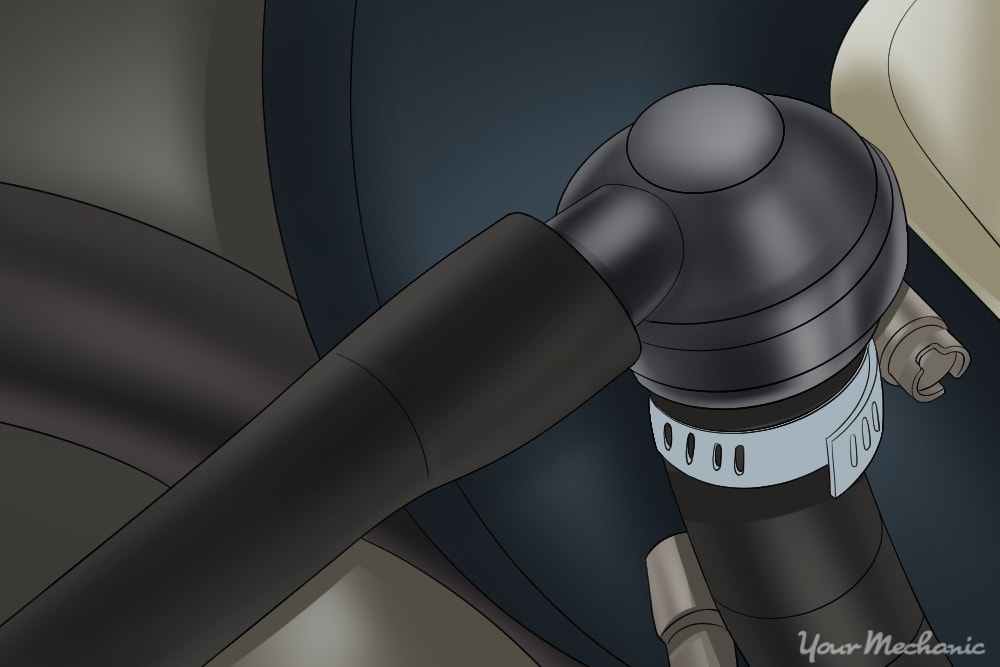
Step 3: Disconnect the vacuum line. There is a large vacuum hose attached to the booster via a plastic check valve that looks like a right angle fitting. Disconnect the vacuum hose, and pull the valve out of the fitting in the booster. This valve should be replaced along with the booster.
Step 4: Remove the master cylinder. Remove the two mounting bolts holding the master cylinder to the booster, and disconnect any brake light switches or electrical connectors. Unscrew the brake lines and install the rubber caps on the line ends, then put the plugs in the openings in the master cylinder. Grasp the master cylinder firmly and pull it off the booster.
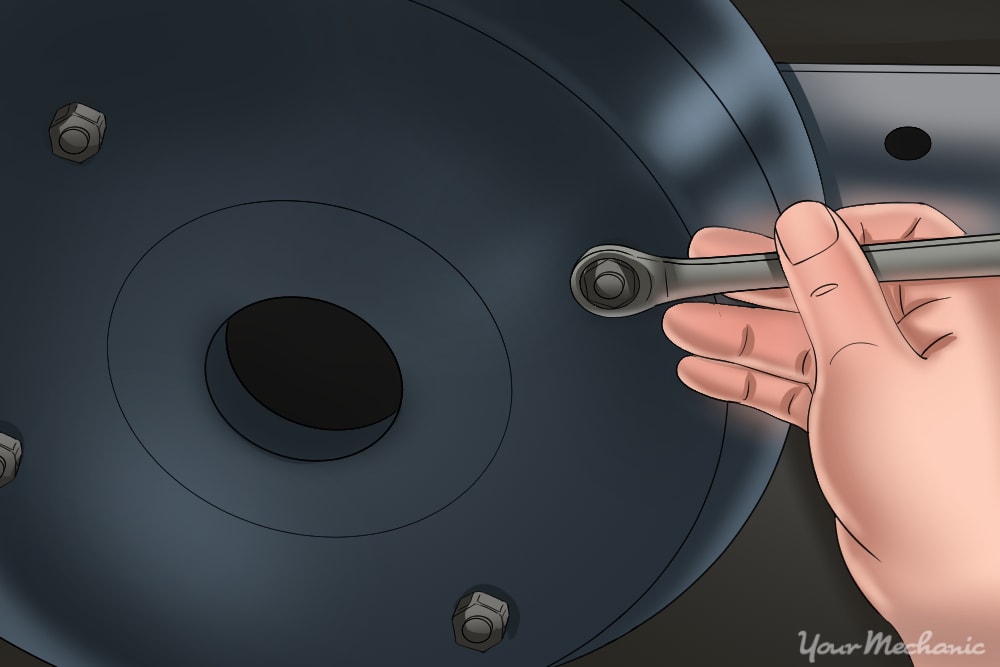
Step 5: Unbolt and remove the brake booster. Locate and remove the four bolts securing the brake booster to the firewall under the dashboard. They probably won’t be very easy to reach, but with your swivels and extensions, you may be able to get the advantage.
Disconnect the pushrod from the brake pedal and the booster is ready to come out. Go back under the hood and pull it off the firewall.
Part 2 of 3: Adjusting and installing the booster

Step 1: Install the brake booster. Install the new booster the same way you removed the old one. Connect the brake pedal linkage and the vacuum line. Start the engine and allow it to idle for about 15 seconds, then shut it off.
Step 2: Adjust the brake pedal pushrod. This adjustment at the brake pedal will probably already be correct, but check it anyway. If there is no free play, the brakes will not release while you are driving. Most cars will have about 5mm of free play here; check your workshop manual for the correct dimension.
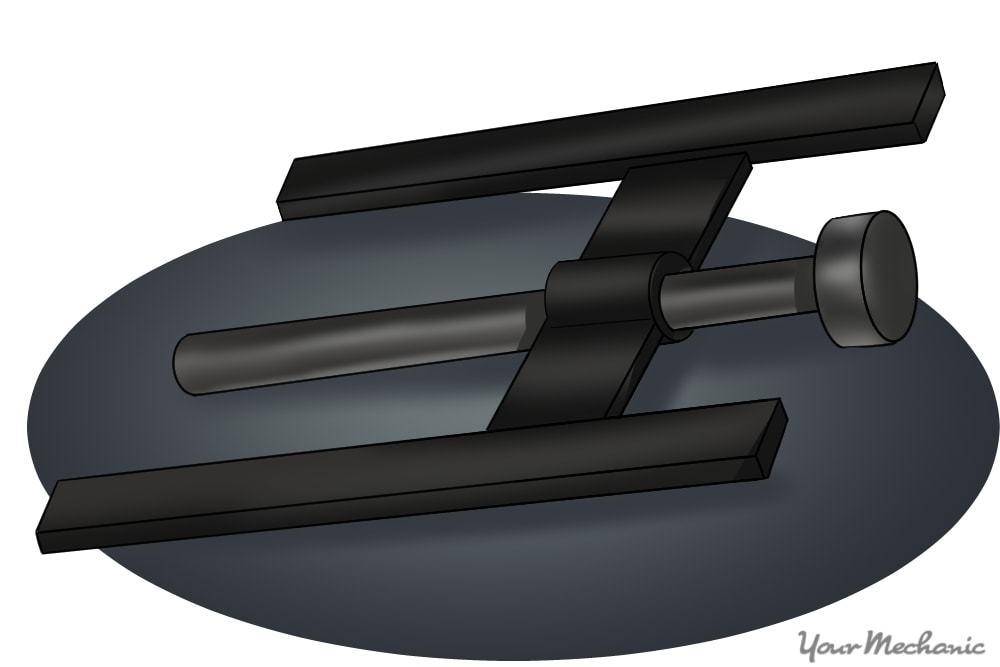
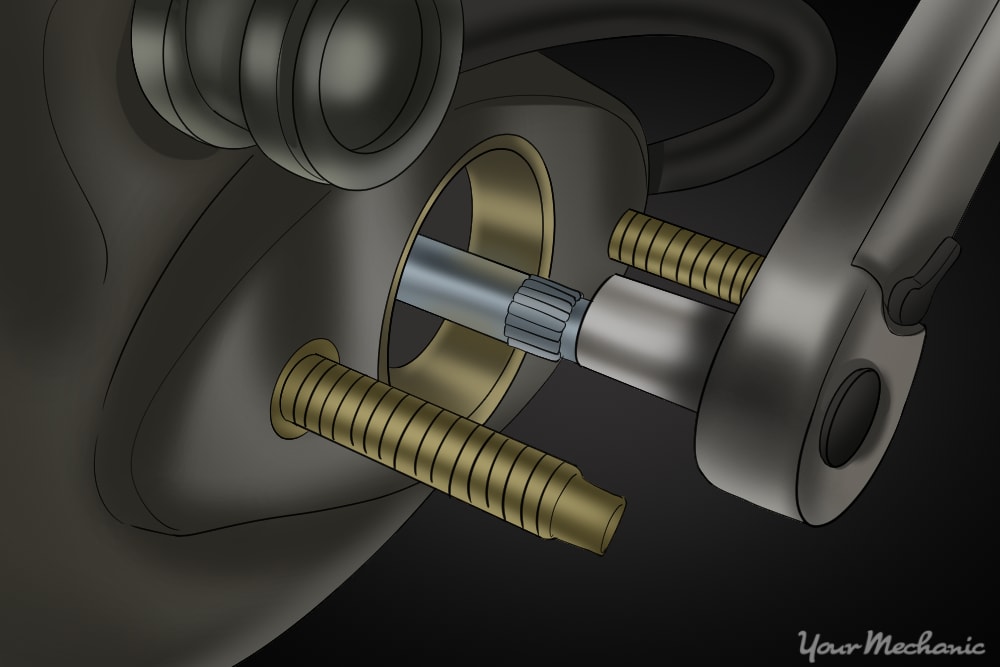
Step 3: Check the booster pushrod. The pushrod on the booster may be correctly set from the factory, but don’t count on it. You’ll need a pushrod measuring tool to check the dimension.
The tool is first placed against the master cylinder base, and the rod moved to contact the piston. Then the tool is placed against the booster, and the rod shows what the distance between the pushrod of the booster and the piston of the master cylinder will be when the parts are bolted together.
The clearance between the pushrod and the piston is found in the workshop manual. It will likely be about .020”. If adjustment is necessary, it is done by turning the nut on the end of the pushrod.
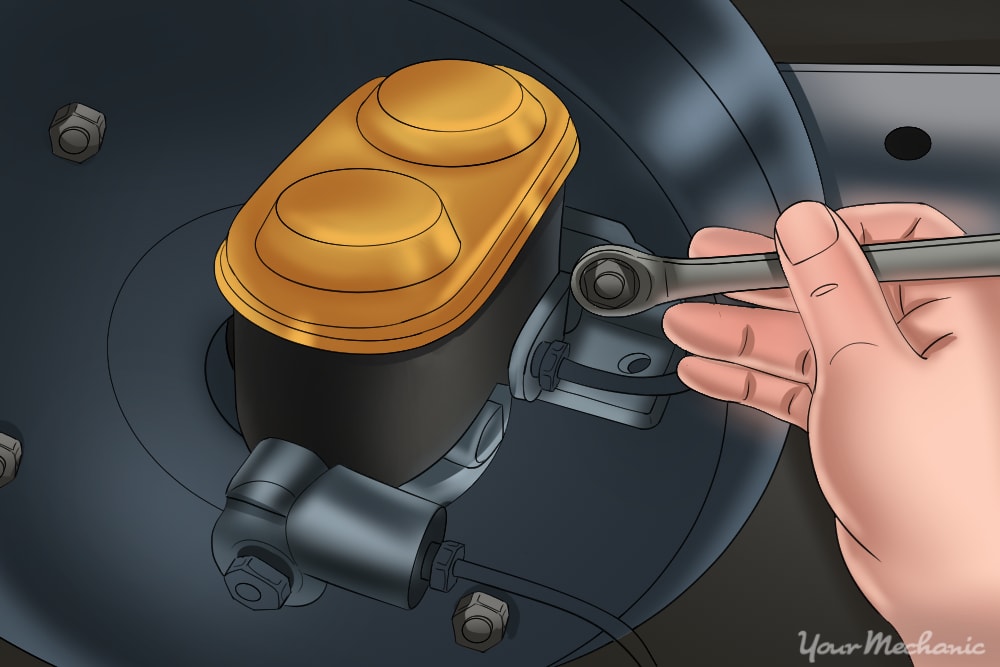
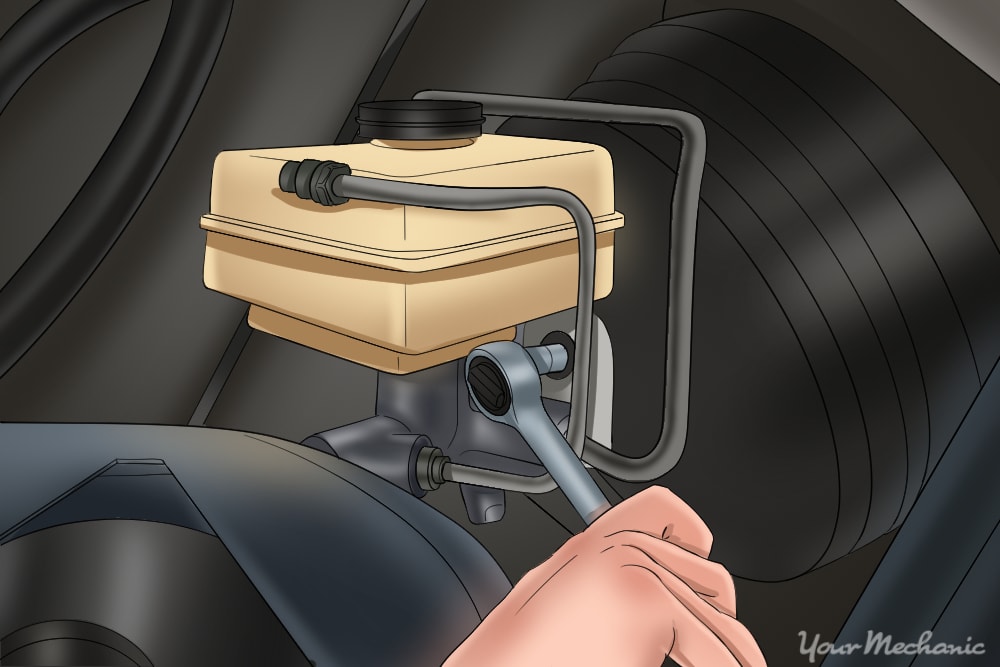
Step 3: Install the master cylinder. Mount the master cylinder on the booster, but don’t tighten the nuts fully yet. It’s easier to install the line fittings while you can still wiggle the master cylinder around.
After you have the lines connected and run up finger tight, tighten the mounting nuts on the booster, then tighten the line fittings. Reinstall any electrical connections and fill the reservoir with fresh fluid.
Part 3 of 3: Bleeding the brakes
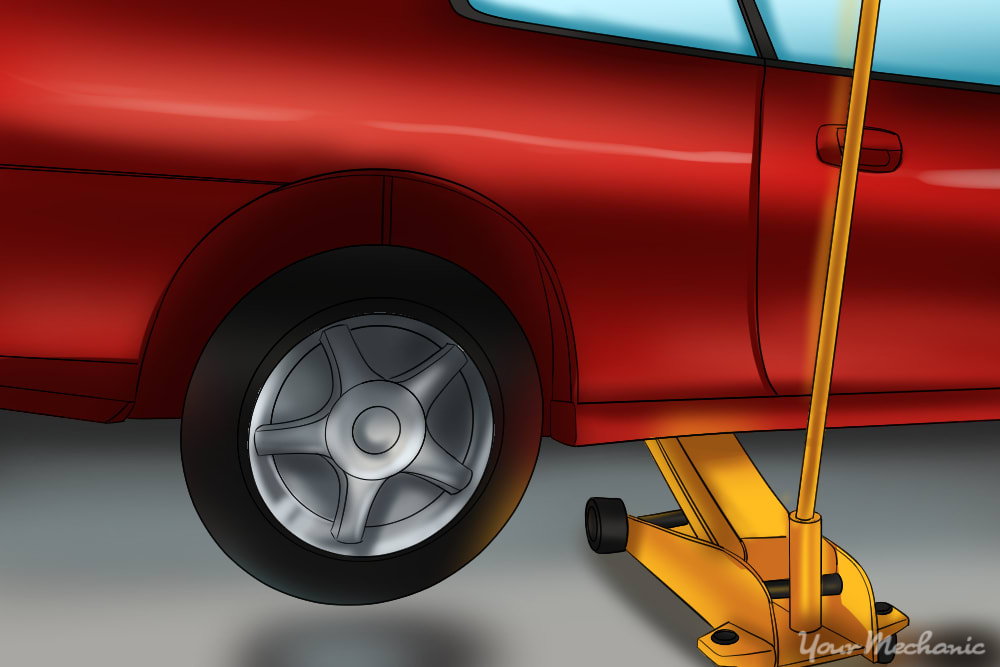
Step 1: Jack up the car. Make sure the car is in park, or in first gear if it is a manual. Set the brake and put wheel chocks under the rear wheels. Jack the front of the car and place it on good jack stands.
- Warning: Working underneath a car is potentially one of the most dangerous things a home mechanic will do, so you don’t want to take any chance that the car can shift and fall on you while you’re working underneath. Follow these instructions and make sure the car is secure.
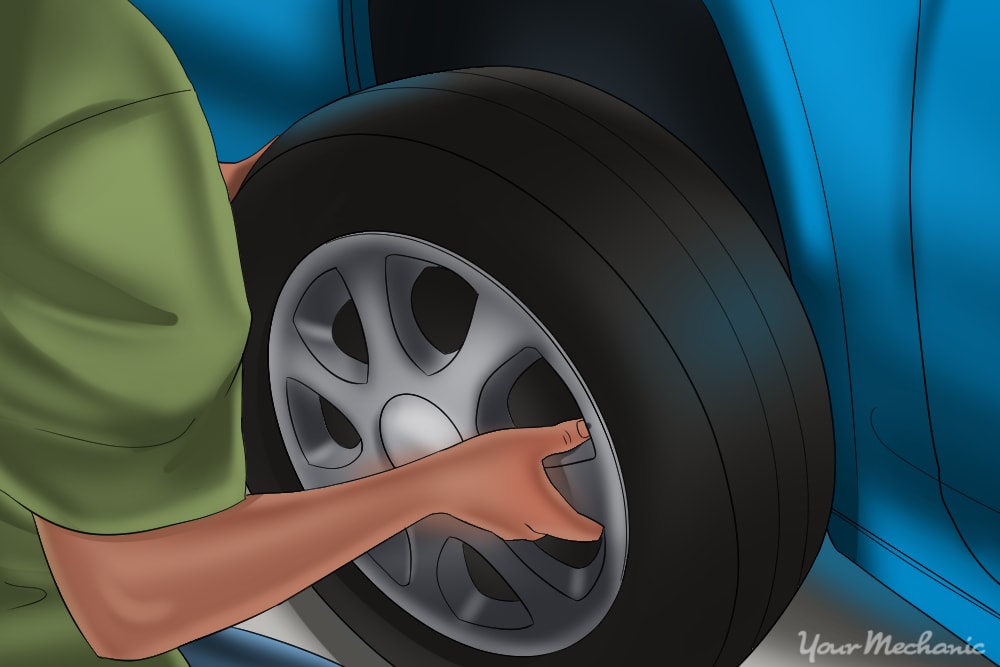
Step 2: Remove the wheels. It may not be absolutely necessary to remove the wheels to access the bleeder screws, but it will make it easier to do the job.
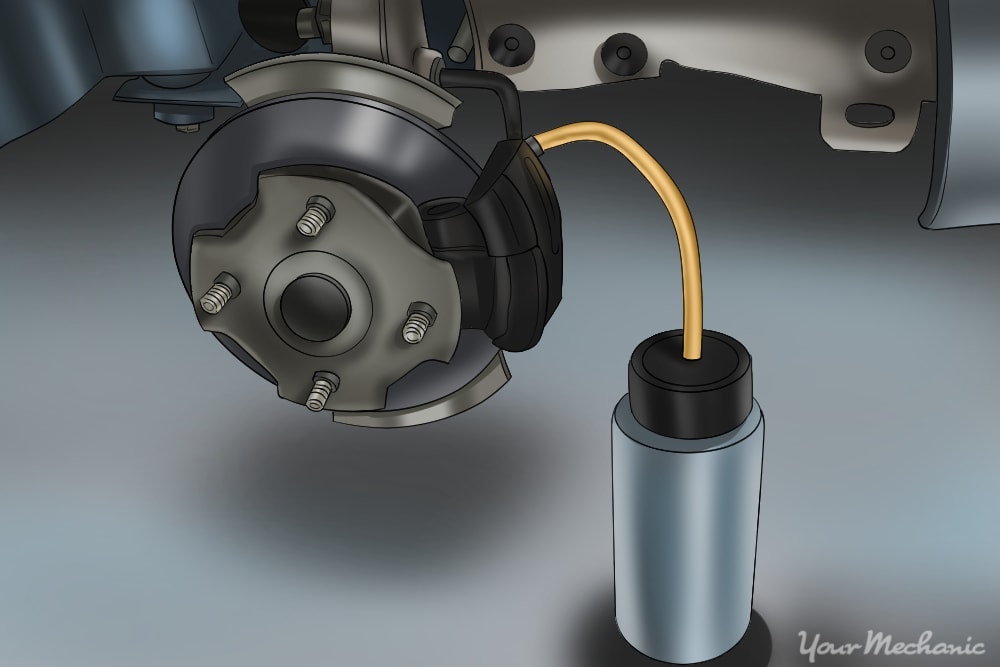
Step 3: Attach the catch bottle. Hook the line to your catch bottle up to the bleeder of the wheel that is furthest away from the master cylinder. Have an assistant sit in the car and pump the brake pedal a few times.
If the pedal responds, have them pump it until it feels firm. If the pedal does not respond, have them pump it a few strokes then hold it on the floor. While they hold the pedal down, open the bleeder screw and allow the fluid and air to escape. Then close the bleeder screw. Repeat this process until the fluid coming out of the screw is free of air bubbles.
Continue bleeding the brakes on all four wheels, working your way to the left front wheel, which is closest to the master cylinder. Refill the reservoir periodically. Don’t allow the reservoir to get empty during this process or you will have to start all over again. When you are done, the pedal should feel firm. If it doesn’t, repeat the process until it does.
Step 4: Test the vehicle. Top off the master cylinder and put the cap back on. Reinstall the wheels and set the car back on the ground. Take it out for a drive and try out the brakes. Be sure to drive around long enough to get the brakes warm. Pay close attention to whether they release properly so you know that your pushrod adjustments are correct.
Changing a brake booster can take a few hours, or it can take a couple of days, depending on the car you drive. The newer your car is, the more complicated the job will be. If you look under the hood of your car or under the dashboard and decide you’d rather not take it on yourself, professional help is always available at YourMechanic, whose mechanics can complete the brake booster replacement for you.