Older vehicles manufactured prior to 1996 typically utilized a vacuum-operated cruise control that used vacuum pressure to hold and release the throttle cable. This system was very consistent and rarely had any problems except for one: the vacuum tank or cruise control vacuum reservoir was prone to premature wear and tear. The original cruise control vacuum reservoir was commonly made of out sheet metal and rusted out.
This requires a car owner to have the vacuum reservoir replaced. Today's modern replacements are made of plastic or durable polymers built to withstand the elements and should last for a very long time. The cruise control vacuum reservoir is designed to store a consistent supply of air that is vacuum pressurized to assist the servo in maintaining vacuum pressure. Most of the time, this part is located behind a front bumper or underneath the dashboard and is connected directly to the cruise control module or servo.
Replacing this component is rather simple as it's usually attached to a strap system or bolted onto a bracket. We will outline the steps needed to replace a cruise control vacuum reservoir attached to a servo which is the most common application for this component. Each manufacturer has a special location for this part, so refer to your service manual if any confusion arises.
- Note: For purposes of this article, we will discuss the steps for removing and replacing the cruise control vacuum reservoir that is most common. The specific location and steps for removing this component may vary based on the vehicle you own. Consult your vehicle service manual as needed.
Part 1 of 3: Determining the symptoms of a bad cruise control vacuum reservoir
Before the use of electronic throttle controls and electronically powered cruise controls, most cruise control systems were powered by vacuum pressure. The servo which controls the throttle linkage needs a constant supply of vacuum to maintain the throttle's position once the system is triggered by the driver. The cruise control vacuum reservoir contains a negative pressure inside the tank. When the engine RPM's increase, the engine vacuum lowers. This is when the cruise control vacuum reservoir does its job by stabilizing the vacuum pressure inside the servo. If the tank is broken, or is leaking in any way, it can impact the operation of the cruise control.
A malfunctioning vacuum reservoir will also display the following warning signs. Cruise control does not hold its speed: If the driver sets the cruise control, it is supposed to hold the linkage through vacuum pressure contained inside the servo (or control unit). When the tank is damaged and is unable to support the servo, it increases vacuum pressure and the throttle linkage will slowly reduce. This causes the vehicle to reduce its speed and eventually shut off.
Cruise control does not activate: In order for the cruise control to be set, vacuum pressure needs to be present inside the servo. However, the servo and vacuum reservoir are both connected. If a leak is present inside the vacuum reservoir, it will impact the servo's ability to hold any vacuum pressure which can render the cruise control inoperative.
A leaking sound is heard from the front of the vehicle: Sometimes a vacuum reservoir develops a very slow leak before it completely fails. If this occurs, the cruise control does not hold a speed for extended periods of time, but it also makes a distinct hissing sound when the vehicle is at idle or vacuum pressure is high inside the motor.
- Note: If you notice any of the above symptoms, you should complete a physical inspection of the tank to verify that it is damaged and needs to be replaced before you order any replacement parts.
Part 2 of 3: Replacing the cruise control vacuum reservoir
The cruise control vacuum reservoir replacement job is actually one of the easiest to complete and can be done by an average mechanic. Most ASE certified mechanics advise that you replace the older vacuum lines at the same time that you complete this job. Vacuum lines wear out over time, and replacing them with rubber hoses extends the life of the cruise control system in your older vehicle.
Materials Needed
- Boxed end wrench or ratchet wrench
- Flashlight
- Flat blade screwdriver
- Replacement cruise control vacuum reservoir
- Replacement vacuum lines
- Safety glasses
Wire brush
Note: Replacing the vacuum reservoir requires you to remove and reinstall vacuum lines. Due to this fact, it's very important that you have some sort of identification process tol verify the location of the removed vacuum lines so that they are not installed in the incorrect location. Many mechanics use masking tape and felt-tipped markers to do this. Before they remove the vacuum lines, they write down a description of the location on tape with a marking pen and then apply it to the line before it's removed. When it's time to replace the lines, it significantly reduces mistakes.
Step 1: Disconnect the battery. As a safety precaution, always remove the battery cables from the battery to ensure there is no power running through the electrical system.

Step 2: Locate the vacuum reservoir. On most US and domestic vehicles with a vacuum style cruise control system, the vacuum reservoir is behind the front headlights on the passenger side of the vehicle.
They may also be located close to the cruise control module or servo which is typically located on the driver side near the dashboard. It's important for you to find the precise location of the vacuum reservoir so that you can plan the next steps of removing ancillary components that may be in the way of removal.
Step 3: Remove any components that are blocking the vacuum reservoir. In most cases, the vacuum reservoir is easy to locate and remove without having to remove too many components on the vehicle.
However, there are times where this will need to be completed. Please refer to your vehicle's service manual before removing any components for exact steps required to complete this job. Some of the specific components that are commonly in the way of removing the vacuum reservoir include the vehicle's dash cover behind the engine, air cleaner, and radiator (in very few cases).
Step 4: Locate and mark vacuum lines. After all components are removed and you have plenty of space to remove the vacuum reservoir, locate and mark the location of each vacuum line. Although there is typically only one vacuum line attached to the reservoir, it's a good habit to get used to completing. Many mechanics recommend that you replace the vacuum lines during this process.
We will describe those steps below:
Trace the vacuum line running from the reservoir to the servo and run the new vacuum line in the same location as the old line, but do not remove the old ones yet. Once the new line is in position, remove the vacuum line attached to the servo. Install the new vacuum line to the servo and remove the old vacuum line from the vacuum reservoir. Finally, remove the old vacuum line from the vehicle.

Step 5: Remove the vacuum reservoir. If you choose to use the old vacuum line, make sure to remove the vacuum line from the vacuum reservoir before removal.
Find the bracket and bolt that secures the vacuum reservoir to the vehicle. Using a socket with an extension and ratchet, remove the bolt holding the vacuum reservoir onto the vehicle. Remove the vacuum reservoir from the vehicle.
Step 6: Clean the location or bracket where the old reservoir was attached. In most cases, the old vacuum reservoir and the attachment are made out of metal and could be quite rusty. Using a wire brush, clean the bracket and any attachments where the new vacuum canister will be installed. This will ensure a clean fit and reduce the potential of the bracket breaking off.
Step 7: Install the new vacuum reservoir. After the area is cleaned, you need to reinstall the new vacuum reservoir.
Attach the reservoir by screwing the bolt back on in the same location it was located. In some cases, the reservoir is held on by slots and no bolt. If this is the case, simply slide the reservoir in the slots to secure it to the vehicle.
Step 8: Install vacuum line onto the vacuum reservoir. If you have secured the vacuum reservoir correctly, the last step is to reinstall the new vacuum line onto the vacuum reservoir.
Step 9: Replace any covers you removed in order to gain access to the vacuum reservoir. Make sure you return all of these to their positions.
Step 10: Replace battery cables. Be sure that these are installed properly.
Part 3 of 3: Test drive the vehicle
After you've completed the replacement job, test the vehicle to ensure that the problem is resolved. In most cases, the issue was that the cruise control shut off automatically or the vehicle did not maintain speed. The test drive will test each of these issues.
Step 1: Start the vehicle. Let it warm up to operating temperature
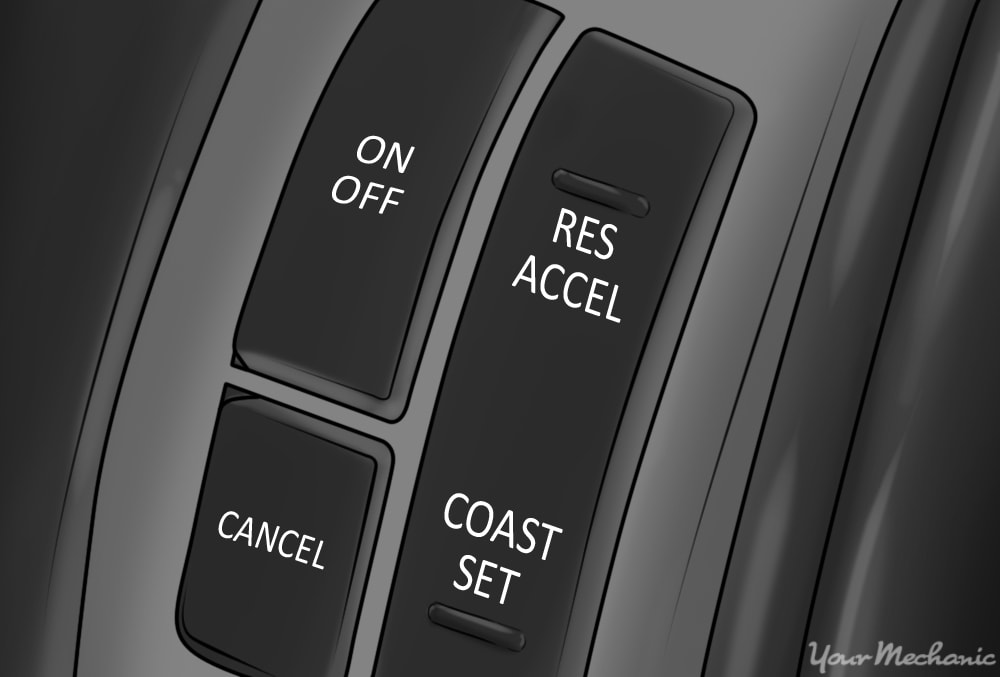
Step 2: Turn the cruise control button to the "on" position. Verify that it illuminates on the dashboard before you drive.
Step 3: Drive your vehicle to the test highway. Accelerate to highway speeds.
Step 4: Set your cruise control at 55 or 65 mph. Check your speed on the speedometer and make sure it does not change (any more than 3 to 5 mph).
Step 5: Reset the cruise control again and drive for 10 to 15 miles. Verify that the cruise control does not shut off automatically.
Replacing a cruise control vacuum reservoir is very simple for most experienced mechanics. However, if you've read these instructions and still don't feel 100% confident in completing this repair, please contact one of YourMechanic’s local, ASE certified mechanics to complete the cruise control vacuum reservoir replacement for you.