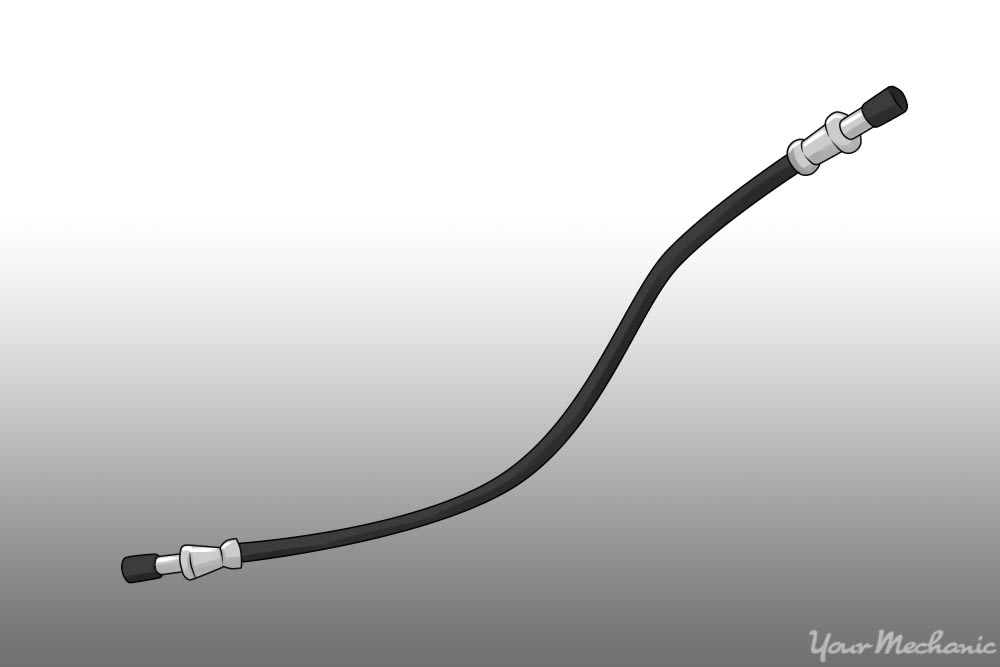
Modern cars use a combination of metal lines and rubber hoses to contain and transfer the fluid that applies your brakes. The lines coming out of the brake master cylinder are made of metal to be strong and long lasting. Metal wouldn’t be able to cope with the movement of the wheels, so we use a rubber hose that can move and bend with the suspension.
Each wheel typically has it’s own segment of rubber hose to deal with the movement of the suspension and wheel. Over time, dust and dirt will eat away at the hoses and eventually they can start leaking. Inspect the hoses on a regular basis to keep your car safe to drive.
Part 1 of 3: Removing the old hose
Materials Needed
- Drain pan
- Gloves
- Hammer
- Jack
- Jack stands
- Line wrench
- Pliers
- Rags
- Safety glasses
Wrenches
Note: You’ll need a few different sizes of wrenches. One is for the connection going into the caliper, typically around 15/16 mm. You’ll need a wrench for the bleeder valve, typically 9 mm. The line wrench is for the connection from the hose to the metal brake line. These connections can be tight if they haven’t been changed for a few years. If you use a normal, open-ended wrench to loosen them, there is a good chance you’ll round off the connections which will mean much more work. The flares on the line wrench make sure that you have a nice, tight grip on the connection while loosening so that the wrench doesn’t slide off.
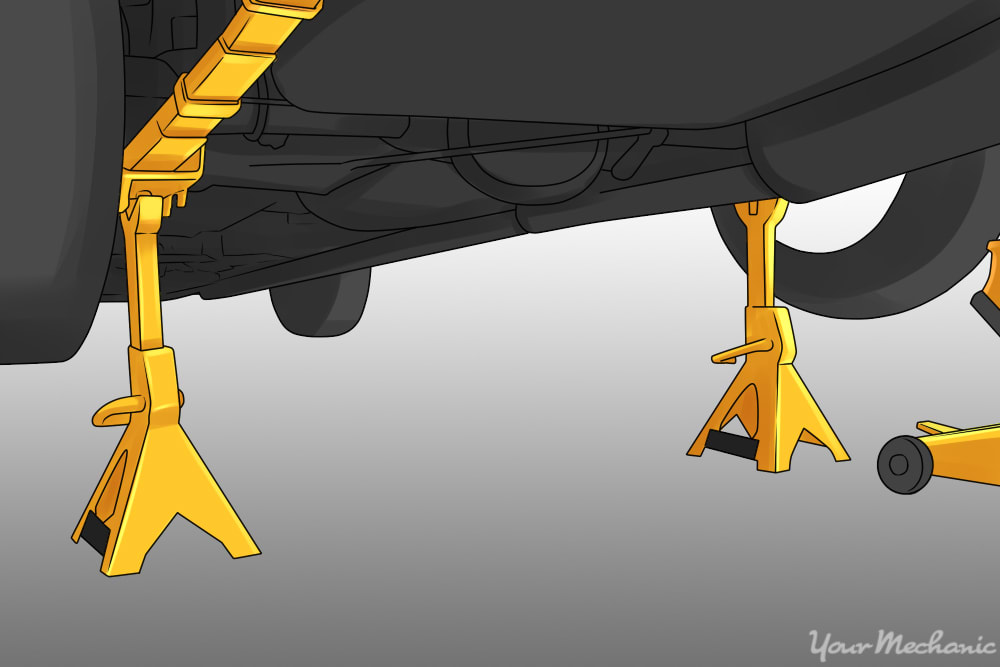
Step 1: Lift the car onto jack stands. On a flat and level surface, jack the car up and place it on some jack stands so it will not fall while the wheels are removed.
Block off any wheels that are left on the ground if you are not replacing all the hoses.
Step 2: Remove the wheel. We’ll need the wheel out of the way to access the brake hose and fittings.
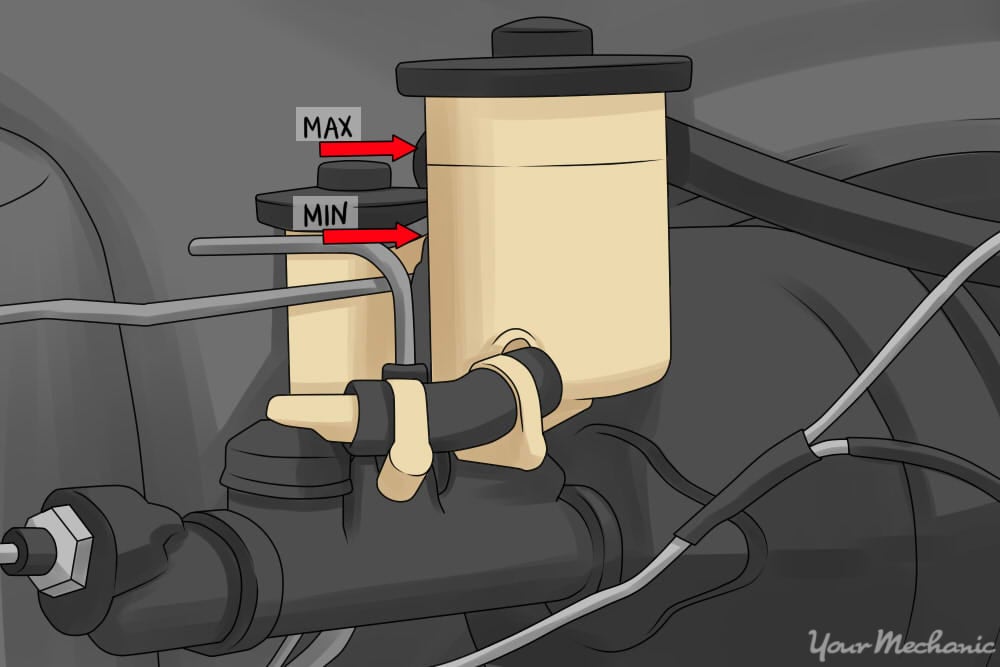
Step 3: Check the brake fluid level in the master cylinder. Make sure you have a good amount of fluid in the reservoir because fluid will start leaking as soon as the lines are disconnected.
If the master cylinder runs out of fluid, it will take longer to fully bleed the system of air.
- Note: Be sure to put the cap back on the reservoir. This will greatly reduce the amount of fluid that comes out of the lines when they are disconnected.
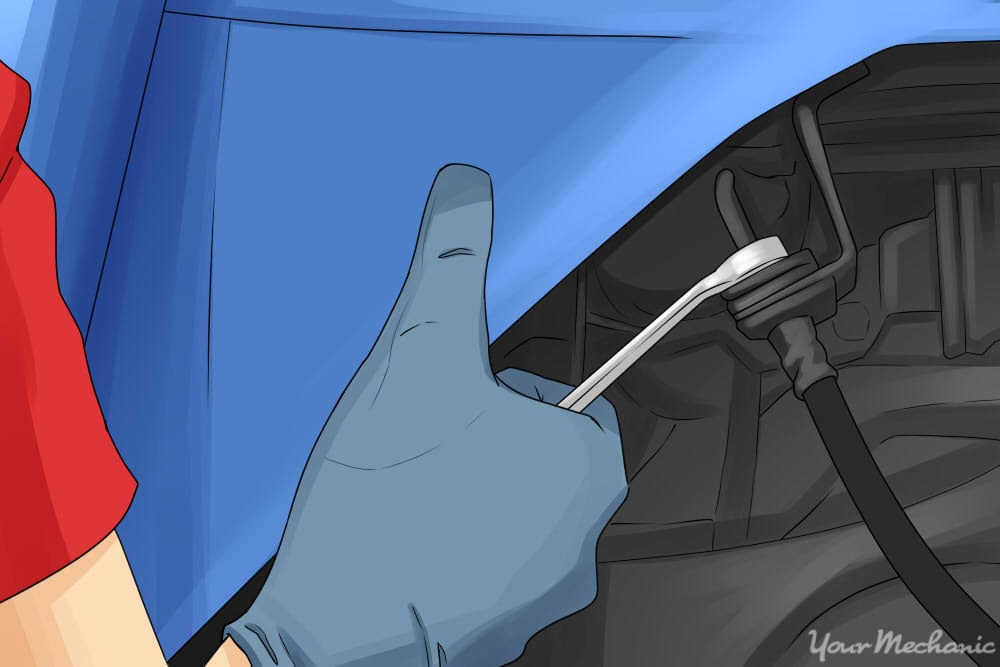
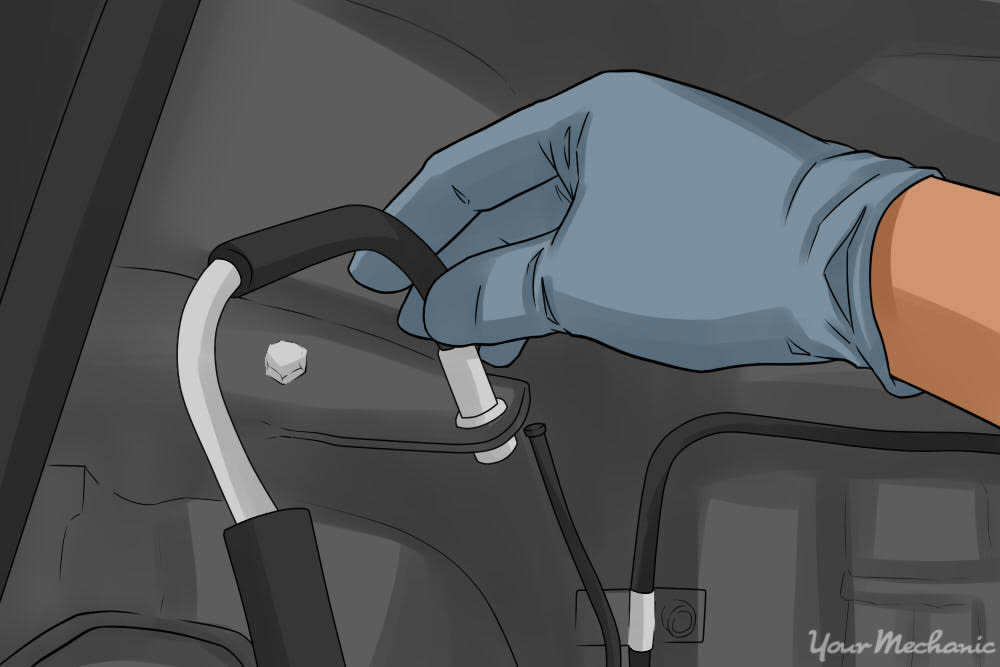
Step 4: Use your line wrench and crack open the top connection. Don’t undo it completely, we just want to be able to unscrew it quickly later on when we actually take the hose out.
Lightly tighten it again so fluid doesn’t leak out.
Tip: Loosen the connection while it is still mounted. The mount is designed to prevent the hose or connection from twisting and it will hold the connection in place while you loosen it.
Tip: Use some penetrating oil if the connection looks dirty and rusty. This will greatly help getting the connections loose.
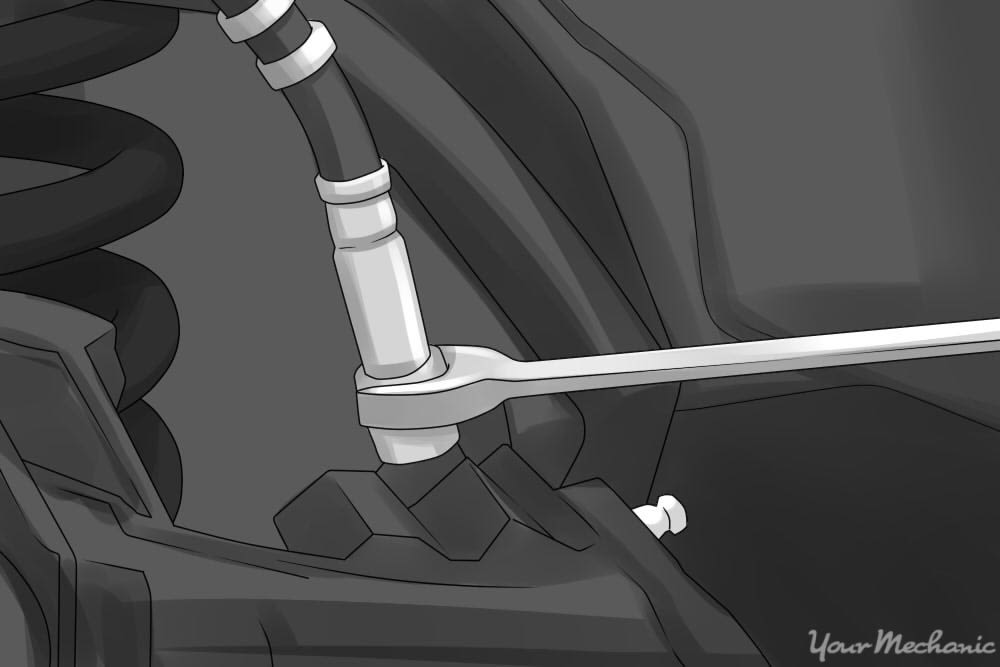
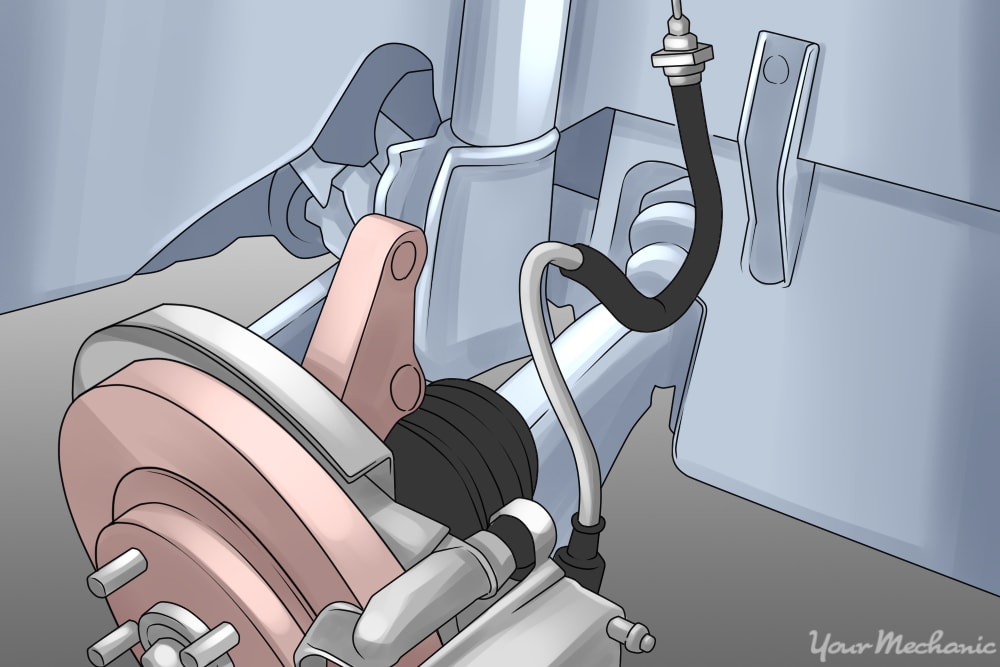
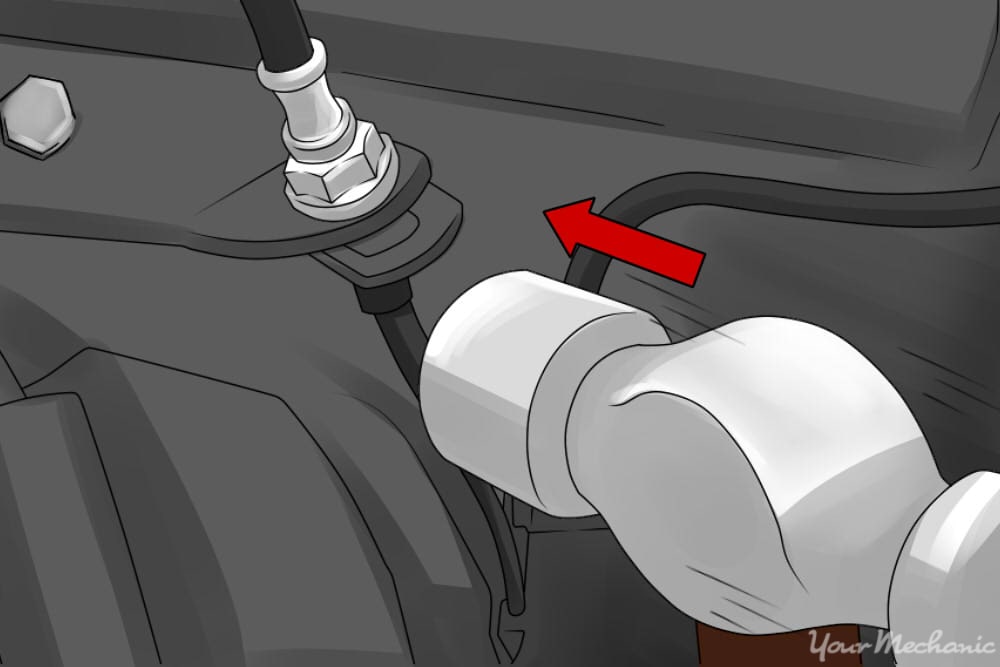
Step 5: Crack open the connection going into the brake caliper. Again, don’t unscrew it all the way, we just want to make sure it will come out easily later on.
Step 6: Remove the mounting bracket clip. This small metal piece should just pull out of the bracket. Don’t bend or damage the clip otherwise you’ll have to replace it.
- Note: At this point, make sure your drain pan is set up underneath and have a rag or two nearby to help with any spills for the next few steps.

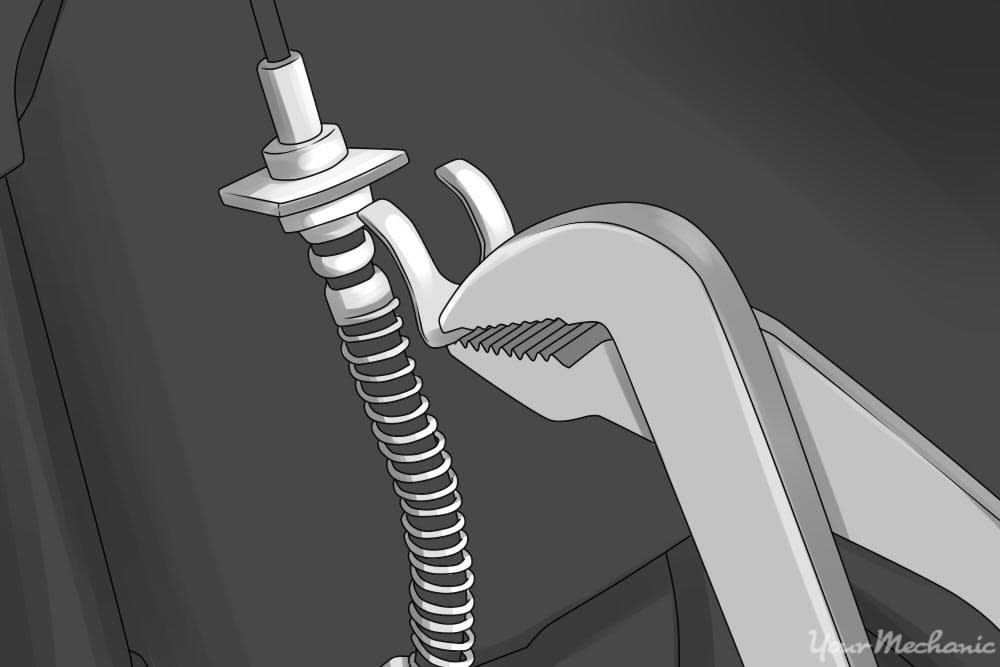
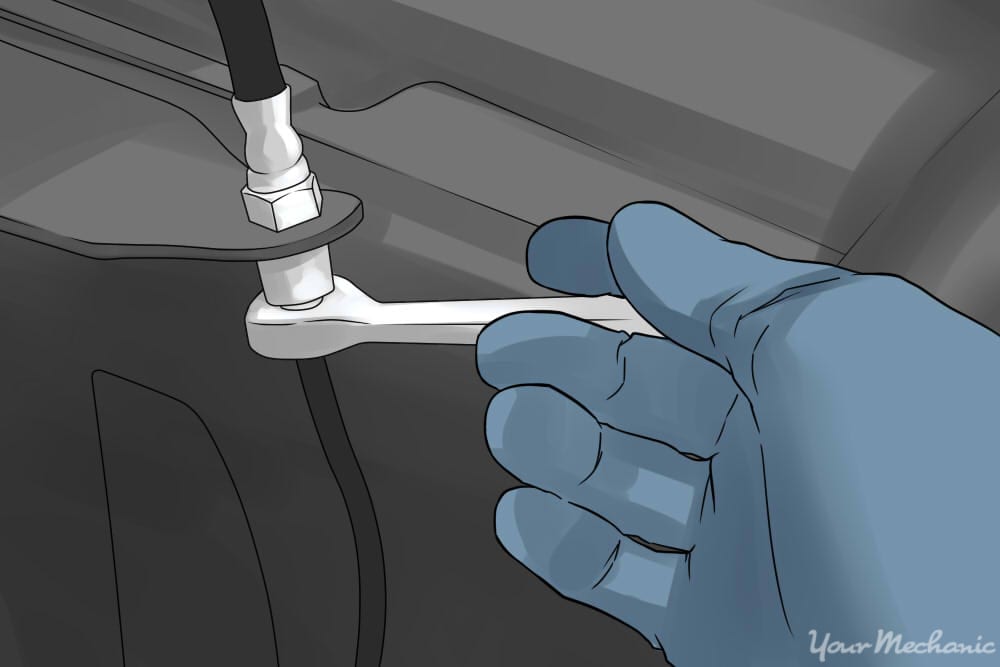
Step 7: Unscrew the top connection completely. The top connection should come undone with no problem since we’ve already cracked it open.
Remove the connection from the mounting bracket as well.
- Note: Brake fluid will start coming out as soon as it’s open a little bit so have the drain pan and rags prepared.
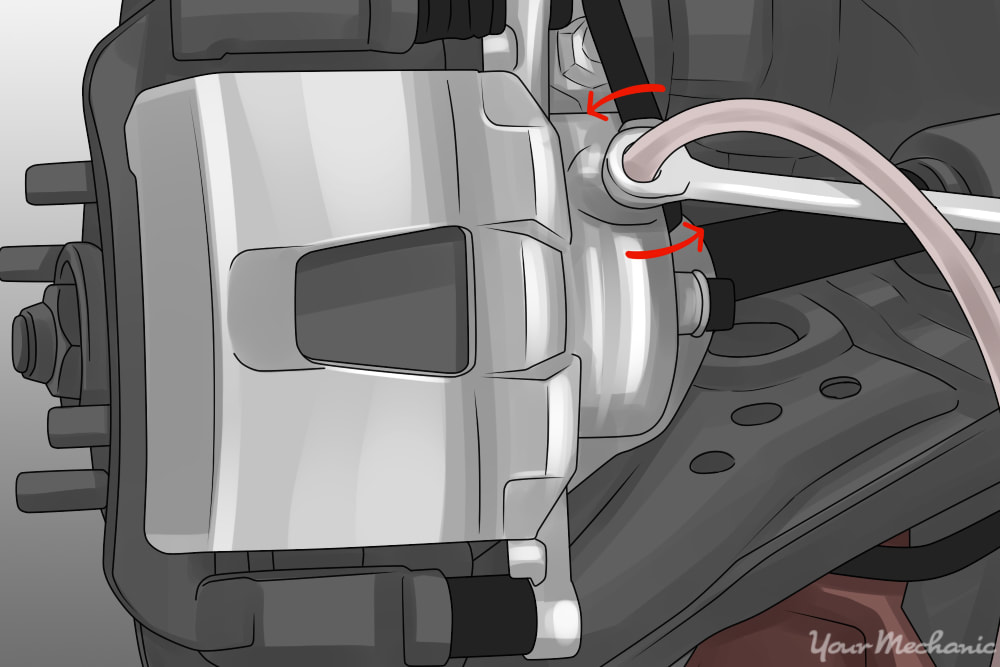
Step 8: Unscrew the hose out of of the caliper. The whole hose will rotate and can fling brake fluid around so make sure you have safety glasses on.
Make sure no fluid gets onto the brake rotor, pads, or paint.
Have your new hose ready to go as we want this transfer to be quick.
- Note: Brake calipers tend to be very dirty so use a rag and clean the area around the connection before undoing it completely. We don’t want any dirt or dust going into the caliper housing.
Part 2 of 3: Installing the new hose

Step 1: Screw the new hose into the caliper. You’ll put it together the opposite way you took it apart. Screw it in until it bottoms out - don’t worry about tightening it yet.
- Warning: Be careful when threading the connections. If you damage the threads on the caliper, the whole caliper will need to be replaced. Go slow and make sure the threads are lined up properly.
Step 2: Reseat the top connection into the mounting bracket. Line up the slots so the hose can’t rotate.
Don’t put the clip back in just yet, we want some play in the hose so we can get everything lined up correctly.

Step 3: Retighten the nut on the top connection. Use your fingers to get it started then a line wrench to tighten it slightly.
Step 4: Use hammer to tap in mounting clips. You don’t need a sledge, but a little weight can help get these on easier.
A couple light taps should get it back into place.
- Warning: Take care not to damage the lines when swinging the hammer.
Step 5: Fully tighten down both connections. Use one hand to tighten them down. They should be snug, not as tight as possible.

Step 6: Use a rag to clean up any left over fluid. Brake fluid can damage other components, namely rubber and paint, so we want to make sure we clean everything.
Step 7: Repeat for all hoses that need to be replaced.
Part 3 of 3: Putting everything back together
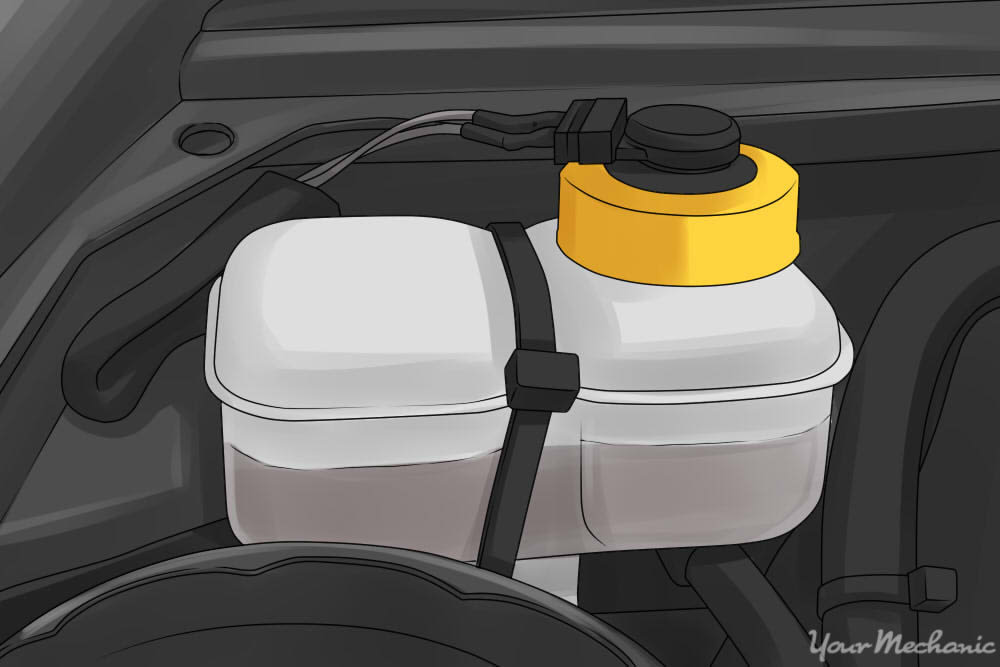
Step 1: Check the fluid level in the master cylinder. Before we start bleeding the system of air, we want to make sure we have a good amount of fluid in the reservoir.
The level shouldn’t be too much lower as long as your transfers were quick.
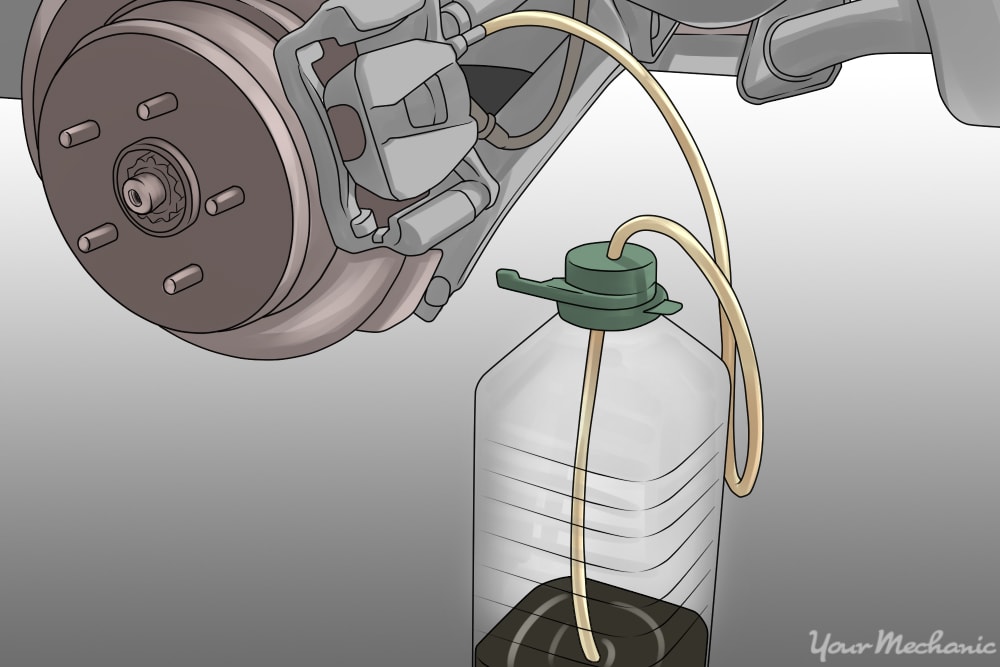
Step 2: Bleed the brakes of air. You should only have to bleed the lines that you replaced. Check the fluid level after bleeding each caliper so that you don’t run the master cylinder dry.
- Tip: Have a friend pump the brakes while you open and close the bleeder valve. Makes life much easier.
Step 3: Check for leaks. With the wheel still removed, pump the brakes hard a few times and inspect the connections for any leaks.
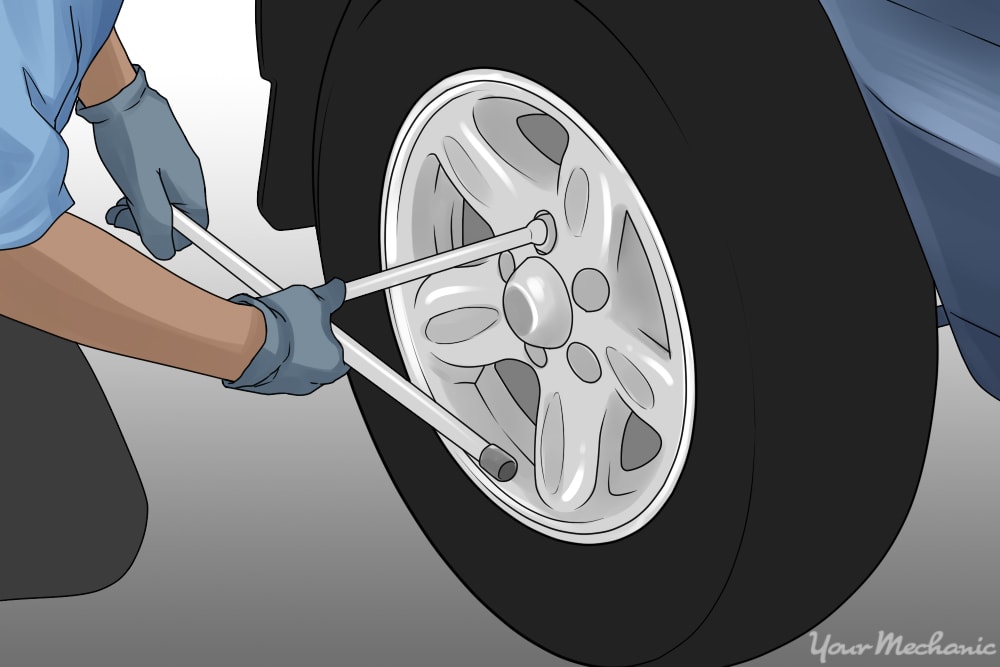
Step 4: Put the wheel back on. Make sure you tighten the wheel to the correct torque specification. This can be found online or in the owner’s manual.
Step 5: Time for test drive. Test the brakes in an empty street or parking lot first before going into traffic. The brakes should feel hard since we just bled the system. If they are soft or spongy there is likely still air trapped in the lines and you’ll need to bleed them again.
Replacing the hose typically doesn’t require any expensive special tools, so you can save yourself some money by doing the work at home. If you are experiencing any difficulties with this job, our certified technicians are always available to assist you.