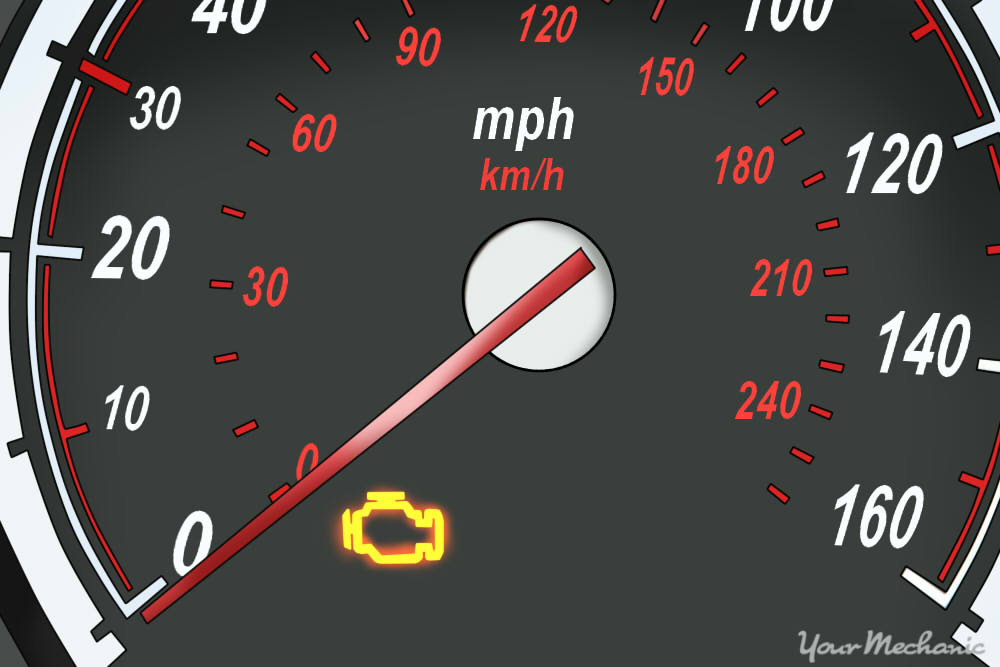
The Check Engine Light turning on is usually a topic car owners try to avoid talking too much about. It can be quite intimidating to see that little light on your vehicle’s dashboard suddenly illuminate, but in reality, it is not something that should paralyze you in fear right away. By preparing yourself with a little automotive knowledge, a helpful tool, and general background information on what this light is actually trying to tell you, you will not only gain more peace of mind, you will also develop a closer relationship to your vehicle.
Diagnostic trouble codes (DTC) are automotive computer codes stored by the on-board computer diagnostic system (OBD) in your vehicle. There are literally hundreds of different codes a Check Engine Light can represent. While that sounds daunting, with a little patience, tackling basic diagnostics will give you useful knowledge about your vehicle and will also allow that Check Engine Light to do what it is really supposed to do: be your guide.
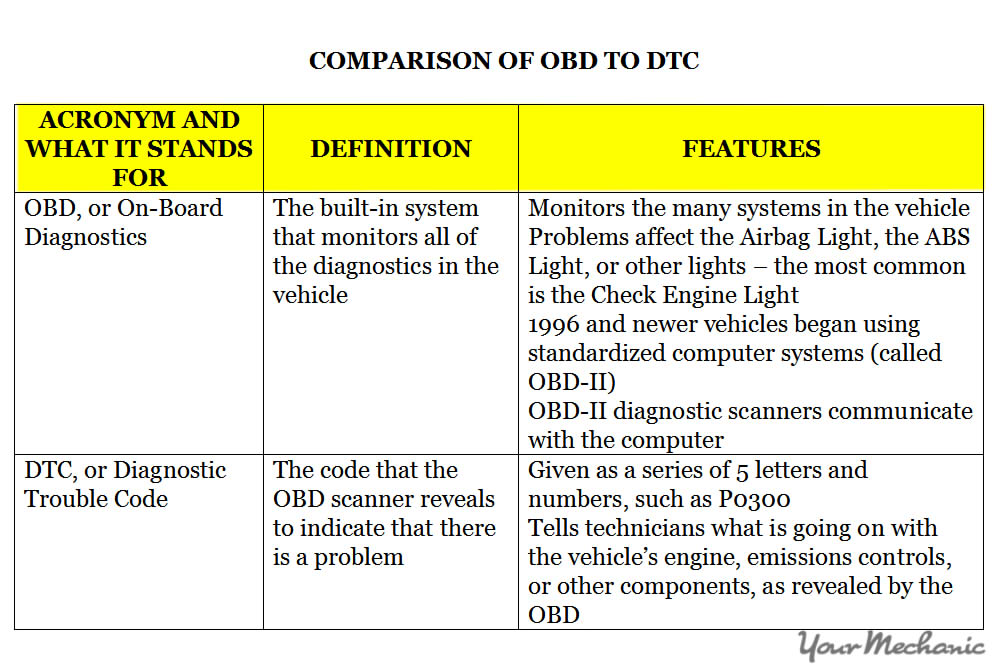
There are two acronyms to be aware of when it comes to discovering more about Check Engine Lights. These two acronyms are OBD and DTC.
- Tip: OBD codes refers to nearly the same thing as DTC codes, therefore you will often hear them used interchangeably in the automotive industry. OBD codes are most frequently referred to as OBD-II, which has been the code type since 1996.
Unfortunately, obvious and helpful vehicle symptoms do not always accompany an illuminated Check Engine Light. Since there are hundreds of possible OBD codes, there are also hundreds of possible reasons for the light, including:
- Computer output circuit issues
- Emissions controls issues
- Fuel and air metering systems problems
- Ignition system faults
- Speed control and idle problems
- Transmission issues
This is why it is important for someone who does not have a lot of automotive knowledge to not assume what a code means. When your Check Engine Light comes on, you should get it checked out quickly by a certified mechanic. If the engine light comes on due to a serious concern, you risk damaging your car further by not repairing the issue right away.
- Warning: If the Check Engine Light comes on and flashes, it indicates a very serious concern. Find a safe place to stop, turn off your car, and have it diagnosed and repaired before you continue to use it.
Inserting and Reading an OBD Scanner
Your Check Engine Light is illuminated when a fault is detected with one of your vehicle’s monitored systems. In order to find out the reason the light is illuminated, you need to read the codes through the OBD port.
You will need an OBD scan tool. The scanner allows you to communicate with the computer and retrieve the trouble codes. Certain scanners may give information on what the revealed code means, but most will just give a five digit number and letter combination.
Follow these 4 steps to insert and read the OBD scanner:
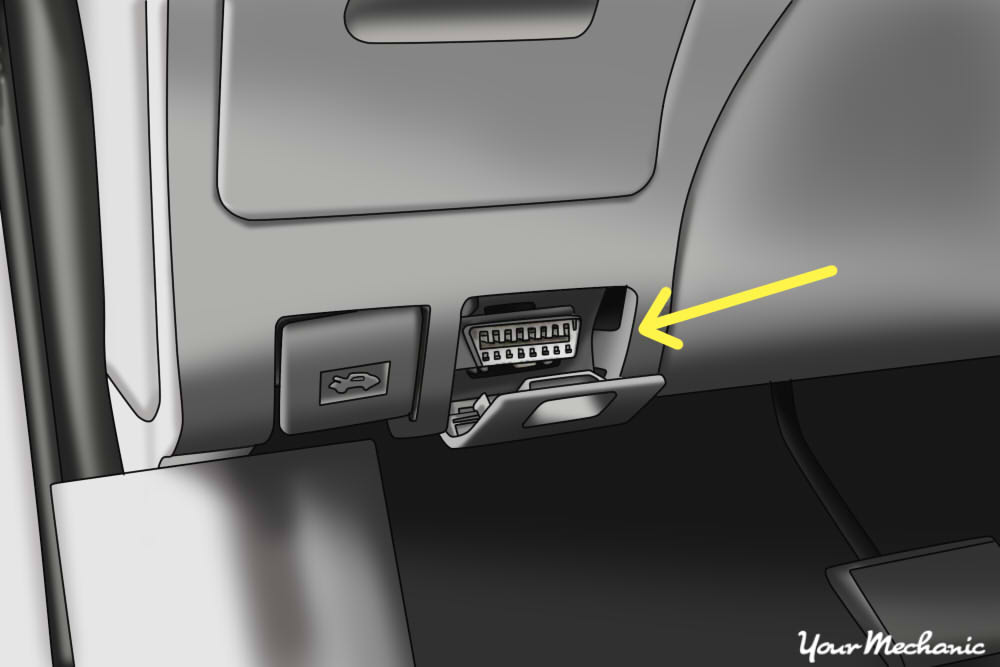
Step 1: Locate your vehicle’s OBD port. The most common mounting location for an OBD port is under the driver’s side of the dash near the pedals.
It legally has to be within 3 feet of the steering wheel and must not require tools to access it.
The connector is a female 16-pin connector that is trapezoidal in shape.
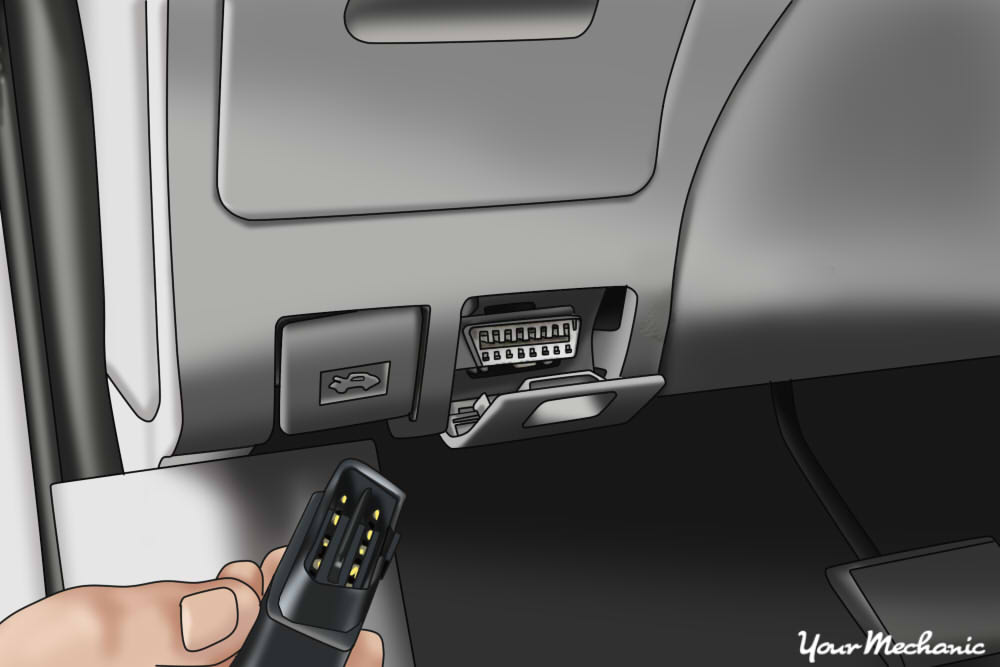
Step 2: Plug your OBD scan tool into the connector. The scan tool’s male end will only fit one way onto the vehicle’s connector.
The scan tool will power up as soon as it has been plugged in.

Step 3: Read the codes in the computer. Each scan tool will have different instructions on how to operate it, so read yours carefully.
Navigate to a heading called “Read Codes” and select it.
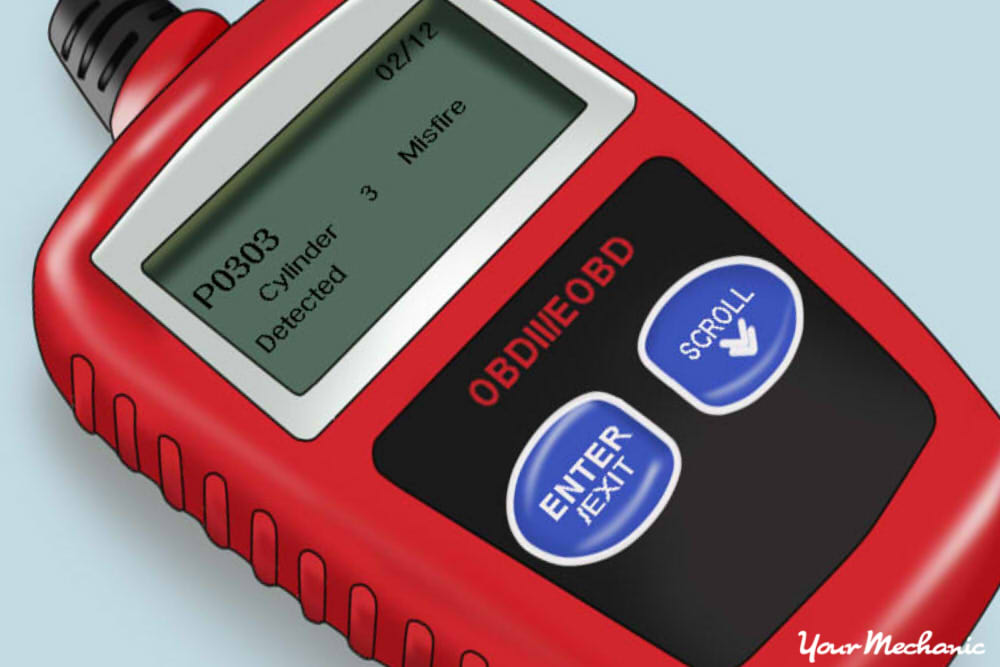
Step 4: Record the codes that display. If there are multiple codes, they may cycle through or you may have to press a button to view the next code.
- Tip: It is very important to write these codes down in the same order as displayed on the scanner. However, the OBD codes will always appear on your scanner when it is plugged into the OBD port or data link connector (DLC).
Interpreting OBD Codes
OBD codes may seem complex, but underneath the letters and numbers, you can identify the general cause of your lit Check Engine Light, allowing you to take the next necessary steps.
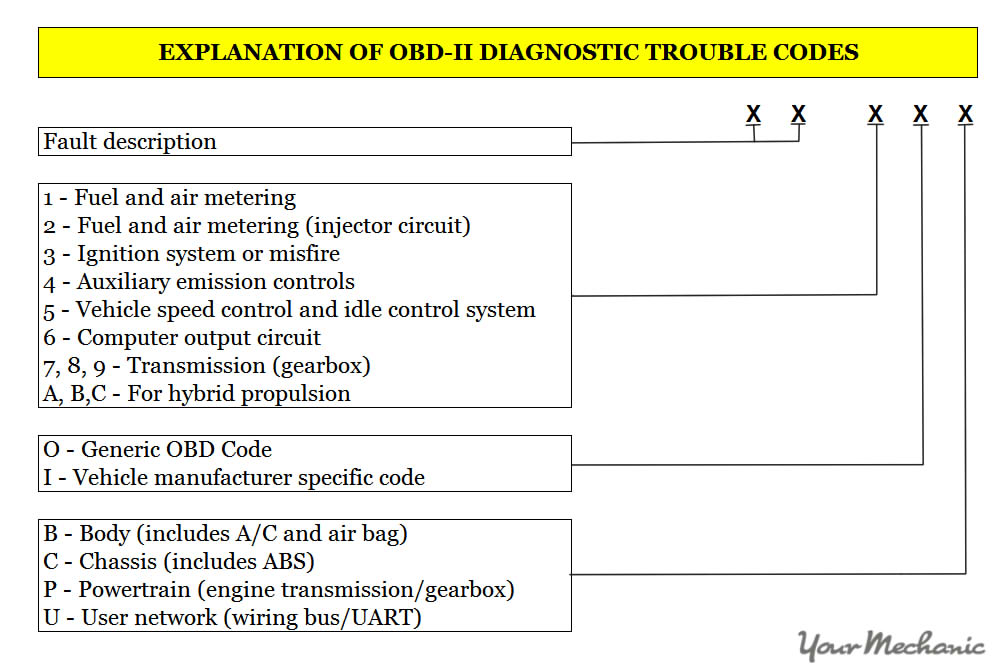
Step 1: Break down your code into sections.
1. The first section is the first character, which is always a letter.
2. The second section is the next character, which is a single number, from 0 to 3.
3. The third section is the third character, which is a single number from 0 to 9.
4. The fourth and last section includes both the fourth and fifth characters together, so it is a pair of numbers, from 00 to 99.
Step 2: Determine the meaning of the letter. There are four possible letters that can be displayed in the first section.
The letter “P” indicates powertrain-related codes such as those involving the engine or the transmission and their sensors. Typically, “P” codes are the only ones that will illuminate the Check Engine Light.

The letter “B” indicates a body code, which means that it relates to a body system such as the airbags.
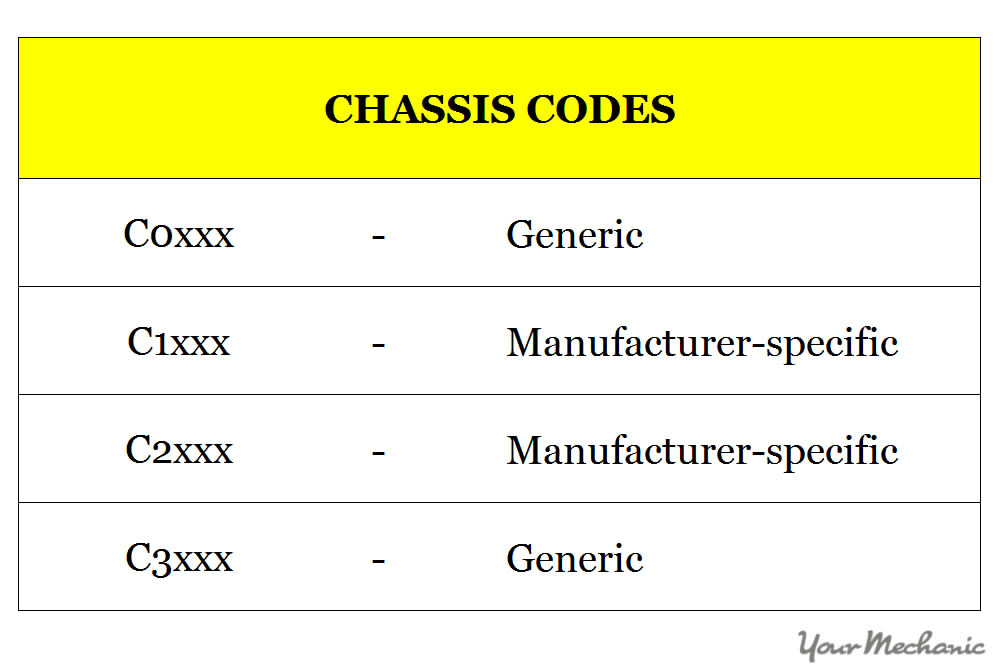
The letter “C” indicates a chassis code, used for systems such as the anti-lock brakes.
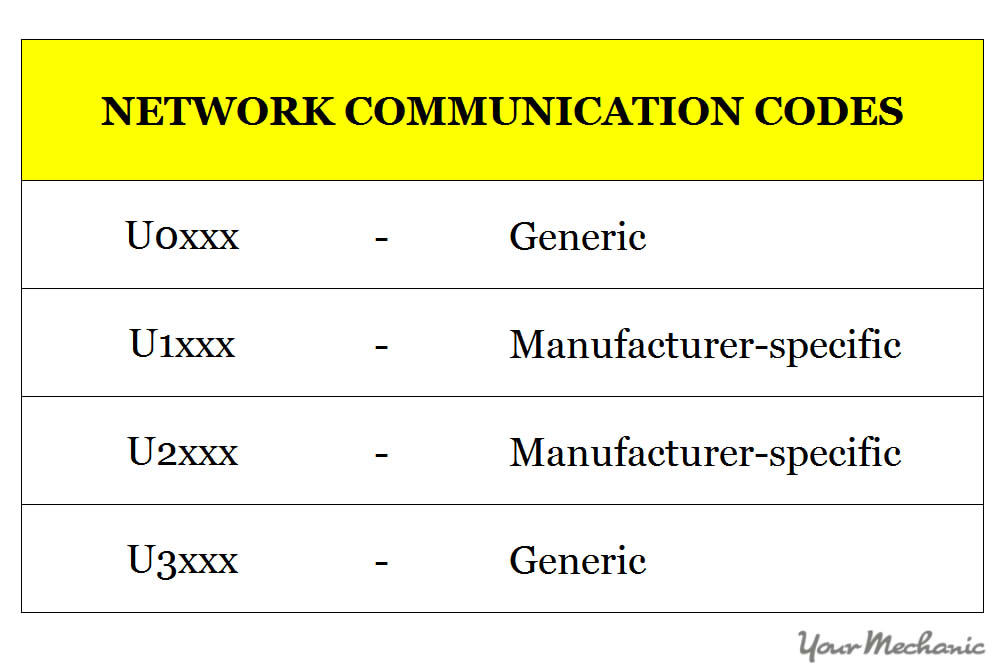
The letter “U” indicates network codes which are used for problems like module failures and losses of communication.
- Note: Only professional-grade or dealership scan tools are able to diagnose codes outside of powertrain codes.
Step 3: Determine if the codes are Society of Automotive Engineers (SAE) codes or manufacturer-specific. This is indicated by the first number in the sequence, immediately after the letter.
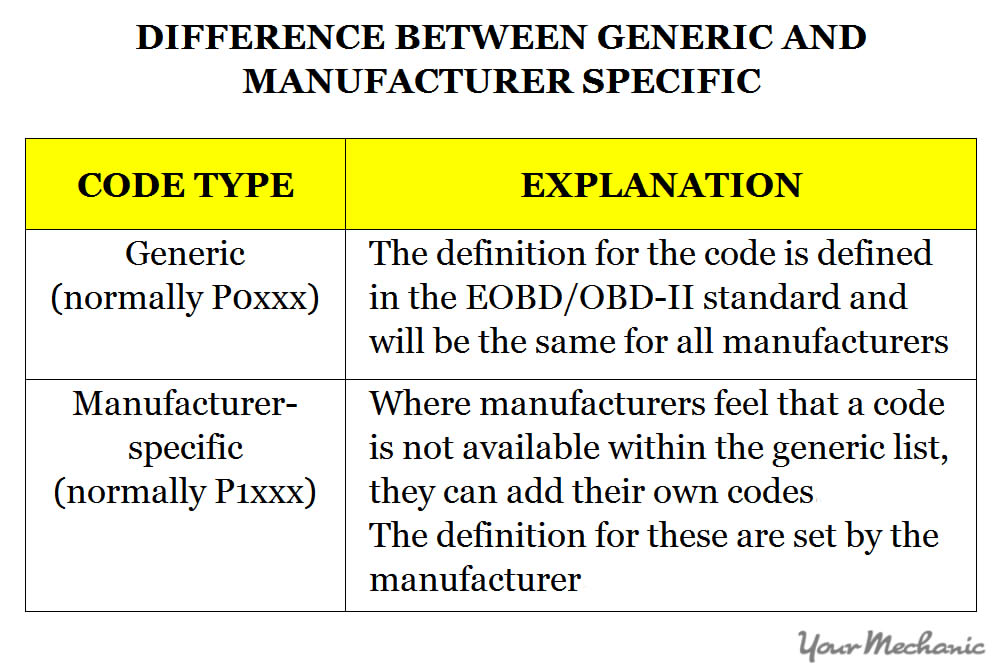
SAE codes are generic codes that apply to all makes and models. SAE codes are indicated with a “0” as the second digit.
Manufacturer-specific codes use a number other than “0” as the second digit.
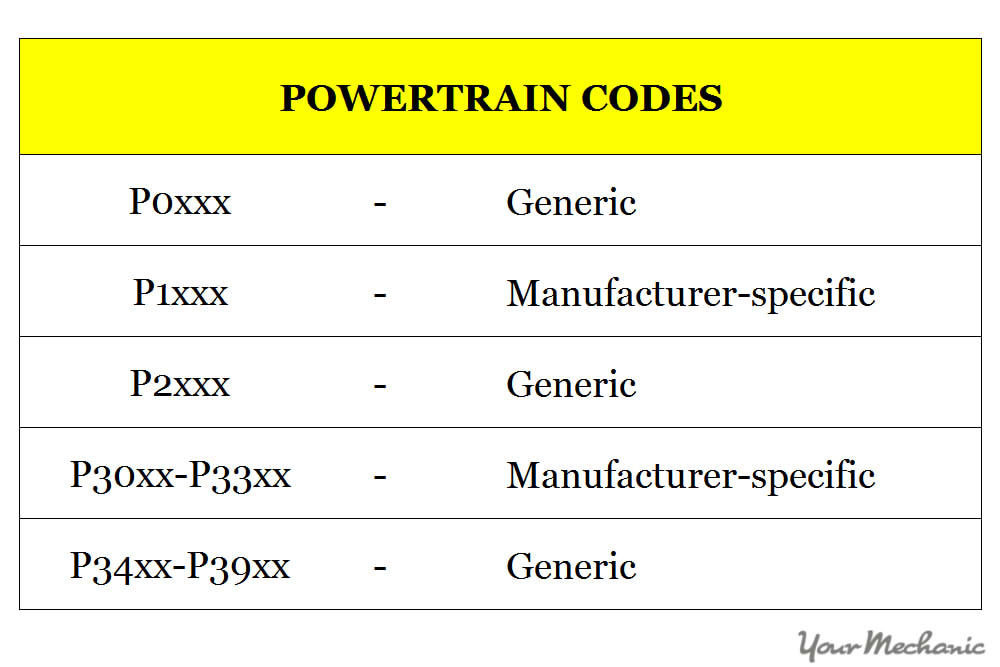
In general, codes that begin with P0 are generic codes concerning a powertrain issue, whereas codes that begin with P1 are manufacturer-specific.
Step 4: Determine which system the code applies to. The third number in the sequence refers to the system that is affected:
A “1” indicates a fuel or air metering system problem, such as an issue with the mass air flow sensor.
A “2” refers to fuel or air metering injection system issues, such as a fuel injector problem.
A “3” indicates an ignition-related problem, such as an engine misfire.
A “4”refers to emissions system problems, like a catalytic converter efficiency issue.
A “5” indicates vehicle speed controls and idle control system problems.
A “6” refers to computer output circuit issues, like an internal computer failure.
The numbers “7”, “8”, or “9” all indicate transmission-related problems, like pressure faults and sensor failures.
Step 5: Determine the exact fault. The last two numbers provide a description of the fault code. To read the description for your specific trouble code, check an online source such as OBD-Code’s website.
- Tip: You will want to address the top DTCs first if there are multiple codes. In some cases, the codes lower down on the list may be symptoms of a code higher up on the list.
It is important to remember that any code revealed is only a starting point for proper diagnosis. An OBD code will only indicate the system experiencing the issue; it will not tell you why or how to fix it. Oftentimes, parts are replaced over and over until it is made clear that a code does not equal the part. Codes can also be generated due to temporary problems, such as a loose fuel cap, a poor connection, or even moisture affecting one of the many sensors’ readings. While determining a code may just be the starting point, it is fundamental, and taking these first steps will help you to learn more about your vehicle and let it be your guide.