The vehicle's heater hoses are included in both the engine cooling system and interior climate control system. The water pump circulates the liquid coolant through the engine and around the combustion chambers to allow cooling of the engine internals. While the coolant thermostat is closed, the liquid coolant circulates within the engine to allow for a quicker warm-up time. Many vehicles use a bypass hose system which allows the heated liquid coolant circulating through the engine to enter the heater core through the heater hoses. Designing the system this way allows the user to get warm air before the engine reaches operating temperature.
The typical symptoms of failed car heater hoses include overheating from a lack of coolant due to a leak. There may be a lack of heat on the inside of the vehicle. A heater control valve can be blocked by the debris from a heater hose wearing from the inside-out and the user may experience lack of heat or an overheating engine.
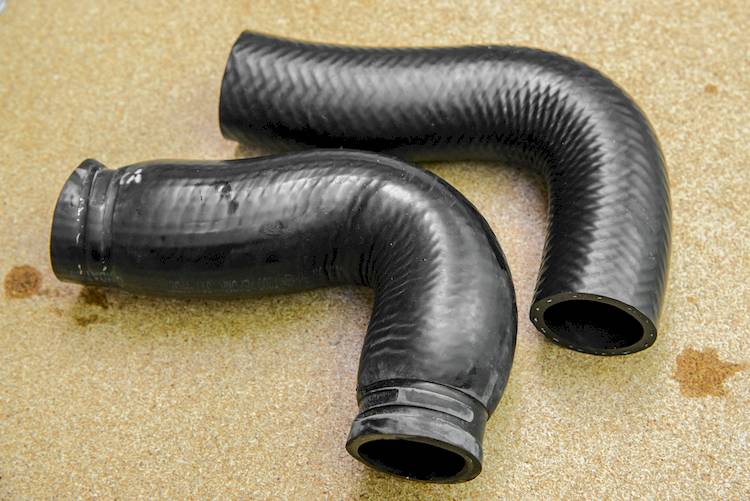
The heater hoses are usually rubber hoses with an integrated nylon thread that makes them pretty strong, but age and contaminants in the coolant can weaken these hoses. Oil from a leaking head gasket or oil cooler may enter the cooling system and begin to ruin rubber hoses from the inside out. If your hoses are especially swollen or you can see obvious deterioration on the inside of the hose, you may have larger issues.
-
Note: The heater core inside the passenger compartment can act as a mini-radiator. The process of creating heat for the passengers cools the liquid coolant flowing through the heater core. In the event of the vehicle overheating, sometimes the heat in the vehicle can be activated to assist in cooling until the vehicle is moved to a safe stopping location. Never drive an overheating vehicle for an extended period of time.
Part 1 of 1: Replacing the car heater hoses
- Warning: Never perform cooling system services on a hot vehicle. The system may be under pressure and contain coolant at scalding temperatures. Let the vehicle sit for at least 2 hours if it has been driven recently.
Materials Needed
- Basic mechanic's tool set
- Channellock pliers
- Coolant recovery container
- Flashlight
- Gloves
- Hose pick tool
- New Coolant
- Replacement hoses
- Safety Goggles or Glasses
- Silicone Spray Lubricant
- Spring clamp removal tool
- Temperature gun
- Vehicle service manual
X-acto knife or razor blade
Warning: Do not use stop leak on any type of vehicle with a coolant leak. The radiator and heater cores have very narrow passages for the coolant to flow through and it is very easy for the stop leak to block the passage altogether which can decrease the efficiency of the cooling system.
Step 1: Prepare your work area. Safety is foremost so put on your safety goggles and gloves and set your drain pan underneath the vehicle. On some models, it may be necessary to raise the vehicle and support the weight with jack stands.
- Tip: The vehicle service manual is a very handy tool. This document lays out very important service information specific to your year model. Follow the steps in the service manual to drain the cooling system. Draining the system can prevent large spills. Remember to capture the old coolant in a container and dispose at a local service facility.
Step 2: Disconnect the battery. Disconnect the battery from the vehicle. We are working with fluids and spilled fluids can ruin electrical components. Open the vehicle's electrical circuit by disconnecting the negative battery terminal.
Step 3: Drain the cooling system. Find the radiator petcock or disconnect the lower radiator hose to empty the cooling system. Details on the location of the drain may be located in the service manual. Try to contain all of the fluid.
- Tip: When the fluid stops dripping, close the drain or reattach the lower radiator hose now. Make sure the parts are secure now. If you forget this step toward the end of the job, you may end up wasting new coolant!
Step 4: Add some lubrication. Use silicone spray to lubricate the hose clamp surfaces. This will make it a bit easier to navigate the clamps along the rubber hose section.
Warning: Do not use oil or any petroleum based lubricant on the rubber components. This will cause the rubber to swell and possibly leak over time.
Note: Notice the way all parts are mounted and the direction the hoses go in. Reversing these hoses will cause the coolant to flow in a direction the system was not designed for. This can allow air pockets to form which may cause an overheating condition.
Step 5: Remove the hose clamps. With the clamp removed, you may notice the hose is still sealed to the hose fitting fairly tightly. Here are a couple of ways to release the rubber hose.
Note: If your vehicle is equipped with spring style hose clamps, now is the best time to replace them with a screw clamp. The spring clamp is designed to be used once. When you remove the spring clamp, it will lose some of it’s tension each time it is compressed and can cause a leak later on. Spring clamps cannot be adjusted like screw clamps can.
Use the hose pick tool. This tool has a pointed end that you can slip under the hose to create a gap between the hose and valve. Slide the pick tool under the rubber hose and move the tool along the area of the hose to pry the rubber hose from the control valve. Silicone spray can be used again here for a little extra lubrication.
Add more silicone pray to the area and grab a pair of channellock pliers. Adjust the pliers so that you can grip the hose without crushing the assembly and gently rock the hose back and forth until you feel it break free. You should be able to twist the hose with your hand and pull it off.
Step 6: Take note of how the hoses are routed. Make a diagram if necessary. We want the coolant flowing in the proper direction when the job is done. Reversing the hoses may hinder cooling system performance.
Step 7: Compare new and old parts. Set the old set of hoses aside the new to compare design and make sure all of the bends are the same. If your vehicle has molded hoses, the original hoses may bend in a way that a universal hose cannot and cause a kink going around the corners. If you see kinks, STOP and get the right hoses.
Step 8: Clean the old hose fittings. If they look messy or pieces of rubber were left behind from the old heater hoses, you’ll want to clean that off now. A razor blade or sandpaper can make quick work of this. Wash away the filings and use silicone spray to add lubrication before installing the hoses.
Step 9: Install the new heater hoses. Route the new hoses and line them up with their fittings. Before sliding the hose onto the fitting, put the new clams on the hose. This makes install a little easier.
Note: This is a great time to perform a flush of your cooling system. You can use one of the old hoses and create a drain long enough to reach a bucket. The other hose can be attached to a water hose to provide clean water at pressure to the system. This process will wash out any loose contaminants in the system. There are flush kits and solvents available for a deeper cleaning. Follow the directions of the kit for the best performance.
The hose fitting will have a barbed end or a flared end. This creates a rough surface or a hump along the fitting. Place the clamp on the section of hose-end behind the hump. This will ensure a tight seal. If the hose ever slips, the clamped section will not spread over the hump so the hose may leak but won’t come off.
Step 10: Refill the system with coolant. Fill the radiator or expansion tank with the proper mix of engine coolant until the reservoir is full. Start the engine and allow it to come up to operating temperature. You will see bubbles as air escapes from the system. Leave the cap off while the cooling system purges air.
Tip: While waiting, command max heat from the climate control and turn the fan speed to the highest setting. This will open the heater control valve and allow coolant to flow through the heater core to remove and air from the system. The air from the vent should be coming out very hot once the heater core is full.
You can use your temperature gun to observe cooling system function. With max heat commanded on inside the vehicle, the hose directing coolant into the heater core should get very hot. The opposite hose coming from the heater core should be cooler than the hose with coolant going in. This is a sign of a well functioning heater core.
The new heater hoses are replaced and fresh clean coolant is circulating through the cooling system. This repair has taken care of one major repair and a maintenance item at the same time. The details are laid out in your vehicle owner's manual, but most vehicles require a cooling system flush every 30-50,000 miles for the best performance. Doing services early gets eyes on the vehicles components and you can find other problem areas by just looking around the area while you’re working.