
The internal combustion engine relies on oil to function. Pressurized engine oil is used to create a layer between moving parts. This layer of protection keeps moving parts from coming into contact with each other. Without this layer between the moving parts, excess friction and heat is created.
Simply put, oil provides protection as both a lubricant and to aid in cooling. To provide this pressurized oil, the engine has an oil pump that picks up the oil stored in the oil pan, builds up pressure, and delivers the now pressurized oil to several locations inside the engine by oil galleries built into the engine components.
The ability of the oil to perform these functions diminishes for several reasons. An engine heats up while running and cools down when shut off. This heat cycle causes the oil to lose its ability to lubricate and cool the engine over time.
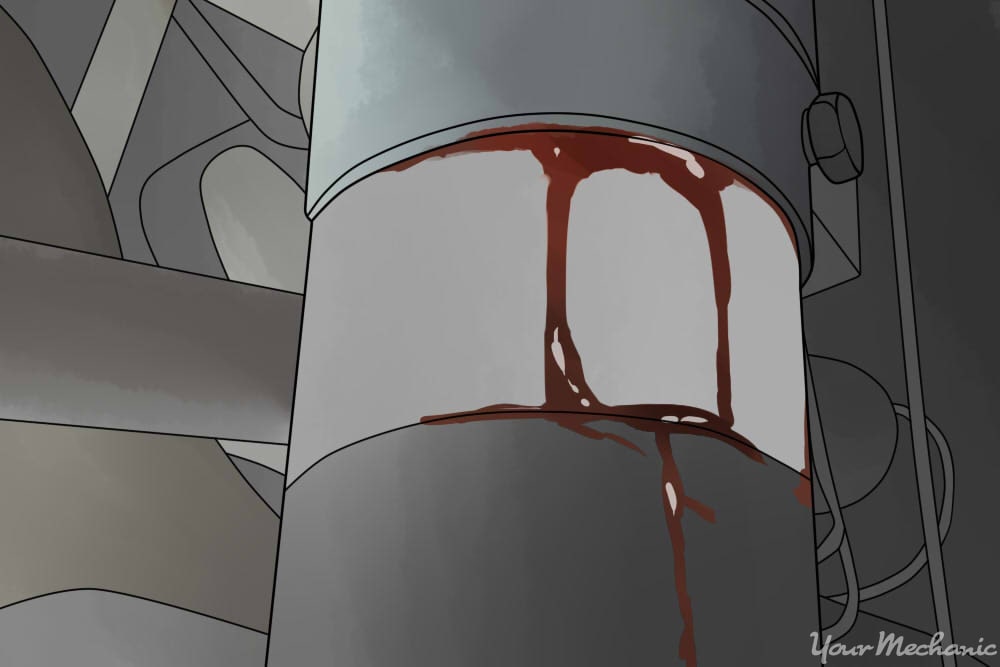
As the oil begins to break down, it creates small particles that can clog the oil galleries. This is why the oil filter is tasked with pulling those particles out of the oil, and why there are intervals determining when the oil and filter need to be changed. If your oil filter housing gasket is failing, your engine light may be on, there may be oil dripping from the filter, and lower than normal oil pressure.
This article covers how to replace the gasket on the oil filter housing. Even though there are several different layouts for an oil filter housing, this article is written in such a way that it should be able to be adapted to most applications.
Part 1 of 1: Replacing an oil filter housing gasket
Materials Needed
- Drain pan
- Hydraulic jack
- Jack stands
- Oil filter wrench (optional)
- Screwdriver set
- Shop towels/rags
- Socket set
- Wheel chocks
- Wrench set
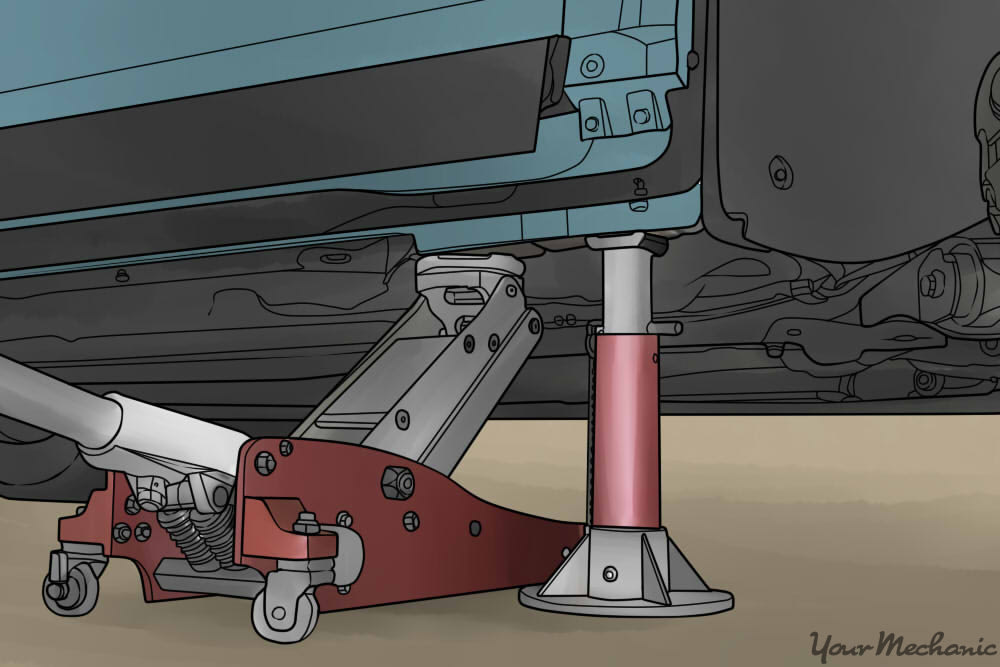
Step 1: Jack up the vehicle and set jack stands. Jack up the vehicle and set jack stands using the factory recommended jacking and stand points.
Warning: Always be sure jacks and jack stands are set on solid ground. Setting either on soft ground can lead to injury.
Warning: Never leave the weight of the vehicle on the jack. Always let the jack down and place the weight of the vehicle on the jack stands. Jack stands are designed to handle the weight of a vehicle for an extended period of time, whereas a jack is only meant to support this type of weight for a short period.
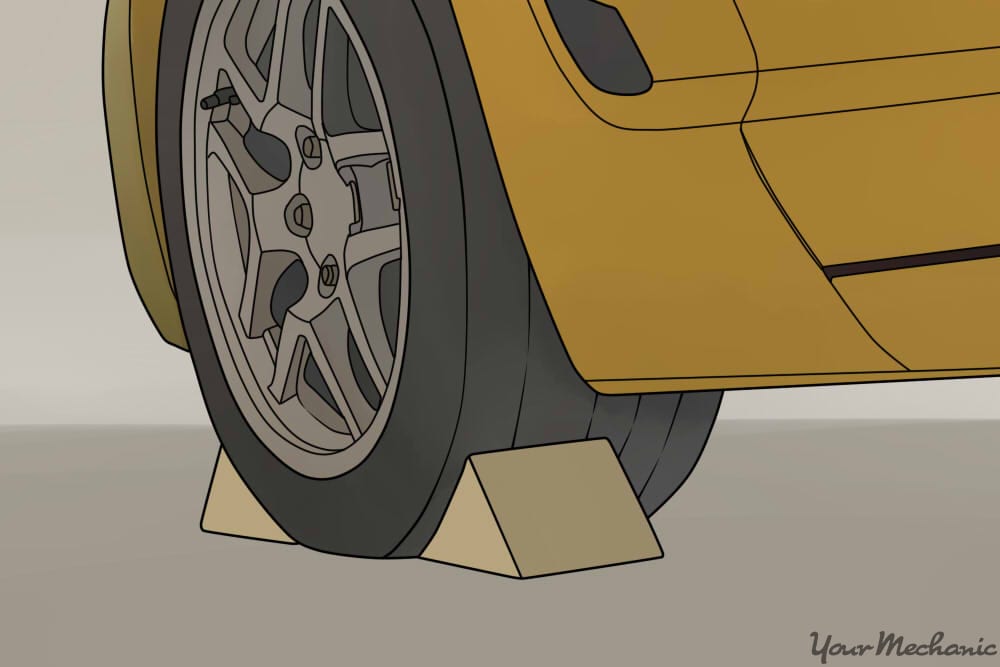
Step 2: Place wheel chocks on both sides of wheels still on the ground. Place wheel chocks on both sides of each of wheels that are still on the ground.
This will lessen the likelihood of the vehicle rolling forward or back, and falling off of the jack stands.
- Note: It is recommended you perform an oil change during this procedure. Any time components are disturbed in the oil system, debris can be dislodged and find its way into the oil. With the removal of the oil filter in this repair, this would be a great time to go ahead and change the oil.
Step 3: Drain the engine oil. Place a drain pan under the oil pan and, with the appropriate wrench, remove the drain plug.
Drain all of the oil from the engine.
Step 4: Reinstall the drain plug. With the oil pan empty, reinstall the drain plug back into the oil pan and tighten.
This is recommended so that it doesn’t get lost during the rest of the repair.
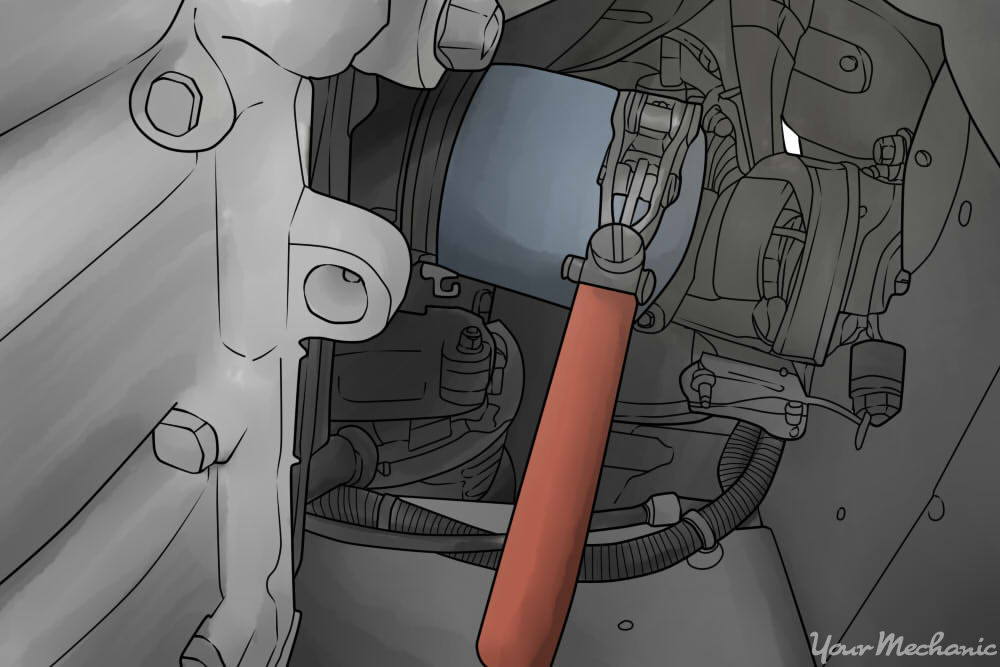
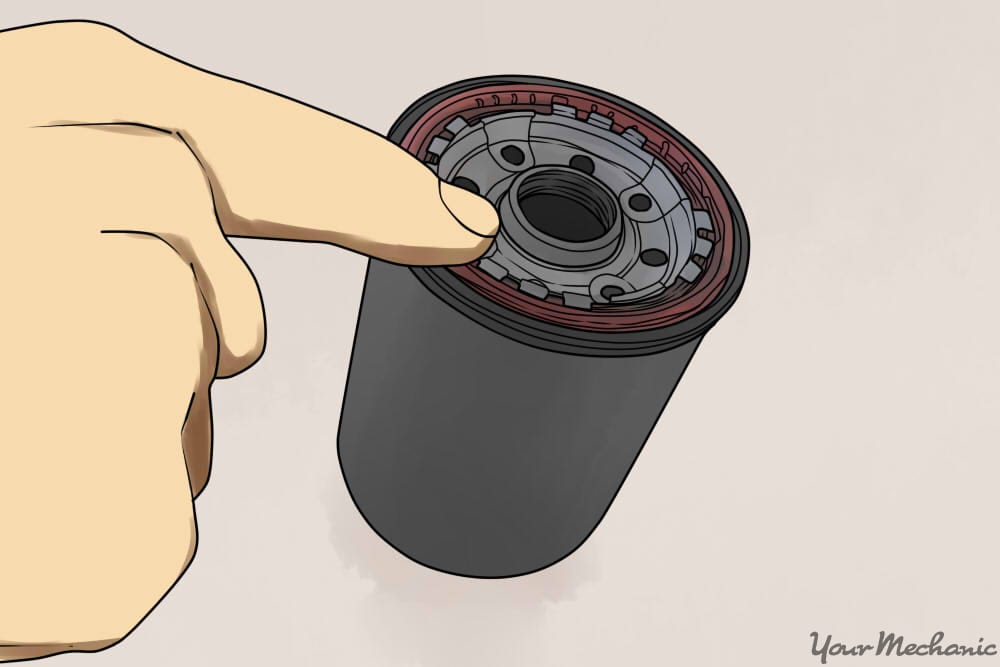
Step 5: Remove the oil filter. Place a drain pan under the oil filter and remove it.
If the oil filter cannot be removed by hand, it may be necessary to use an oil filter wrench.
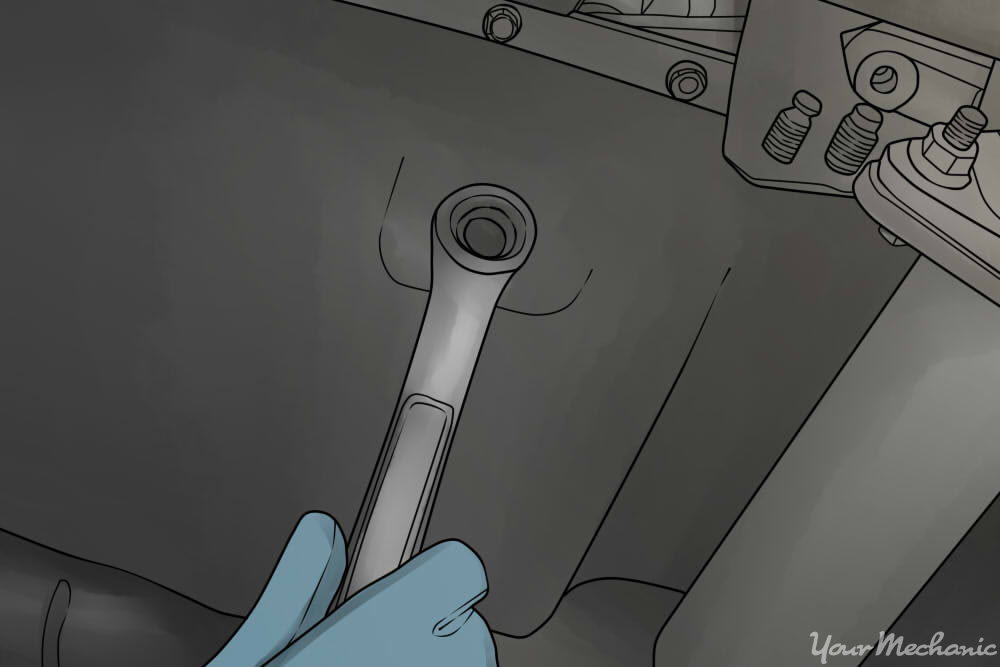
Step 6: Remove the oil filter housing retaining hardware. Remove the retaining hardware holding the oil filter housing to the engine block.
This can be any number and combination of bolts, nuts, or clamps.
- Warning: Be sure all of the old gasket is removed. The gasket may stick to either the oil filter housing or the engine block. Not removing all of the gasket can lead to leaks and/or oil starvation to the critical components.
Step 7: Compare replacement oil filter gasket to the one being removed. Compare the replacement oil filter housing gasket to the one that was removed.
Be sure that the replacement gasket has all of the correct cutouts and that it will fit correctly before installing it.
Step 8: Install the replacement gasket and reinstall the oil filter housing. Install the replacement gasket and reinstall the oil filter housing.
Reinstall the hardware that secures the oil filter housing to the engine block.
- Note: When installing a new oil filter, it’s recommended you partially fill the oil filter before installing it onto the engine. This will avoid premature wear due to oil starvation.
Step 9: Install a new oil filter. Lightly lubricate the o-ring seal on the new oil filter with a bit of new oil.
This will help the oil filter to seal correctly. Spin the new filter into place.
Step 10: Add oil. Add the recommended amount of oil to the engine found in your repair manual.
Step 11: Start the engine. Start the engine and allow it to run for a couple of minutes.
This will allow the oil to circulate and disperse the oil to all of the vital areas.
Step 12: Check for leaks. Shut the engine off and check the area around the oil filter for signs of any leaks.
If there is a small amount of oil seeping from the top of the oil filter, check to be sure the oil filter is tight.
Step 13: Remove the jack stands. Using the hydraulic jack, raise the car back up and remove the jack stands.
Let the car back down.
Step 14: Recheck the engine oil level. Recheck the engine oil level with the car sitting flat on the ground.
It is possible that more oil may need to be added at this point.
The oil filter housing gasket may have a leak allowing the oil out of the system at a very high rate, which could end up being damaging to your engine. If at any point you feel that you could use a hand with replacing the oil filter gasket on your vehicle, have one of YourMechanic’s certified technicians come to your home or business to perform the repair for you.