Pneumatic suspension systems are designed to provide improved vehicle ride, handling, and driving performance. They also function as load leveling systems when the vehicle’s ride height shifts due to changes in vehicle loading.
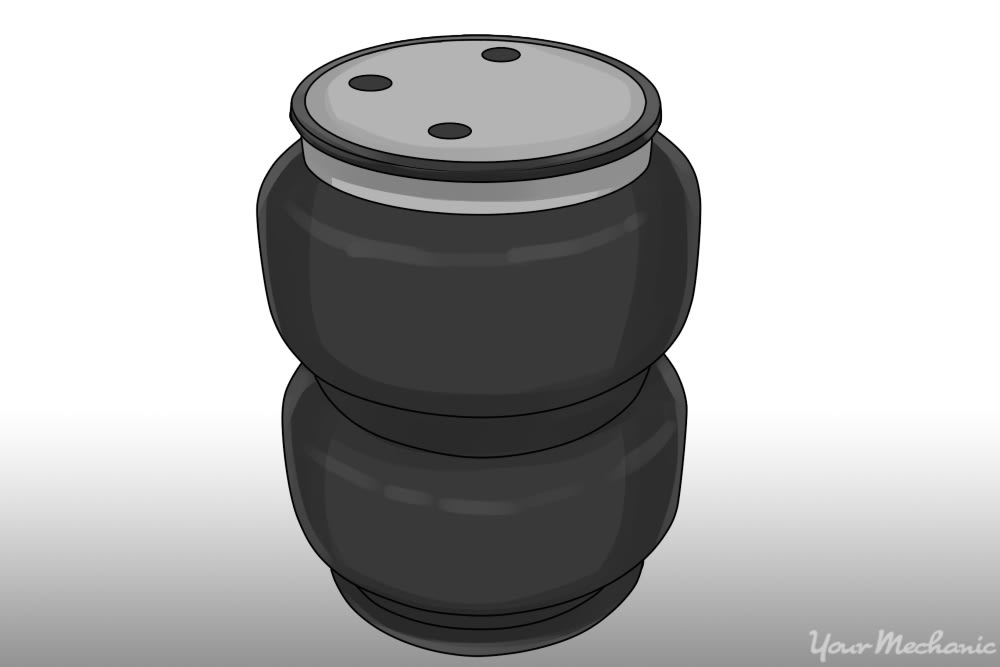
Most air springs are found on the rear axle of vehicles. The bottoms of the air springs sit on support plates that are welded to the axle. The tops of the air springs are attached to a body member. This allows the air springs to support the vehicle weight. If an air spring is no longer functioning, you may experience excessive bouncing while driving or even bottoming out.
Part 1 of 1: Replacing an air spring
Materials Needed
- ⅜ inch drive ratchet
- Metric sockets (⅜ inch drive)
- Needle nose pliers
- Scan tool
- Vehicle lift
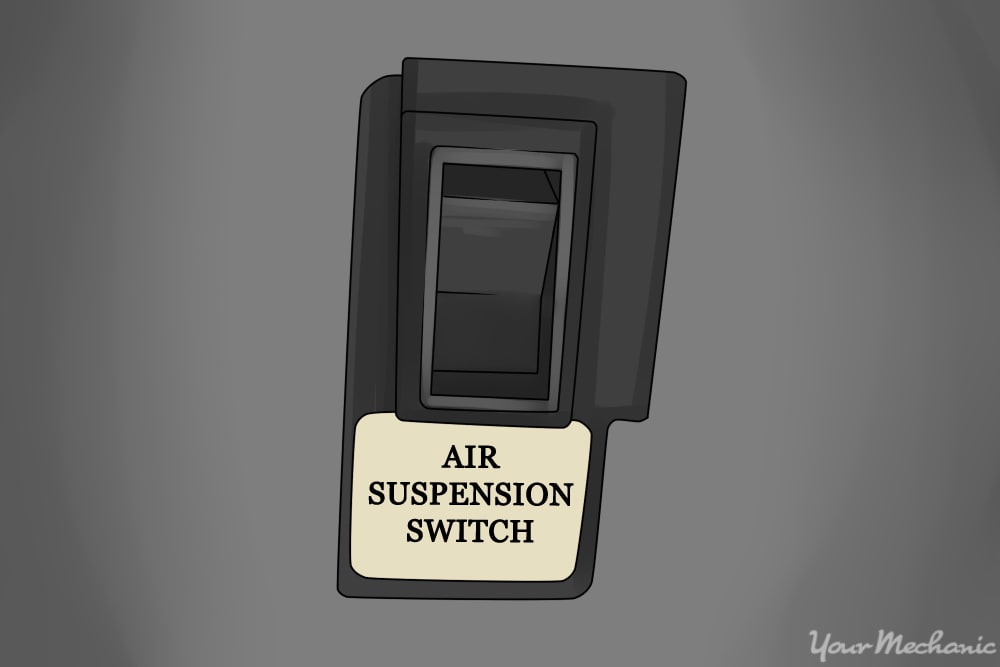
Step 1: Turn the air suspension switch off. This ensures that the air suspension computer will not try to adjust the vehicle ride height while you are working on the vehicle.
Step 2: Locate the air suspension switch. The air suspension switch is most commonly located somewhere in the trunk compartment.
It can also be located in the passenger side footwell. On some vehicles, the air suspension system is turned off by using a series of commands on the instrument cluster.
Step 3: Raise and support the vehicle. The vehicle must be positioned on a suitable vehicle lift prior to deflating the air suspension system.
The lift arms of the vehicle lift must be placed securely under the vehicle to lift it off of the floor without damage. If you’re not sure where to place the vehicle lift arms for your vehicle, you can Ask a Mechanic for specific details regarding your particular vehicle.
If a vehicle lift is not available, then use a hydraulic floor jack to lift the vehicle off the ground and place jack stands under the vehicle body. This safely supports the vehicle and removes all vehicle weight from the suspension while you are servicing the vehicle.
Step 4: Deflate the air suspension system. Using the scan tool, open the air spring solenoid valves and the vent valve on the air compressor.
This relieves all of the air pressure from the suspension system which allows you to service the air spring more safely.
Warning: Before performing maintenance on any air suspension components, disable the system by turning off the air suspension switch. This prevents the suspension control module from making changes to the vehicle ride height when the vehicle is in the air. This prevents vehicle damage or personal injury.
Warning: Do not remove an air spring under any circumstances when the air spring is pressurized. Do not remove any components supporting an air spring without either venting the air pressure or supporting the air spring. Disconnecting a pressurized air line that is connected to the air compressor can cause personal injury or damage to components.
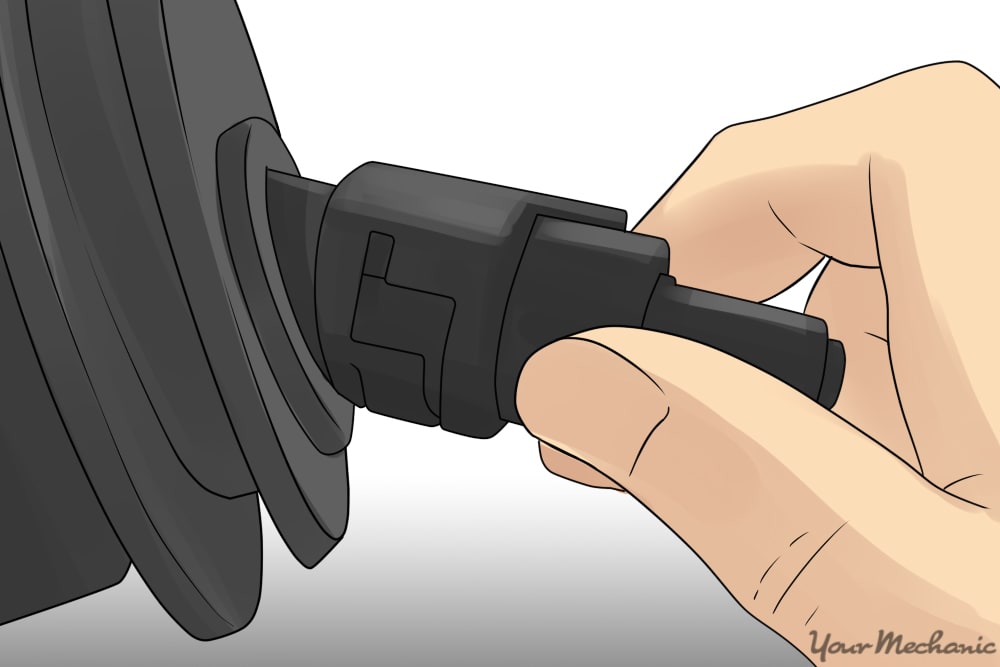
Step 5: Disconnect the electrical connector to the air spring solenoid. The electrical connector has a lock device or a tab on the connector shell.
This ensures positive connection between two mating halves of the connector. Carefully pull on the lock tab to release the lock and pull the connector shell away from the air spring solenoid.
Step 6: Remove the air line from the air spring solenoid. Air spring solenoids use a push-to-connect fitting for attaching air lines to the solenoid.
Depress the colored air line retaining ring on the air spring solenoid and firmly pull on the air line to remove it from the solenoid.
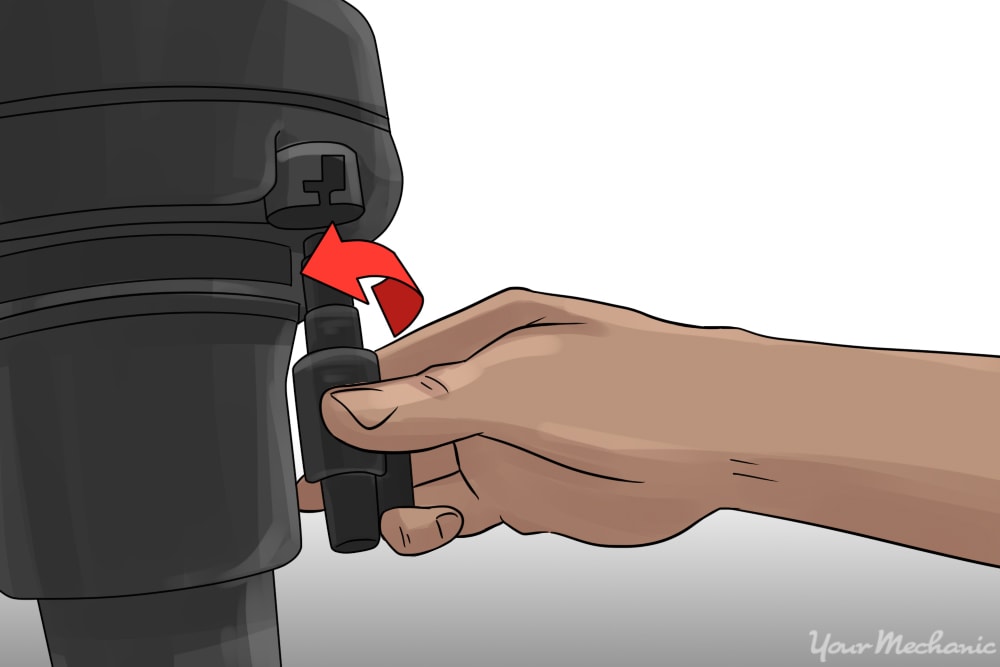
Step 7: Remove the air spring solenoid from the air spring assembly. Air spring solenoids have a two-step lock.
This prevents personal injury when removing the solenoid from the air spring. Rotate the solenoid to the left to the first lock position. Pull the solenoid out to the second lock position.
This step allows any residual air pressure inside the air spring to exhaust. Turn the solenoid left again to the stop and pull the solenoid out to remove it from the air spring.
Step 8: Remove the rear air spring retainer located on the top of the air spring. Remove the air spring retaining ring from the top of the air spring.
This detaches the air spring from the vehicle body. Squeeze the air spring with your hands to compress it, and then pull the air spring away from the upper mount.
Step 9: Lift the air spring off of the bottom mount on the rear axle. Remove the air spring from the vehicle.
- Warning: To avoid damage to the air spring, do not allow the vehicle suspension to compress before the air spring is inflated.
Step 10: Place the bottom of the air spring onto the bottom spring mount on the axle. The bottom of the air spring assembly may have locating pins to aid in orientation of the air spring.
Step 11: Compress the air spring assembly with your hands. Position it so that the top of the air spring mates with the upper spring mount.
Make sure air spring is in the proper shape with no folds or creases.
Step 12: Install the spring retainer clip on the top of the air spring. This firmly attaches the air spring to the vehicle and prevents it from shifting its position or falling out of the vehicle.
- Note: When installing the air lines, make sure the air line (usually a white line) is fully inserted into the push-to-connect fitting for correct installation.
Step 13: Install the air spring solenoid valve into the air spring. There is a two-step lock on the solenoid.
Insert the solenoid into the air spring until you reach the first step. Turn the solenoid to the right and push the solenoid in until you reach the second step. Turn the solenoid to the right again. This locks the solenoid into the air spring.
Step 14: Connect the air spring solenoid electrical connector. The electrical connector attaches to the air spring solenoid in one way only.
There is an alignment key on the connector that ensure proper orientation between the solenoid and the connector. Push the connector onto the solenoid until the connector lock clicks into place.
Step 15: Connect the air line to the air spring solenoid. Insert the white plastic air line into the push-to-connect fitting on the air spring solenoid and push in firmly until it bottoms out.
Gently tug on the line to ensure that it does not come out.
Step 16: Lower the vehicle to the ground. Raise the vehicle off of the jack stands and remove them from under the vehicle.
Slowly lower the floor jack until the vehicle is slightly lower than normal vehicle ride height. Do not let the vehicle suspension bottom out. This can damage the air springs.
Step 17: Turn the suspension switch back to the on position. This allows the air suspension computer to sense vehicle ride height and command the air compressor to turn on.
It then reinflates the air springs until the vehicle reaches normal ride height.
After the air suspension system has been reinflated, lower the floor jack completely and remove it from under the vehicle.
The typical air suspension system is very complex, and the air springs are just one part of the system. If you are sure the air sping is bad and needs to be replaced, have one of YourMechanic’s certified technicians come to your home or place of business and do the repair for you.