One of the most popular car modifications done today is lowering a vehicle’s suspension. A vehicle’s suspension is usually lowered to increase the visual appeal of a vehicle and for the potential increase in handling performance it may provide.
While there are several methods to lower a vehicle’s suspension, the two most common ones are using a replacement spring kit for models with coil spring suspension and using a lowering kit with blocks for vehicles that employ leaf spring suspension.
Use the following steps to understand the process of lowering both types of suspensions using basic hand tools, a few specialty tools, and the correct lowering kits.
Method 1 of 2: Lower a coil spring suspension using lowering springs
Many vehicles, especially compact cars, use coil spring suspension, and lowering them is simply a case of replacing the stock coil springs with shorter ones that leave the vehicle at a lower height when at rest. These shorter springs are often tuned to be stiffer than stock ones to give the suspension a more sporty and responsive feel.
Materials Needed
- Air compressor , or other source of compressed air
- Air impact gun
- Basic set of hand tools
- Jack and jack stands
- Set of new lowering springs
- Socket set
- Strut spring compressor
- Wood blocks or tire chocks
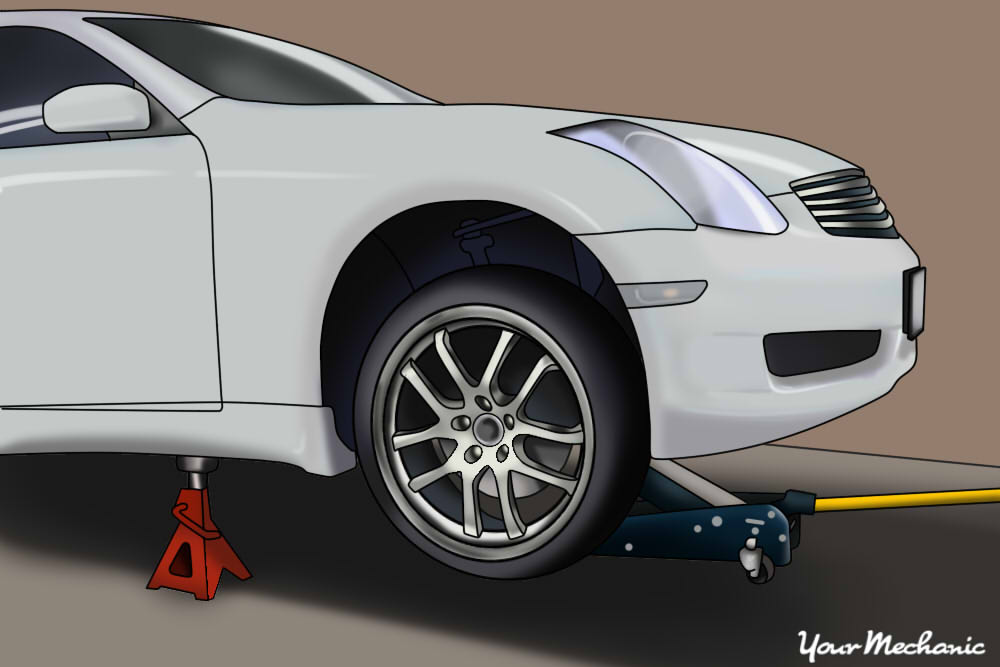
Step 1: Raise the front portion of the car. Raise the front of the vehicle off the ground, and secure it on jack stands. Place wood blocks, or tire chocks at the rear wheels, and set the parking brake to prevent the car from rolling.
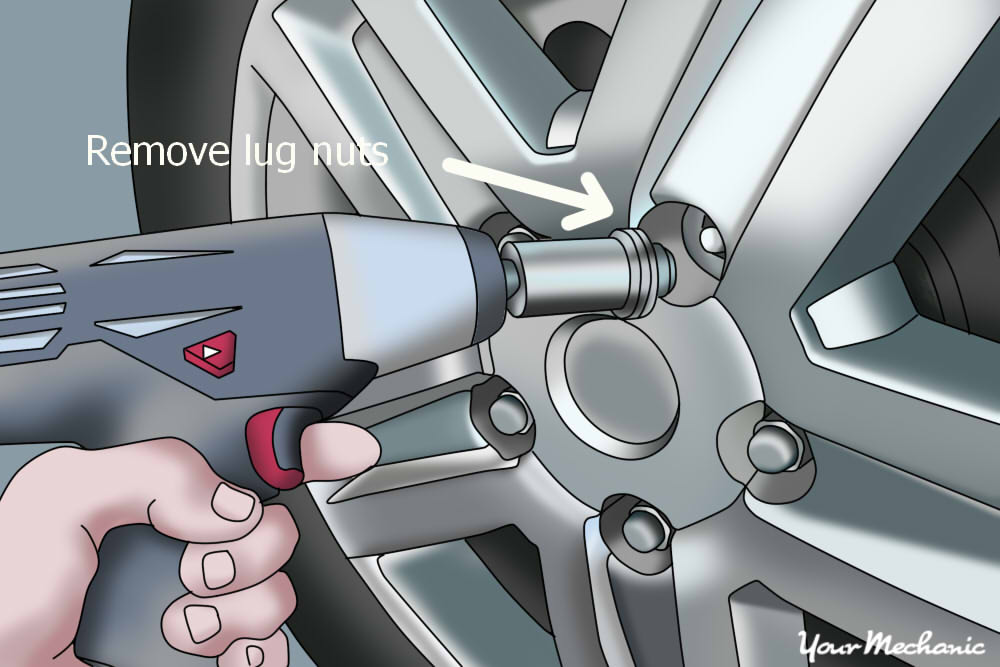
Step 2: Remove the lug nuts. Once the vehicle has been raised, use the impact gun, and the appropriate size socket, to remove the lug nuts. Once the lug nuts are removed, remove the wheel.
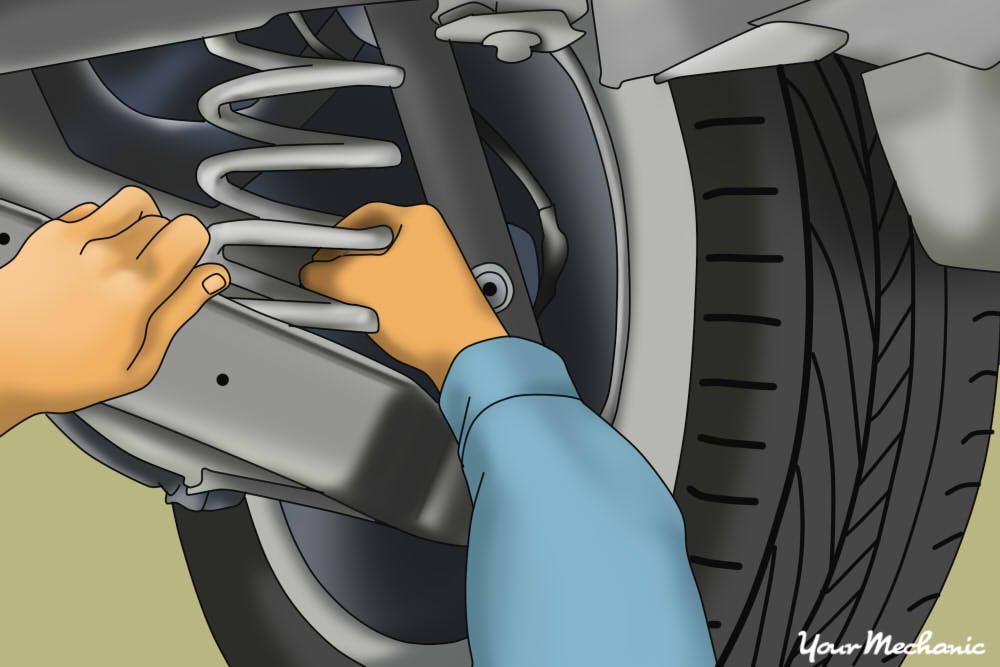
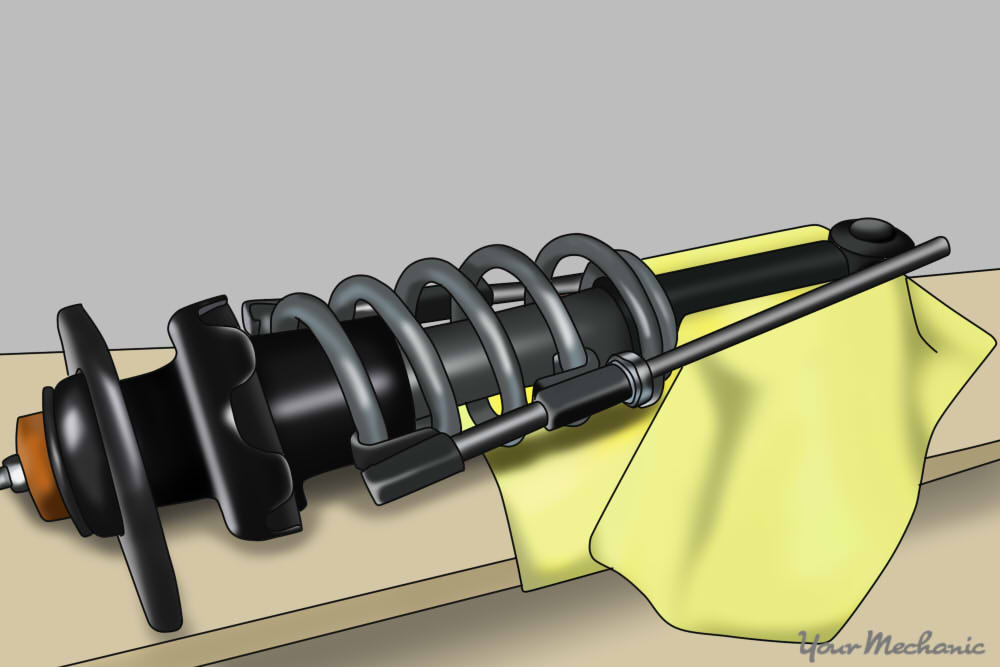
Step 3: Remove the vehicle’s front strut assembly. Remove the front strut assembly, by removing the bolts that secure it at the top and bottom using wrenches, or a ratchet and the appropriate sockets.
Though exact struts designs can vary greatly from vehicle to vehicle, most struts are usually held in by one or two bolts at the bottom and a few bolts (usually three) at the top. The three top bolts can be accessed by opening the hood and they can be removed by loosening them from the top.
Once all of the bolts have been removed, pull the entire strut assembly free.
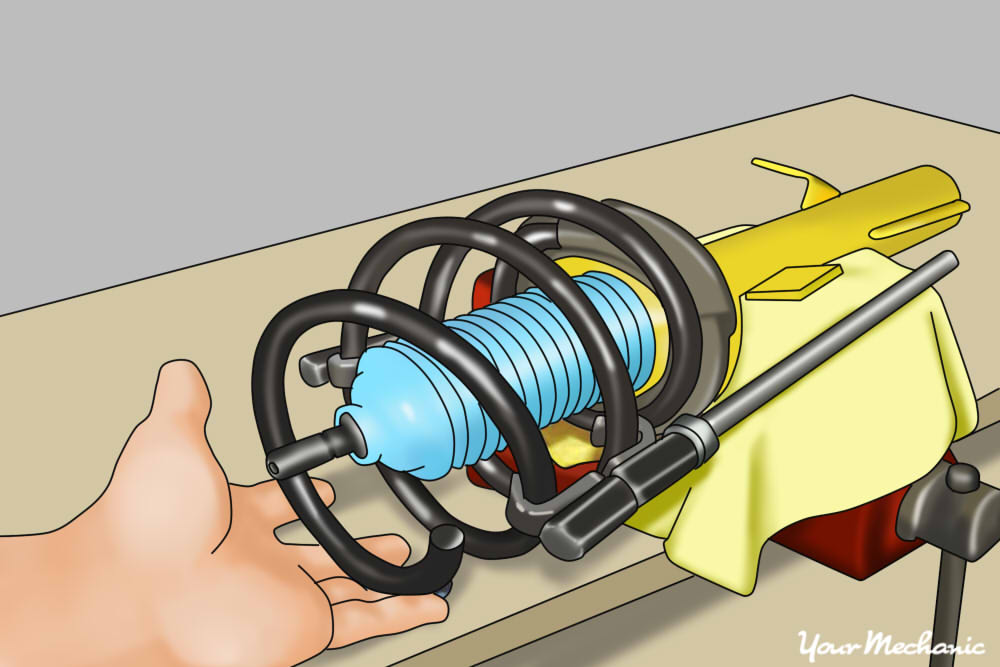
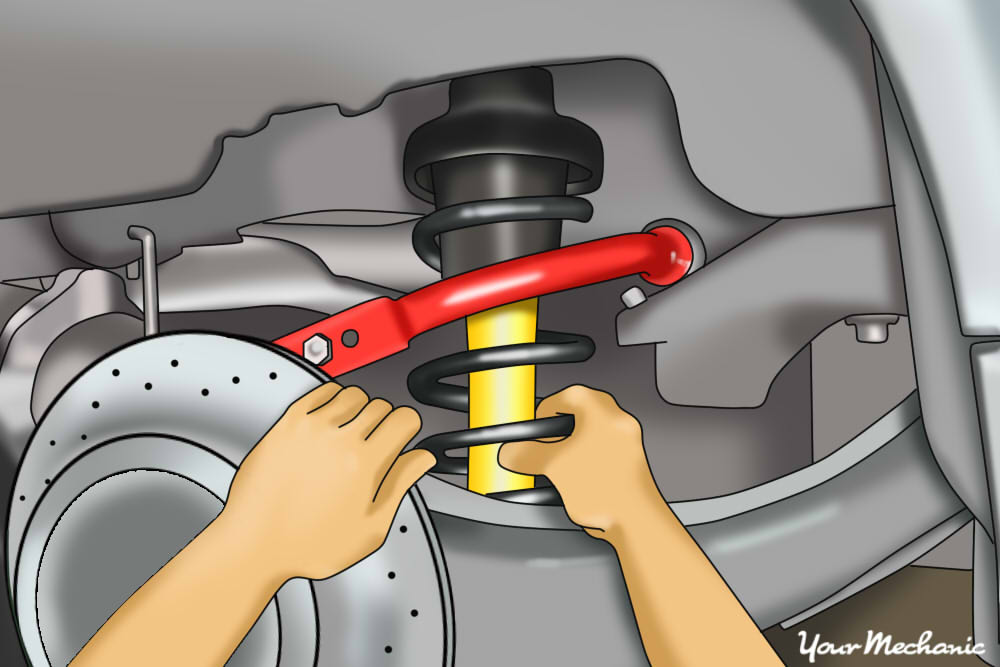
Step 4: Compress the strut spring. Once the strut assembly has been removed, take your strut spring compressor, and compress the spring to remove all the tension between the spring and the upper strut mount.
It maybe necessary to continuously compress the spring in small increments, interchanging between both sides, until enough tension is relieved for the upper strut mount to be safely removed.
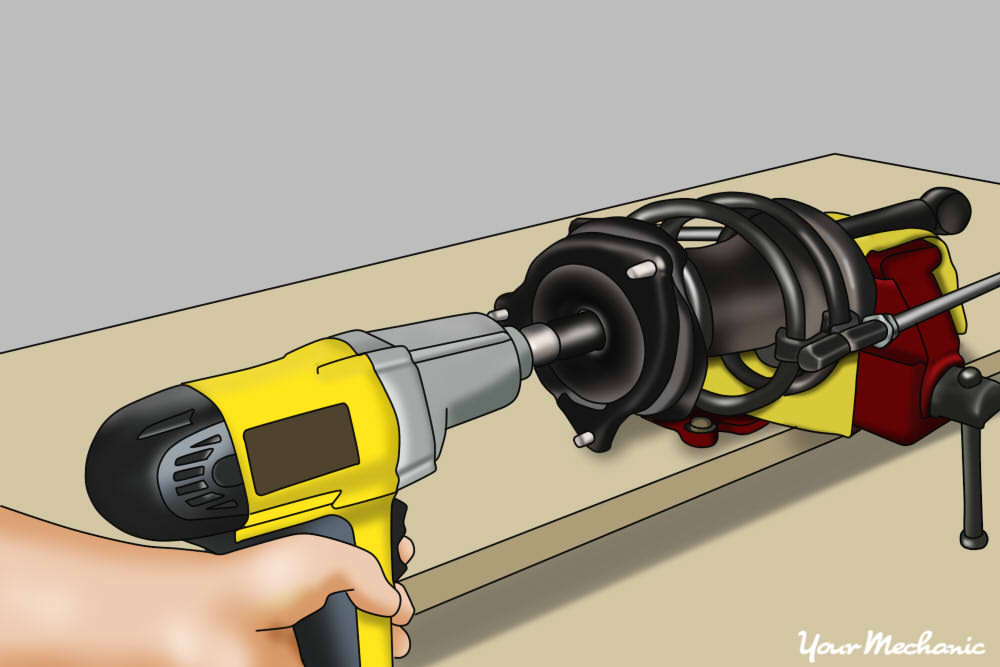
Step 5: Remove the compressed coil spring. After the coil spring has been adequately compressed, turn on the compressed air, take your air impact gun and the appropriate sized socket and remove the top nut that secures the strut mount to the strut assembly.
Once this top nut is removed, pull off the upper strut mount, and remove the compressed coil spring from the strut assembly.
Step 6: Install new coil springs onto the strut assembly. Many lowering springs sit on the strut perch in a very specific manner, so ensure that you seat the spring correctly when installing it onto the strut assembly.
Be sure to replace any rubber spring seats, if they are included as part of your kit.
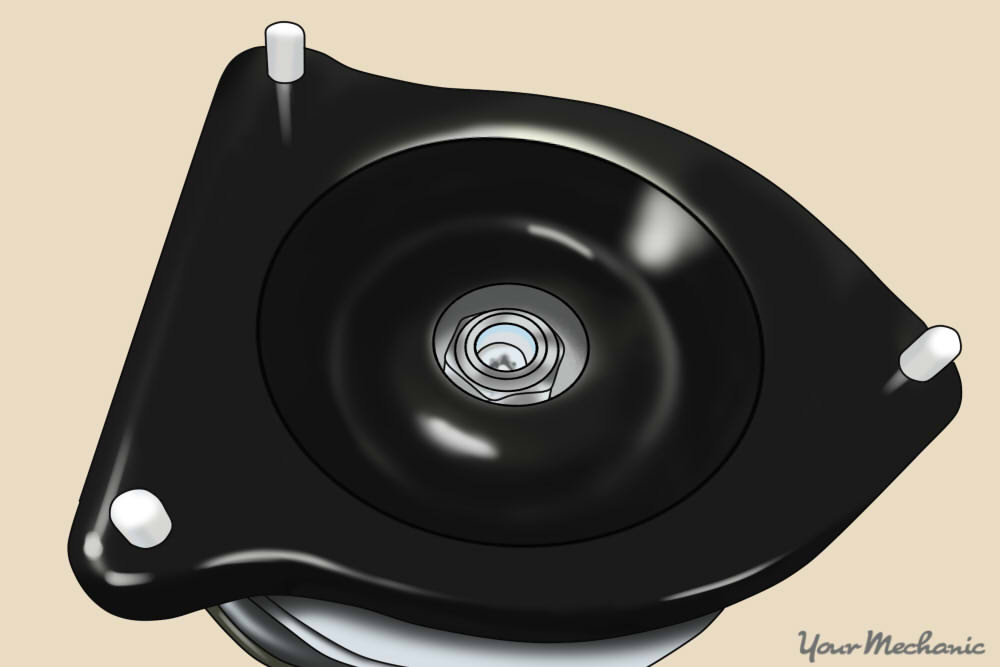
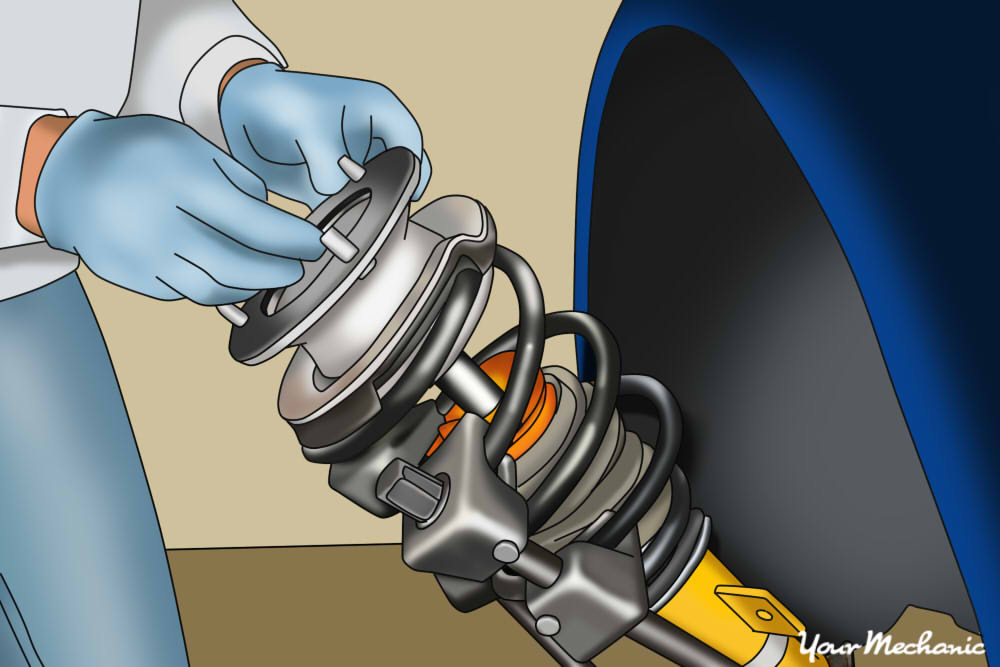
Step 7: Reinstall the upper strut mount. Reinstall the upper strut mount onto the spring assembly, above the new coil spring.
Depending on how much lower your new coil springs are, you may have to compress the spring again before can reinstall the nut. If that is the case, simply compress the spring until you can install the nut, turn it for a few threads, and then tighten it with the air impact gun.
Step 8: Put the strut assembly back onto the car. Once the strut assembly has been reassembled with the new lowering spring, put the strut assembly back onto the vehicle in the reverse order of the removal procedure.
- Tip: It is easier to put one of the bottom bolts in first to support the strut and then install the rest of the hardware once the strut is secured to the vehicle.
Step 9: Lower the opposite side. Once the strut has been reinstalled onto the vehicle, reinstall the wheel and torque the lug nuts down.
Proceed to lower the opposite side by repeating the procedure on the opposite strut assembly.
Step 10: Replace the rear coil springs. Once the front springs have been replaced, proceed to replace the rear coil springs using the same procedure.
In many vehicles, the rear coil springs will often be similar, if not easier to replace than the fronts, and just need the vehicle to be raised enough to release tension and pull the spring out by hand.
Method 2 of 2: Lower a leaf spring suspension using a universal lowering kit
Some vehicles, primarily older vehicles and trucks, use leaf spring suspensions instead of coil spring suspensions. Leaf spring suspension uses long metal leaf springs, secured to the axle via U-bolts, as the main suspension component that suspends the vehicle above the ground.
Lowering vehicles with leaf spring suspensions is usually a very simple matter, requiring only basic hand tools, and a universal lowering kit, which can be purchased at most automotive parts stores.
Materials Needed
- Basic set of hand tools
- Jack and jack stands
- Universal lowering block kit
- Wood blocks or tire chocks
Step 1: Raise the vehicle. Raise the vehicle and place a jack stand under the frame, nearest to the side of the vehicle you will first be working on. Additionally, place wooden blocks, or tire chocks under any opposite of the side of the vehicle that you are working on, as to prevent the vehicle from rolling.
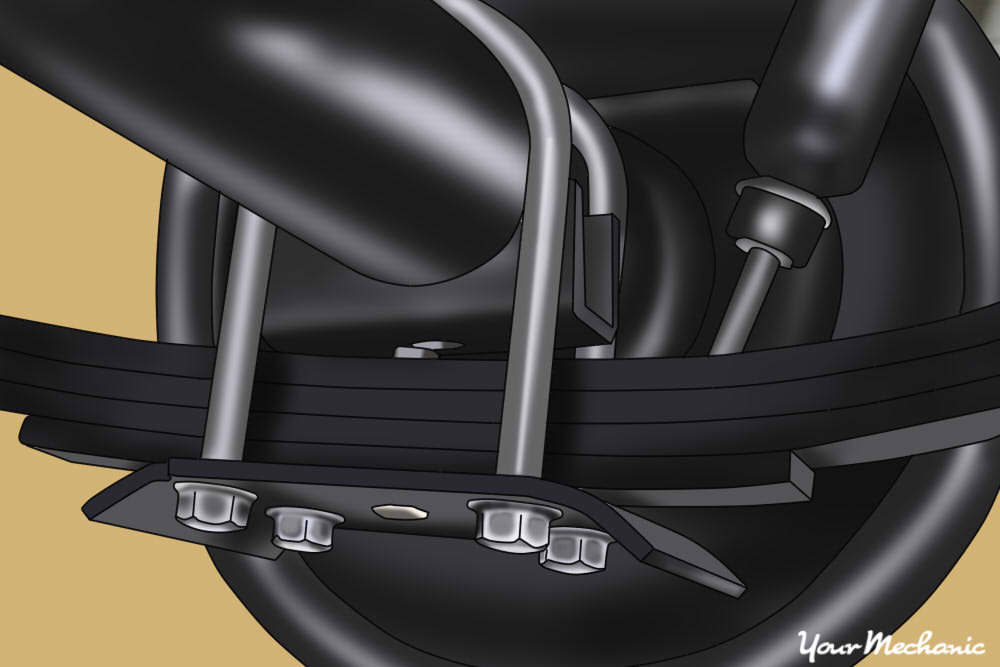
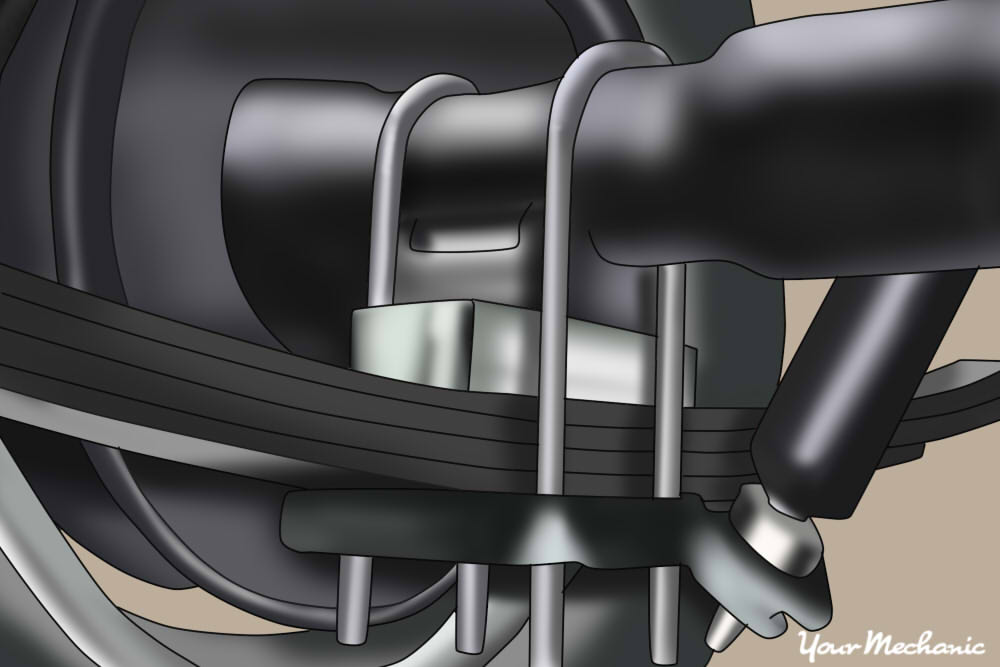
Step 2: Remove the bolts of the suspension spring. Once the vehicle is raised, locate the two U-bolts on the suspension leaf springs. These are long bolts shaped like U’s with threads on the ends, that wrap around the axle and bolt up to the underside of the leaf springs, securing the two together.
Remove the U-bolts individually, using the correct tools — usually just a ratchet and the appropriate socket.
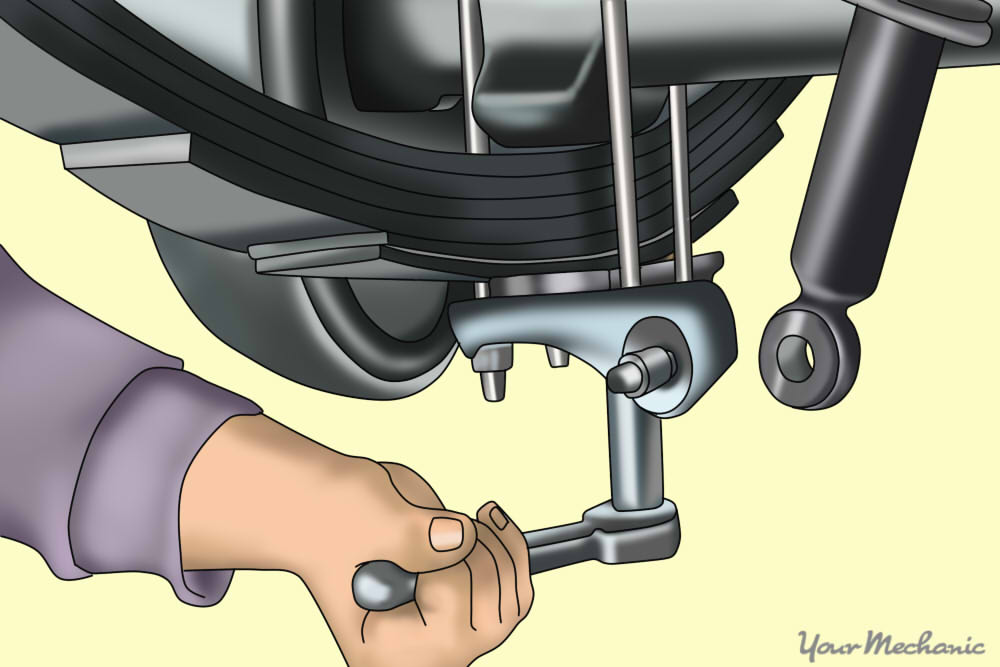
Step 3: Raise the axle. Once both the U-bolts are removed, take your jack, and place it underneath the axle near the side you are working on, and proceed to raise the axle.
Raise the axle until there is enough room for the lowering block to fit between the axle and the leaf springs. For example, if it is a 2 inch lowering block, then you will need to raise the axle until there is a 2 inch gap between the axle and spring so that there is enough room for the block to fit in.
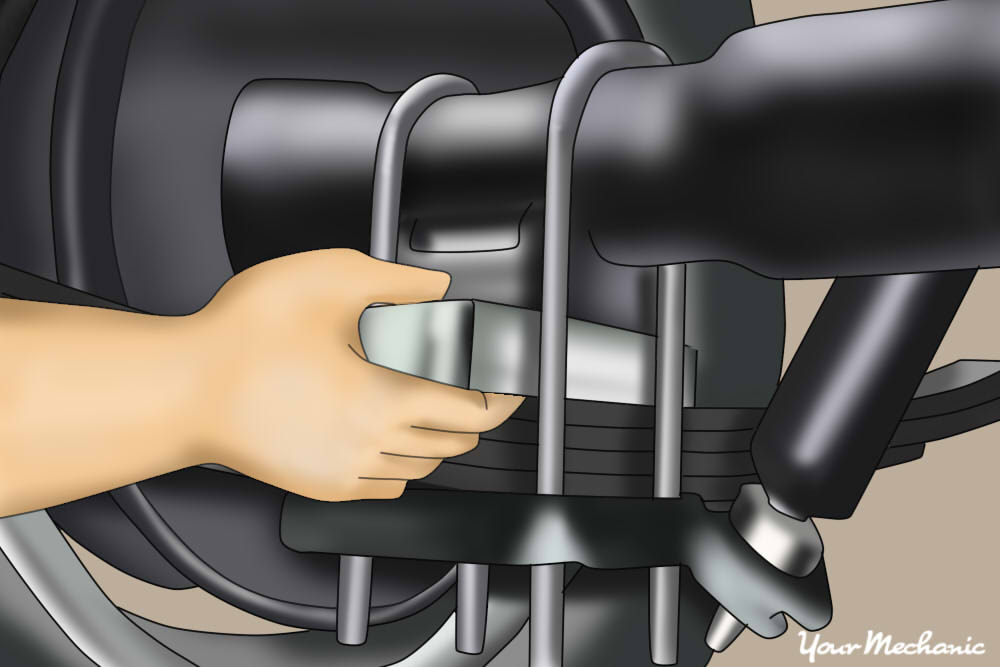
Step 4: Install new U-bolts. Once the lowering block is installed, take the new, extended U-bolts in your lowering kit and install them over your axle. The new U-bolts will be slightly longer, to compensate for the extra space taken up by the lowering block.
Double check that everything is lined up correctly, install the nuts on the U-joints and torque them down into place.
Step 5: Repeat the steps for the opposite side. At this point, one side of your vehicle has been lowered. Put back the tire, lower the vehicle, and remove the jack stand.
Repeat the same procedure as outlined in steps 1-4, to lower the opposite side and then repeat it for the rear suspension.
Lowering a vehicle’s suspension is one of the most common modifications done today, and doing so can not only add visual appeal, but may even have performance benefits, if done correctly.
While lowering a vehicle is a pretty straightforward job, it may require the use of special tools. If you do not feel comfortable taking on such a task, this is something that any professional technician should be able to carry out for you.
If you feel like there is something wrong with the suspension after you lower the vehicle, get a certified mechanic, such as one from YourMechanic, to inspect the suspension and replace the suspension springs if necessary.