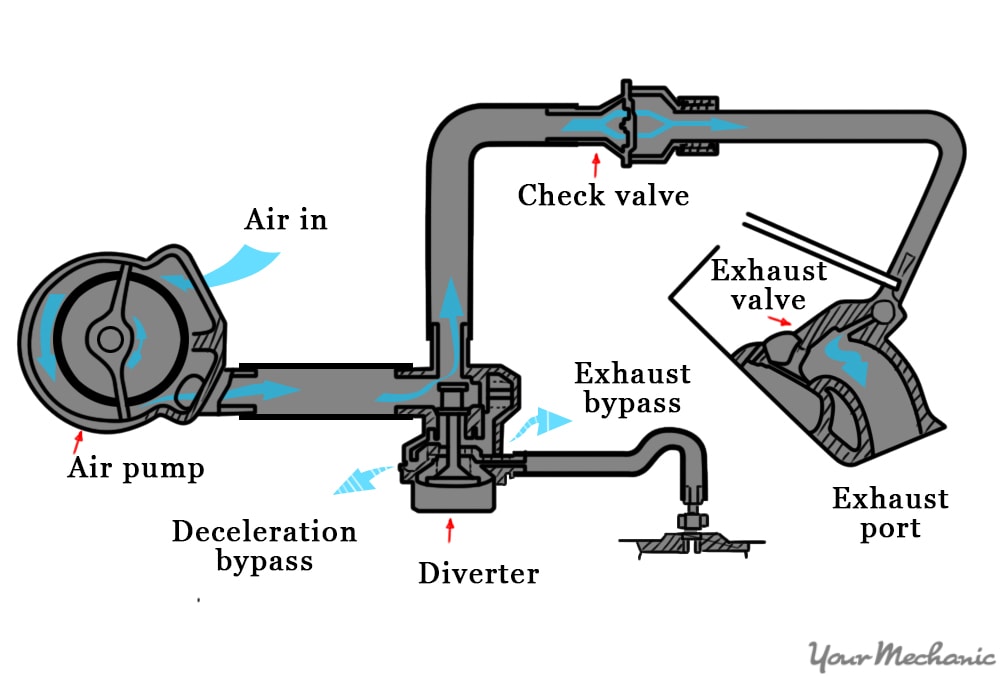
The smog system was introduced in domestic vehicles in 1966. This system is designed to redistribute exhaust gases containing unburned fuel (or vehicle emissions) back into the intake manifold where it is burned during the combustion process. However, this process is expedited by the introduction of "fresh air" from a secondary air pump (known commonly as the smog pump) plumbed into the exhaust manifold or the beginning of the exhaust pipes. In conjunction with the EGR valve and recirculation system, the exhaust air supply tube and smog pump significantly improved vehicle emissions control for several decades.
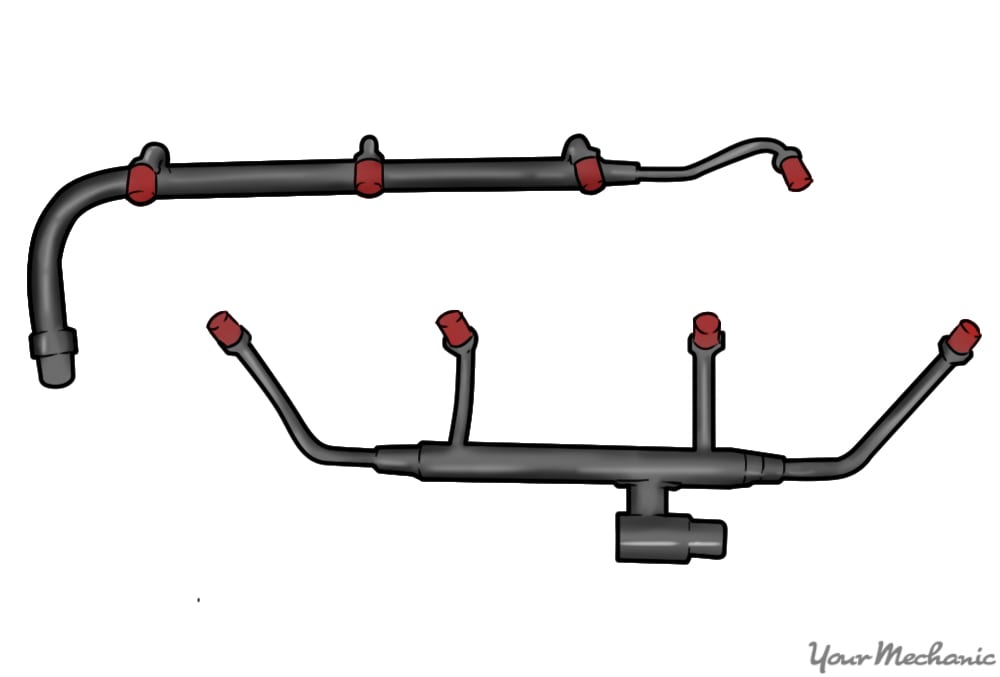
Today's modern cars, trucks, and SUVs all use a similar system that is electronically controlled as opposed to those powered by a series of pumps, hoses, and belts. Most vehicles manufactured between 1966 and the early 2000's use the exhaust air supply tube, also referred to as the secondary exhaust manifold pipe. This pipe is attached to the secondary air supply pump (or smog pump) and is plumbed under a series of fuel injection and vacuum lines and attaches either individually (to each exhaust port) or to one connection in the center of the exhaust manifold. The exact size, shape, and design of this component varies considerably depending on each vehicle manufacturer's engineering plans.
The exhaust air supply tube is typically metal and made out of thin wall stainless steel. It's very common for the exhaust air supply tube to wear out due to its proximity to the exhaust manifold, which produces a tremendous amount of heat as the engine operates. This component may be prone to developing cracks or holes over time or to becoming clogged by excess carbon or particulate matter coming from the exhaust system, and if it is not changed or serviced quickly, it will eventually break.
When this occurs, the vehicle can develop a significant exhaust and vacuum leak which may cause the engine to not fire correctly. It will also cause the vehicle to fail emissions testing and lose fuel efficiency, and may damage internal engine components, especially the cylinder head hardware. Although most exhaust air supply tubes can last for the length of time you own the vehicle, additional factors such as engine grime and exposure to salt water or sodium chloride (used on icy roads) may cause the pipe to rust or wear out prematurely.
Most vehicles that utilize this system are older and do not have advanced engine control modules (ECMs) that can sense when a component failure exists. For vehicles that have do have ECMs, a series of sensors will indicate that an exhaust system is leaking. This will trigger an OBD-II error code of P-0412 or P-0471 to be stored inside the ECM. This can then be downloaded by a diagnostic scanner and will give you or your mechanic a good starting place to diagnose the precise cause of the exhaust system leak.
If the vehicle does not have an onboard computer that stores these codes, you'll have to do some manual diagnostic work to determine if a problem with the exhaust air supply tube exists.
The following are a few of the physical warning signs or symptoms of a problem with this component:
The exhaust has a funny smell. Usually the exhaust coming from the tailpipe has a particular smell that most vehicle owners are quite familiar with. This smell is produced after the engine exhaust is circulated through the catalytic converter, which breaks down particulate matter and expels the exhaust out of the tailpipe. However, before it gets to this component, exhaust gas smells different. If you notice a different-than-usual smell coming from the engine compartment, it may be caused by a cracked exhaust air supply tube.
Excessive noise is coming from the engine compartment. The exhaust system is also designed to muffle the exhaust sound. When a leak occurs closer to the motor in the exhaust system, it will create a much louder sound, especially when the vehicle accelerates. In some cases, this is caused by a crack in the exhaust pipes, but it may also be produced by a cracked exhaust air supply tube or a crack in this tube’s connection to the exhaust manifold.
The vehicle does not pass emissions testing. The primary purpose of the exhaust air supply tube is to reduce the amount of particulate matter and NOx (nitrogen oxides) that are produced during the combustion process. By introducing fresh air into the exhaust system, it can dilute NOx particles. However, when this tube does not work correctly, it can cause the vehicle to produce higher emissions than are legal.
The engine misfires or backfires. Another indicator of an exhaust leak is when the engine backfires during deceleration. This problem is amplified the closer the leak is to the exhaust manifold.
Note: The instructions described below are general instructions for replacing the kind of exhaust air supply tube that is typical of most vehicles with a 4- or 6-cylinder inline engine. But because each specific vehicle has a unique design, location, and replacement instructions for this part, it is recommended that you purchase a service manual for the exact vehicle make, model, and year you are working on so that you can follow the manufacturer's guidelines, and especially so if you are working on a vehicle with a V-type engine.
Part 1 of 2: Replacing the exhaust air supply tube
In most cases, a broken exhaust air supply pipe will be very easy to notice. Whether it's the loud sound coming from under the hood or the reduced engine performance, the signs that this part is damaged and needs replacing are pretty hard to miss. Once you've decided to replace this component, there are a few things you'll need to do before you can take on the job.
The first thing that most mechanics do is physically inspect the part that is broken so they can get a good look at what they need to order. Although part houses are typically pretty accurate when providing you with parts these days, sometimes the part they have on file can be for a different model or edition of your vehicle.
Once you've ordered the correct replacement parts, you will need to gather the rest of the needed tools and materials in order to complete this project.
Materials Needed
- Flashlight or droplight
- Clean shop rags
- Boxed end wrench(s) or ratchet wrench set(s); 3/8" drive is recommended to remove engine covers and other components covering the exhaust air supply tube
- Replacement exhaust air supply line (and any appropriate gaskets as needed)
- Flathead and philips head screwdrivers
- Penetrating oil
- Safety equipment (safety glasses, protective gloves, etc.)
- Service manual specific to your vehicle
The exhaust air supply line that is referred to in this step-by-step guide is attached to the secondary air pump (or smog pump) and to connections that attach to the exhaust manifold or to exhaust pipes near the exhaust port. In most cases, you can access these parts rather easily after removing any engine covers, air filter tubes, or other components that cover the engine.
- Note: According to most service manuals, this job will take between one and two hours to complete. The majority of that time will be spent removing ancillary components. Make sure you have adequate time and work space set aside for this project.

Step 1: Disconnect the vehicle's battery. Although there are not many electrical lines to disconnect, it's always best to remove the battery cables before completing any work under the hood.
Locate the vehicle's battery and disconnect the positive and negative battery cables. Place the battery cables away from the terminals to avoid accidental sparks or attachment.

Step 2: Remove the engine cover and any other necessary components. On most domestic and foreign vehicles manufactured after 1993, there is typically an engine cover that is attached to four bolt holes screwed into brackets or other engine components.
Remove these bolts and then the engine cover. Then remove any other ancillary components that need to be removed in order to gain access to the exhaust air supply tube, referring to your vehicle’s service manual for specific instructions.
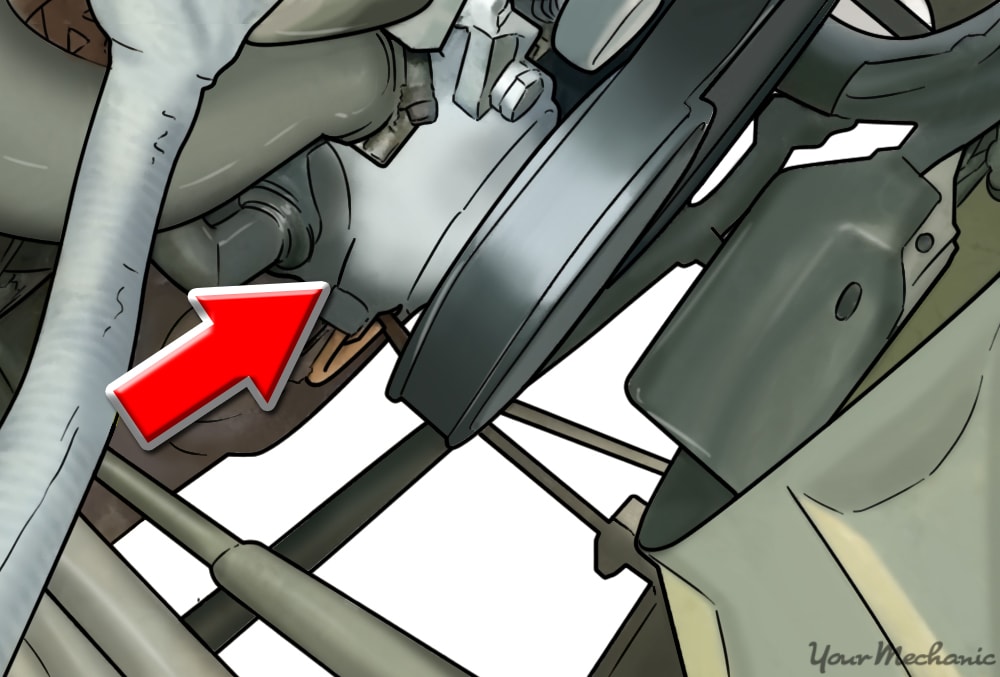
Step 3: Locate exhaust air supply tube and its attachments to the smog pump and the exhaust manifold. You'll need to find the smog pump first before you remove any parts. Typically the smog pump will be located on the passenger side, near the front of the motor.
It is often powered by the serpentine belt, so finding that belt may help you more easily find the smog pump.
Once you find it, locate the exhaust air supply tube that runs to the exhaust pipe. It's possible that there will be a hose that runs to a regulator and then attaches to the exhaust pipe.
Another way of completing this step is to start at the exhaust manifold and locate any pipes or lines that are attached to the manifold and lead away towards the front the motor. Either way, you should verify that you have the right parts before you start removing components.
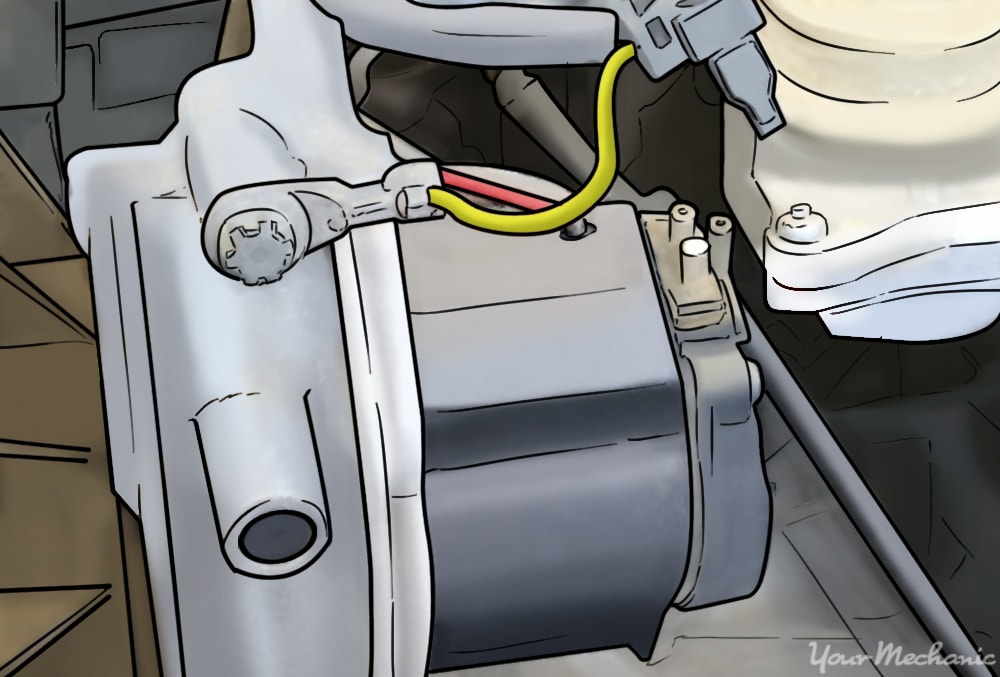
Step 4: Remove any electrical harnesses. Although you've already removed the battery cables, it's always a good idea to remove any sensors or electrical harnesses that are attached to the smog pump or the exhaust air supply tube.
On some modern cars, trucks, and SUVs, there will be a series of small sensors that are attached to each exhaust port air supply tube. This is more typical with vehicles manufactured after 2010 and those that have air supply tubes that are attached to each individual exhaust port. For these vehicles, be sure to remove each electrical connection and remember where each one needs to be reattached upon reinstallation.
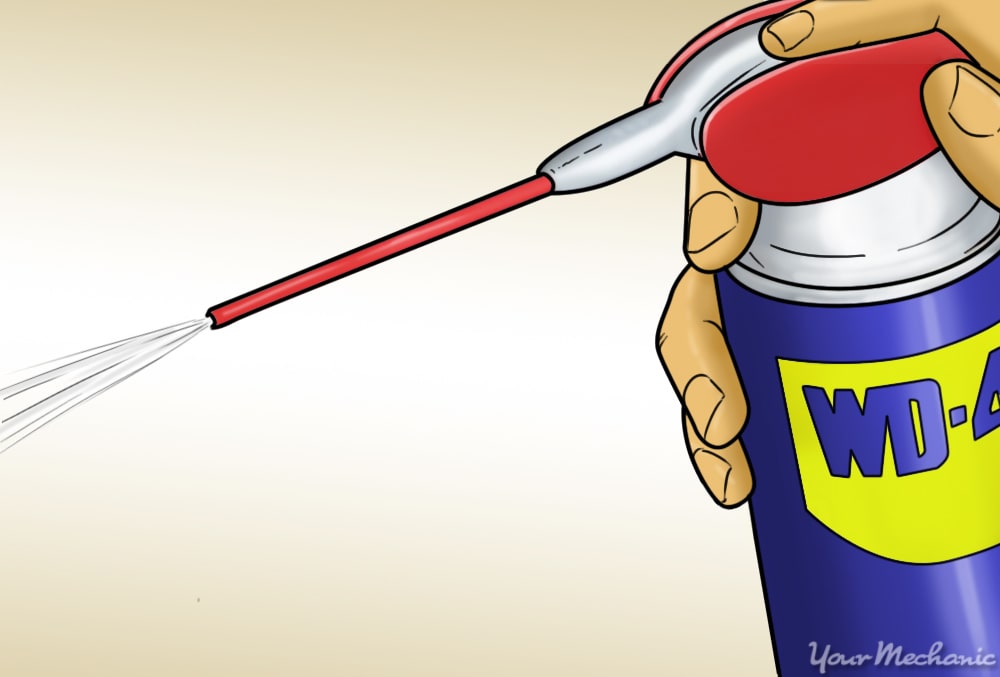
Step 5: Apply penetrating oil to the exhaust manifold connections. After you find the connections (bolts) that secure the exhaust air supply tube to the exhaust system, spray them with penetrating oil.
Make sure to use the extension hose on the penetrant spray as you don't want to spray it all over the motor. Let the bolts soak for at least 5 minutes.
- Tip: Before spraying the penetrating oil onto the bolts, cover the area underneath the bolts with several shop rags. This will reduce the potential of having the fluid soak onto other parts, including the exhaust manifold. It will burn once the engine starts, and most likely will not cause a fire, but it's better to be safe and clean than sorry.
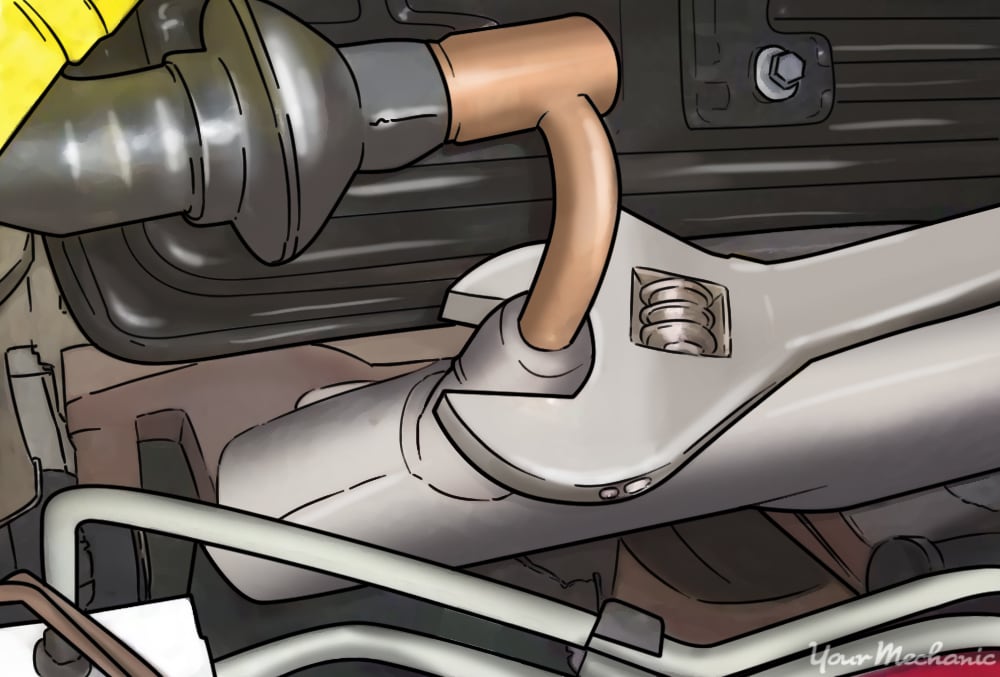
Step 6: Remove the exhaust manifold connections first. It's much easier to work backwards in this case, so remove the bolts that attach the exhaust air supply tube to the exhaust manifold or exhaust ports first.
Use a boxed end wrench to loosen these bolts and nuts. Once the bolts and nuts have been removed, push the line aside.
Step 7: Remove the smog pump connection. Use a boxed end wrench to remove the other bolts that hold the exhaust air supply tube to the smog pump.
You can now remove the old exhaust air supply tube.
Step 8: Clean the exhaust air supply tube connections. Before you install the new part, make sure to clean the connections where each end of the new exhaust air supply tube will attach.
This ensures a clean and secure connection and will reduce the potential for leaks.
Step 9: Install the new air supply tube. Just like most installs, the installation of this part is virtually just the reverse of the removal.
Attach the exhaust air supply tube to the smog pump and tighten all the bolts. Then, attach the exhaust air supply tube to the exhaust manifold, again tightening all the bolts.
Step 10: Clean all the bolts and the surrounding areas. Use a shop rag to wipe the bolts and surrounding areas clean of any excess oil.
Step 11: Reattach any electrical harnesses. Plug the electrical connectors back into the smog pump and the exhaust air supply tube as applicable.
Step 12: Reattach the engine cover and any other ancillary parts. Reinstall the engine cover along with any other components that needed to be removed to access the exhaust air supply tube.
Step 13: Reattach the battery cables. Reconnect the battery cables to the battery to restore power to the vehicle.
Part 2 of 2: Testing the repair
Once you have completed this repair, it will be important for you to test fire the engine and check to see if the symptoms you noticed initially were resolved.
Step 1: Clear the work area. The first thing you should do is make sure that all tools and materials have been removed from under the hood of your vehicle.
Step 2: Start the engine. With the vehicle in park and the hood open, start your engine. If the engine starts and the exhaust noise or the other symptoms are gone, the repair was completed correctly.
In some cases, you might still hear some noise when the engine starts. If this occurs, shut off the engine and recheck your connections to the exhaust manifold and the smog pipe. It is possible that they might just be loose.
Step 3: Test drive the vehicle. It's also a good idea to complete a quick test drive in order to check the repair under normal driving conditions.
Simply drive the vehicle for 10 minutes around your neighborhood and verify that there are no loud noises coming from under the hood.
You may smell some burnt penetrating oil initially, but that should burn off within a day or two.
Depending on the make and model of the vehicle you are working on, the replacement of this component is usually rather simple. If you've read these instructions and still don't feel 100% confident about completing this repair, or you would just prefer to have a professional do the job for you, you can always contact one of the certified mechanics at YourMechanic to complete the exhaust air supply tube replacement for you. They can even do a full inspection of your exhaust system at your convenience.