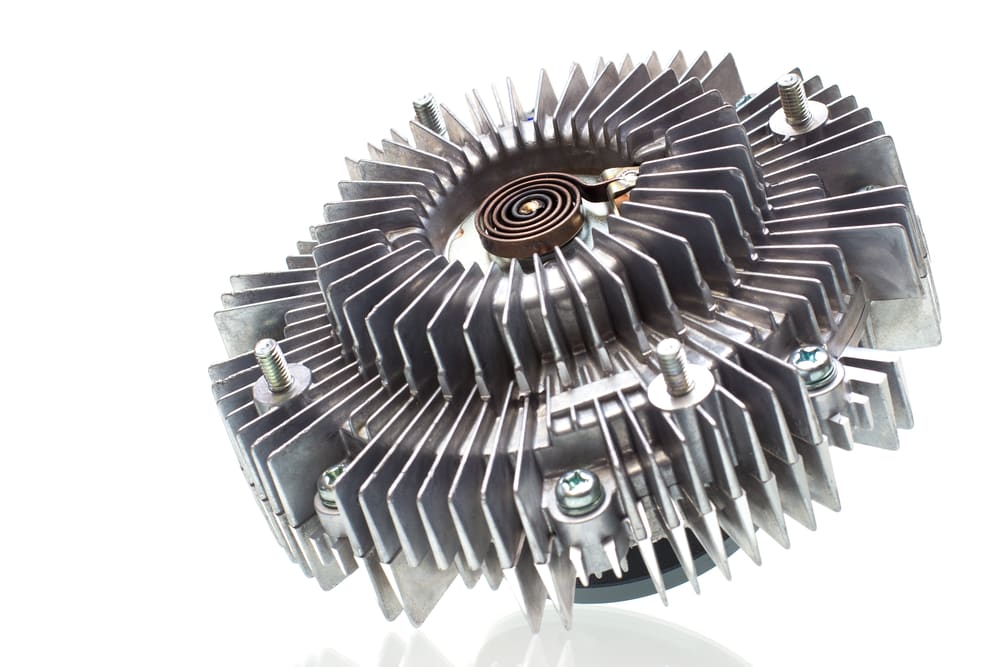
A fan clutch is designed with a temperature sensitive spring that is used to control the engaging and disengaging of the fan depending on the temperature of your engine. As you you drive faster, the temperature of your engine creeps up and eventually causes this spring to expand, thereby engaging the fan clutch. Internally, the fan clutch is made up of a set of clutch plates and a coupling filled with a silicone based oil with an internal valve that opens and closes directing the flow of the oil between two separate cavities. One of these cavities acts as a reservoir and the other goes into the clutch itself. When this valve opens, fluid enters the clutch assisting the fan in turning faster. As this valve shuts, this oil flows back into the reservoir which causes the clutch to slip, forcing the fan to turn much slower.
Fan clutch problems
The temperature sensitive spring described above is often times one of the potential culprits when it comes to fan clutch problems. Additionally, as the consistency of the fan clutch oil slowly degrades over the years, the clutch can begin to slip more than normal eventually slowing down to a point where it does not keep up with the cooling needs of the engine. Other symptoms may be things like oil leaking or loose clutches which may cause a bit of a wobble.
Different types of fan clutches
There are commonly two different types of fan clutches. One is known as a as a thermal fan clutch which is described above. This design works based upon temperature and reacts to fluctuations in engine temperature, controlling the engagement and disengagement of the fan this way. The other type of fan clutch is what is known as a non-thermal or sometimes called a torque limiting fan clutch which is controlled with slippage in the clutch plates rather than temperature control. For purposes of this article, the removal and installation process is the same for either type.
Part 1 of 1: Replacing your fan clutch
Materials Needed
- Pulley locking tool
- Wrench
- Socket set with ratchet
- Rubber mallet
Step 1: Checking your fan clutch for problems. A fan clutch in good working order will have a fair amount of resistance when spun free handedly.
A good rule of thumb on the degree to which it slips is that if it spins more than 1 to 1-½ times on it’s own, it is safe to assume it needs to be replaced.
Conversely, if it offers too much resistance in that it does not turn much beyond your assistance, it is safe to say it has seized up, which will also require replacement. A common technique used to measure appropriate fan speed is by using a timing light. Mark one of the fan blades with a white pen or chalk and use a timing light to check for changes in fan speed which may indicate problems as well. Other indicators of potential worn fan clutches may also be wobbling or bearing noises coming from the water pump shaft.
Step 2: Remove the fan shroud. Because every application is different, some of these steps may need to be altered in order to fit your specific application. On most applications, however the fan shroud is fastened by several bolts which will need to be removed in order to remove the shroud. Most applications will also require removal of the top radiator hose in order to get the fan shroud out. If this is the case, be sure to drain your coolant system prior to doing this. Once this is done, you can remove the fan shroud from the engine compartment.
Step 3: Remove the fan. There are typically two types of ways the fan will be attached; one will be with four large bolts, in which case you will need just a basic wrench of the appropriate size to remove. The other method of attachment is a large nut that will likely require the use of a special pulley locking tool that is used to keep the pulley from moving while removing the nut.
Since this is a specialty tool, most “do it yourselfers” may not have access to this tool. If this is the case, an alternative to using this specialty tool can be the use of a screwdriver. Use the screwdriver to hold keep the bolt in place while loosening the nut. Pay special attention to the placement of the screwdriver while doing this as this can damage the edges of the bolts if not done properly.
Step 4: Rock from side to side. Once all bolts and/or nuts have been removed, hold the fan with both hands slightly rocking it from side to side sliding it off of the water pump shaft.
Step 5: Remove the bolts. Secure the fan on a work table with plenty of room to work with the fan shaft facing your direction. There are four large bolts in the center of the fan assembly that hold the clutch in place. Remove these bolts and the clutch will be free from the fan.
Step 6: Install the new fan clutch. Hold the new fan clutch in place aligning the bolt holes in the same place as the old clutch.
Lightly run the bolts into the holes making sure the threads are lining up properly
- Tip: The bolts should run into the threads freely with little or no resistance. If they feel tight or like you are using too much force, you are likely cross threading them which can lead to the bolts not staying in tightly and eventually falling out. Note, this is extremely important.
Step 7: Tighten the bolts. Once you’ve run all bolts in finger tight, use your wrench to tighten them according to factory specifications (refer to your service manual or instructions with the new fan clutch).
Step 8: Put the fan back into the engine. Slide the fan assembly back into the engine compartment paying special attention to the water pump shaft alignment.
Once in place, gently run the four bolts back into place holding the fan with one hand and running the bolts back in with the other. This may take some maneuvering to keep things straight, but remember, slow and steady and paying attention to detail is important.
When all four bolts are back in place and run in finger tight, use the same wrench you used to remove them with to tighten them back up according to factory specifications (Again, refer to your service manual for exact specifications).
If your application requires you to remove the top radiator hose to get the fan shroud out, now would be the time to reinstall that same radiator hose. Be sure to also remember to refill your coolant system if draining it was part of the removal process.
Slide the fan shroud back into place lining up the bolt holes in the same position as it was removed. Run each bolt back in finger tight until all are accounted for and tighten per factory specifications (Refer to service manual for torque specs).
You have now replaced your fan clutch. A good practice as always is to start the vehicle and listen for abnormal noises and watch for movements in the replacement parts that are not consistent.