How to Replace a Control Arm Assembly

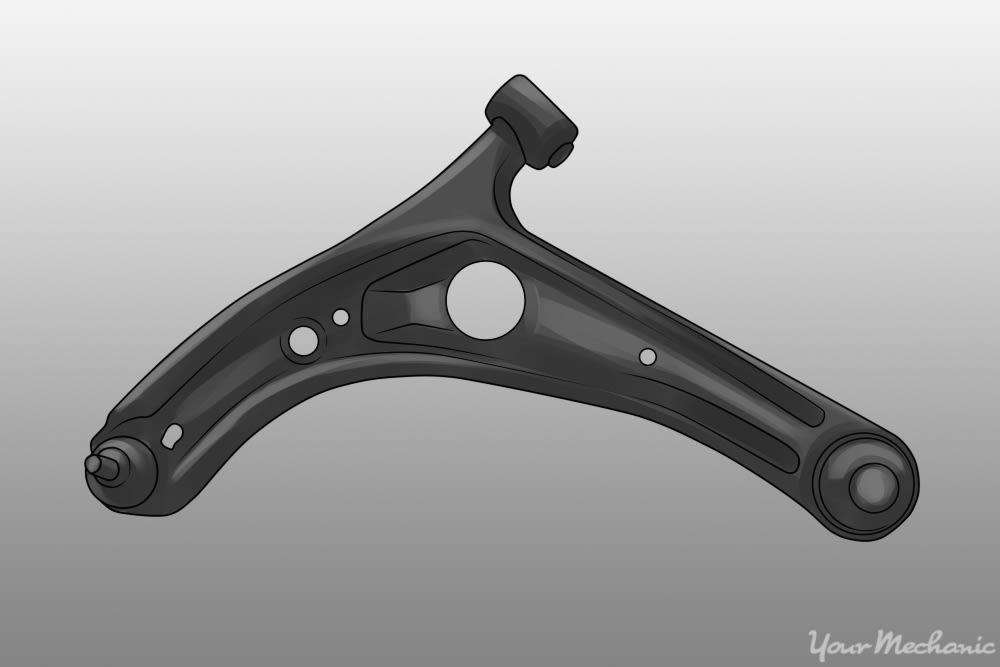
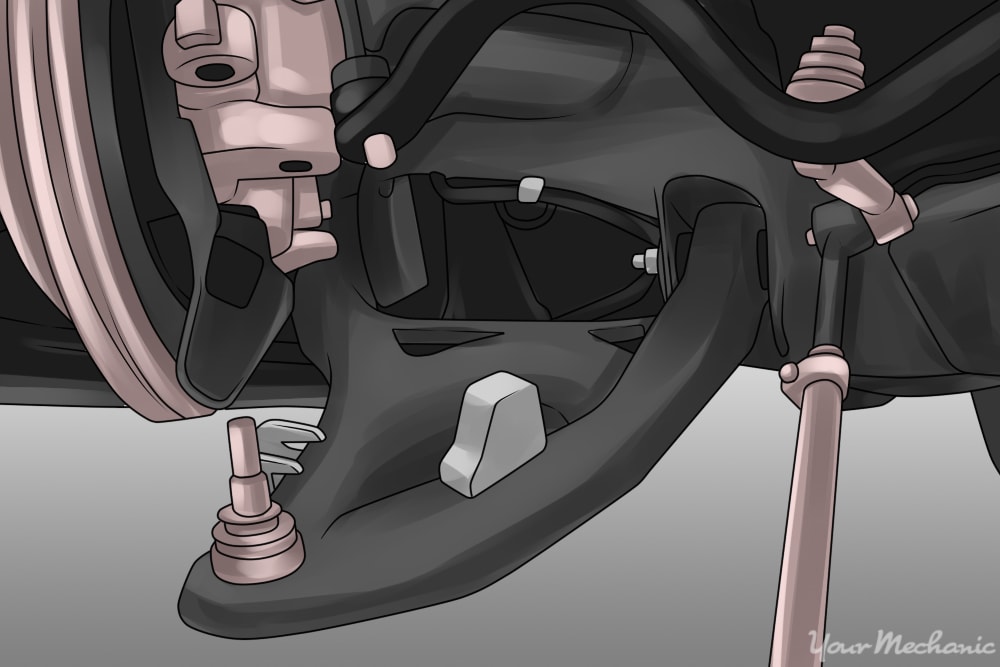
Control arms are an important part of your vehicle’s suspension. They provide a mounting point for the wheel assembly including the wheel hub and brake assembly. Control arms also provide a pivot point for your wheel to travel up and down as well as turn left and right. The front lower control arm is attached at its inner end to the engine or suspension cradle by rubber bushings and at the outer end by a ball joint to the wheel hub.

If the control arm is damaged due to impact, or if the bushings and/or ball joint need replacement due to wear, it is more time and cost-effective to replace the entire arm as it generally comes complete with new bushings and ball joint.

Part 1 of 2: Raise your vehicle

Materials Needed

  • Floor jack
  • Jack stands
  • Wheel chocks

  • Note: Be sure to use a jack and jack stands with the appropriate weight capacity to lift and support your vehicle. If you are unsure of your vehicle’s weight, check the VIN label which is usually located on the inside of the driver’s door or on the door jamb itself for your vehicle’s Gross Vehicle Weight Rating (GVWR).

jack and jack stand placement

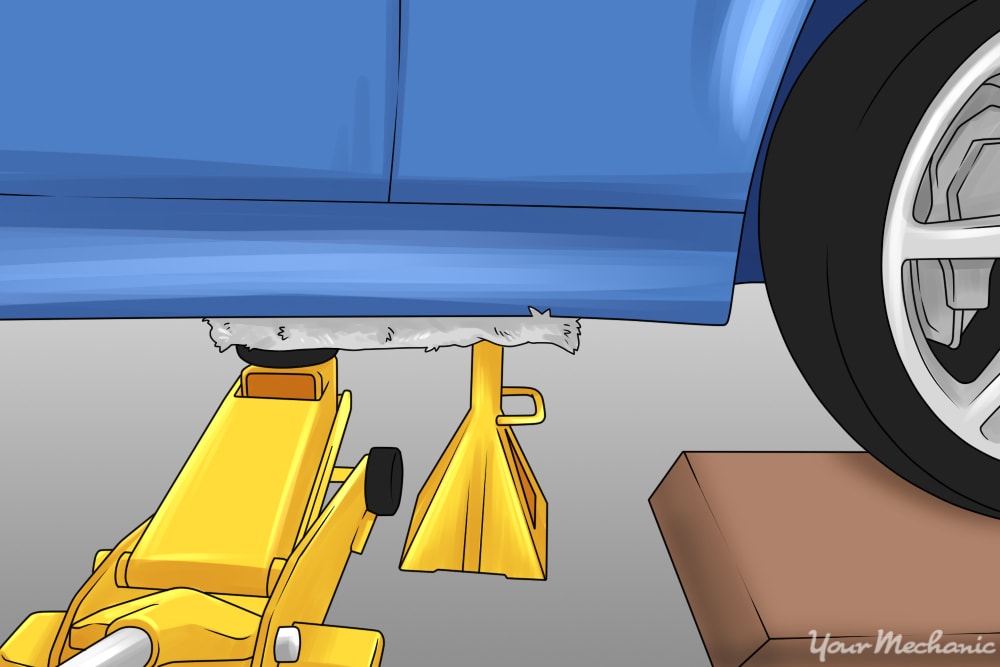
Step 1: Locate your vehicle’s jacking points. With most vehicles being low to the ground and having large trays or belly pans under the front of the car, it is best to do one side at a time.

Jack the vehicle up at the recommended jacking points instead of trying to raise it by sliding the jack under the front of the car.

  • Note: Some vehicles have a clear marker or cut out under the sides of the car located near each wheel to indicate the proper jacking point. If your vehicle does not have these indications, consult your owner's manual for the proper jack point locations. As you are replacing suspension components, it is safer if you do not lift the vehicle from any suspension points.

Step 2: Secure the wheel. Position the wheel chocks or blocks, in front of and behind at least one or both rear wheels.

Raise the car slowly until the tire just loses contact with the ground.

Once you get to that point, find the lowest point underneath the car at which to place a jack stand.

  • Note: Be sure to place each jack stand in a strong spot such as under a cross-member or chassis to support the car. Once positioned, slowly lower the car onto the jack stand using the floor jack. Do not fully lower the jack and keep it in the extended position.

Part 2 of 2: Replace the control arm

Materials Needed

Step 1: Remove the wheel. Using the ratchet and socket, loosen the lug nuts on the wheel. Carefully remove the wheel and keep it aside.

Step 2: Separate the ball joint from the hub. Select the appropriately sized socket and wrench. The ball joint has a stud that extends into the wheel hub and is secured by a nut and bolt. Remove them.

typical ball joint and hub connection

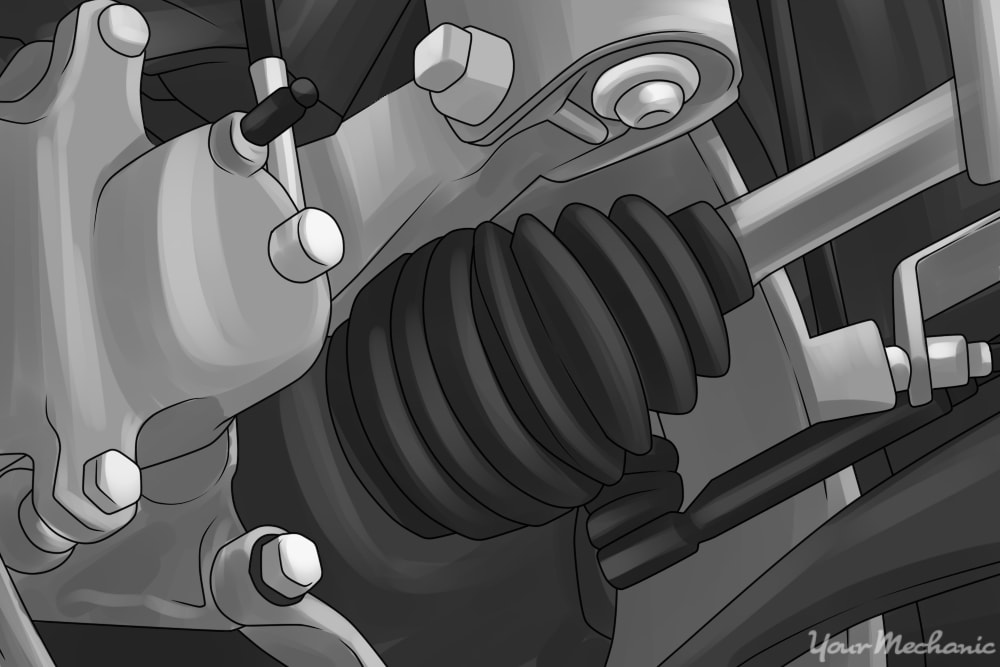
Step 3: Separate the ball joint. Insert the ball joint separator between the ball joint and the hub. Give it a tap or two with the hammer.

Don’t worry if it takes a few good whacks to separate them.

  • Note: Age and mileage sometimes make them difficult to separate.

ball joint removal tool

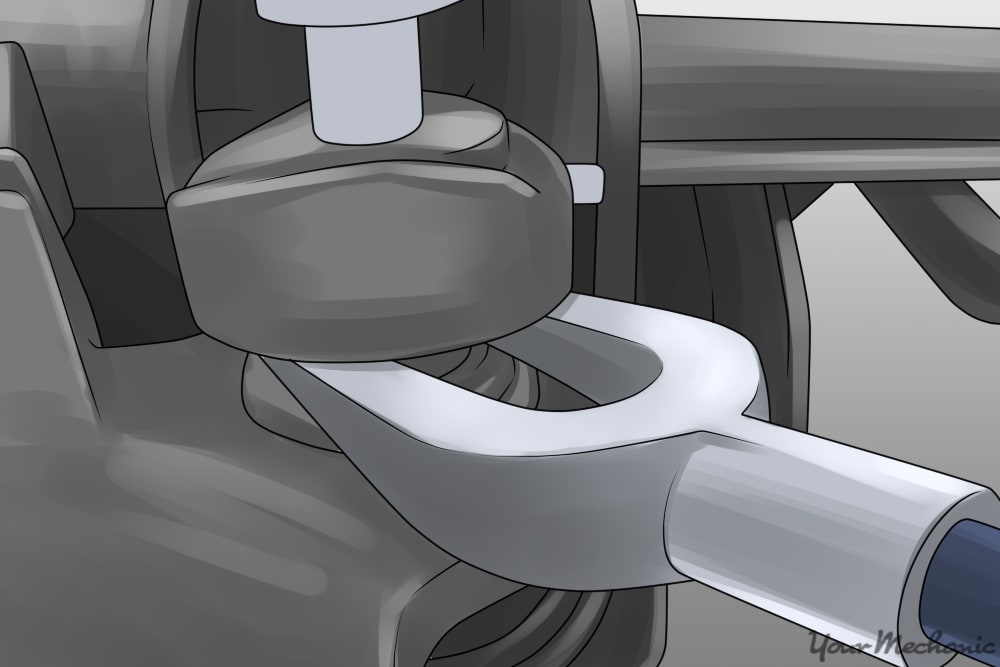
Step 4: Separate the control arm from the cradle. In some vehicles, you will be able to remove the control arm bolt with a ratchet/socket on one side and a wrench on the other. Others may require you to use two wrenches due to space limitations.

Once you remove the nut and bolt, the control arm should pull out. Use a little muscle to remove it, if needed.

ball joint freed from suspension hib

Step 5: Install the new control arm. Install the new control arm in the reverse order of removal.

Bolt up the cradle side of the control arm then bolt the ball joint into the hub, making sure to push it in as far as required before tightening the bolt.

Reinstall the wheel and lower the vehicle once the control arm is properly secured. Repeat the process on the opposite side, if needed.

Ensure that you have the wheel alignment checked after any suspension repairs. If you are not comfortable with performing this process on your own, get a certified professional, such as one from YourMechanic, to replace the control arm assembly for you.


Next Step

Schedule Control Arm Assembly Replacement

The most popular service booked by readers of this article is Control Arm Assembly Replacement. YourMechanic’s technicians bring the dealership to you by performing this job at your home or office 7-days a week between 7AM-9PM. We currently cover over 2,000 cities and have 100k+ 5-star reviews... LEARN MORE

SEE PRICING & SCHEDULING

The statements expressed above are only for informational purposes and should be independently verified. Please see our terms of service for more details

Recent Control Arm Assembly Replacement reviews

Excellent Rating

(1,200)

Rating Summary
1,122
46
8
3
21
1,122
46
8
3
21

William

35 years of experience
731 reviews
William
35 years of experience
Jaguar XJ8 V8-4.2L - Control Arm Assembly Replacement (Front Lower Left, Front Lower Right) - Sun City West, Arizona
William worked extremely hard on the repair even though the job took much more time that was allotted and replacement parts had to be modified to fit the car.
Hyundai Sonata - Control Arm Assembly Replacement (Rear Upper Left, Rear Upper Right) - Glendale, Arizona
This is the second time I've had William wolf work on my vehicle William always does a great job and my vehicle runs much better after he works on it!

Greg

23 years of experience
624 reviews
Greg
23 years of experience
Dodge Magnum V6-3.5L - Control Arm Assembly Replacement (Rear Upper Left, Rear Upper Right, Rear Lower Left, Rear Lower Right) - Mesa, Arizona
Another 5 star service from Greg. Honesty, professionalism, confidence and expertise at every step. My beloved wagon is handling and running better than ever thanks to Greg's knowledge and experience.
Dodge Magnum - Control Arm Assembly Replacement (Front Upper Left, Front Upper Right, Front Lower Left, Front Lower Right) - Mesa, Arizona
Greg is the best mechanic I've had, hands down. Honest, hardworking, and attentive to details often missed by garages.

Chris

15 years of experience
82 reviews
Chris
15 years of experience
Chevrolet Avalanche V8-5.3L - Control Arm Assembly Replacement (Front Upper Left) - Oklahoma City, Oklahoma
Chris was outstanding. He is so knowledgeable and takes the time to explain things. He will give you an honest opinion on anything about your vehicle. I will always request Chris for any mechanic work I need in the future.
Nissan Pathfinder - Control Arm Assembly Replacement (Rear Upper Left, Rear Upper Right, Rear Lower Left, Rear Lower Right) - Oklahoma City, Oklahoma
Chris replaced 4 rear control arms as I requested. He kept me posted on the arrival time, status of the old parts, and completion of the new work. Well done!

Mike

27 years of experience
265 reviews
Mike
27 years of experience
Jeep Liberty V6-3.7L - Control Arm Assembly Replacement (Front Lower Left, Front Lower Right) - Belleville, Michigan
Second time using Mike. Great experience. Came to my place and performed the work while I was working. Was done within estimated time frame.
Dodge Avenger - Control Arm Assembly Replacement (Front Lower Left) - Flat Rock, Michigan
Show's up on time very nice guy and dose grate work I use him numerous of times and would use him in the future great mechanic

Need Help With Your Car?

Our certified mobile mechanics make house calls in over 2,000 U.S. cities. Fast, free online quotes for your car repair.

GET A QUOTE

Related articles

How Long Does a Stay Rod Last?
In In order to operate safely, your car’s engine needs coolant and a way to disperse the heat the coolant absorbs. That’s where the radiator comes in. It’s a crucial component of your car. However, it’s not particularly strong. The...
The Guide to Right-of-Way Laws in Maryland
Right-of-way Right-of-way laws are in place to provide people with the guidance they need to know how to react in the presence of other drivers or pedestrians. They determine who should have the right of way, and who should yield...
P2403 OBD-II Trouble Code: EVAP Leak Detection Pump Sense Circuit/Open
Diagnostic Diagnostic Trouble Code (DTC): P2403 P2403 code definition EVAP Leak Detection Pump Sense Circuit/Open Related Trouble Codes: P2404: EVAP Leak Detection Pump Sensor Circuit Range/Perf P2405: EVAP Leak Detection Pump Sensor Circuit Low P2406: EVAP Leak Detection Pump Sensor...

Related questions

Steering alignment pulling left
You’ve gotten stuck in the ditch on the left side so the odds are that there is a damaged or bent component on that side. If you really hit it hard, a lot of times, you are going to hit...
issues installing the front right lower control arm on a 2005 chrysler sebring 2.7l v6.
There won't be any issues removing the lower fork on the strut. It may make installation a bit easier to get it loose so the control arm can at least be aligned with the vehicle and the bolts started. If...
When replacing my ball joints on my 2005 dodge Strauss do I need to replace the control arms as well
Hi there. When changing out the ball joints, you don't need to change the control arms if you have a replacement ball joint. However, if you are wanting to replace the bushings and the ball joint, then you may get...

How can we help?

Our service team is available 7 days a week, Monday - Friday from 6 AM to 5 PM PST, Saturday - Sunday 7 AM - 4 PM PST.

1 (855) 347-2779 · hi@yourmechanic.com