Automatic transmissions in current production vehicles are a masterpiece of engineering. They can take a single power input from the engine or electric motor and multiply it in a way that allows us to drive at greater speeds, and under a greater load. The abilities listed above would not be possible if the engine and transmission were not able to communicate back and forth. The transmission converts a signal from the engine (speed, load, etc.) in order to determine which gear it needs to be in to meet the requirements requested by the driver.
The transmission can be controlled by a cable signal. This cable, known as the kickdown cable, is used to control what gear the transmission is in. Its function is important for smoother driving, optimum performance, and better emissions, but if the kickdown cable is out of adjustment or not working properly, it can cause premature wear and damage. Problems caused by an improperly working kickdown cable include slow shifting and jumping gears.
Method 1 of 1: Replacing the kickdown cable
Materials Needed
- Hydraulic jack
- Jack stands
- Needle nose pliers
- Screwdriver set
- Wheel chocks
- Wrench set
-
Warning: Always be sure jacks and jack stands are set on solid ground. Setting either on soft ground can lead to injury.
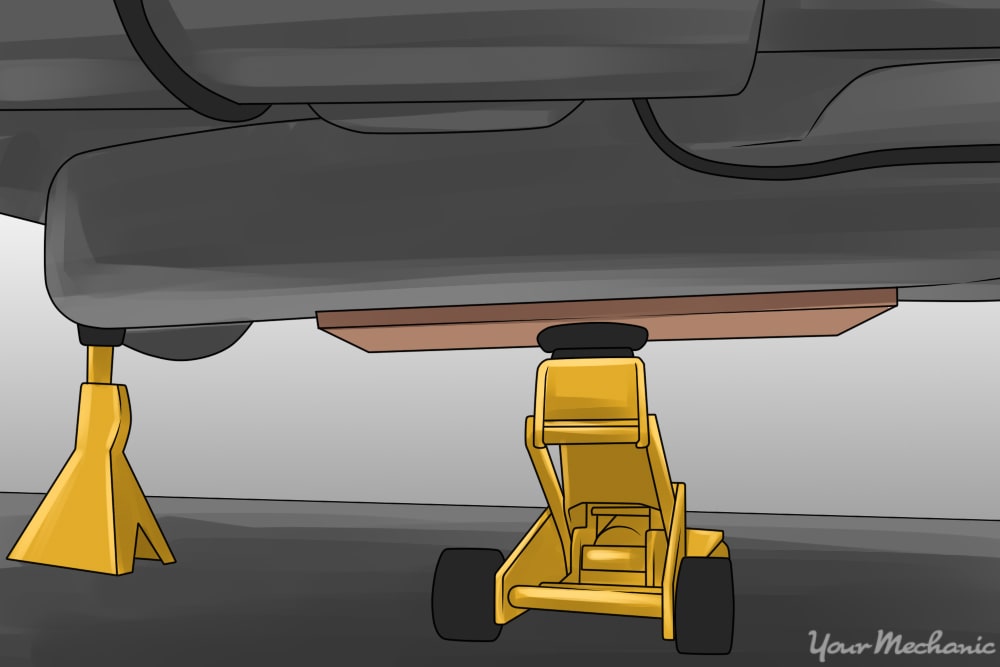
Step 1: Jack up the front of the vehicle and set the jack stands. Jack up the front of the vehicle and set the jack stands using the factory recommended jacking and stand points. Be sure to position the stands so that the area around the side of the transmission can still be accessed.
- Warning: Never leave the weight of the vehicle on the jack. Always let the jack down and place the weight of the vehicle on the jack stands. Jack stands are designed to handle the weight of a vehicle for an extended period of time, whereas a jack is only meant to support this type of weight for a short period.
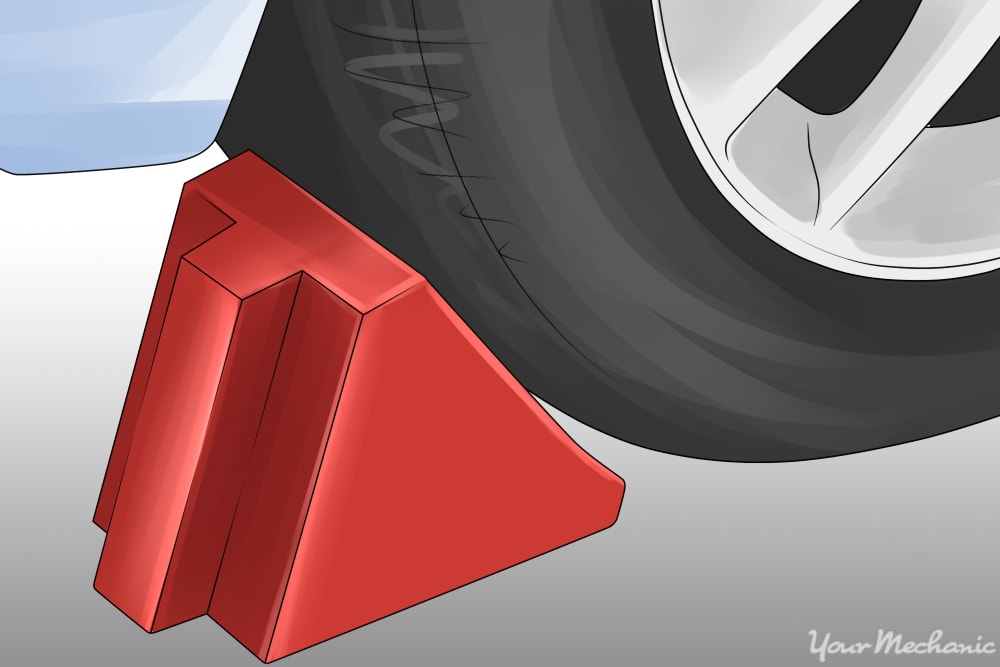
Step 2: Place wheel chocks on the rear wheels. Place wheel chocks on both sides of each of the rear wheels. This will lessen the likelihood of the vehicle rolling forward or backward, and falling off of the jack stands.
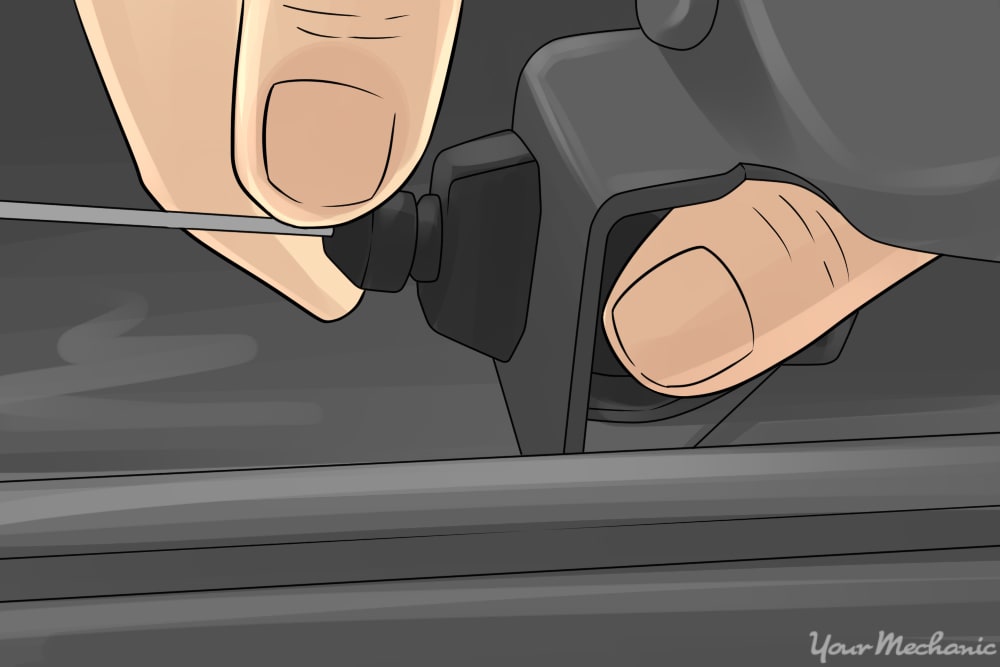
Step 3: Disconnect the kickdown cable at the carburetor or throttle body. On the side of the carburetor or throttle body will be a set of wire cables. Typically there are two or three of these cables. One is for the throttle and the other is the kickdown cable. If there is a third, this is typically the cruise control cable.
Depending on the type of cable, either pop off the cable end connector, or remove the cotter pin and slide the cable end off of the side.
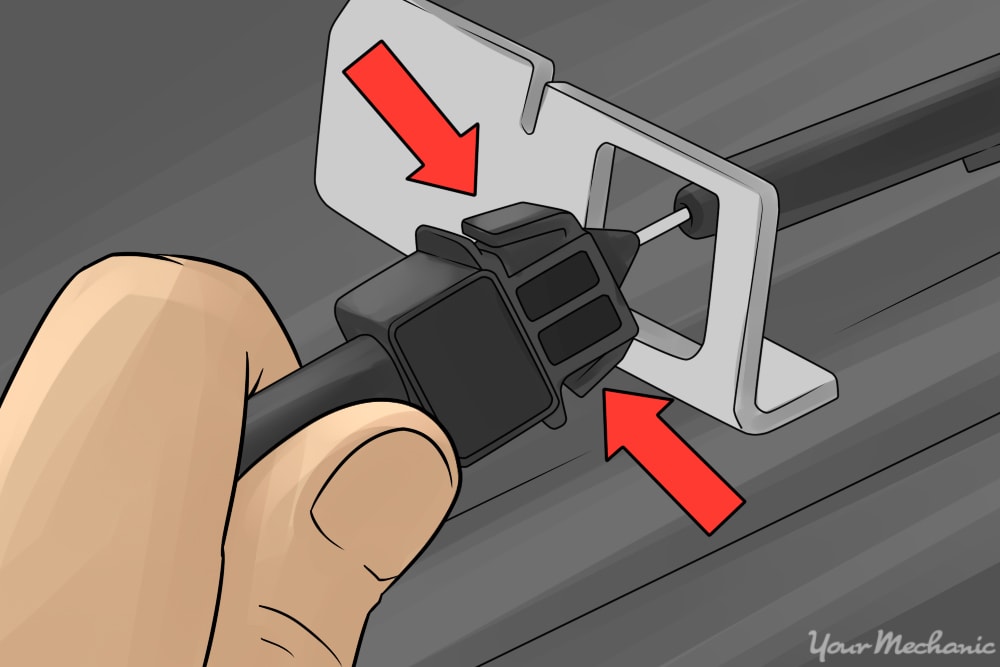
Step 4: Remove the kickdown cable from the mounting bracket. Remove the kickdown cable from the mounting bracket. This is accomplished by pressing in on the two tabs on either side of the housing, where it pushes through the bracket. Then you can slide the kickdown cable from the bracket.
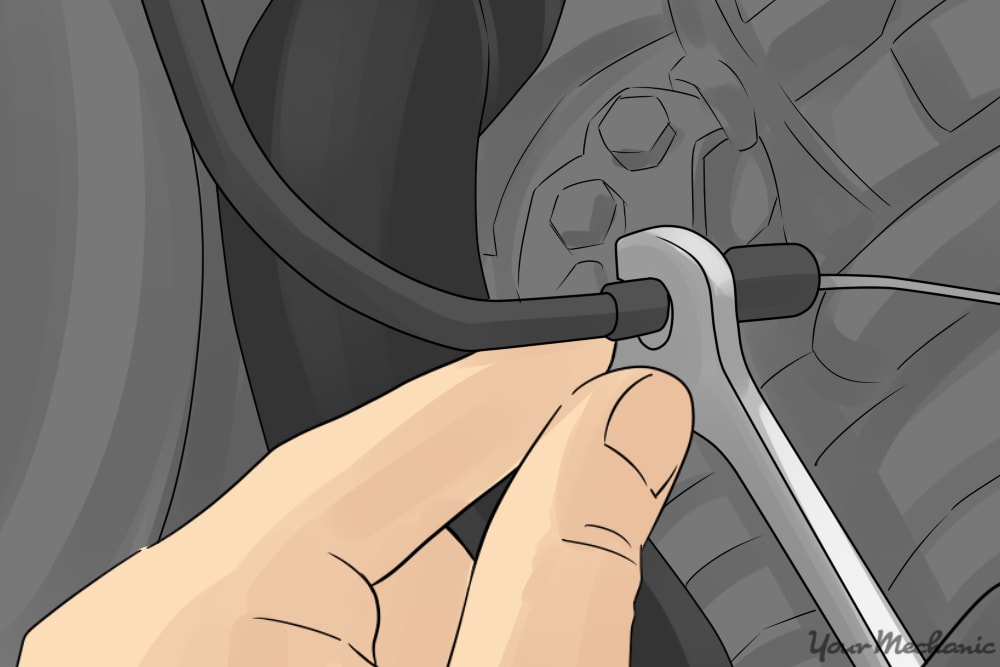
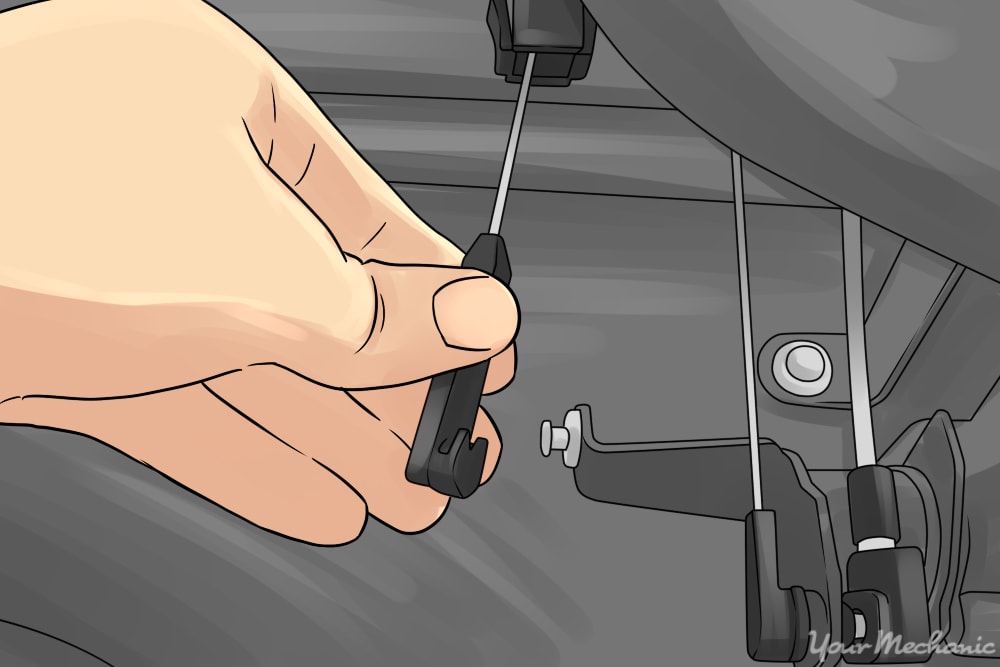
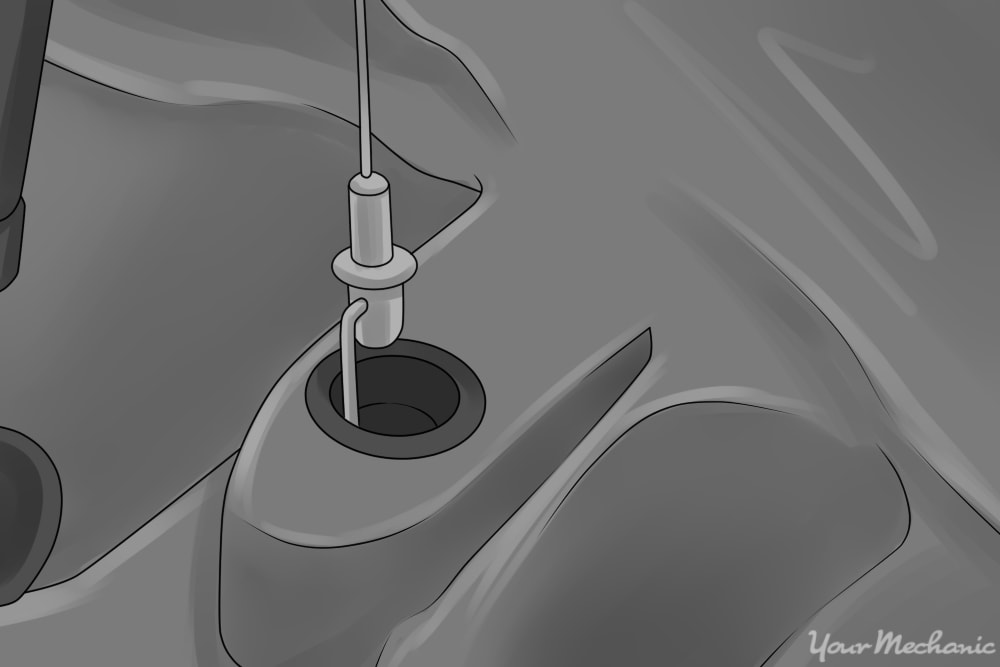
Step 5: Remove the bolt that secures the kickdown cable to the transmission: Remove the bolt that secures the kickdown cable to the transmission housing. There is typically just one bolt that secures the cable to the transmission housing, although there can be more. Be sure to verify that all fasteners are removed before trying to remove the kickdown cable.
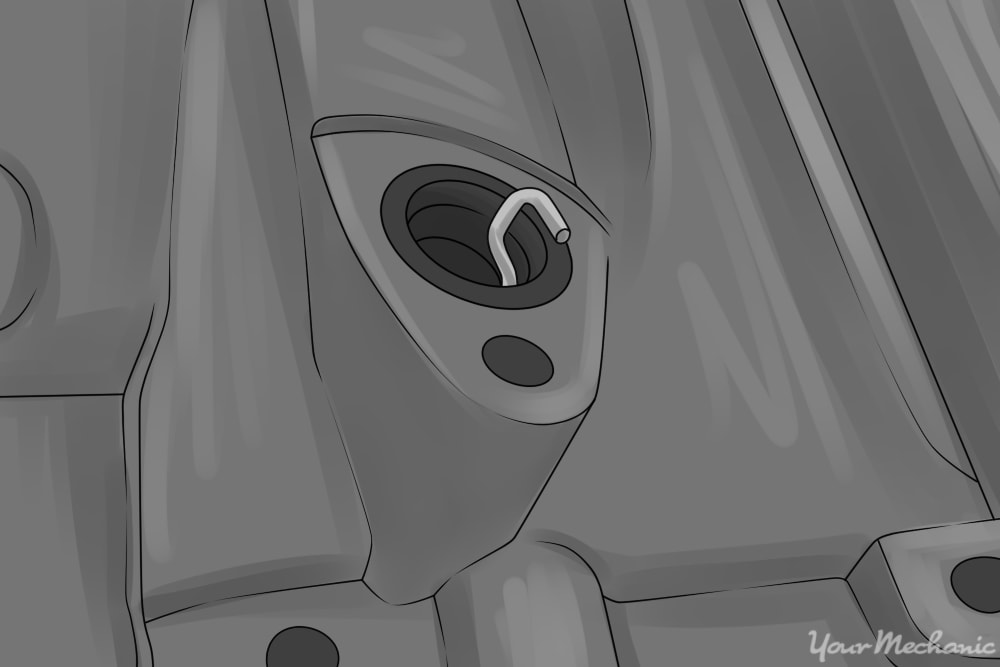
Step 6: Disconnect the kickdown cable from the transmission hook. With the retaining bolt removed, gently pull up on the kickdown cable to expose the linkage that the cable is connected to. Twist the end of the kickdown cable to disengage it from the linkage.
Step 7: Remove the cable from the vehicle. With both ends disconnected, fish the cable out of the car. Keep in mind that there could be any number of wire ties or zip ties holding it in place, so be sure to remove them before pulling too hard on the cable.
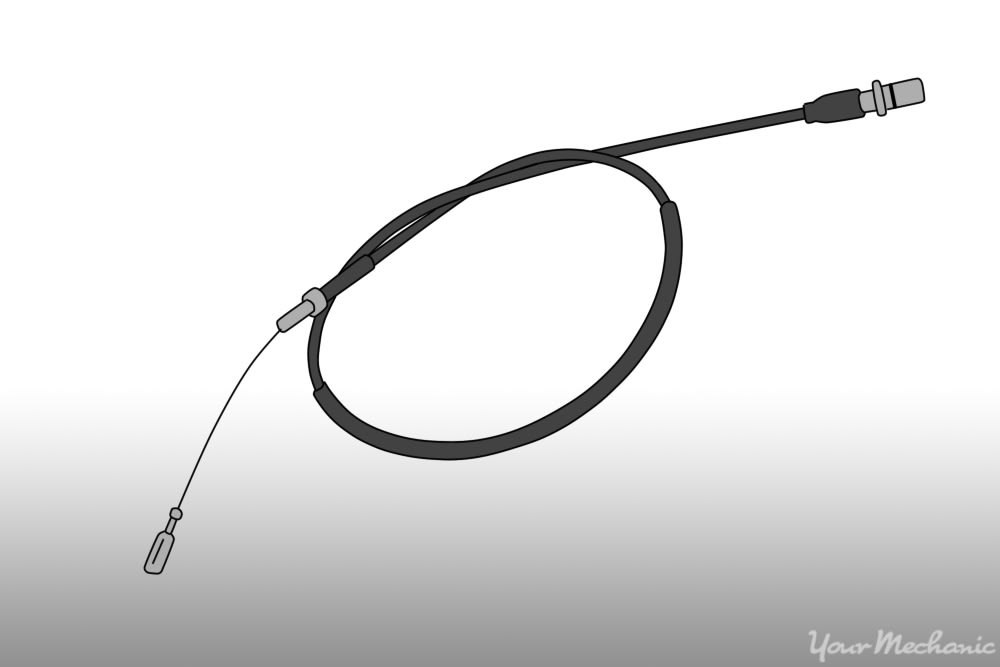
Step 8: Compare the replacement kickdown cable to the one being removed. Compare the replacement kickdown cable to the one that was removed. You will need to verify that the length is the same, the retaining clips for the mounting bracket are the same style and size, and most importantly, that the connectors for the transmission and the carburetor/throttle body are the same.
- Note: The installation of the kickdown cable is typically easier to install by connecting it to the carburetor/throttle body first, but in some instances it will be necessary to install the transmission end first. Simply perform the following steps in the order needed to complete the task.
Step 9: Install the cable onto the mounting bracket. From the engine compartment, slide the transmission end of the kickdown cable between the back of the engine towards the side of the transmission where the kickdown cable gets mounted.
Feed the carburetor/throttle body end through the mounting bracket far enough to engage the clips into the mounting bracket. Push firmly enough to ensure the retaining tabs are fully engaged, and give the cable a light tug to be sure it is seated.
Step 10: Mount the kickdown cable end to the linkage. Mount the kickdown cable end to the linkage on the carburetor/throttle body. Reinstall any retaining hardware that was removed on disassembly.
If the kickdown cable was the type that could just be popped off without removing any hardware, place the kickdown cable end over the stud and firmly press until you feel it engage.
Step 11: Reinstall the kickdown cable end onto the transmission linkage. From underneath, feed the kickdown cable down to the point where you can reconnect the cable to the linkage on the transmission. It may be necessary to pull the cable out of the housing enough to give yourself a little slack in order to get the kickdown cable end attached.
Step 12: Bolt the kickdown cable housing back into the transmission. Slide the retainer portion of the kickdown cable outer housing back into the transmission, being careful to keep the cable end engaged on the transmission linkage. Once it is seated, install the bolt and tighten it snugly, but be sure not to overtighten it to the point that it cracks.

Step 13: Adjust the kickdown cable. With the kickdown cable replaced, it is necessary to adjust it. This is accomplished at the carburetor/throttle body end of the cable, at the mounting bracket connector.
On the side of the kickdown cable’s outer case there is a button you will need to depress. While holding the button in with one hand, you will need to push the adjuster into the housing with the other hand. Release the button.
Now move the throttle linkage to full throttle either by hand or by pressing the accelerator pedal. You should hear a ratcheting sound. This is the self-adjuster doing its job. At full throttle, the inner cable should be taut.
Step 14: Jack the vehicle back up and remove the jack stands. Once you are confident that the kickdown cable is successfully installed, jack the car back up with the hydraulic jack and remove the jack stands from underneath the vehicle.
Step 15: Test drive the vehicle. Take the car for a short test drive at first. Check that the vehicle shifts through the gears properly. Listen for anything that sounds out of the ordinary. If you hear something that doesn’t sound right, pull over immediately and visually inspect for anything that looks out of place and repair as necessary.
Step 16: Check for fluid leakage. When the vehicle has passed its function test, look underneath the vehicle to be sure there are no fluid leaks. Any time you disturb a gasket or seal, there is the possibility of a leak. Taking a couple of seconds at this point can save a lot of expense later.
Current production automatic transmissions are a real marvel, but when you start having a problem with one, it can quickly seem very overwhelming. They are a very intricate piece of machinery that a lot of people take for granted. For this reason, a little bit of preventative maintenance can go a long way. Ignoring a problem with any automatic transmission can quickly become an expensive replacement. Taking the time to perform the smaller repairs, like changing the kickdown cable, can help to avoid much bigger issues.
If at any point you feel like you could use a hand with replacing the kickdown cable, contact a professional technician, such as one available at YourMechanic. YourMechanic has trained and certified professionals that can come to your home, or place of business, and perform the repairs for you.