What is the Air Conditioning System?
When your car’s air conditioning (AC) begins to lose power and doesn’t blow cool air, it may be time for an AC recharge. Recharging the AC means adding more refrigerant to your AC system to allow the air to start blowing cold again.
Important to know: recharging the AC is a temporary fix to a likely bigger problem. If your system is indeed missing refrigerant, your air conditioning system has a leak and needs to be inspected and repaired with a certified mechanic. Refrigerant does not evaporate in an airtight system, so air must be leaking in.
- Note: Some older vehicles cannot have their AC unit recharged. These vehicles generally fall before the year 1995 and use an R12 refrigerant no longer made. The only option is AC replacement. Though an ac recharge can be completed at home, it is still considered a more professional repair, as it contains work with hazardous liquid and is best left for a certified mechanic.
How to Recharge a Car's AC
Because of the sensitivity of this procedure, we will explain how to use the AC recharge kits. They have shown to be the most effective and safest option in comparison to trying to repeat a mechanic’s role at home.
Materials Needed: * AC dispenser with trigger and low side gauge * Meat thermometer * Refrigerant (12-28 ounces, depending on vehicle requirement. This information is located on the underside of the hood). * Safety glasses and gloves
Tip: Always wear safety glasses when performing work under the hood. It is especially important to be careful to not get any refrigerant on your skin as it freezes quickly and is very painful. Please be sure to follow all instructions that are included with your AC recharge kit and read every canister’s warnings carefully.
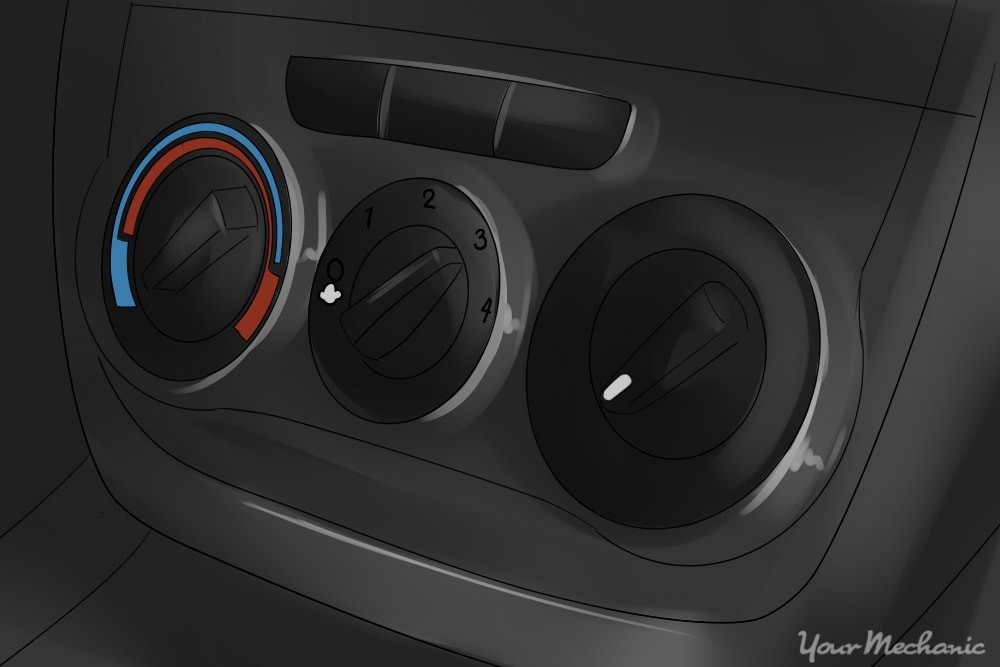
Step 1: To begin an AC recharge, start your car and turn your AC to Max or High.
Step 2: The next step for an AC recharge is to determine if the AC compressor is engaging. An AC compressor is a device driven by the AC accessory belt that converts the refrigerant from liquid to gas. The compressor has a clutch at the end of it that should be spinning with the accessory belt when the AC is on high. Look for these pulleys moving.
If the clutch on the compressor is indeed engaging, then it is likely that the system is low on refrigerant, especially if the air is still blowing slightly cold. You will still want to move ahead with testing the pressure before adding refrigerant.
If the clutch is not engaging the compressor, then the AC system is either very low on refrigerant, there is an electrical problem, or the compressor itself has failed. Adding more refrigerant after pressure testing will allow you to know which of these the cause is.
Step 3: The third step to recharge the AC is to test the pressure. To test the pressure, turn the vehicle off and locate the low side pressure port. The low side pressure service port is generally located on the passenger side of the engine bay. It will have a black or gray cap on it with the letter “L”.
- Tip: If you are having a hard time finding it, try locating the two aluminum pipes that are coming out of the firewall (the metal wall behind the engine) and trace the larger-diameter pipe until you find the service port.
Step 4: Continue the AC recharge by attaching the recharge hose from the kit. To attach the recharge hose, place the quick-connect fitting — found on the end of the recharge hose — over the port and push down firmly until you hear it click into place.
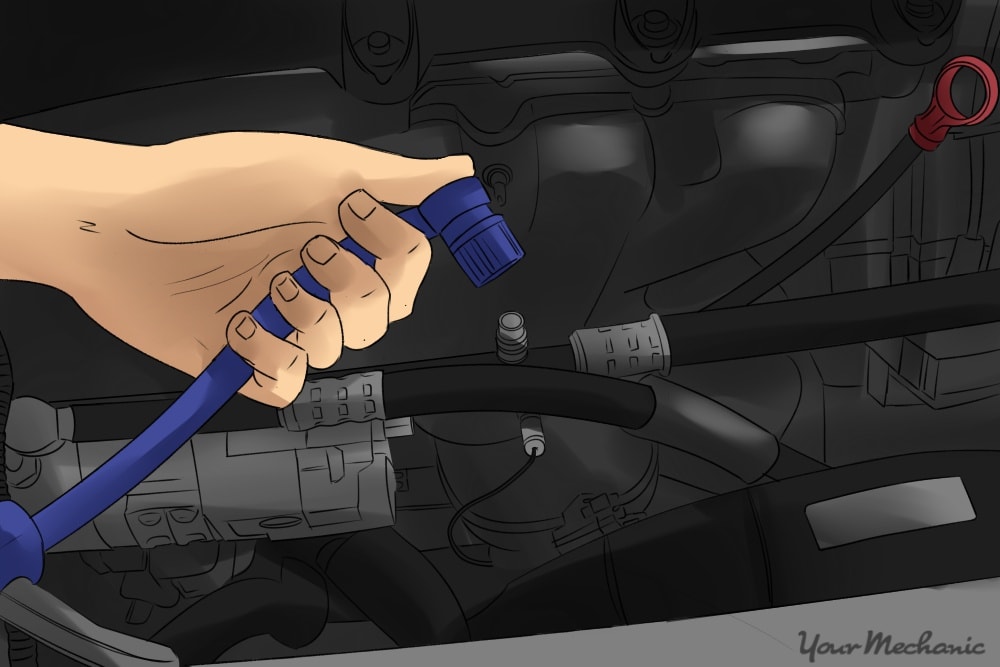
- Warning: Be careful not to pull the trigger at this time as this will release refrigerant from the AC system into the atmosphere.
** Step 5**: The first step to verifying the AC has been recharged is to restart the vehicle and make sure the air conditioner is on the highest settings. Begin to monitor the gauge by watching for the AC compressor to engage the clutch. Once the compressor is engaged, if the low side pressure is under 40 psi, it is verified that the AC system is undercharged. You want the reading to be as close to 40 psi as possible.
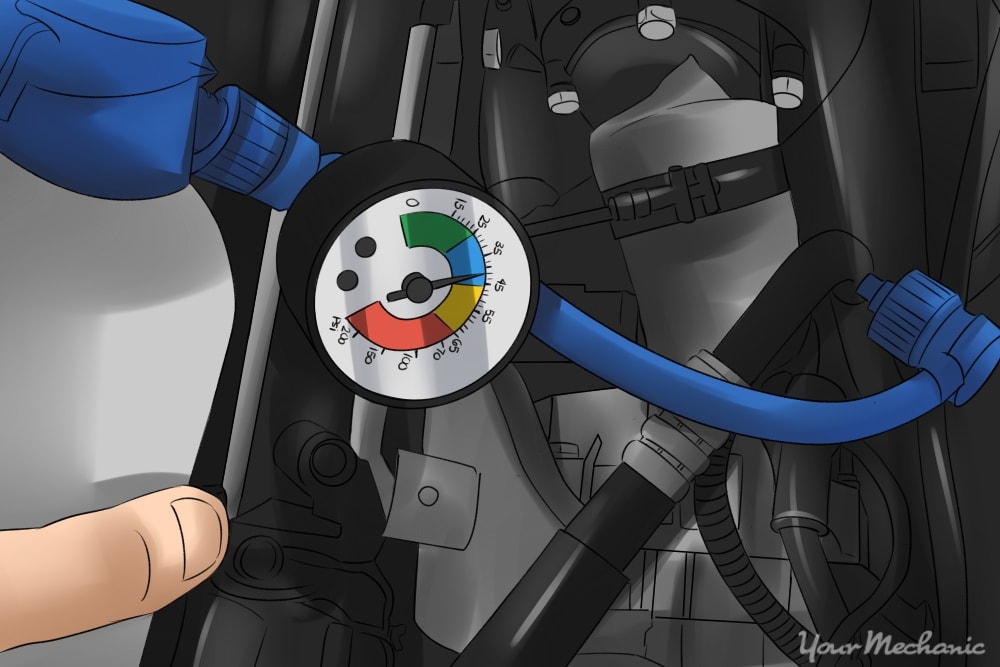
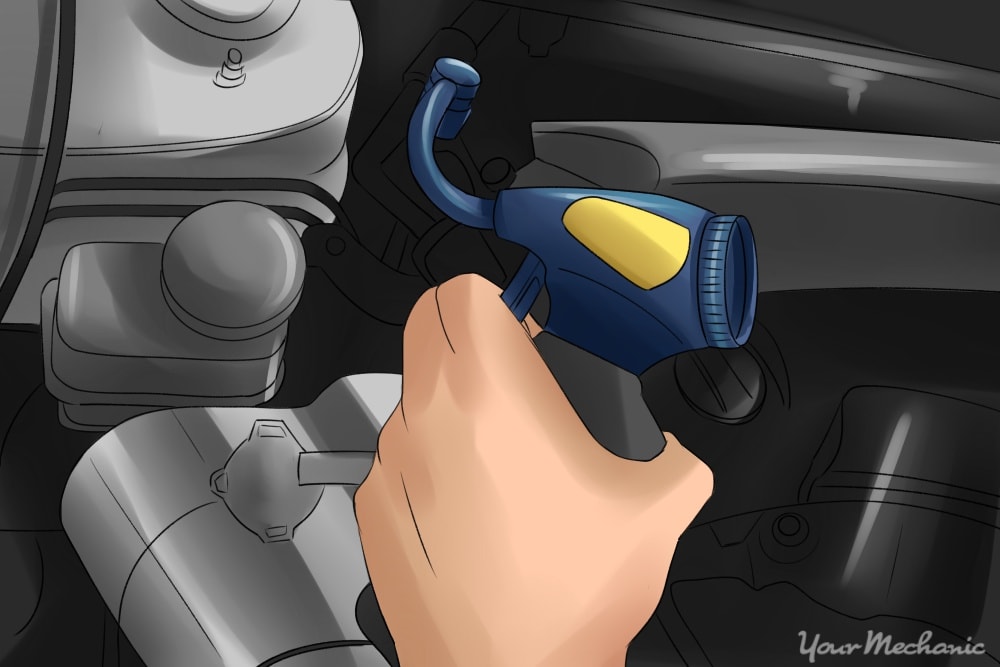
Step 6: Start step six of the AC recharge by threading the refrigerant can onto the recharge hose. Threading the can onto the hose allows you to slowly top off the AC system with liquid refrigerant. Once the can is installed, hold the can upright and squeeze the trigger for 5 to 10 seconds to add the refrigerant to the system. After you release the trigger, check the pressure gauge to be sure you are not overcharging the system.
- Proceed until you are as close to 40 psi as possible.
Step 7: The final step is to test to see if the AC has been recharged. Return to the inside of the car and check the temperature. Using a thermometer, insert it into one of the AC vents on the driver’s side, near the steering wheel, and note the temperature. A fully charged system will blow air as cold as 28 degrees. This can vary slightly depending on ambient temperature as well as whether the vehicle has been stationary.

- If the pressure is over 40psi, that is considered “high” low side pressure. This can be caused by overcharging the system or if the compressor itself is malfunctioning. If the pressure is reading high, it is time to seek professional mechanic help, as repairs may be necessary.
You have successfully recharged your AC! Your AC should be running colder now and your drive should be much nicer.
- Warning: It must be stressed that if your refrigerant was low to begin with, there is little doubt that there is an AC system leak. AC repairs are highly specialized and this sort of repair needs to be addressed by a professional for proper procedures and practice, as well as keeping the refrigerant from leaking into the atmosphere and polluting the air we breathe.