
A neutral safety switch works just like a clutch switch except that it keeps an automatic transmission from starting in gear. The neutral safety switch will allow the engine to start with the transmission selector in park and neutral.
The switch is located in two places on the vehicle. Column shifters have the neutral safety switch located on the of the transmission. Mechanical floor shifters have the neutral safety switch located on the of the transmission. Electronic floor shifters have the neutral safety switch in the shifter housing and a gear position switch on the transmission. This is commonly known as shift by wire.
If you have the column or floor shifter in park or in neutral and the engine does not start, then the neutral safety switch may have failed. Also, if the column or floor shifter is in gear and the engine is able to start then the neutral safety switch may have failed.
Part 1 of 8: Verifying the neutral safety switch condition
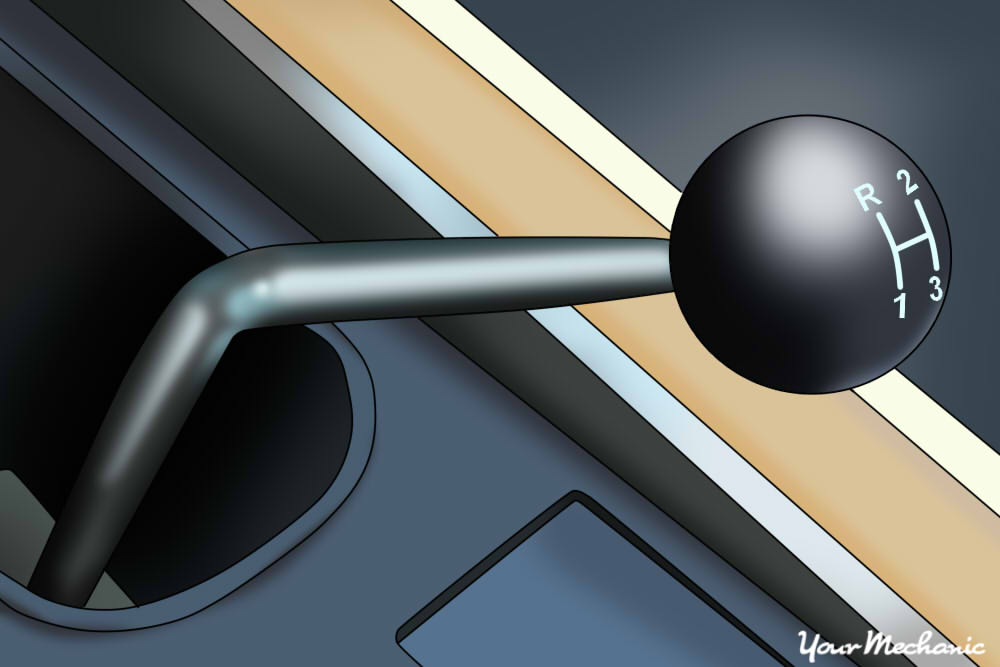
Step 1: Place the column shifter or floor shifter in park. Turn on the ignition key to start.
Step 2: Set the parking brake. Place the column shifter or floor shifter into neutral.
Turn on the ignition key to start. The engine should start if the neutral safety switch is working correctly
Part 2 of 8: Preparing to work
Materials Needed
Step 1: Park your vehicle on a flat, hard surface. Make sure that the transmission is in park.
Step 2: Place wheel chocks around the rear tires that will be remaining on the ground. Engage the parking brake to the lock the rear tires from moving.
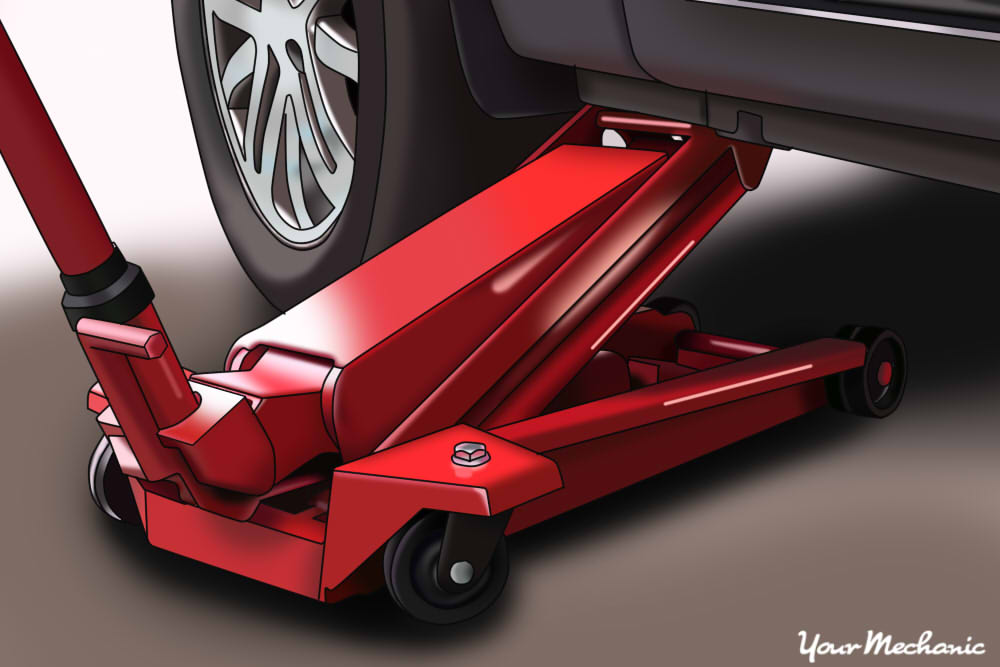
Step 3: Raise the vehicle. Lift under the vehicle at its specified jacking points until the wheels are completely off the ground.
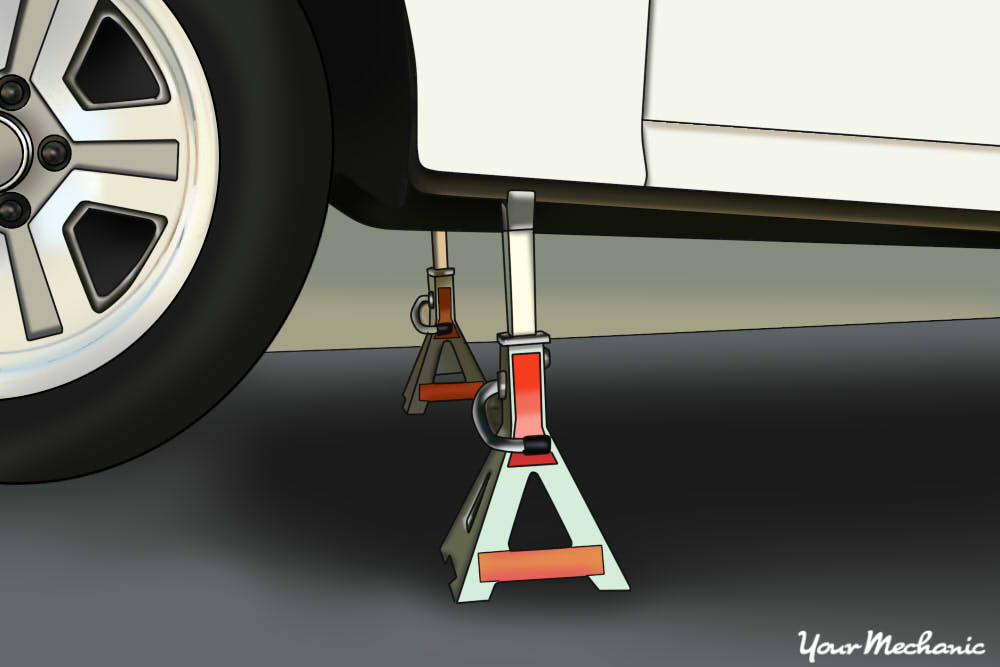
Step 4: Place the jack stands. The jack stands should go under the jacking point locations and lower the vehicle onto the jack stands.
For most modern cars, the jacking points for jack stands will be on the pinch weld just under the doors along the bottom of the car.
- Note: Best to follow the vehicles owners manual for proper jacking locations.
Part 3 of 8: Removing the column shifter neutral safety switch
Materials Needed
- Allen wrench set
- Boxed end wrenches
- Breaker bar
- Fastener remover (only for vehicles with engine guard)
- Needle nose plyers
- Nine volt battery saver
- Ratchet with metric and standard sockets
- Small punch
- Small pry bar
- Torques bit set
- Torque wrench
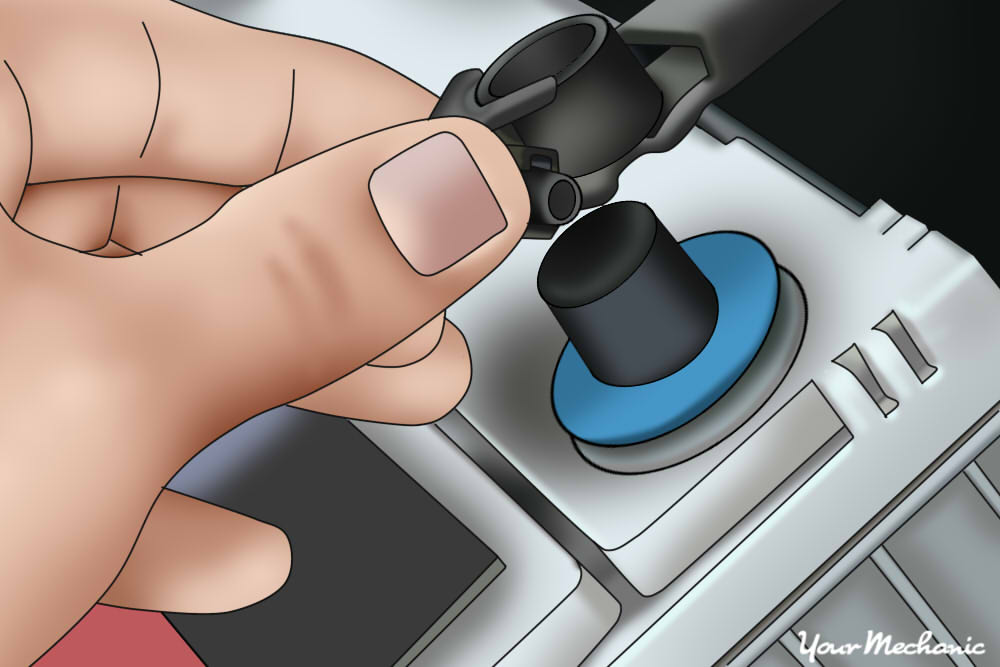
Step 1: Install a nine volt battery saver into your cigarette lighter. This will keep your computer live and keep your setting current in the vehicle.
If you do not have a nine volt battery saver, it is not a big ordeal.
Step 2: Open the hood and disconnect the battery. Remove the negative post off of the battery terminal.
This discharges the power to the neutral safety switch.
Step 3: Get your creeper and tools. Go under the vehicle and locate the neutral safety switch.
Step 4: Remove the shifter linkage attached to the shifter on the transmission. This linkage may be installed with a bolt and lock nut or with a boss pin and cotter pin.
Step 5: Remove the mounting bolts to the neutral safety switch.
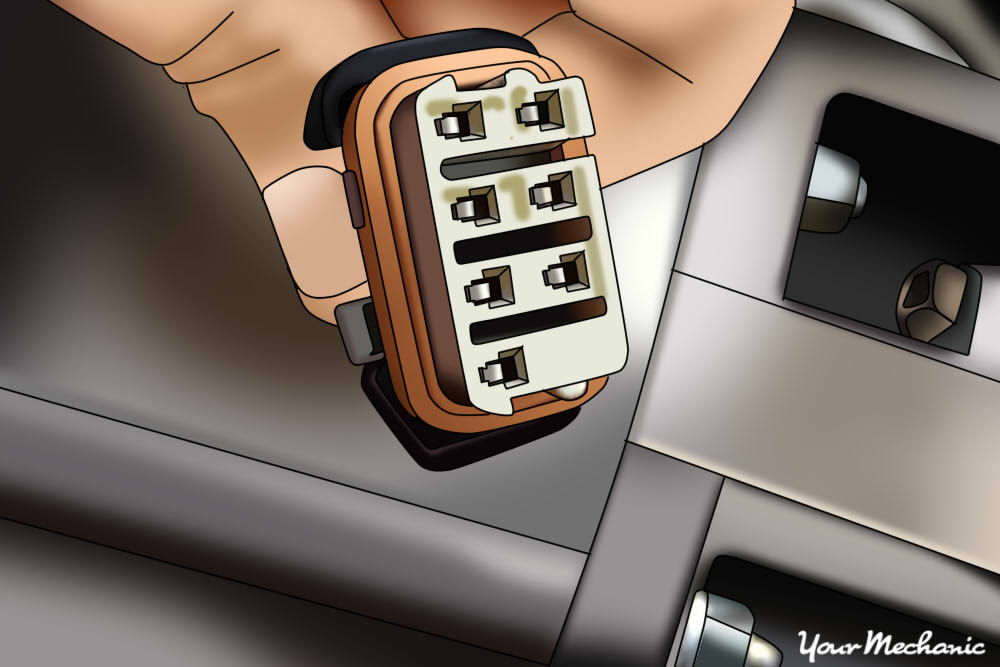
Step 6: Unplug the harness to the neutral safety switch. You may need to use a small pry bar to pop the harness off.
Step 7: Remove the nut from the shifter shaft on the transmission. Take off the shifter linkage bracket.
- Note: Most shifter shafts on a transmission will lock into park with turning clockwise.
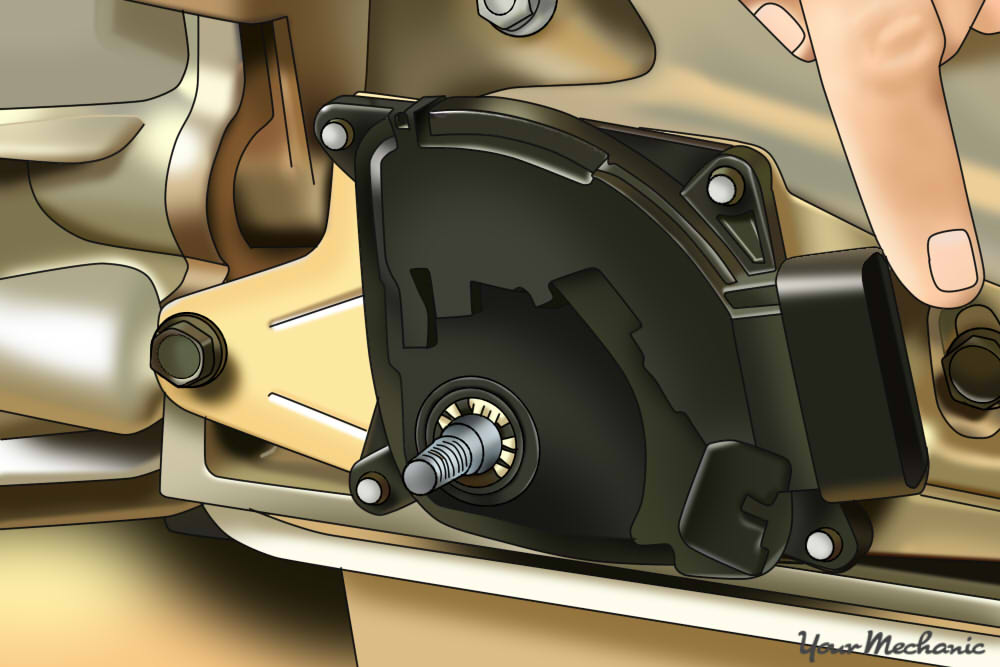
Step 8: Remove the switch. Using the small pry bar, apply slight pressure against the neutral safety switch and the transmission and remove the switch.
- Note: The old switch may break when removing due to rust or contamination.
Part 4 of 8: Removing the electronic floor shifter neutral safety switch
Materials Needed
- Allen wrench set
- Boxed end wrenches
- Breaker bar
- Fastener remover (only for vehicles with engine guard)
- Needle nose plyers
- Nine volt battery saver
- Ratchet with metric and standard sockets
- Small punch
- Small pry bar
- Torques bit set
- Torque wrench
Step 1: Install a nine volt battery saver into your cigarette lighter. This will keep your computer live and keep your setting current in the vehicle.
If you do not have a nine volt battery saver, then it is okay.
Step 2: Open the hood and disconnect the battery. Remove the negative post off of the battery terminal.
This discharges the power to the neutral safety switch.
Step 3: Bring your tools with you in the passenger side of the vehicle. Remove the carpet around the shifter housing.
Step 4: Remove the mounting bolts on the floor board. These are the bolts that secure the floor shifter.
Step 5: Pick up the floor shifter assembly and detach the harness. Turn the shifter assembly over and you will see the neutral safety switch.
Step 6: Remove the neutral safety switch from the shifter housing. Be sure to clean the contact on the harness of the vehicle prior to installation.
Part 5 of 8: Installing the column shifter neutral safety switch
Materials Needed
- Allen wrench set
- Anti-Seize
- Boxed end wrenches
- Breaker bar
- Fastener remover (only for vehicles with engine guard)
- Needle nose plyers
- Nine volt battery saver
- Ratchet with metric and standard sockets
- Small punch
- Small pry bar
- Torques bit set
- Torque wrench
Step 1: Check that transmission is in park. Using the shifter linkage bracket, turn the shifter shaft on the transmission clockwise, ensuring that the transmission is in park.
Step 2: Install the new neutral safety switch. Use Anti-Seize on the shifter shaft to prevent rust and corrosion between the shaft and the switch.
Step 3: Screw in the mounting bolts by hand. Torque the bolts to proper specs.
If you do not know the specification for the bolt torque, you can tighten the bolts 1/8 turn.
- Warning: Tightening the bolts too tight will crack the new switch
Step 4: Plug in the harness to the neutral safety switch. Make sure that the lock engages and secures the plug.
Step 5: Install the shifter linkage bracket. Tighten the nut to the proper torque specifications.
If you do not know the specification for the bolt torque, you can tighten the bolts 1/8 turn.
Step 6: Install the linkage onto the linkage bracket. Tighten the bolt and nut up tight.
Use a new cotter pin if the linkage was attached by a boss pin.
- Warning: Do not use the old cotter pin due to work harden and fatigue. The old cotter pin could break prematurely.
Step 7: Hook up the negative battery cable to the negative terminal. This will supply power to the new neutral safety switch.
Remove the nine volt battery saver from the cigarette lighter.
Part 6 of 8: Installing the electronic floor shifter neutral safety switch
Materials Needed
- Allen wrench set
- Anti-Seize
- Boxed end wrenches
- Breaker bar
- Fastener remover (only for vehicles with engine guard)
- Needle nose plyers
- Nine volt battery saver
- Ratchet with metric and standard sockets
- Small punch
- Small pry bar
- Torques bit set
- Torque wrench
Step 1: Install the new neutral safety switch into the shifter housing.
Step 2: Place the floor shifter onto the floor board. Attach the harness to the floor shifter and place the floor shifter down onto the floor board.
Step 3: Install the mounting bolts on the floor board. These secure the floor shifter.
Step 4: Install the carpet around the shifter housing.
Step 5: Hook up the negative battery cable to the negative terminal. This will supply power to the new neutral safety switch.
Remove the nine volt battery saver from the cigarette lighter.
Part 7 of 8: Lowering the vehicle
Step 1: Raise the vehicle. Lift under the vehicle at its specified jacking points until the wheels are completely off the ground.
Step 2: Remove the jack stands. Keep them far away from the vehicle.
Step 3: Lower the vehicle to where all four wheels are on the ground. Pull out the jack and put it aside.
Step 4: Remove the wheel chocks from the rear wheels. Put these aside.
Part 8 of 8: Testing the new neutral safety switch
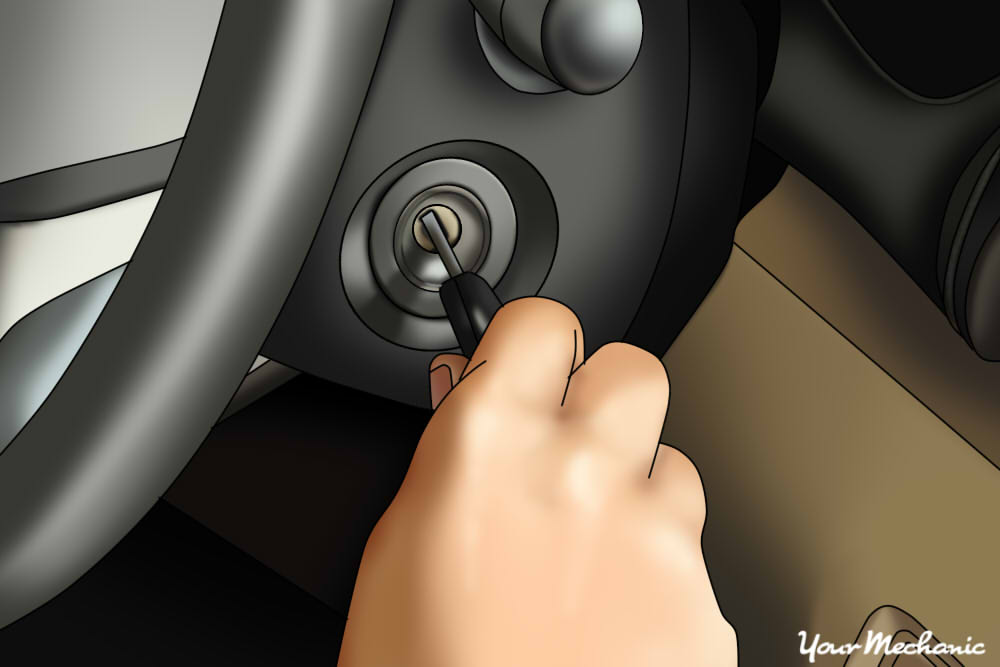
Step 1: Make sure that the shifter is in the park position. Turn on the ignition key and start the engine.
Step 2: Turn the ignition off making the engine shut off. Place the shifter into neutral position.
Turn on the ignition key and start the engine. If the neutral safety switch is working correctly the engine will start.
To test the neutral safety switch, shut the engine off and restart the engine three times in the park position and three times in the neutral position on the shifter. If the engine starts up every time, then the neutral safety switch is working correctly.
If you cannot get the engine to start up in the park or neutral position or if the engine starts up in gear after replacing the neutral safety switch, then you need further diagnosis of the neutral safety switch and you may have electrical failure. If the problem persists, then you should seek out help from one of YourMechanic’s certified mechanics that can inspect the clutch and transmission and diagnosis the problem.