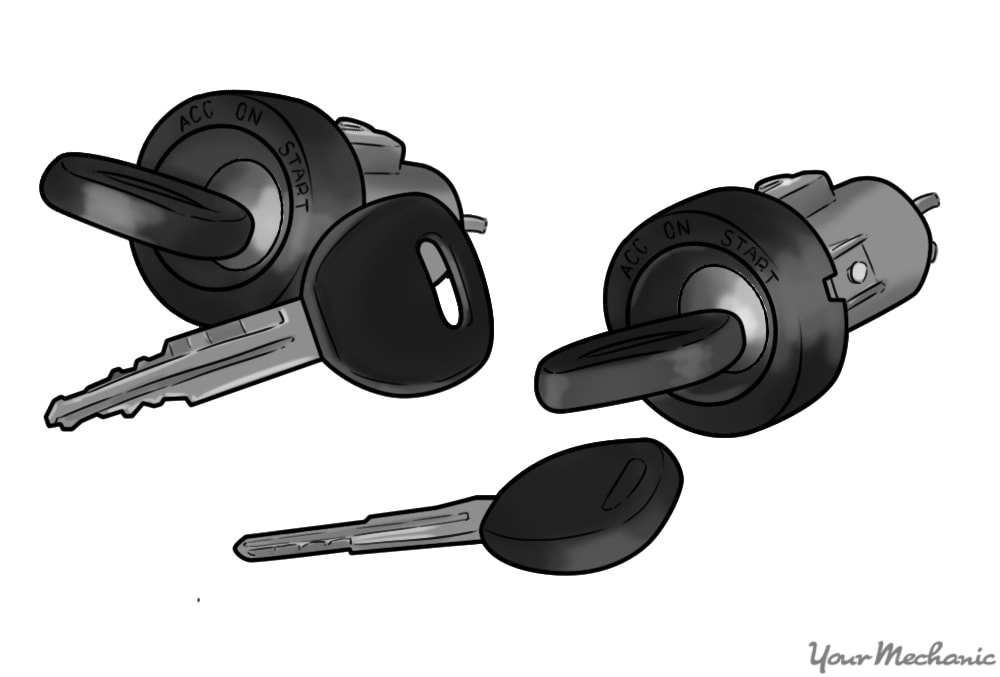
When a driver wishes to start their car, typically it's as simple as inserting a key and turning it forward. However, from time to time, the ignition lock assembly or small parts inside this device can complicate the situation. The ignition lock assembly is a tumbler and key mechanism that is used to trigger power supply to auxiliary components and engage the starter motor to begin the ignition process. Usually the ignition lock assembly never has any problems. The part itself is designed to last the life of the vehicle. But over time, constant use, or debris or broken keys inside the tumblers, may cause this part to fail. If the ignition lock assembly is wearing out, it will display a few common side effects such as issues inserting and removing the key, or the car not starting at all.
Most modern cars that use keyless remote starting have a key that has a computer chip inside of it. This requires a different type of ignition system. The instructions noted below are for older vehicles without a chip-style ignition key or push button starting features. Please refer to the vehicle's service manual or contact your local ASE certified mechanic for assistance with modern ignition systems.
Part 1 of 1: Replacing the ignition lock assembly
Materials Needed
- Boxed end wrench or ratchet sets
- Flashlight or drop light
- Regular size flat blade and Phillips head screwdriver
- Replacement ignition lock cylinder
- Safety equipment (safety glasses)
- Small flat blade screwdriver
Step 1: Disconnect the vehicle's battery. Locate the vehicle's battery and disconnect the positive and negative battery cables before proceeding.
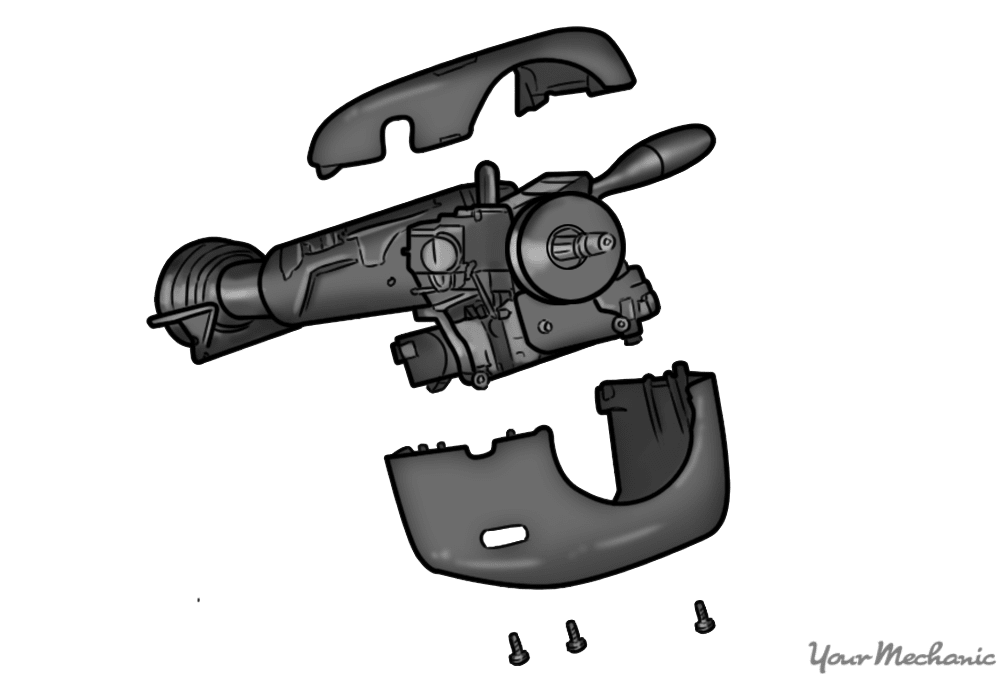
Step 2: Remove the steering column cover bolts. There are usually three or four bolts that are located on the sides and bottom of the steering column that need to be removed in order to access the ignition lock cylinder.
Locate the plastic covers that hide these bolts. Using a small, flat blade screwdriver, remove the plastic covers and set them aside.
Note the size and style of the bolts and use the appropriate tool to remove the bolts. In some cases they will be Phillips head screws or standard/metric sized bolts that will require a socket and ratchet for correct removal.
Step 3: Remove the steering column covers. Once the bolts have been removed, you should be able to remove the steering column covers.
This becomes easier if you unlock the steering wheel with the adjustable arm located underneath or to the left of the steering column, so you can move the steering wheel up and down to loosen the column covers.
Step 4: Locate the ignition lock cylinder. After the covers have been removed, you should be able to locate the ignition lock cylinder.
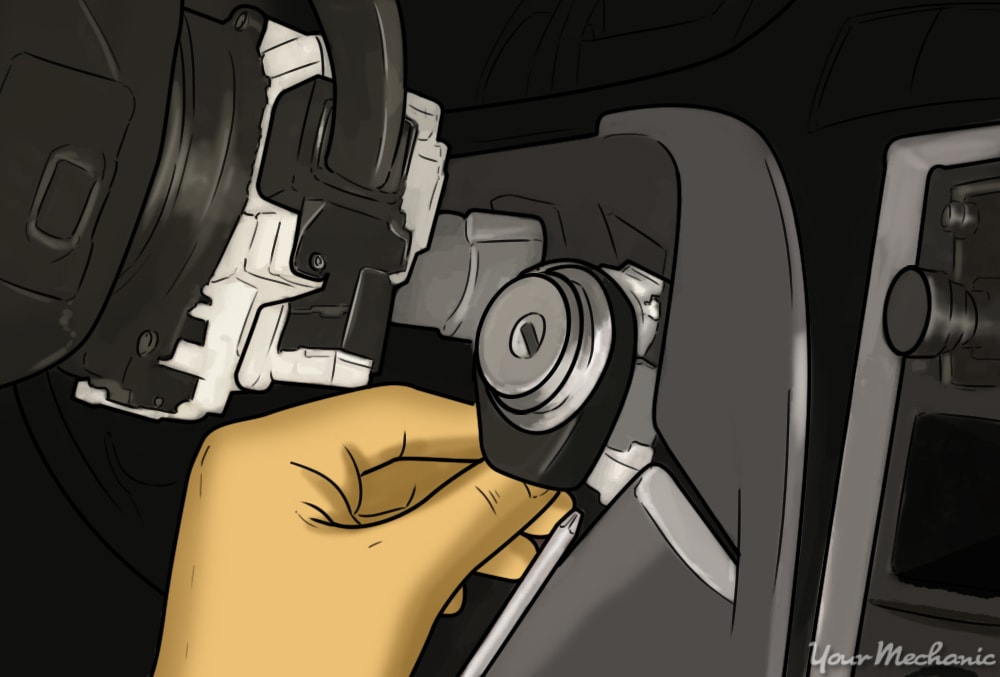
Step 5: Remove the cover on the ignition lock cylinder. On most vehicles, there is a plastic or metal clip that is over the ignition lock cylinder. To remove this, remove the small screw that holds this cover in place, typically located on the bottom of the switch. Once the screw has been removed, carefully slide the cover off the ignition lock cylinder.

Step 6: Removing the lock cylinder. The process for removing the lock cylinder will vary based on the individual manufacturer. In most cases, this process will require you to insert the key and turn it to the first setting which unlocks the steering wheel. While you do this, use a flat blade screwdriver to press a small metal push pin that is located underneath the ignition lock cylinder. Depressing this switch will unlock the cylinder from the housing.

Step 7: Remove the ignition lock cylinder from the housing. After you've pressed the button and unlocked the ignition lock cylinder from the lock body, the ignition lock cylinder will be ready to remove. With the key still inserted, gently remove the ignition lock cylinder from the lock body.
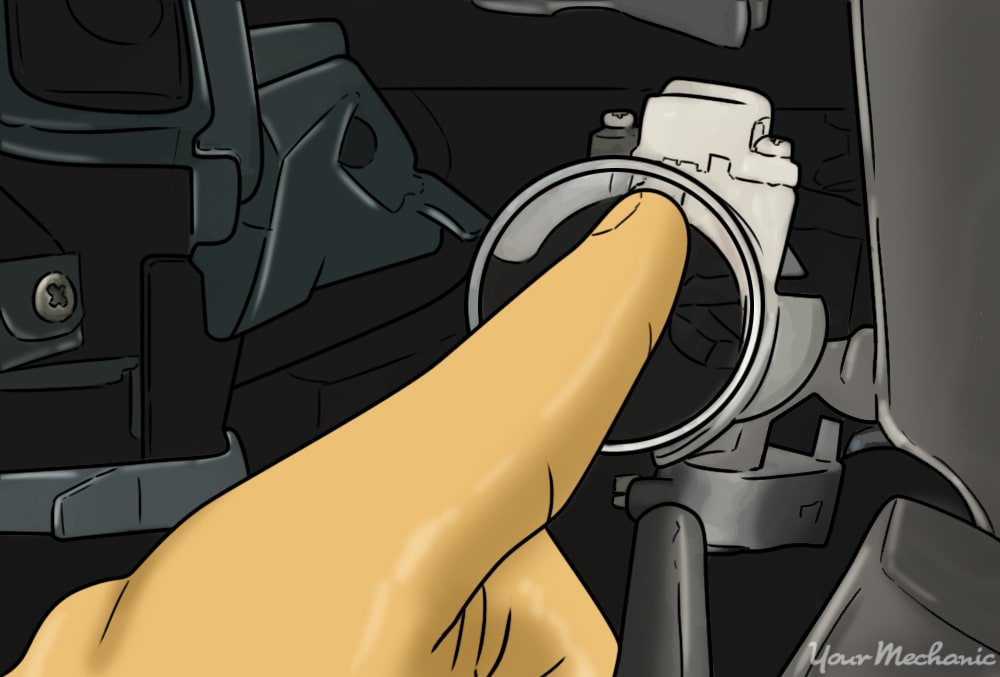
Step 8: Loosen the two screws on top of the lock body. You should see two screws that are located on the top of the lock body after you've removed the ignition lock cylinder. Loosen these screws about four full turns.
Step 9: Install the new ignition lock cylinder. In most cases, installing the new ignition lock cylinder is very simple. However, you should refer to your vehicle's service manual to find out anything particular to your vehicle. For example, on some vehicles, you have to press down on the bottom spring of the ignition lock cylinder so it does not bind up inside the lock housing.
Step 10: Tighten the two screws on top of the lock cylinder. After the new ignition lock cylinder is secure inside the housing, tighten the two screws on top of the lock body.
Step 11: Replace the ignition lock cylinder cover. Reinstall the ignition lock cover and tighten the screw underneath.
Step 12: Replace the steering column covers. Put the steering column covers back into place.
Step 13: Test the operation of the new ignition lock cylinder. Before you reconnect the battery, make sure your new ignition lock cylinder moves to all four positions with the new key. Test this function three to five times to verify the repair was completed correctly.
Step 14: Reconnect battery terminals. Reattach the positive and negative terminals to the battery.
Step 15: Clear error codes with the scanner. In some cases, the check engine light will illuminate on your dashboard if there was a problem detected by your ECM. If these error codes are not cleared before you test fire the engine, it is possible that the ECM will not allow you to start the vehicle. Make sure to clear any error codes with a digital scanner before you test the repair.
It's always best to refer to your service manual and completely review their recommendations before taking on this type of job. If you've read these instructions and still don't feel 100% confident in completing this repair, please contact one of our local ASE certified mechanics from YourMechanic to complete the ignition switch replacement for you at your home or office.