When you need to go somewhere in your car, usually you grab your car keys and your driver’s license, hop in the driver’s seat, and go. There’s little attention given to your vehicle aside from making sure there’s enough fuel in the tank to get you where you need to go.
As a driver, you’re responsible for the condition of the vehicle you are operating - whether it is your own, a friend or family member’s car, or a rental. Ensuring you are driving a safe vehicle is important not only for your own safety but for other people on the road as well.
Checking your tires is an important part of making sure you are driving a safe vehicle. Every time you prepare to get behind the wheel, you should perform a quick safety check on your vehicle, including an inspection of your tires.
Here’s a simple tire inspection you can perform in less than a minute. You can save yourself the embarrassment of calling a tow truck, or maybe even prevent an accident.
Part 1 of 4: Check your tire tread for sufficient depth and uneven wear
Having a sufficient tread depth is important to ensuring the safest possible driving experience. If your tread is worn out, you may not have enough traction to accelerate or brake safely, especially in slippery or wet conditions.
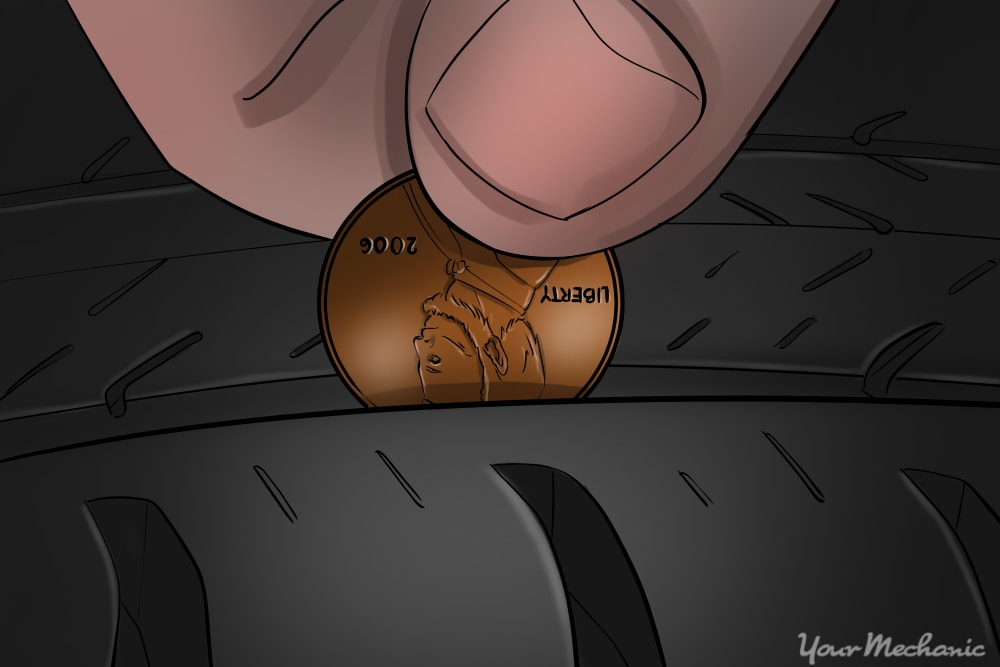
Step 1: Place a penny between the tread blocks of your tire. Place the penny with Lincoln’s head facing you and upside down in the tread.
If Lincoln’s head is partially or fully covered by the tire tread, your tire has enough tread to drive safely. This indicates at least 2/32 of an inch of tread depth remains on your tire.
If the top of Lincoln’s head is exposed, you need to have your tires replaced.
- Warning: If your tread is low, use your vehicle sparingly until your tires have been replaced. Don’t go on long trips with worn out tires to prevent blowouts or flats.
Step 2: Use the penny to check tread depth around the tire. Check three or more spots around the tire with a penny to make sure the tread is wearing evenly.
Compare the tread depths to determine if they appear the same.
Step 3: Measure two or three spots across the tread contact patch of your tire. Uneven wear can occur either around the tire or across the contact patch.
Step 4: Check all four tires in the same fashion. Use the penny to gauge the tread depth and wear on the remaining tires.
Step 5: Note any inconsistencies in tread depth on each tire. This can indicate a need to have a wheel alignment performed, a suspension or steering repair diagnosed and completed, or a tire balance issue.
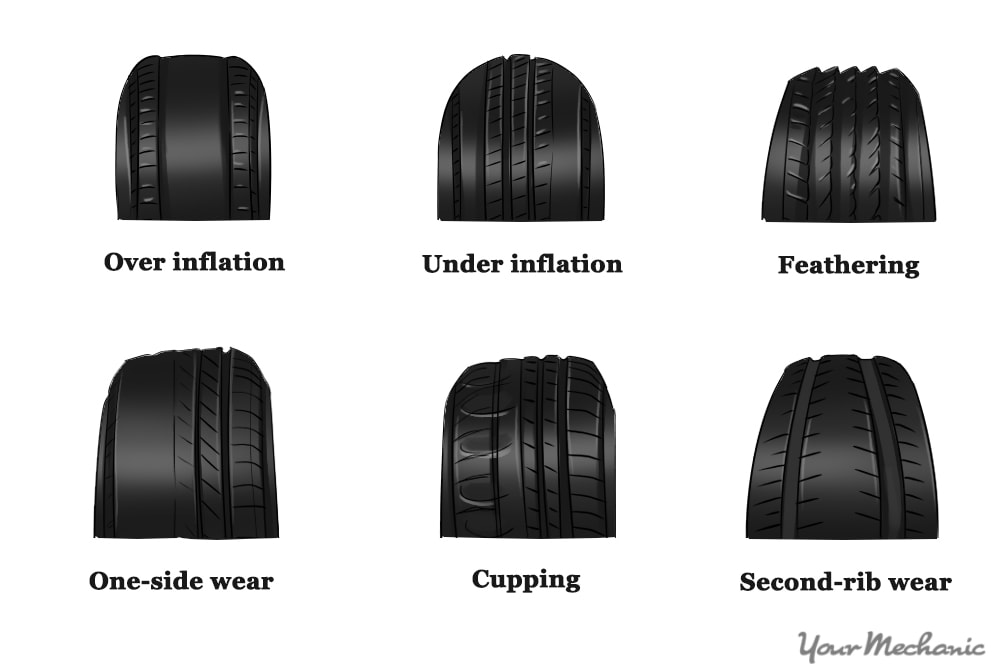
Step 6: Note any inconsistent measurements between all four of your tires. This can help a mechanic determine the location of a problem.
It can also simply indicate the need to perform a tire rotation.
When you have performed a tire safety check a few times, it will only take a few seconds per tire to check tread depth and make sure your tires are wearing evenly.
Step 7: Check for exposed cords on your tire. Visually look for metal or fabric strands sticking out of your tire.
If you can see the metal or fabric strands used to reinforce the inner part of your tire, you need to have your tires replaced immediately.
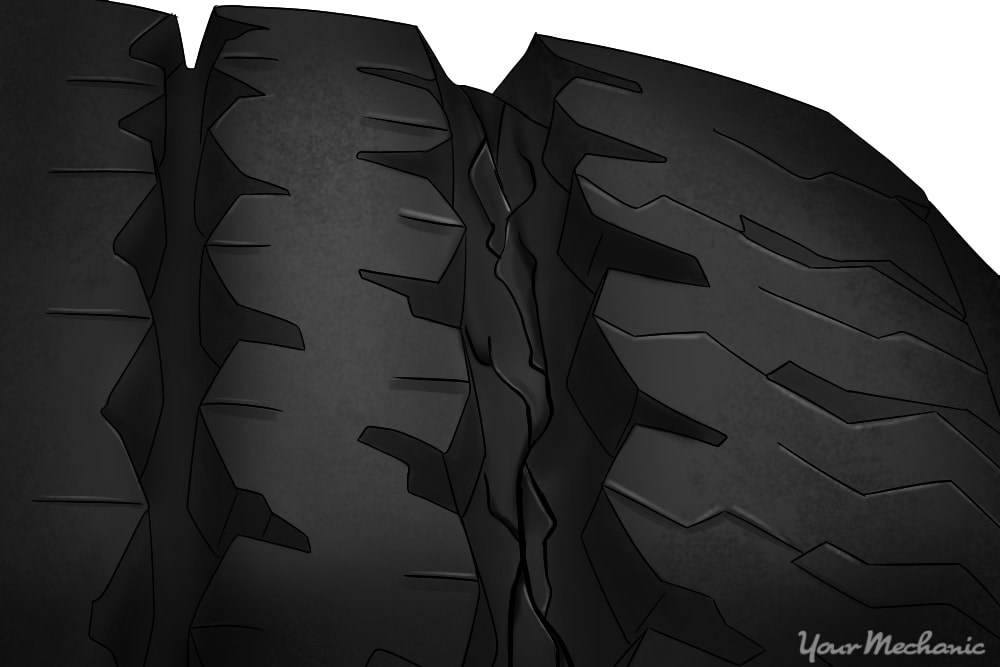
Part 2 of 4: Check for cracking on the tires
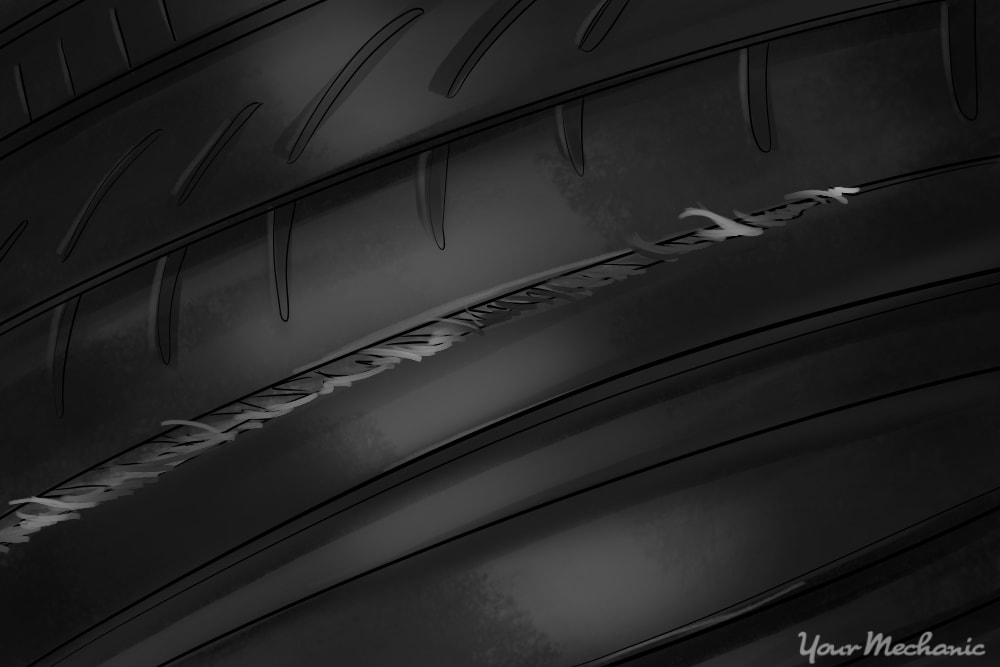
Cracking occurs on tires when the rubber begins to degrade. It’s common to see fine cracks forming either between the tread blocks or on the sidewalls, but it should never expose the cords or leak air.
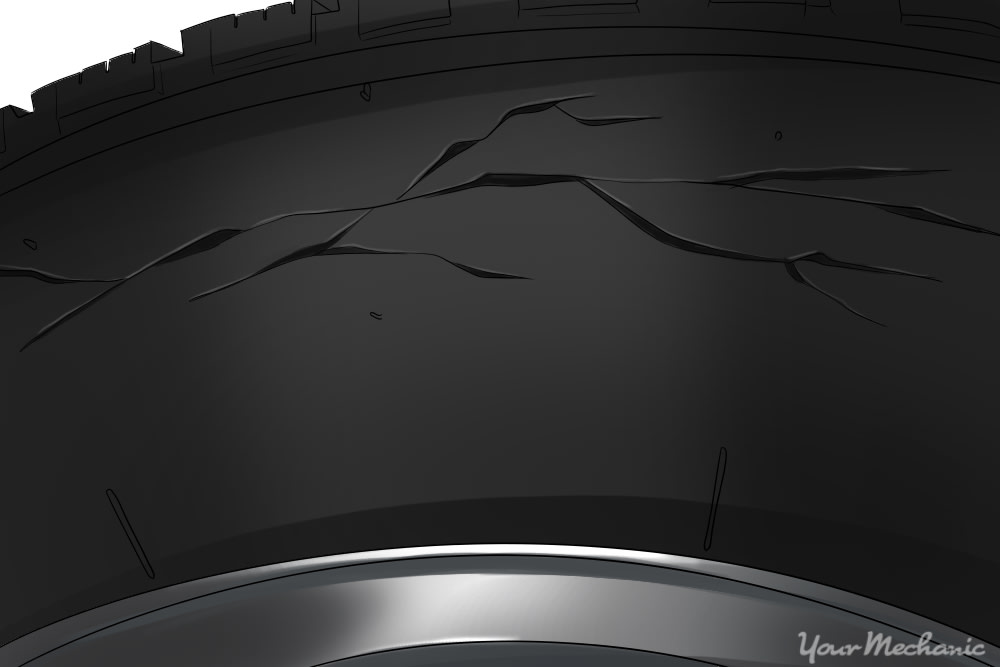
Step 1: Look at the area between the tread blocks to check for cracking. You may find fine cracks or wide cracks.
If there are fine cracks, it’s a normal part of a tire aging, but they should be monitored regularly to prevent encountering a dangerous driving situation.
If there are wide cracks where you can see the steel belts or woven fabric, your tire is not safe to drive on.
Step 2: Check the sidewall for cracking. Again, you may see some fine cracks here.
Like the area between the tread blocks, minor cracking is normal due to weathering but cracks exposing inner tire layers are a serious condition requiring tire replacement.
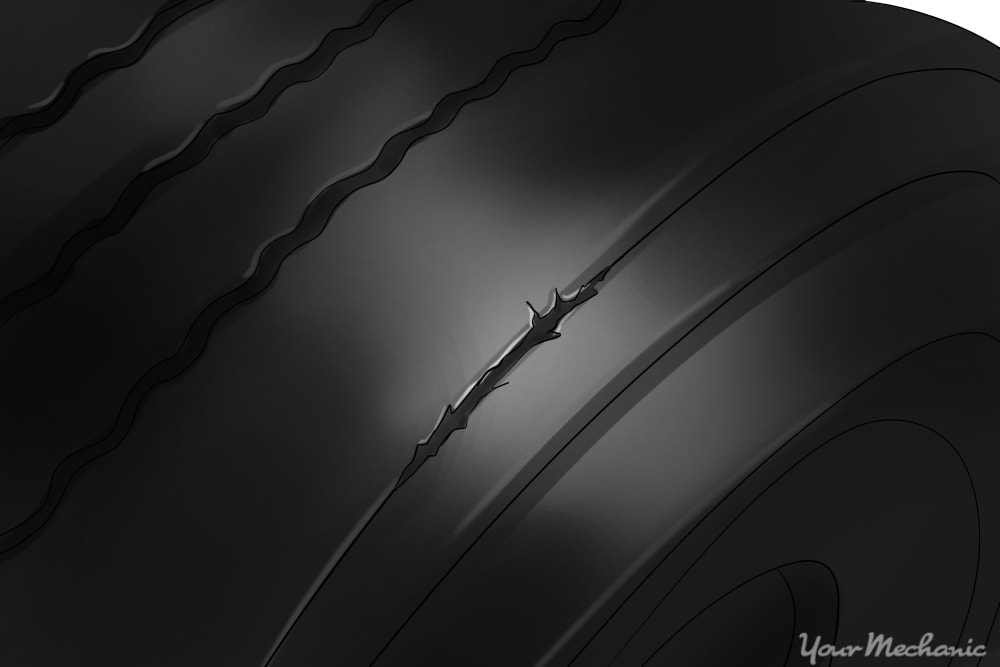
Step 3: Check for tread separation. On tires with degrading rubber, the tread can separate from the body of the tire.
You can see this as large cracks forming at the join between the sidewall and the tread section.
If minor cracking is present on only a few tread sections, you can safely operate your vehicle but should keep an eye on the cracking.
If the crack is wide enough to fit the corner of a credit card in, the tire should be replaced immediately. Tire failure can result from operating on such a tire.
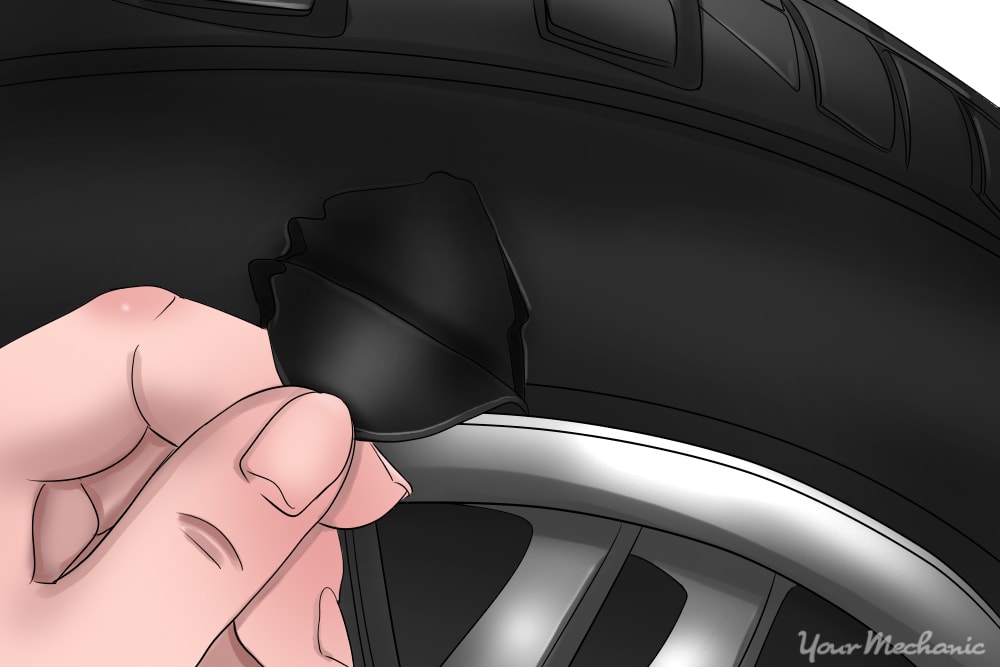
Part 3 of 4: Check for objects, bulges or punctures in the tire

Step 1: Visually inspect your tire tread for anything that doesn’t belong. Nails, screws, pieces of metal, and large rocks can be embedded in your tire, puncturing the liner and causing a leak.
Items puncturing the tire may actually leak very slowly because the puncture is plugged with the object, though it still needs to be replaced very soon.
Step 2: Check the sidewall for cuts or protruding objects. Visually check for anything that looks like it doesn’t belong.
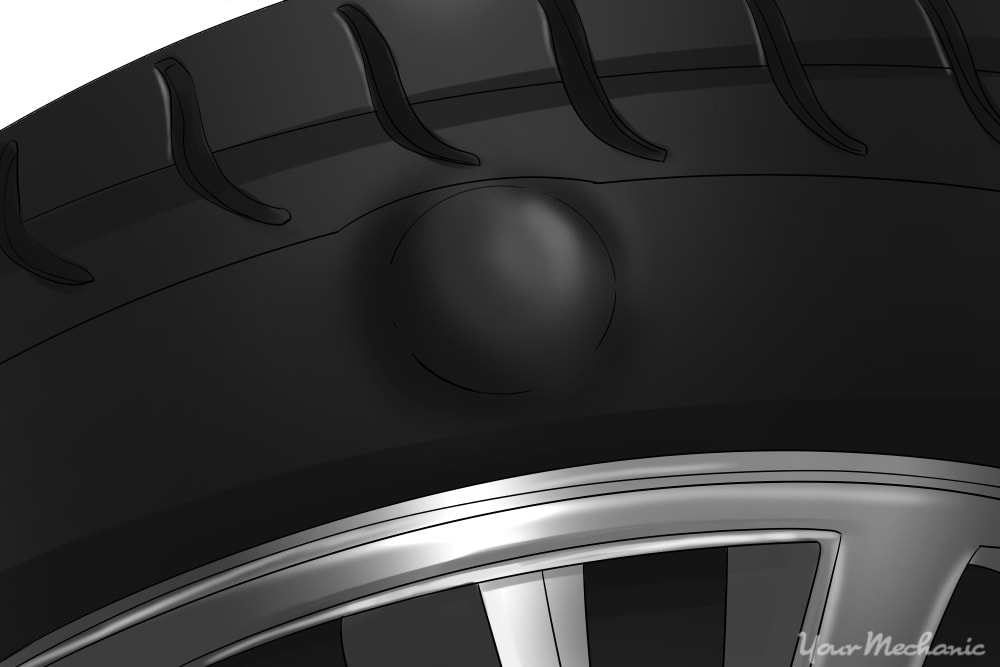
Step 3: Look for obvious bulges or bumps on your tire. Look for egg-sized lumps that feel softer than the rest of the tire when pressed.
Check for any bulges on the tire tread section. These never belong.
Bulges or lumps indicate tire separation where air has entered between the rubber layers in the tire. Though it may not leak immediately, it is unsafe to operate your car with a tire separation.
- Tip: Your tire has a seam on the sidewall from manufacturing. This may protrude outward slightly but it is a normal condition.
Part 4 of 4: Check your tire pressure
Ensuring you have the proper pressure in your tires not only ensures you have a smooth ride and handling and optimum fuel economy but also provides the best traction possible. Tires that are under-inflated or over-inflated can feel loose when steering and will have an increased stopping distance in panic braking situations.
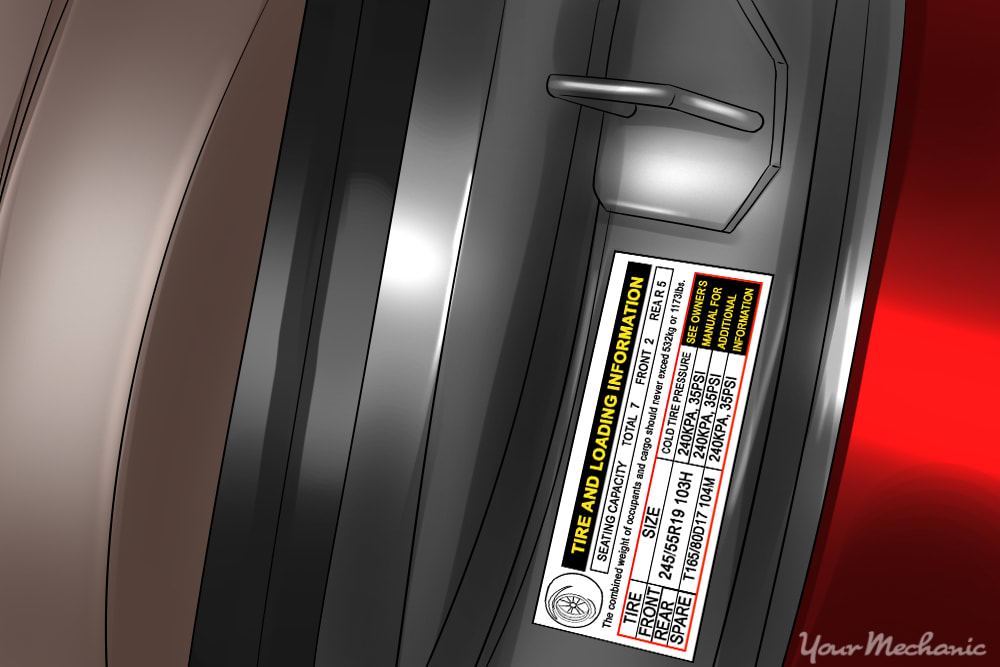
Step 1: Find the proper tire pressure for your vehicle. Locate the proper tire pressure for your vehicle in your owner’s manual specifications section or on the driver’s door pillar placard.
After checking your tire pressure a few times, you’ll recall the right pressure by memory.
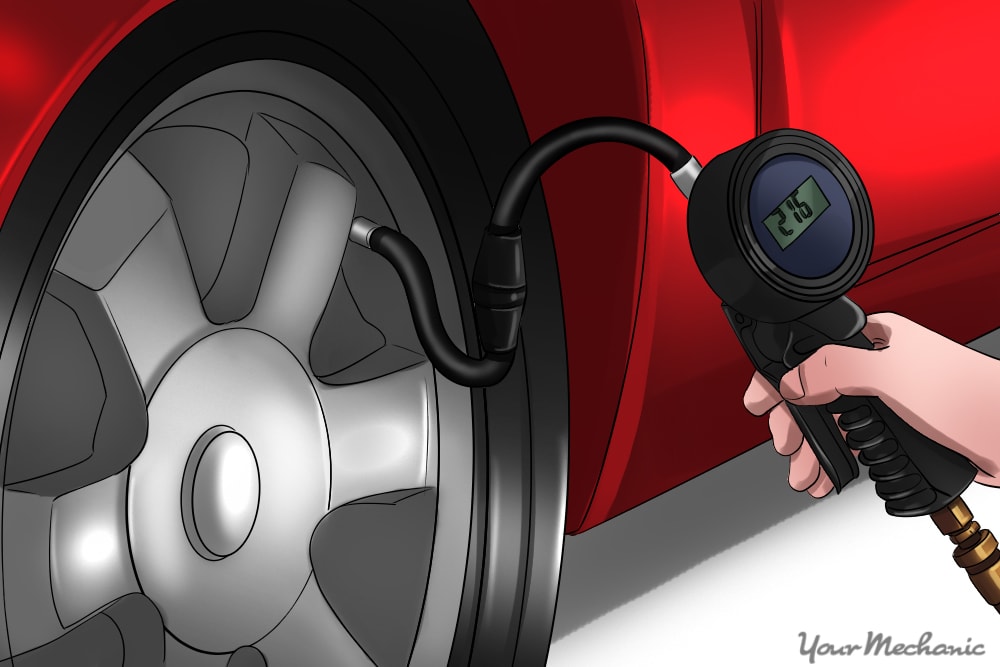
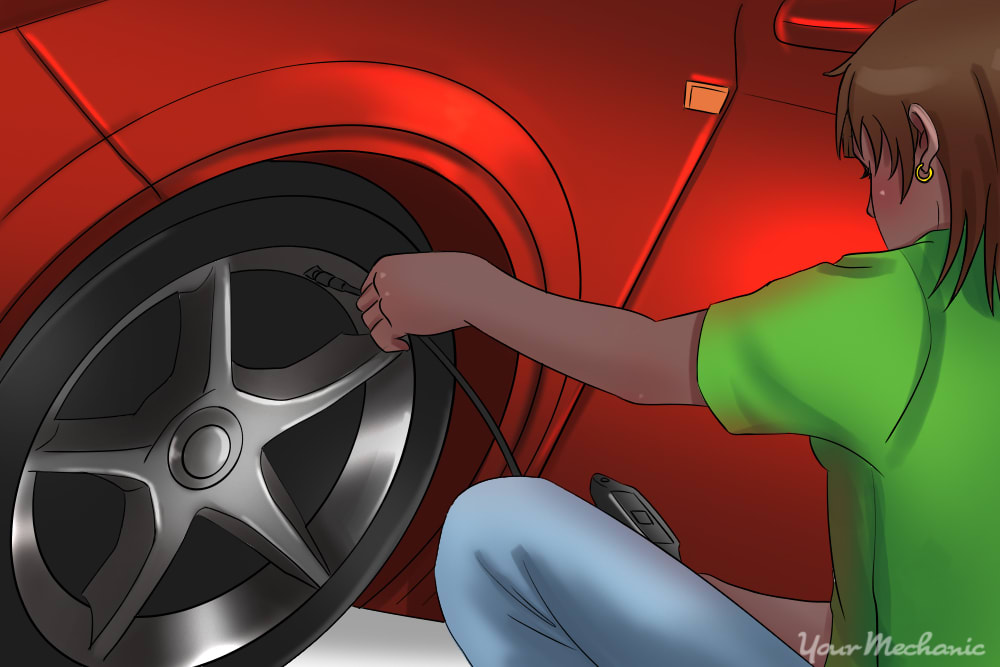
Step 2: Check the tire pressure at each wheel with a tire pressure gauge. A few different styles of tire pressure gauges include a stick gauge, a dial gauge, and a digital gauge.
Remove the valve stem cap from the valve stem by turning it counterclockwise. Press the tire pressure gauge squarely against the valve stem to get a pressure reading.
If there is hissing from the valve stem as air leaks out, adjust the tire pressure gauge more squarely on the valve stem to seal it off. Check the pressure reading on the gauge and compare it to the recommended pressure you found earlier.
Step 3: Adjust the tire pressure as needed. Use an air compressor or simply let air out.
Inflate the tires with an air compressor if the pressure is too low. Let air out of the tire by pressing on the valve stem needle if the pressure is too high.
After you follow these steps and repeat the tire check a few times, it should become second nature and you’ll easily remember how to do the inspection. Ideally, you should perform a visual tire safety check every time you drive your vehicle. If you don’t perform a tire safety check every time you drive your car, perform it at least every time you fuel up your car. If you find that your tires need service due to any of the problems mentioned above, one of YourMechanic’s certified mechanics can conveniently come to your home or office to perform any service you need.
