There are a few warning signs that you should be aware of regarding your vehicle’s brakes. A hard-to press-pedal, grinding sounds, and vibrations in the pedal are all signs that something isn’t working properly. With this guide, you will learn a few ways you can test for and identify issues with your brakes.
Part 1 of 4: Testing the parking brake
While the parking brake may not seem as significant as your normal brakes, it is very important that it works properly. You need to use your parking brake when parked on a hill to save your vehicle’s transmission - and in emergencies, it may be able to help slow your vehicle down.
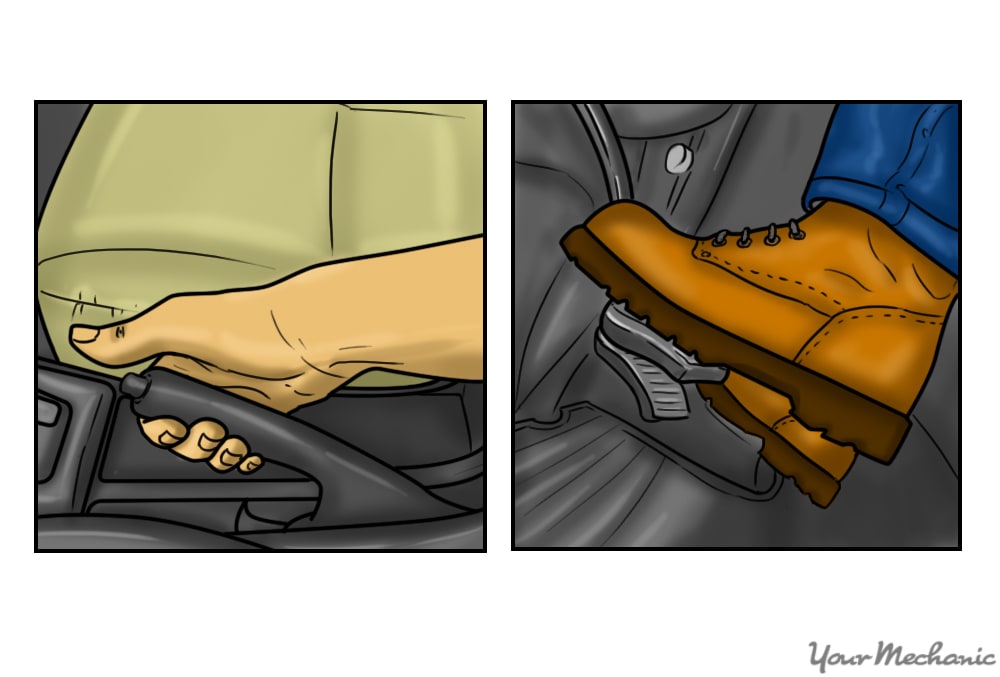
Step 1: With the engine off, apply your parking brake. You shouldn’t have to push or pull too hard to apply the parking brake.
Typically, you’ll hear about four to seven clicks as you engage the parking brake. Pedal-type parking brakes should not go all the way to the floor.
If you have to pull or push the brake lever all the way to its limit and the brakes don’t engage, the linkage is malfunctioning. The cable may have been stretched out or the linkage in the brakes may be broken. This should be repaired as soon as possible.
Step 2: Start the car engine. With the parking brake still applied, put the car in drive and move your foot off the brake.
Make sure you have space in front of you in case your car doesn’t stop. It is okay for the car to move a few inches, but it shouldn’t move very far.
- Note: For manual transmissions, stop the car on an incline or decline, put it in neutral with the parking brake on, and move your foot off the brakes. The parking brake should hold the car.
Step 3: Release the parking brake. Make sure the car can move with no resistance and that the parking brake does fully disengage.
Like before, if the parking brake does not fully disengage, the cable or linkage is most likely the cause. The cables can be adjusted to compensate for the stretching over time and if it is too tight, there won’t be enough slack to disengage the brakes.
Part 2 of 4: Testing the deceleration brakes
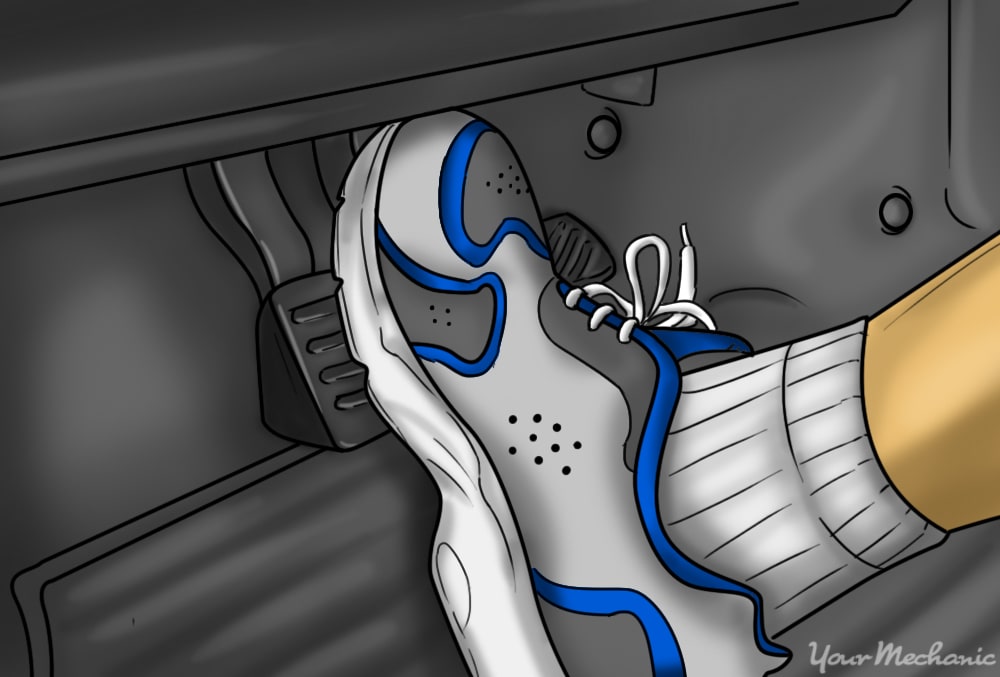
Step 1: Park your car in an empty parking lot. Start the engine and press on the brake pedal until you feel resistance - this resistance is the brakes being pressed against your rotor or drum.
The pedal should not travel more than a quarter of the total distance to the floor before you feel the brakes engaging.
If you have to press fairly far, or the pedal feels spongy, there is likely air in your brake lines. The most common fix for this issue is bleeding the brakes. This will remove the air from the lines so the brake fluid can transfer the power to the brakes successfully.
Step 2: Press and hold your foot on the brake pedal. Use firm and steady pressure. You want to make sure the pedal doesn’t start sinking to the floor as you’re holding it.
A sinking pedal usually means that the main seal in your master cylinder is failing and allowing fluid to leak around it. It could also mean there is a leak somewhere and every time you press on the pedal, you are pushing fluid out. This is a serious issue and should be fixed as soon as possible.
Step 3: Pump the pedal quickly a few times. Note what position the pedal returns to.
If it is higher than before, this is another indication of air trapped in the lines. As you pump the pedal, the air causes the fluid to heat up slightly and expand.
Step 4: Put car in drive or first gear. Get the car moving and let it coast with your foot off of the gas pedal.
With the windows down, listen for scraping sounds while the car is moving.
A scraping sound while moving - without the brake pedal pressed down - usually indicates the brake pads are not returning to the rest position, but are constantly rubbing against the rotor or drum.
- Tip: Having a friend outside the car listening can help identify where the sound is coming from. It can be hard to determine the direction while you are in the vehicle.
Step 5: Press lightly on the brake pedal to engage the brakes. Don’t stop the car immediately: let it come to a slow stop.
Keep listening for odd sounds while the brakes are engaged.
Step 6: Test at a higher speed: If the parking lot is big enough, accelerate a little faster and press on the brakes harder, still keeping an ear out for any abnormal sounds.
Also see if the steering wheel starts to pull in one direction or the other. This indicates the brakes are working better on one side of the car than the other. The difference in wheel speed causes the car to start changing direction.
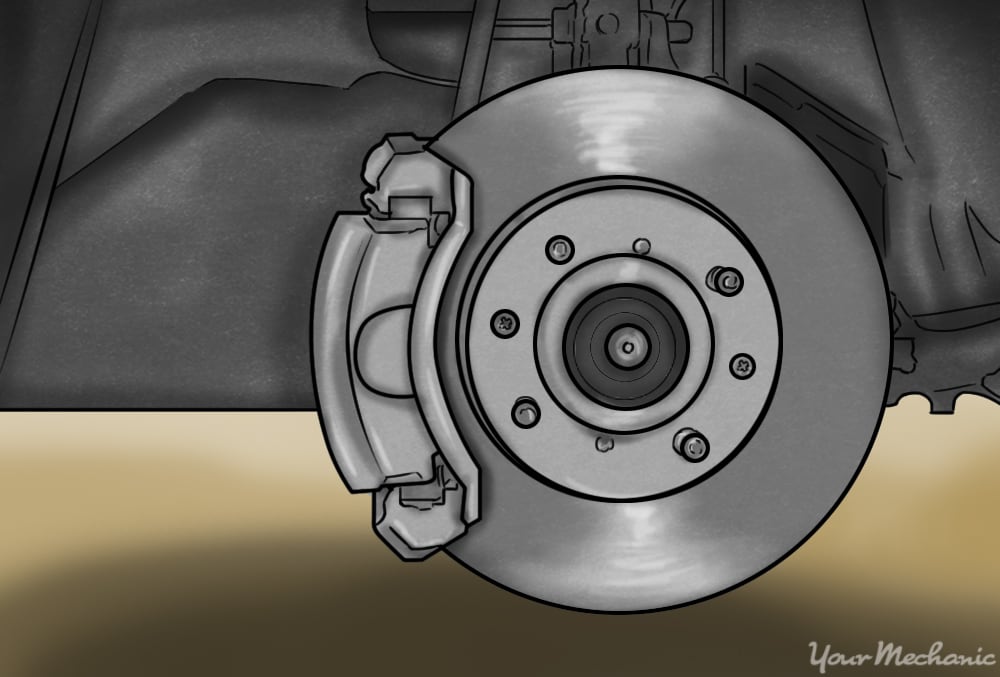
Part 3 of 4: Visually inspect the disc brakes
Materials Needed
- Breaker bar
- Floor jack
- Jack stands
- Socket for lug nuts
Torque wrench
Note: The most common lug nut sizes are 19 and 21mm for metric, and ¾” or 13/16” for older domestic vehicles.
Step 1: Lift the car up. Use your jack to lift the car and place jack stands underneath so the car doesn’t fall while you are inspecting it.

Step 2: Grab one wheel at the top and bottom. Rock it back and forth to see if there is any movement.
Note: While this doesn’t test the brakes, a worn-out wheel bearing can cause similar issues to malfunctioning brakes.
Step 3: Spin the wheel by hand. Listen for any scraping and feel for any resistance while the wheel spins.
Step 4: Step on the brakes while the wheel spins. The wheel should stop pretty much immediately. If it doesn’t, there may not be enough pressure getting to the caliper to fully engage the brake.
- Tip: Have a friend step on the brakes while you watch the wheel.
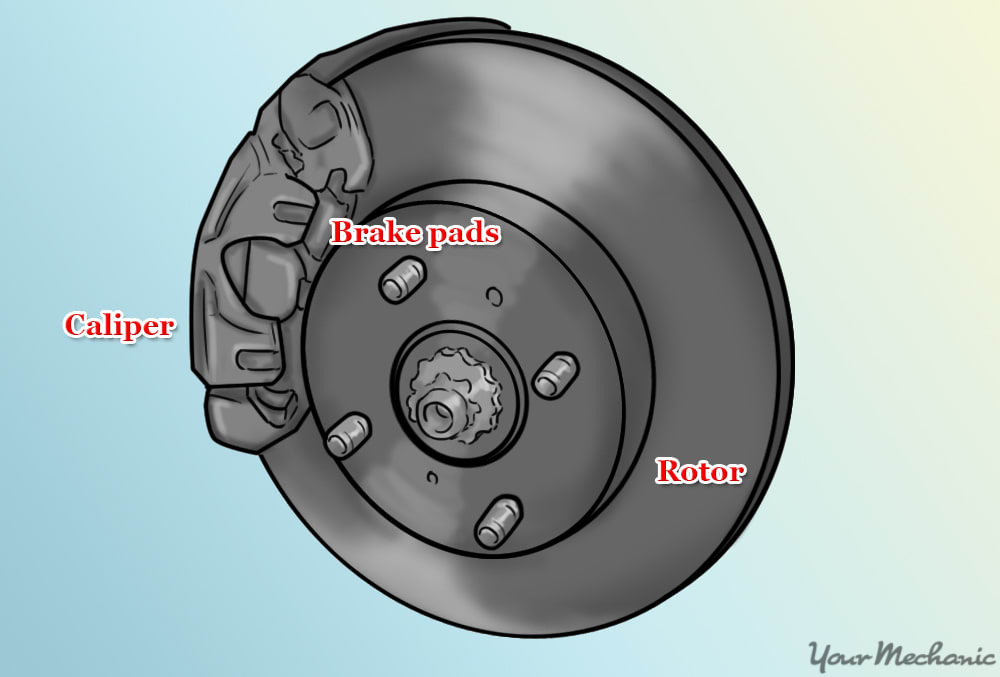
Step 5: Remove the wheel to expose the rotor and caliper. Now you can look at the caliper, pads, and rotor.
- Note: You may have to lower the car back to the ground to loosen the lug nuts.
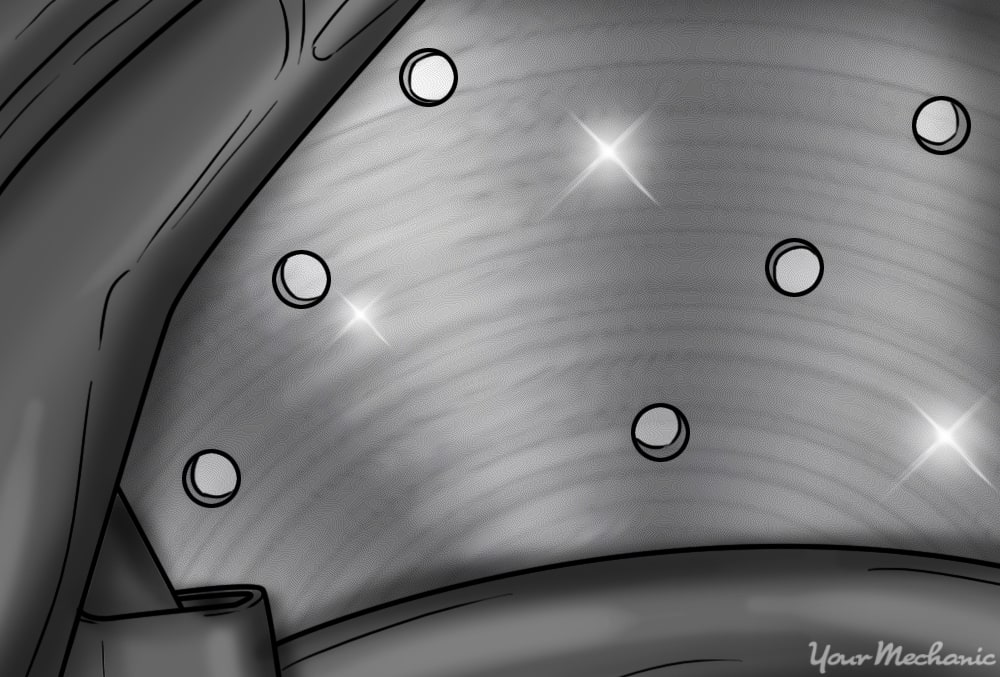
Step 6: Inspect the rotor. The rotor should be smooth and shiny with a uniform silver color. Look for uneven, grainy texture or discoloration.
An uneven, grainy surface indicates abnormal wear; the rotor needs to be replaced if this is found.
Blue or purple spots indicate that the metal has gotten too hot from braking too hard - this can cause multiple issues. When the metal gets that hot, it becomes tempered and gets harder, while the metal around this spot will be softer and will wear out more quickly. Soon there will be a bulge in the rotor - which causes a nasty grinding sound.
Overheating can also cause the rotor to warp, which will create a pulsating feeling in the brake pedal when trying to slow the car down. Warping can also occur from letting the rotor get too thin.
As the rotor gets worn down, a sharp lip on the edge usually starts to appear from the metal getting cut away. Turning the rotors will get rid of this lip, show you how much metal is left on the rotor.
- Note: Whenever you replace your brake pads, you should get the rotors turned if you are not replacing them.
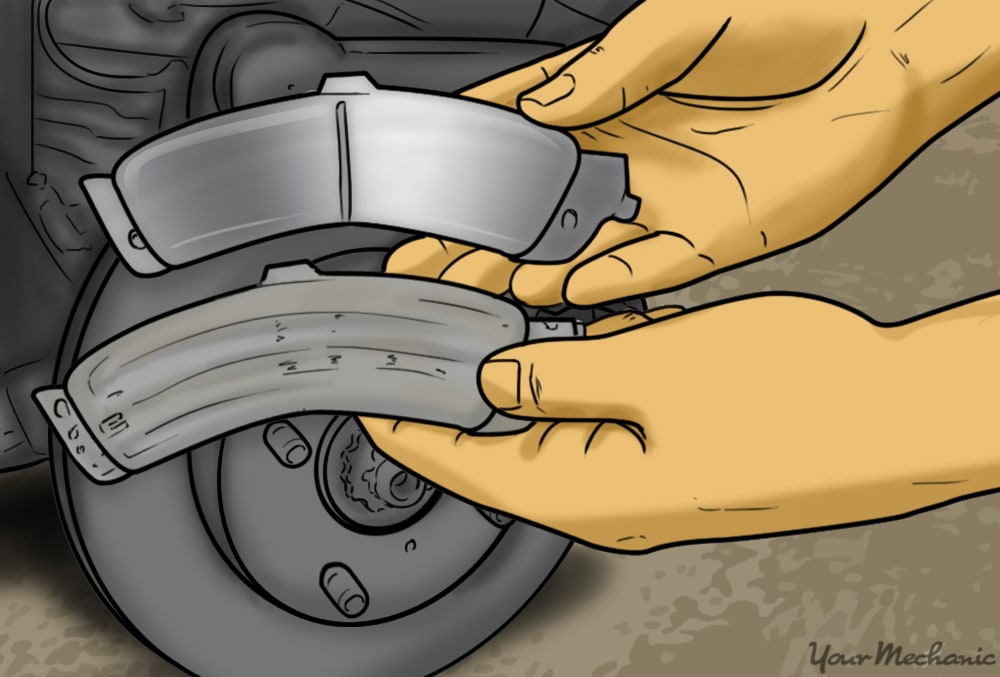
Step 7: Inspect the brake pads. Check the wear indicator on the pad, typically a small slit in the brake material.
If there is no slit visible, then the pads need to be replaced as the material is too thin.
Check the inside and outside pads to make sure they are wearing evenly. If they aren’t wearing equally, the caliper isn’t able to apply the same pressure to both sides of the rotor - so only one pad is fully engaging.
Make sure there is no oil or grease on the pad material itself. It’s okay for some grease to be on the backing of the pad where it rides against the caliper, but the rotor and pad itself should be completely dry.
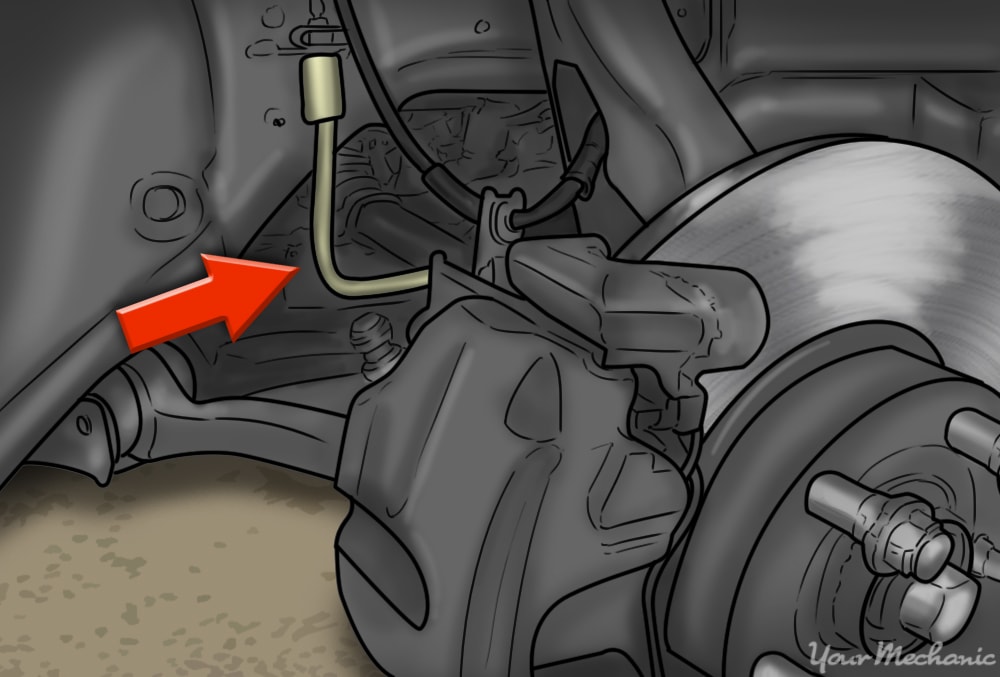
Step 8: Inspect for leaks. Look all around the back, front, and sides of the caliper for any indications of leaking fluid.
Check the brake line for tears or rips, and where the line goes into the caliper. Also check the bleeder screw for dried liquid as these can develop leaks over time.
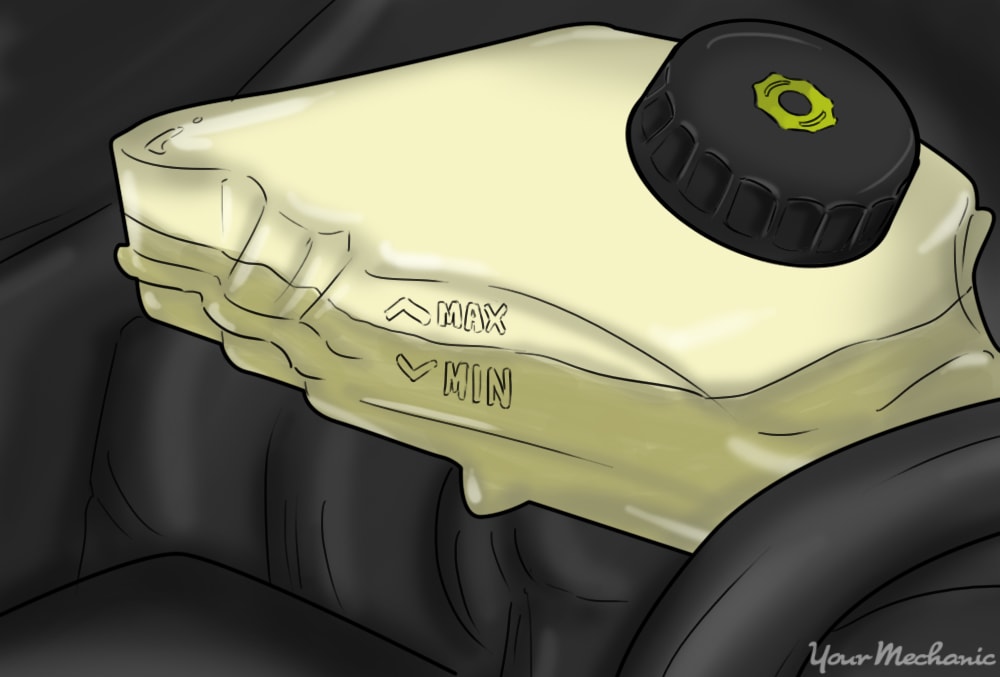
Step 9: Inspect the master cylinder. Make sure the fluid level is okay. Check the lines coming out of the master cylinder for any indications of leaks.
- Note: It is normal for the fluid level to not be at the max. As the brake pads wear down, more fluid gets drawn into the lines, lowering the overall level in the master cylinder. As long as the fluid is above the minimum, you should not add more fluid. If it is below the minimum, there is a leak somewhere that needs to be found and remedied.
Part 4 of 4: Visually inspect the drum brakes
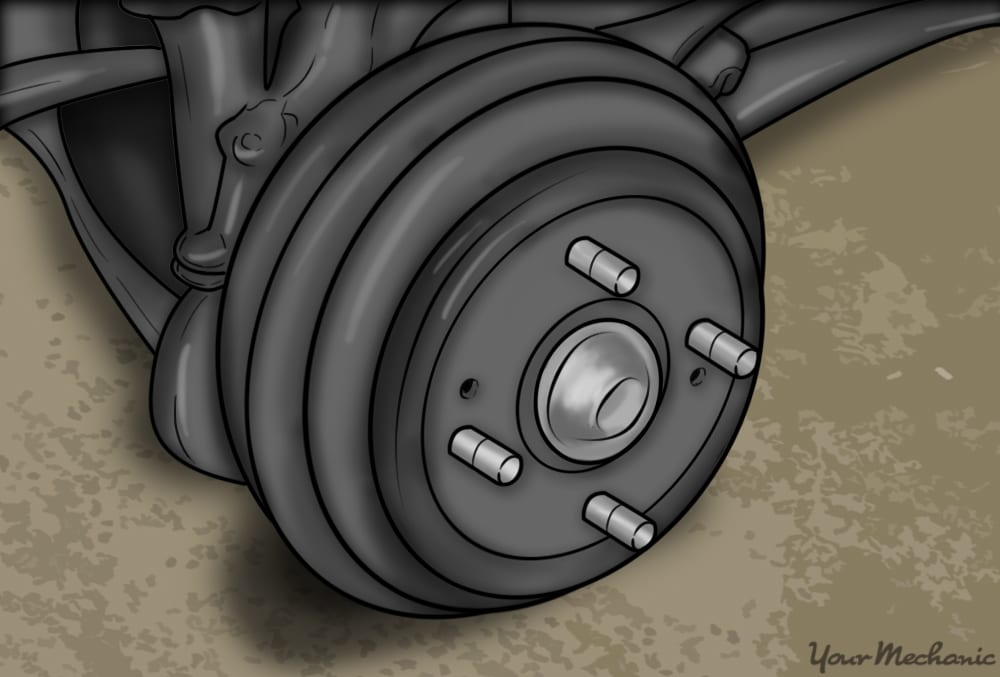
Step 1: Follow Step 1 through Step 5 in the previous section. If you haven’t already, follow the above steps to test the wheel bearing and brakes to rule out other causes. Then remove the wheel so you can look at the drum.
Step 2: Remove the brake drum. All the components are hidden inside the drum - you’ll need to take it off to inspect the shoes.
There may be a screw on the front of the drum that needs to be undone before the drum slides off.
If the drum doesn’t come off readily, it may have rusted to the wheel hub on the inside surface. Tap the drum lightly with a hammer to loosen the rust. Be sure not to damage the wheel studs.
- Note: If the drum still isn’t coming off after loosening any rust, then the pads most likely have worn into the drum surface and created a lip. This will prevent you from moving the drum over the brake shoes, and you may need to enlist the help of a certified mechanic to help you remove and replace the brake drum.
Step 3: Inspect the brake shoes. The shoes should be smooth with a dull appearance. A shiny or “glazed” look means the material has gotten too hot and isn’t as effective.
Move the brake shoes back and forth; they shouldn’t move very much.
Also look for cracks in the material and make sure both pads are wearing down evenly. Similar to disc brakes, it is possible for the brakes to apply uneven pressure to the pads, causing only one to wear down.
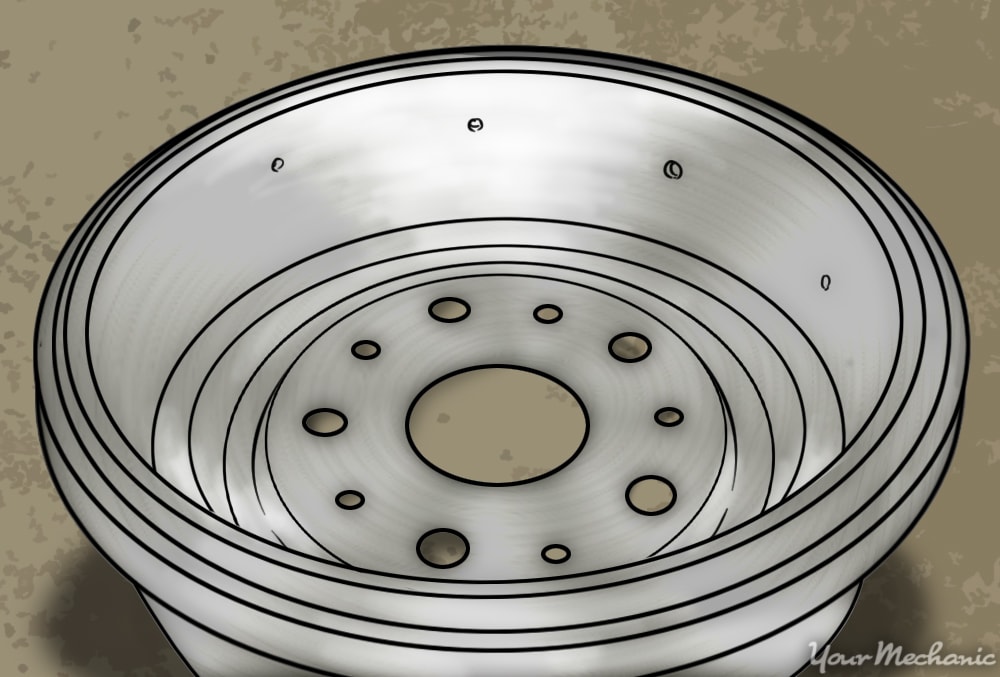
Step 4: Inspect the inside of the brake drum. Like a rotor, the inside surface that the shoes rub against should be shiny and smooth. Look for grainy, uneven surfaces and discoloration.
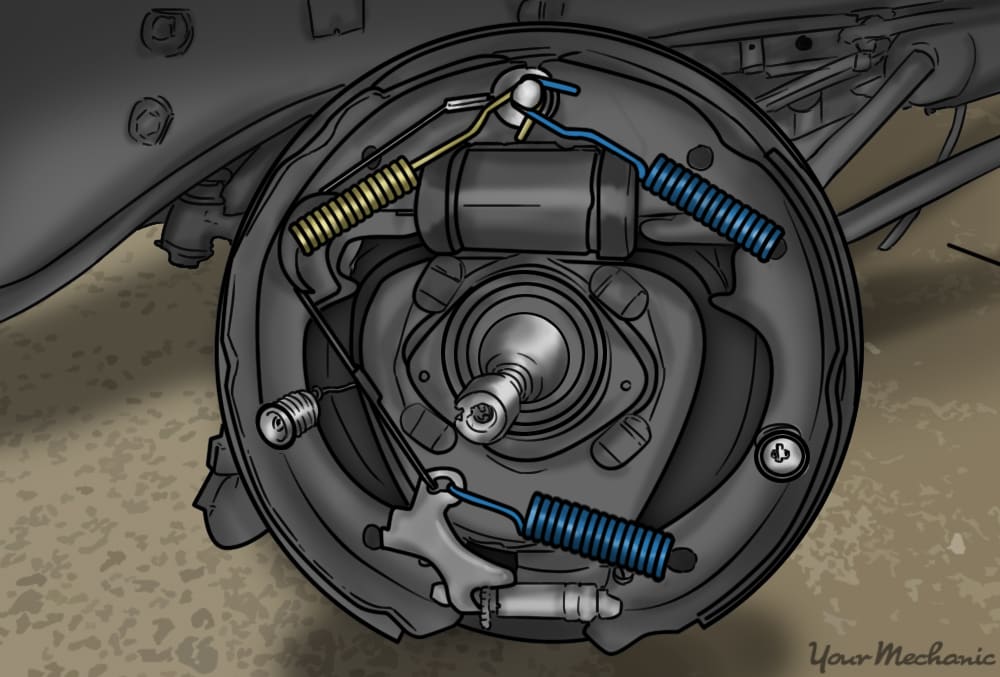
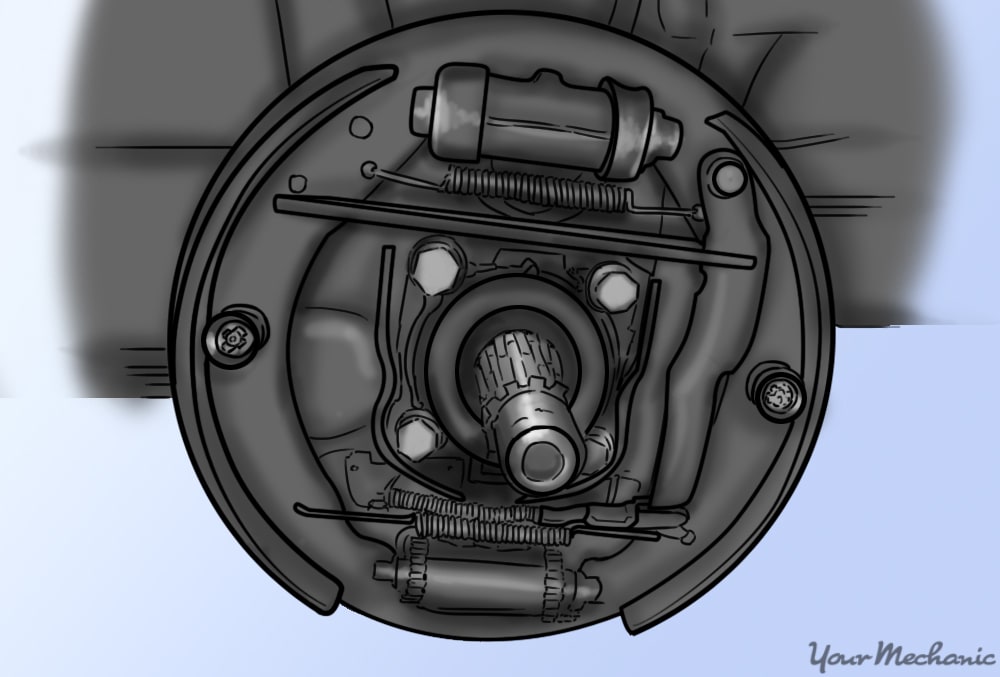
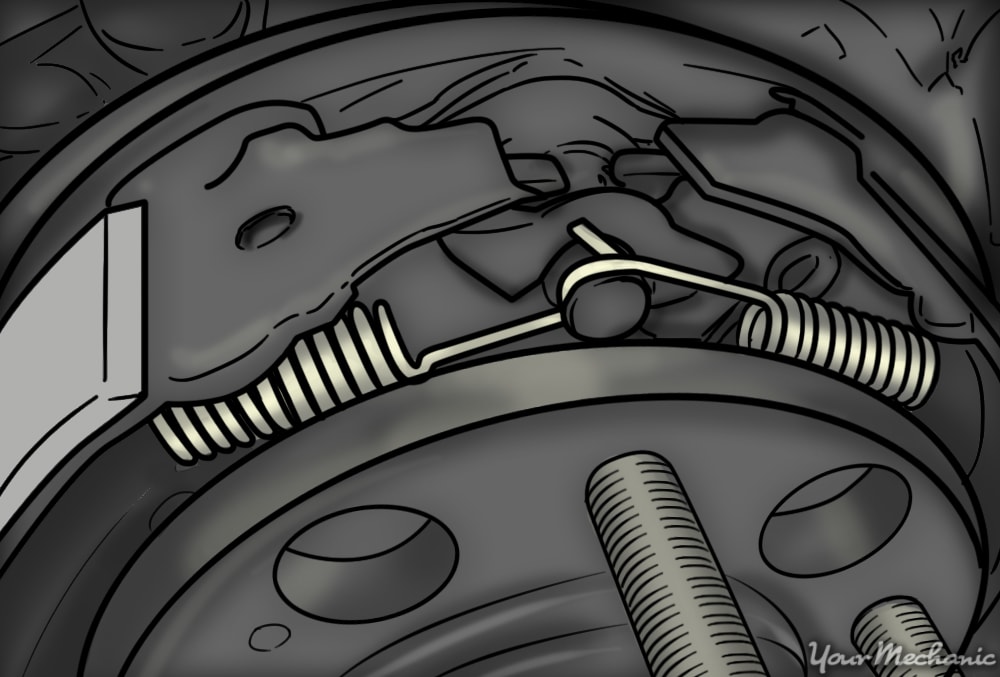
Step 5: Inspect the springs and linkages of the brakes. Drum brakes have more linkages and connections on the inside compared to discs. Nothing should be loose.
All the springs should be connected at both ends. Give them a light tug to make sure they are not loose.

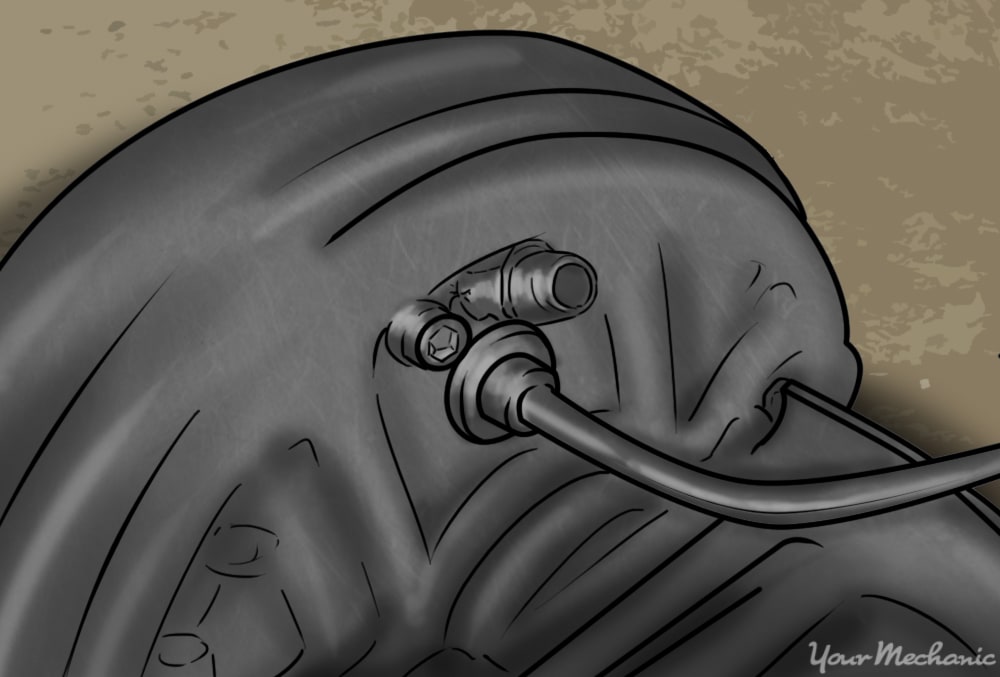
Step 6: Inspect the wheel cylinder. The large cylinder at the top is what contains the hydraulic piston that pushes the shoes out against the drum.
When the internal seals begin to fail, liquid will leak from the rubber seals on the sides. Make sure there is no indication of leaking fluid around this area.
Step 7: Make sure both shoes are in contact with the anchor pin. Right above the wheel cylinder is the anchor pin. The indents at the top of the brake shoes should be around the pin, and the springs should be hooked on as well.
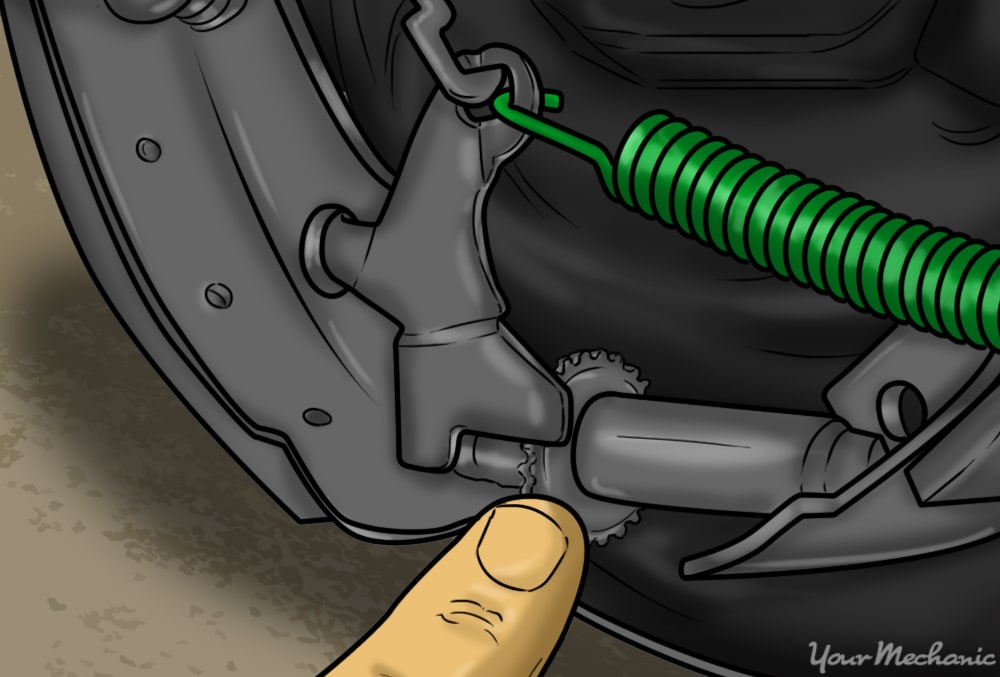
Step 8: Inspect the self adjuster. At the bottom of the brake shoes is the star wheel self adjuster. Make sure it is seated properly against both shoes.
There should be a metal lever with one end inside the star wheel. When you step on the brakes, this lever pushes up against the star wheel and will begin to rotate it.
Over time, as the brake material gets thinner, the lever will push the wheel more - which in turn unscrews the adjuster and widens the gap between the shoes. This keeps the distance between the brake material and the inner lining of the shoe constant so you don’t have to push further on the brake pedal.
Step 9: Inspect the brake lines for leaks. Drum brakes will have similar lines to disc brakes. Inspect them for cracks and leaks, as well as inspecting the bleeder screw on the back side of the brake.
Step 10: Inspect the master cylinder. Make sure the fluid level is okay. Check the lines coming out of the master cylinder for any indications of leaks.
- Note: It is normal for the fluid level to not be at the max. As the brake pads wear down, more fluid gets drawn into the lines, lowering the overall level in the master cylinder. As long as the fluid is above the minimum, you should not add more fluid. If it is below the minimum, there is a leak somewhere that needs to be found and remedied.
With these methods of checking your brakes, you’ll be able to inspect most of the components of the braking system. Keep in mind that small squeaks can be caused by metal rubbing, even if the pads and rotors are still in good shape - so if you can’t find the source of the sound, you may just need to get the brakes lubricated. Our certified technicians here at YourMechanic are always available to assist you in diagnosing any brake issues you might encounter if you need extra help.
