When most people experience problems with their car’s tail lights, usually replacing the bulb with a new one corrects the problem. However, sometimes it’s more than a light bulb and in fact the fuse is causing the problems. While most car owners can tackle a bulb replacement, if the problem falls with the wiring it could get more detailed. To make it even more complicated, tail lights will vary from one vehicle make to the next. Some can be repaired without tools, while others require the entire light assembly to be removed in order to gain access to the bulbs.
Following the provided steps in this article can help you determine if you can perform the repair yourself or if you will need to enlist the assistance of a certified mechanic to assist with fixing the vehicle’s tail lights.
Part 1 of 4: Materials Required
- Bulb(s) - specific vehicle bulb purchased at auto parts store
- Flashlight
- Fuse puller
- Fuse - new and correct sized
- Gloves
- Small ratchet
- Sockets - 8mm and 10mm deep wall socket
Part 2 of 4: Replacing the tail light bulb
A burned out bulb is the most common reason for tail light repair. It is important to attempt to replace the bulb first before moving forward with checking the fuses as this could save you time and energy. Wear gloves to prevent the oils on your skin from getting on the glass.
- Note: Be sure the vehicle is turned off before you start.
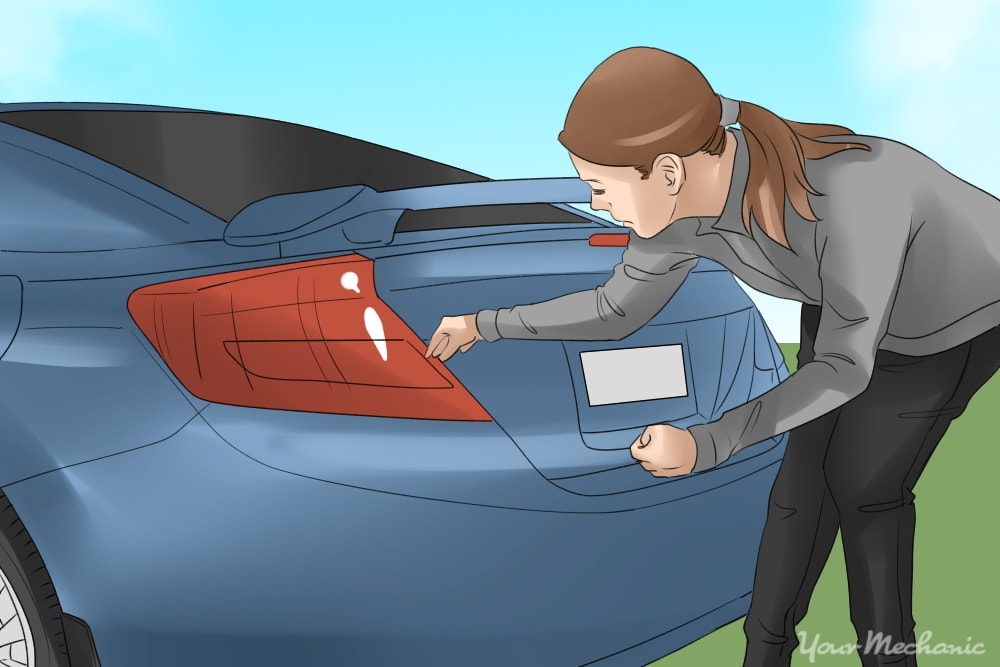
Step 1: Locate the tail light access panel. Open the trunk and locate the access panel to the tail lights. In most vehicles this will be a soft, felt-like carpet door that is attached with either velcro or a hard plastic panel with a twist latch. Open this panel to gain access to the back side of your tail lights.

Step 2: Unbolt the tail light housing. Depending on the make and model of the vehicle, it may be necessary to unbolt the tail light housing from the vehicle to change any necessary bulbs. In this case, use the ratchet and correct size socket to remove the nuts. There are typically three and this will allow you to gently remove the tail light assembly from its cavity.
- Tip: If you need to unbolt the tail light assembly to change one bulb, it is a good idea to change all of them. This may save you the time and extra work as bulbs generally start to burn out around the same time.
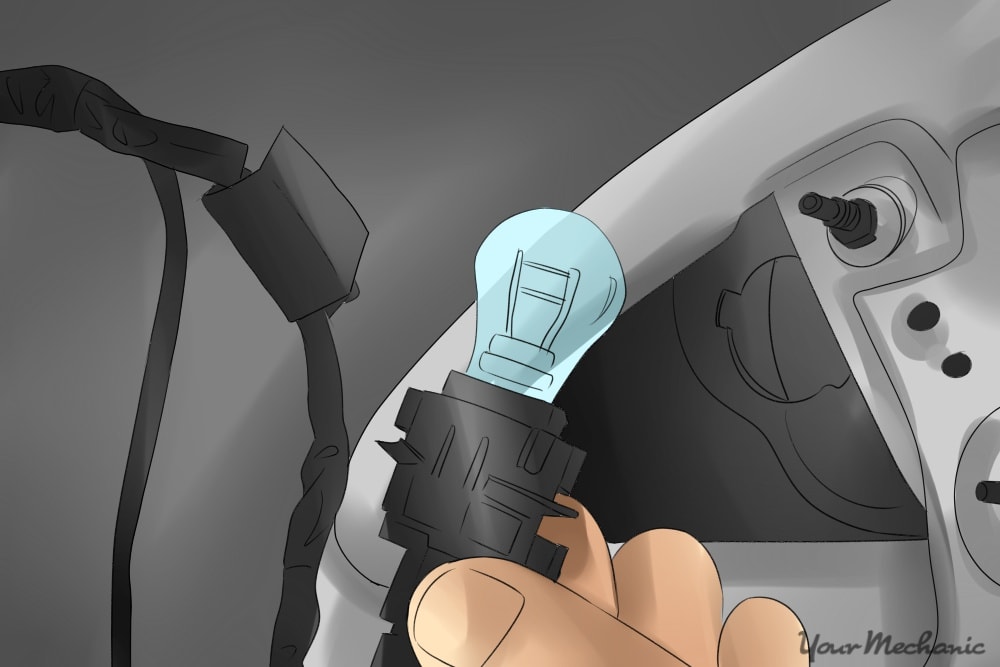
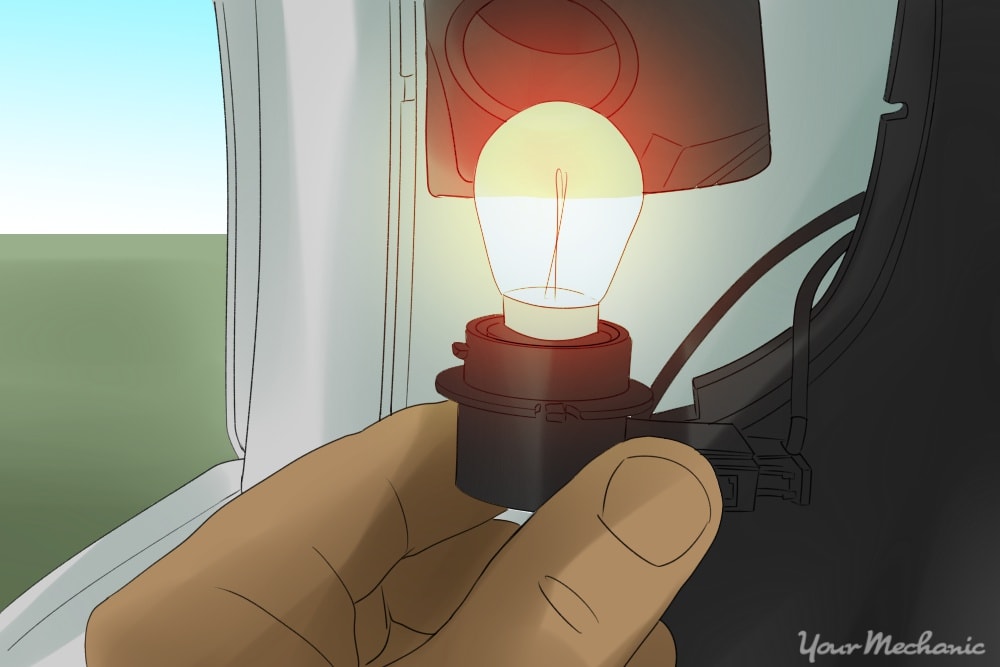
Step 3: Unlock the tail light socket. If you have clear access to the tail lights, locate the tail light socket and twist counter clockwise. This will unlock the socket and allow you to remove it from the tail light assembly, gaining access to the bulb.
Step 4: Inspect the wiring. Examine the tail light sockets and connectors to be sure that the wiring is visually intact. There should be no signs of cuts or of breakage.
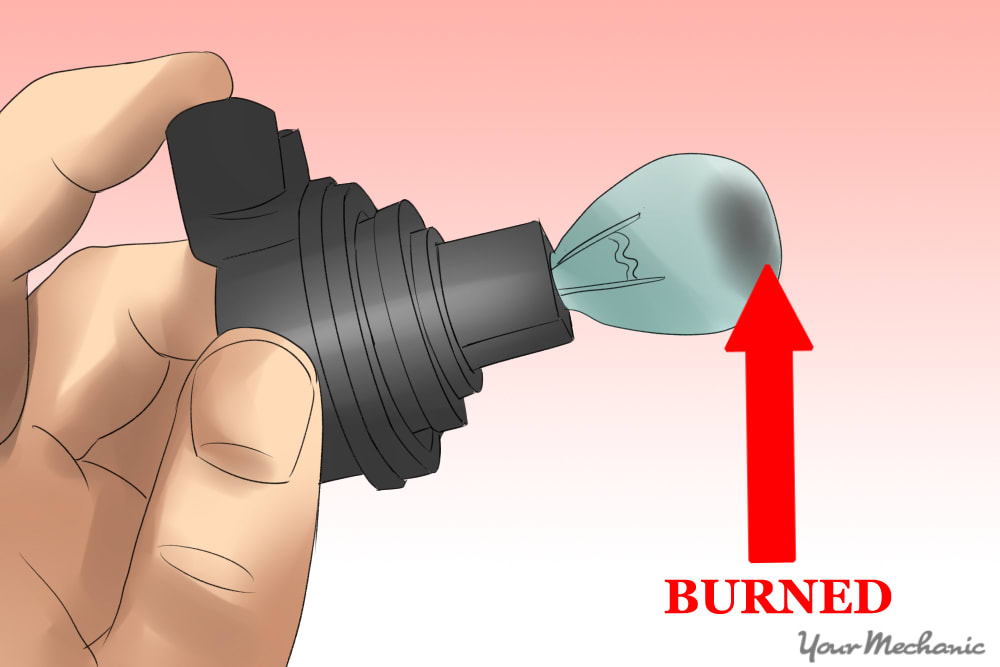
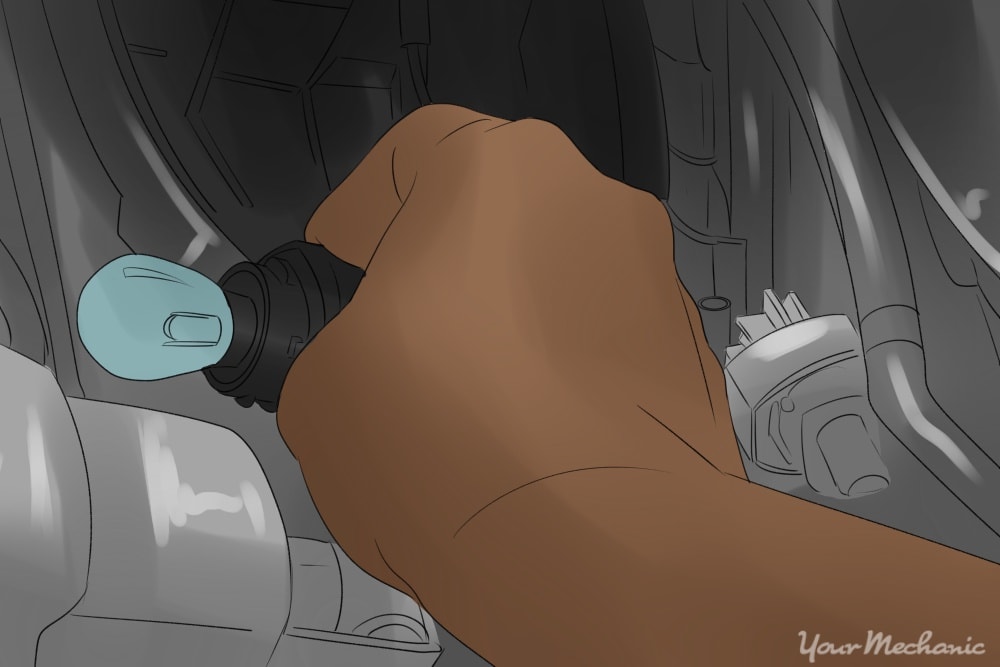
Step 5: Remove and inspect the bulb. Once you have access to the bulb, see if the bulb has a round or rectangular base. If the base is rectangular, wiggle and pull the bulb straight out of its socket. If the bulb has a round base, use your thumb and forefinger to twist and unlock the bulb, then gently pull it out of its socket. Examine the bulb visually for signs of burn marks on the glass as well as the condition of the filament.

Step 6: Replace the bulb with a brand new one. As mentioned earlier, using a glove will ensure that the natural oils from your fingertips do not get on the bulb. When skin oil gets on the bulb glass it can cause the bulb to crack when heated.
- Tip: These steps will also work to change brake lights, turn signal lights and reverse lights if they are all located in the same tail light housing.
Step 7: Test out the new bulb. After you have replaced the bulb, turn on your tail lights and check right there on the spot to be sure that the new bulb is working correctly before you put everything back together.
Step 8: Reinstall the tail light assembly. Once you are satisfied with your repair, insert the bulb socket back into the tail light assembly and twist it clockwise until it clicks into place. If the tail light assembly was removed, place it back in its cavity and secure it with the nuts. Snug it down ¼ to ½ turn past snug with the appropriate size socket and ratchet.
Part 3 of 4: Broken assembly
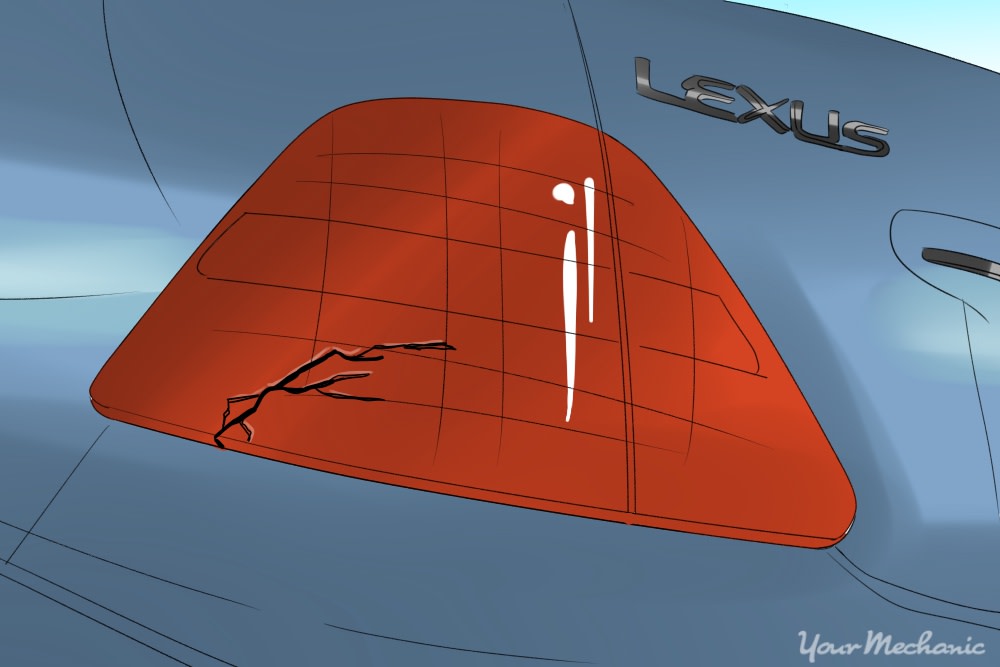
If your tail light assembly is cracked or broken, this is an excellent time to attempt to perform a minor repair or replace the assembly all together if the damage is bad enough.
Reflective tape can be purchased to repair small cracks and holes in your tail light from the same local parts store that sold you those light bulbs. Be sure to follow all directions printed on the product purchased. Removing and cleaning the tail light before placing the reflective tape will allow for optimal adhesiveness.
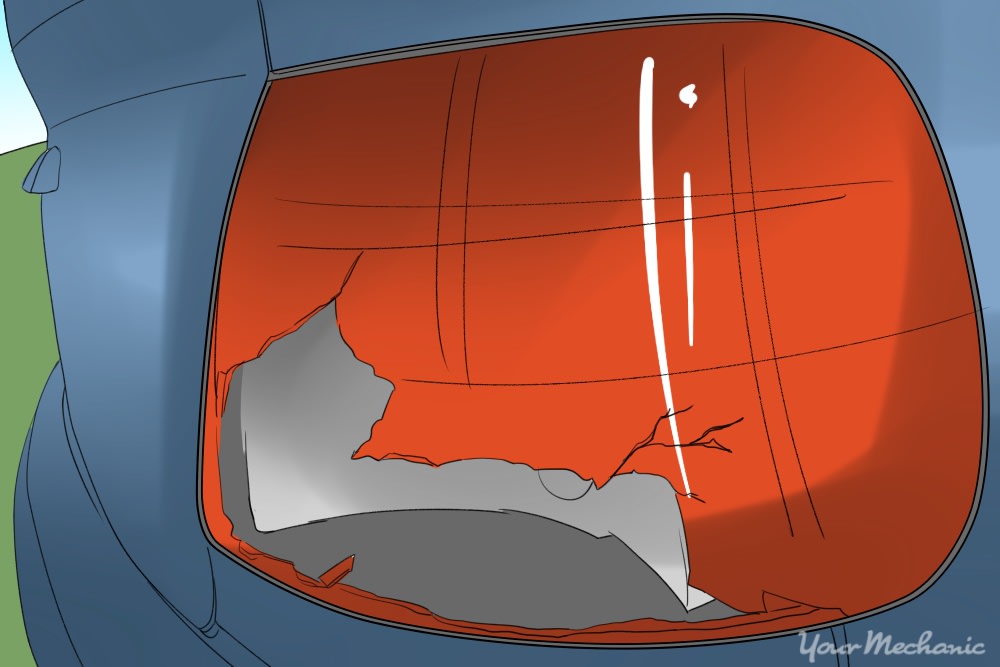
If your tail light has a rather large crack, multiple cracks, or has pieces of it that are missing, then a replacement will be the best and safest choice.
- Tip: There are tail light repair kits that claim to mend minor damage to tail lights; however, best way to repair a damaged tail light is to replace it entirely. This will ensure that no water enters the assembly area to cause damage to the entire electrical system.
Part 3 of 3: Inspecting the fuse as a culprit
Occasionally, you will replace a light bulb and find out your tail light is still not operating correctly. Your next move is to locate the fuse box inside your vehicle. Most are located under the dashboard while others may be located in the engine bay. Refer to your owner's manual for the exact location of your fuse box and tail light fuse.
Usually the fuse box will have a fuse puller already present, allowing for the removal of the fuse in question for visual inspection.
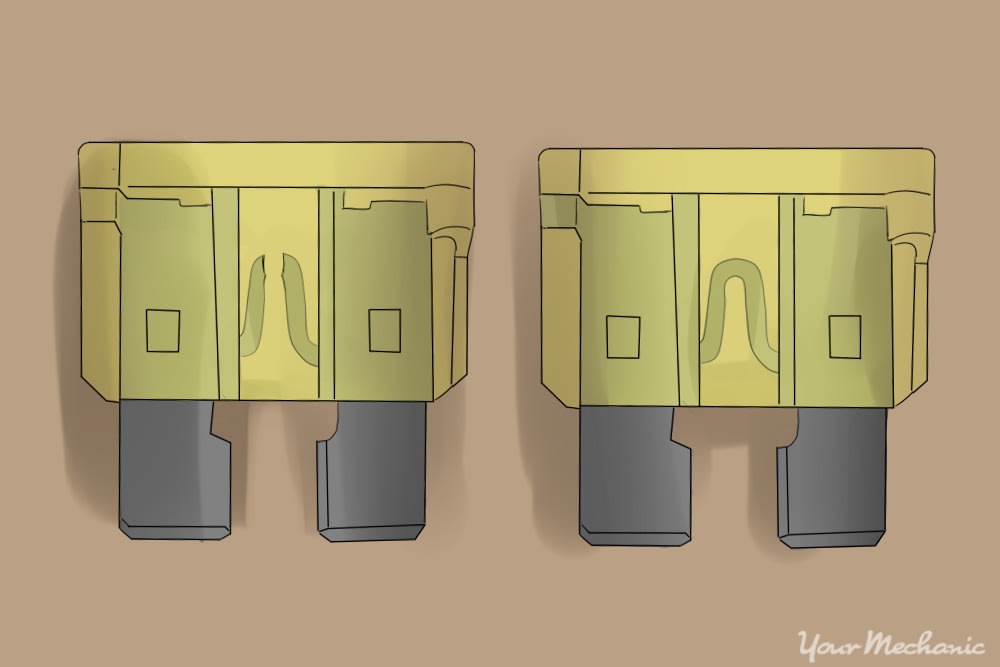
Pull out the tail light fuse and look for cracks as well as the state of the metal filament inside. If it looks burnt or if it is not connected, or if you question the fuse at all, replace it with the correct size fuse.
