The clear bra is the 3M clear protection film that covers the front of your vehicle and helps protect it. As this protection film ages, it becomes dry and brittle. At this point the clear bra starts to become an eyesore, but it is also very difficult to remove.
You may think that there’s no fixing a clear bra that gets to this stage, but with a little bit of work and patience, you will be able to completely remove the 3M clear protection film, and get the front of your car back to looking the way it should.
Part 1 of 1: Remove the 3M protection film
Materials Needed
- Adhesive remover
- Car wax
- Heat gun
- Microfiber towel
- Non-metal scraper
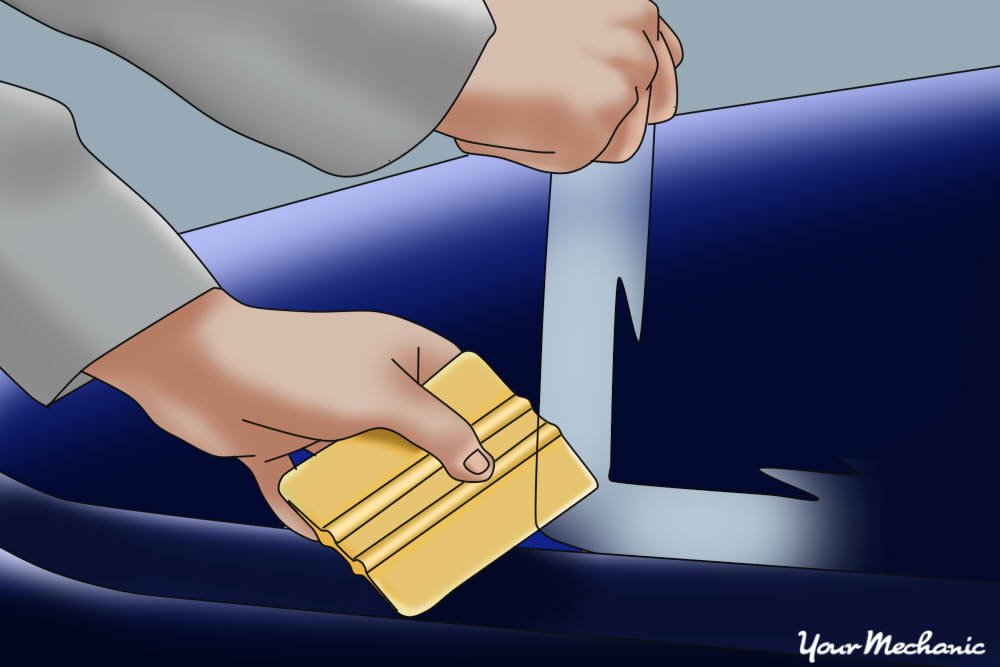
Step 1: Gently try to scrape the clear bra away. To get a feel for how hard the process will be, try to scrape the bra away at one corner.
Use a soft, non-metal scraper, and start at a corner, where you can get underneath the protective film. If the protective film comes off in large strips, then the next steps will be a little easier, and you can even skip the heat gun if you’d like.
If the clear bra is coming off very slowly, in tiny pieces, then the process will take a little bit longer, and you will definitely need to use a heat gun.
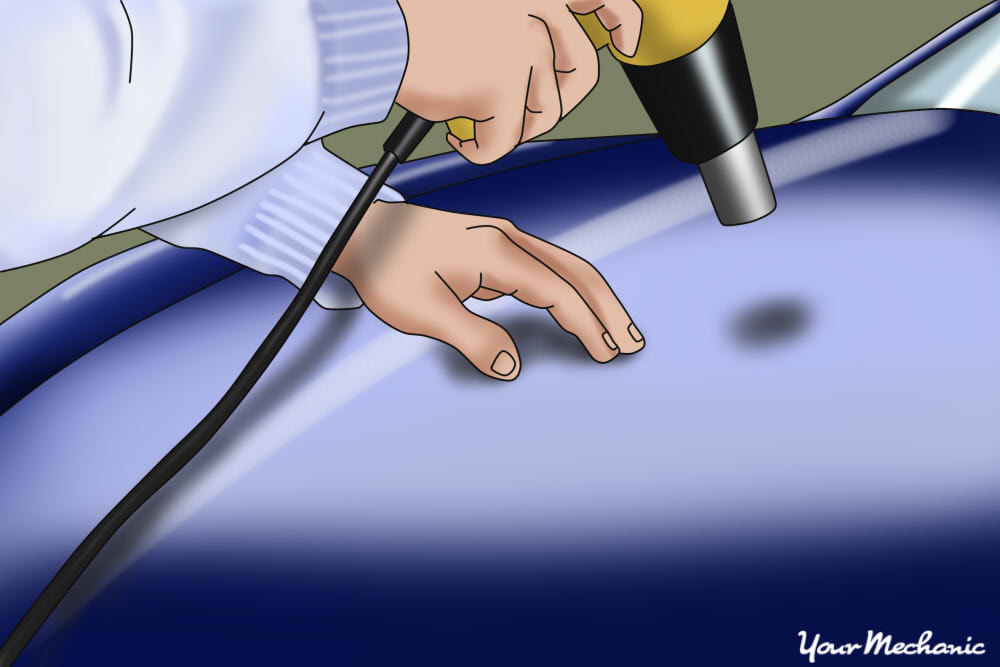
Step 2: Use a heat gun or hot steam gun to apply heat. When using the heat gun, you want to work in patches.
Start with a small portion of the clear bra, and hold the heat gun over it for one or two minutes, until the protective film is sufficiently warmed up. You should hold the heat gun between 8 and 12 inches from the car, so as not to burn the clear bra.
- Warning: Always follow the manufacturer’s instructions when using the heat gun, and exercise extreme caution with this tool.
Step 3: Use the scraper on the heated area. Use the soft, non-metal scraper on the area that you just applied the heat gun to.
Depending on the clear bra, the whole section may come off at once, or you may have to scrape for a while to get all of the protective film off.
- Tip: Only worry about getting the protective film off of the car. Don’t worry about the adhesive residue that will likely remain on the hood, as you’ll be getting rid of that later.
Step 4: Repeat the heating and scraping process. Continue to heat a small section, and then scrape it away, until the entire clear bra has been removed.
Step 5: Apply some adhesive remover. After the protective film has been entirely heated and scraped off, you’ll need to get rid of the adhesive that remains on the front of the car.
To do this, add a small amount of adhesive remover to a microfiber towel, and rub the adhesive off. Like the heating and scraping, you should use the adhesive remover in small sections at a time, and re-apply the remover to the towel after you have done each section.
If the adhesive is not coming off easily, you can use the non-metal scraper along with the microfiber towel to help remove all the adhesive.
- Tip: After using adhesive remover, you can rub a clay bar over the area to help pick up any remaining specks of adhesive.
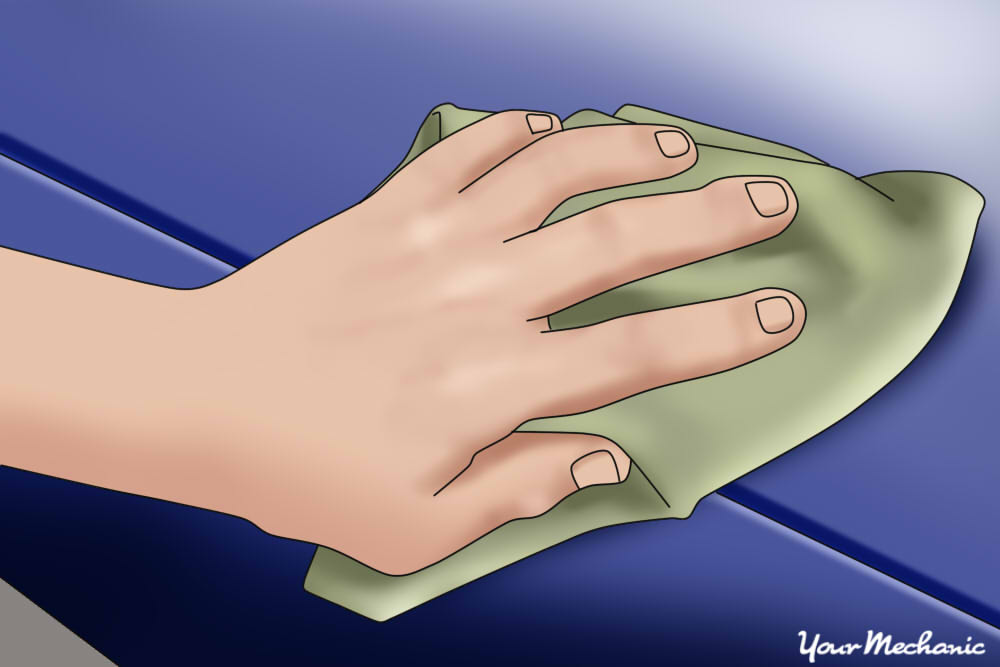
Step 6: Dry off the area. After you have removed all of the protective film and adhesive, use a dry microfiber towel to completely dry the area that you have been working on.
Step 7: Wax the area. To finish up, apply some car wax to the area that you have been working on to help polish it up.
This will make the area where the clear bra used to be look as good as new.
- Tip: It’s a good idea to wax the entire front of the car, or just the entire car, so that the area you waxed doesn’t stand out.
After you’ve completed all of these steps, it will be nearly impossible to tell that your vehicle ever had a clear bra on the front of it. Your car will look clean and new, and it will be completely undamaged in the process. If you feel uncomfortable with any of these steps, Ask a Mechanic for some quick and helpful advice to make the job a lot easier.
