The paint job on your vehicle protects it and provides a unique look as you cruise the streets. Putting a custom paint job on your vehicle can be a very rewarding experience, but it is not for the faint of heart. In most cases, applying paint and a clear coat should be done by a professional, but buffing out the finish can be a do-it-yourself practice if you are willing to put in the hours.
If you have recently applied clear coat to a paint job, it’s time to buff it out to a high shine. Clear coat should be allowed to harden for at least 24 hours before attempting to use a buffer.
In most cases, you will be trying to remove “orange peel” when buffing a new paint job. Orange peel is an imperfection in the paint job which makes the surface look bumpy. Orange peel only happens during the painting process and is not something that happens during waxing or cleaning a car.
The amount of orange peel on a vehicle will depend on how thickly the paint and clear coat are applied. There are a number of variables that can affect the amount of orange peel that appears on a paint job.
Sanding and buffing the clear coat can help reduce and remove the orange peel effect. Keep in mind that buffing clear coat can take some time, practice, and precision if you want to achieve a showroom shine on your vehicle..
- Warning: A factory paint job may contain some orange peel but the clear coat finish on factory paint is very thin. It is so thin that it is not recommended that anyone but a professional try to remove the orange peel by polishing the finish of the car. The method described below is for custom paint jobs where extra layers of clear coat have been applied with the intentions of buffing it out.
Part 1 of 2: Buffing a clear coat
Materials Needed
- Buffing compound
- Buffing pad (100 percent wool)
- Electric buffer/polisher
- Finishing polish
- Sandpaper (400, 800,1000, and 1200 grit)
- Soft foam buffing pad
- Spray detailer
- Variable speed polisher
- Wax
Wool or foam pad (optional)
Note: If you aren’t experienced using an electric buffer, it is recommended that you use a wool or foam pad for polishing. An electric buffer creates heat which can damage the base coat if you are not careful.
Step 1: Soak the sandpaper. Take all of your sandpaper and put it in a bucket full of clean water and let it soak for roughly ten minutes up to an hour.
Step 2: Wash your car. You want to make sure your car is very clean before you begin your work, so wash it very thoroughly with soap and a brush or sponge dedicated to car washing to ensure it does not scratch.
Use a microfiber towel or a chamois to dry the vehicle completely once it’s cleaned. Allow it to air dry if necessary.
Step 3: Begin to wet-sand the clear coat. The clear coat should be wet-sanded with 400 grit sandpaper. This is to replace the orange peel with finer and finer scratches, which will eventually be filled in with polish.
The sanding steps help diminish the clear coat until the entire surface is smooth. The polishing helps smooth out the scratches made by the sandpaper.
Sanding can be a time consuming process, so plan to spend some time on this step.
Step 4: Continue wet-sanding with higher grit sandpaper. Move up to 800 grit sandpaper, and then 1,000 grit, and finally 1,200 grit. The surface should look smooth and you should see a crosshatch pattern in the sanding marks.
Step 5: Tape delicate surfaces. Apply masking tape to areas of surfaces you do not want to scratch with the sandpaper, such as molding, edges of panels, headlights or taillights, and weather stripping.
Step 6: Prep your sandpaper. You have two options for sanding: you can start with the courser grit sandpaper (between 600-800 grit), or you can go straight to the fine-grit sandpaper (between 1,200-2,000 grit).
- Tip: For optimum results, you will want to start with a courser grit, and finish with the fine grit. Either way, you want to remove the sandpaper from the bucket and attach it to the sanding block by cutting it and forming it as necessary.
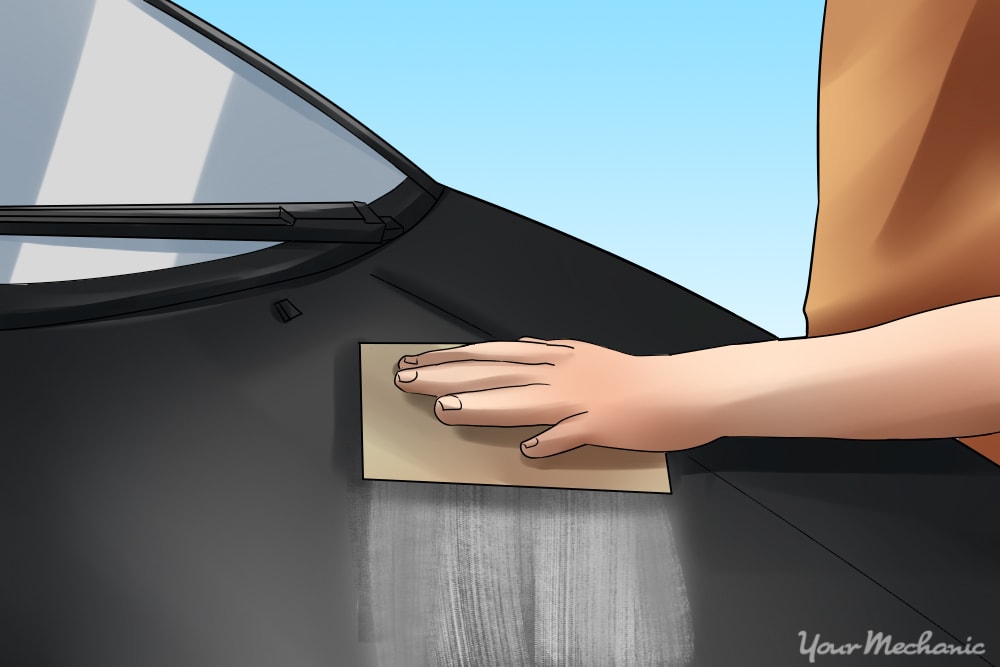
Step 7: Sand the car. Apply light and steady pressure with one hand and begin sanding. Take the spray bottle in the other hand and spray the surface if it ever begins to dry out.
Step 8: Sand with the proper technique. Sand evenly, and sand at a 45 degree angle to scratches you are trying to remove, so you can determine them from the sanding scratches. If you’re not sanding scratches, sand in straight lines and in the direction that wind would flow over the car.
Step 9: Dry the sanded area. Once the water starts to run off and has a milky color, stop sanding. Dry the spot with the towel to inspect it to make sure you’re not penetrating the clear coat all the way through.
- Tip: Remember to keep the surface you’re sanding dripping wet at all times.
Step 10: Sand with a finer grit. Switch to a finer grit sandpaper and repeat the sanding process from Step 5 to remove the scratches made by the coarse grit sandpaper.
When you’re done, dry off the area. It should have a uniform, dull, and chalky appearance.
When all surfaces have been sanded, remove the masking tape.
- Note: Never allow the surface you’re sanding to dry out.
Part 2 of 2: Buff the sanded area with polish
Step 1: Apply the polish. Evenly apply polish to electric buffer or foam pad. If you’re using an electric buffer, turn it on at a low RPM (around 1,200-1,400) and begin polishing, moving the buffer around the area frequently to keep one area from overheating. If you are using a foam pad, apply the polish in firm circular motions until enough polish has been applied.
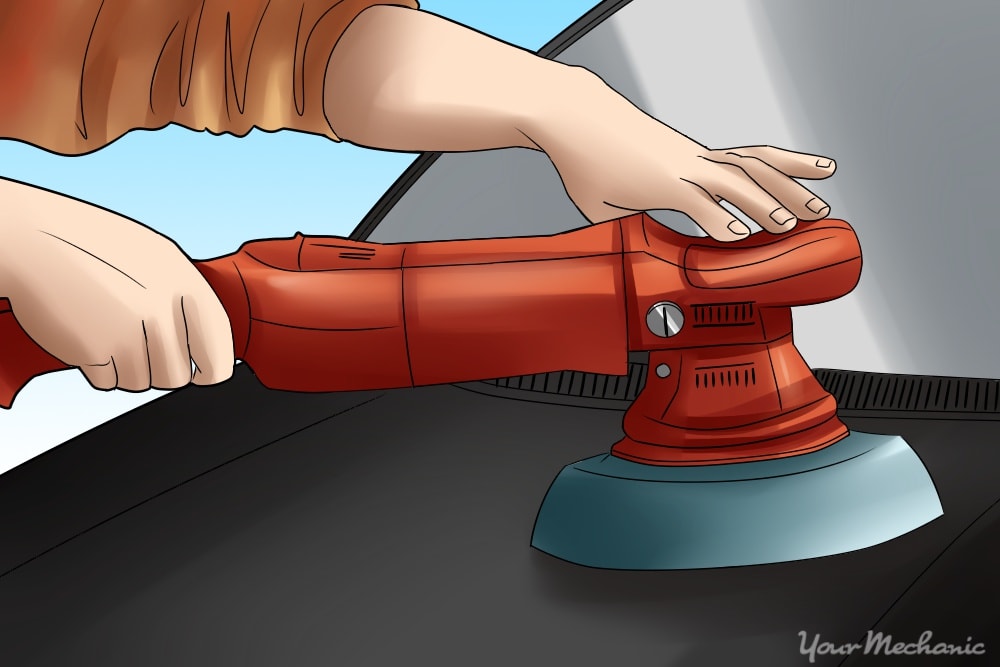
Use a variable speed polisher. The variable speed polisher allows you to adjust the speed of the polisher for use with specific polishing compounds. It will let you get the best finish on the vehicle.
Start with a 100 percent wool buffing pad. Use a buffing compound such as Meguiar’s Ultra-Cut, which can be found at most auto supply stores. Wipe off any remaining buffing compound when you are done.
- Warning: Do not put too much compound on the pad or you could burn through the paint. If you are new to buffing, take it slow, and if possible, practice on a spare part before buffing your vehicle.
Step 2: Continue buffing with a soft pad and finishing polish. The scratches should now be gone but you may see fine swirls on the surface. Switch to a soft buffing pad and a finishing polish, which are available at most automotive supply stores.
The buffer can be run at higher speeds during this phase. Keep buffing until the vehicle has a high shine.
- Warning: Don’t keep the buffer on one area for more than a couple seconds or you risk damaging the base coat. Make sure you have enough polish so the buffer stays wet, or you might end up having to start again or clear coat the surface once more.
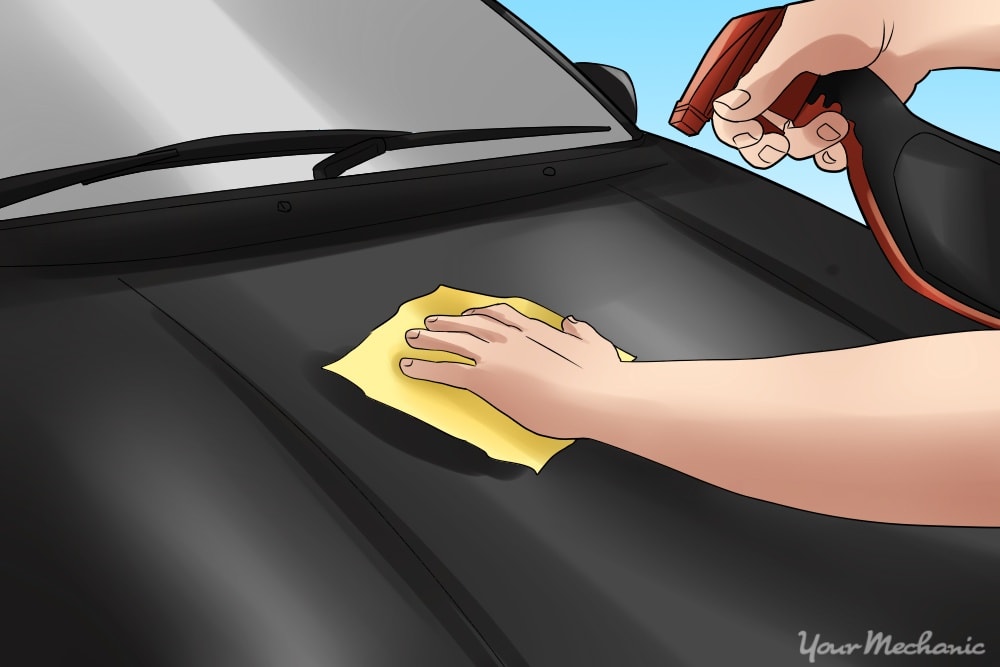
Step 3: Clean off the buffed spot with a spray detailer. Meguiar’s Final-Inspection comes highly recommended. This will give the area a final clean and remove any remaining residue.
Step 4: Inspect the area for any missed spots. If you find any, repeat the buffing steps until the entire surface is properly buffed and looks clean and shiny.
Step 5: Apply a coat of wax to the buffed area. This will add an additional layer of protection. Use a high-quality paste or liquid wax and apply as per the manufacturer's directions.
It’s time to put away all of the buffing tools and enjoy the fruits of your labor. While buffing out a layer of clear coat can be a ton of work, it is well worth the effort when you’re cruising down the streets and watching heads turn as you roll past.
Remember, to maintain the shine level, the vehicle will need to be cleaned and waxed on a regular basis.
Applying a clear coat to your car is a smart way to preserve it, but sometimes this can go wrong, leaving it with the notorious “orange peel” effect, which requires a wet sand to remove. This process helps restore beauty and shine to give your car maximum appeal. Wet sanding is a way to ensure that the clear coat looks as expected, enabling it to provide protection and give your car the polished look you desire. YourMechanic has a useful guide to applying a clear coat base if you are searching for extra help in getting started and applying the clear coat properly.
