In between routine oil changes and scheduled maintenance, cars can go a pretty long time without getting even a brief once-over from a professional. Luckily, some things that normally need checking or changing can be serviced right at home. Not only can doing this kind of simple maintenance save money in the long run, it can actually make the long run many miles longer.
While car repair can be an intimidating subject to explore, taking charge of your own vehicle’s basic maintenance and repairs can be very satisfying. With some preparation and hand tools, you will get to learn in detail about the machine you use on a daily basis - and save yourself some time, money, and stress by doing basic repairs on your own.
No matter what type of repair or service your vehicle needs, there are four areas in which to be prepared that will allow you to better handle questions and concerns regarding basic maintenance and repair on your vehicle. With preparation in the areas listed below, you can feel confident to try a basic repair yourself.
If any problems pop up along the way, or if you think you are in over your head, then don't hesitate to have a professional give you some assistance.
Part 1 of 10: Prepare your materials for a tune-up and possible repairs
No matter what type of repair or service your vehicle needs, there are four areas in which to be prepared that will allow you to better handle questions and concerns regarding basic maintenance and repair on your vehicle. With preparation in all areas listed in the steps below, you can feel confident to try a basic repair yourself.

Step 1: Get a service manual for your car. It is highly recommended that anyone preparing to do work on their own vehicle should first purchase a quality service manual that is specific to that vehicle.
Haynes is highly recommended and makes service manuals for practically every vehicle on the road today. The book is easy to read and will give you detailed information about every system found in and on your vehicle, as well as providing step-by-step instructions on how to perform different repair or maintenance procedures.
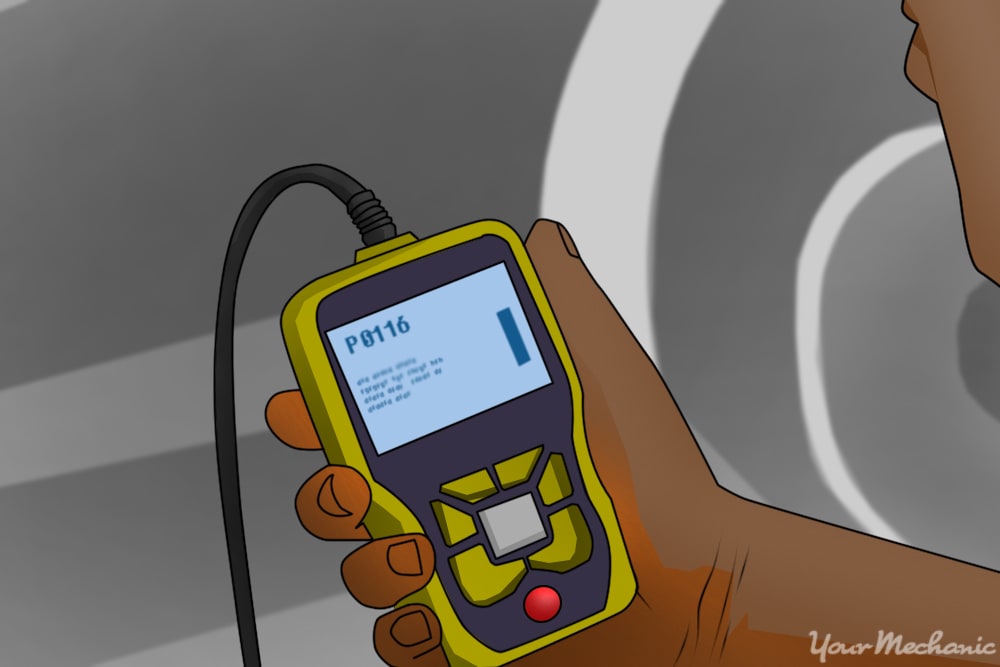
Step 2: Get an OBD-II scanner. An OBD-II scanner is a must-have if you plan on repairing a vehicle newer than 1996.
Retrieving trouble codes from the vehicle’s computer can be very difficult, and oftentimes impossible without an OBD-II scanner handy.
Having an OBD-II scanner will give you the power to “talk” with the vehicle’s computer and retrieve trouble codes that have set off your Check Engine Light. Each code will point you in the direction of where the engine is having trouble
Having a code is the vehicle's way of saying, “Hey! I don’t feel good, and this is where it hurts.” Just like when you go to the doctor when you’re sick.
There are well over 100 OBD codes that all mean different things. When your Check Engine Light comes on, the first thing you want to do is retrieve that code, and then go the internet and research the code. Each code is unique to a certain system on your vehicle and, along with consulting your service manual, you can determine what the problem is and if you are able to do that repair yourself, or if you need to enlist the assistance of a professional.
- Tip: If your vehicle has more than one code present, you always want to diagnose and make repairs to resolve the first code that has been retrieved, as the codes below it may be sympathy codes. A sympathy code is the result of the primary code affecting more than one system.
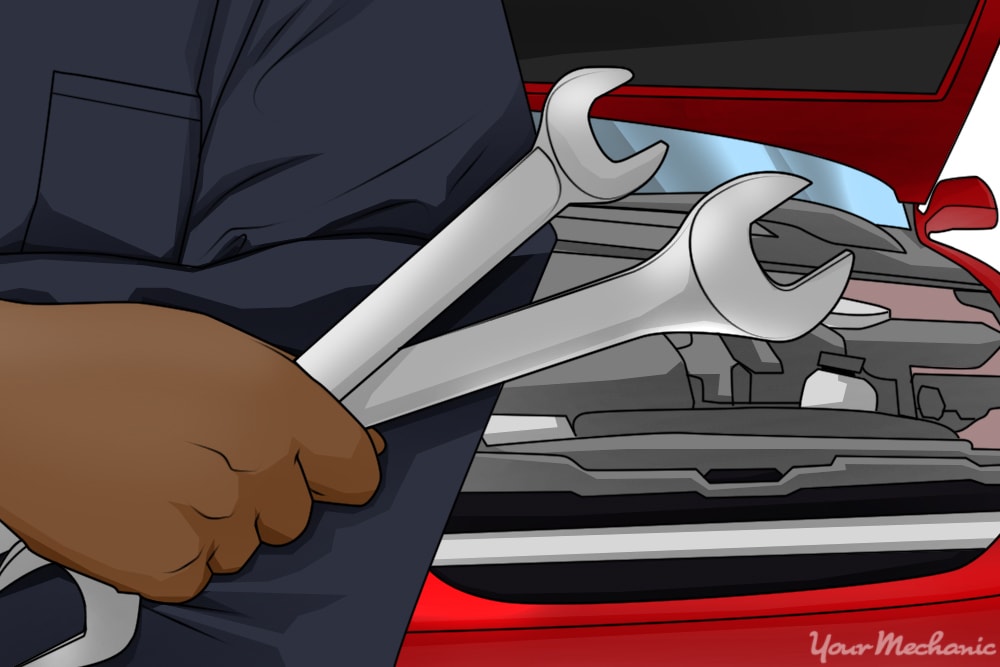
Step 3: Have the correct tools and supplies. Before attempting any repair or tune-up, there are some commonly used tools and car supplies that you should have on hand.
You do not need to have specialty tools to work on your car. In fact, most mechanics use basic tools to perform most repairs.
Quality tools do not need to be expensive either. Craftsman tools work great for automotive repair and come with a lifetime warranty, if you ever manage to actually break one. There are plenty of mechanics tool sets that come bundled up with everything you need as well. Your needs and budget will determine your tool purchases.
Before diving into the tune-up, it is important to gather all of the supplies necessary to do it properly. In addition to your basic tools, there are some other common car products that you’ll need to have ahead of time.
Materials Needed
- Brake fluid
- Coolant
- Drain pans
- Engine oil appropriate for your car
- Fire extinguisher
- Flat blade (various sizes)
- Floor jack
- Gloves
- Phillips screwdrivers (various sizes)
- Power steering fluid
- Rags or paper towels
- Ratchet (⅜ inch ) and matching socket set
- Safety glasses
- Safety jack stands
- Transmission fluid
Tip: Most socket sets include 10mm - 19mm sized sockets. Other sizes can be purchased individually.
Also, be prepared to replace the following automotive parts (or have them replaced by a professional) if necessary:
- Battery
- Brake pads and/or brake rotors
- Tires
- Windshield wiper blades
Step 4: Be aware of - and take - safety precautions. Safety is an extremely important thing to take into consideration when working on your car.
Be sure to get yourself a good pair of safety glasses and mechanics’ gloves. The glasses will help keep your eyes safe from falling debris or fluid splashes when working underneath or around your vehicle, and the gloves add an extra layer of protection to keep minor cuts, abrasions, and burns to a minimum.
Having a small fire extinguisher and keeping it charged and within reach is important when working with gasoline or hot fluids. While it is unlikely that a fire will break out, it is always best to be extra safe.
When dealing with fluids of any kind, be sure you have drain pans to catch old fluids - and be sure dispose of them properly. Most auto part stores will gladly recycle your used fluids for you. It is also a good idea to keep a bag of cheap cat litter in the event of an accidental spill. Cat litter is handy to soak up spilled fluid, making cleaning a spill much easier.
The best basic repair starts with knowledge and being prepared, and knowing these four areas well can better prepare you for any repair you are planning to tackle yourself. With these four steps taken care of, you will have confidence that you are prepared as best as you can be.
Part 2 of 10: Checking your oil

The oil is what keeps everything in the engine running smoothly, and not having enough can cause serious damage. Checking your oil is an ideal place to start with your vehicle tune-up.
Step 1: Start with a cool engine. Turn off the engine and wait about 10 to 15 minutes for it to cool down a bit.
Step 2: Locate the dipstick near the oil cap. The oil cap is easy to spot when looking at the engine bay. It will be clearly labeled and will possibly be a bright color like yellow or red. Near this cap there will be the handle to a dipstick.
This dipstick will tell you how much oil is in the engine. Before pulling on the handle to remove the dipstick, get a rag (or paper towel) ready.
Step 3: Remove and reinsert the dipstick. Pull on the dipstick until it is fully exposed, and wipe it clean with the rag.
Take the clean dipstick and insert it back into the engine. Now pull it out again, and it will accurately measure the amount of oil in the engine.
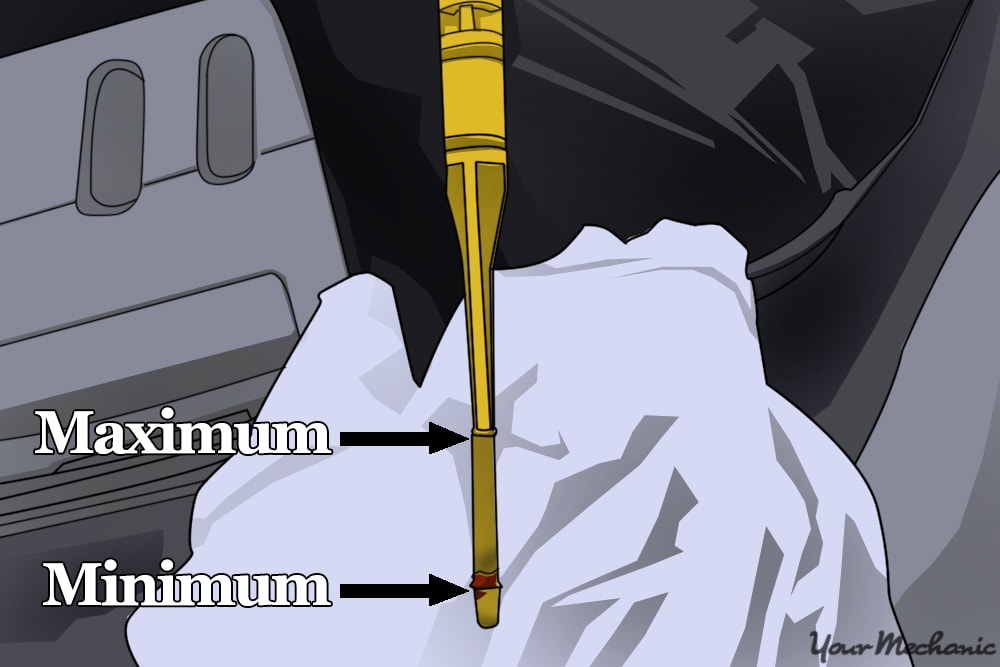
Step 4: Check the oil level on the dipstick. There will be lines or notches in the dipstick marking the level that the oil should reach.
If the oil is low, then more can be added to the engine via the oil cap.
Step 5: Add oil if necessary and recheck oil level. Unscrew the oil cap and pour in a small amount of oil (a moderate amount if the oil is particularly low). Do not try to pour in oil through the tiny dipstick hole.
Clean the dipstick again and then measure the amount of oil. Repeat this process until there is an appropriate amount of oil in the engine.
If there are two lines or notches on the the dipstick, try to get the oil to a level between the two marks.
If the oil is very low, there may be a leak. The engine could also be burning oil. Getting the problem diagnosed properly by a certified mechanic will save time and money in the long run.
Part 3 of 10: Checking the transmission fluid
Since the transmission fluid reservoir is located in the engine bay around the engine itself, it can easily be checked right after the oil. Here’s what to do:
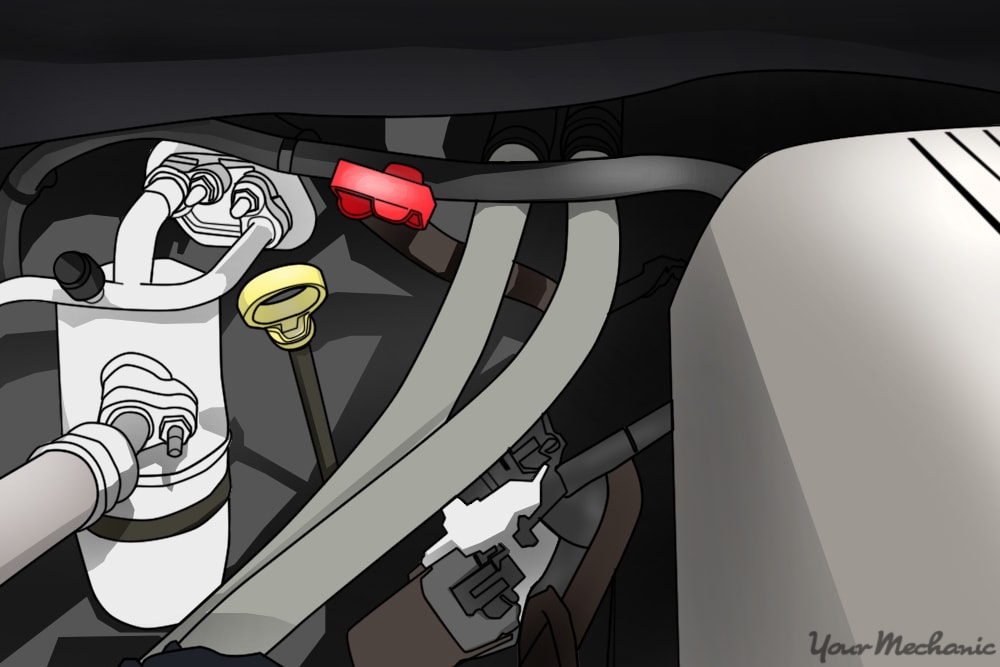
Step 1: Locate the dipstick near the transmission fluid cap. Pull the dipstick out and wipe it clean, then reinsert it.
Step 2: Check the transmission fluid level on the dipstick. Measure the level of transmission fluid by pulling out the cleaned dipstick and looking at the lines or notches to see where the fluid hits.
Add more transmission fluid into the transmission fluid cap if it is low.
Part 4 of 10: Check your other fluids
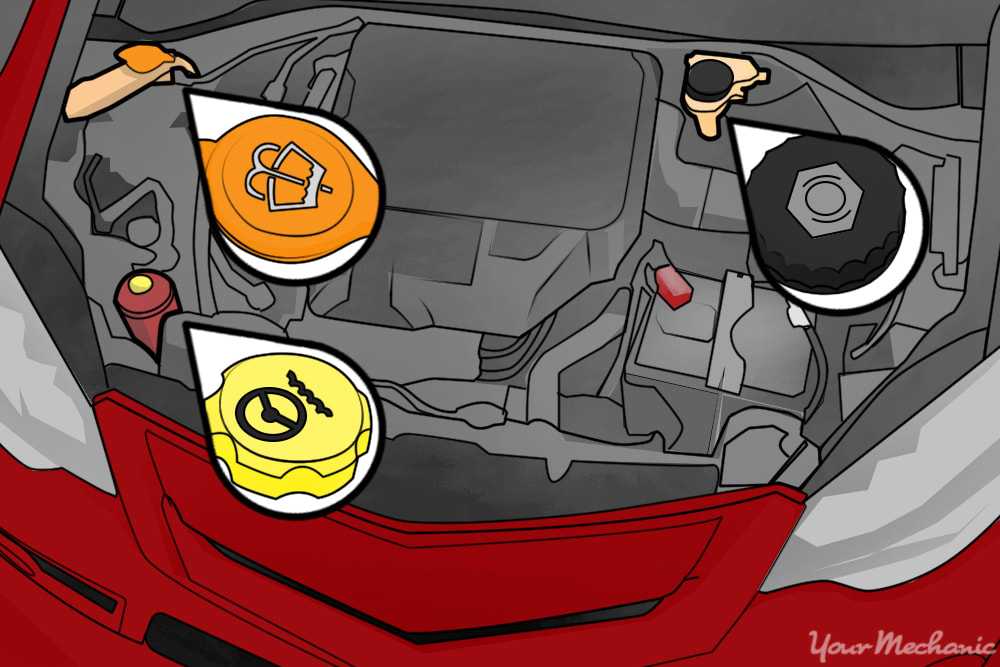
Step 1: Locate the reservoirs containing remaining fluids. There are plastic reservoirs that are used to hold fluids for the brakes, power steering, and windshield washer fluid.
Step 2: Check the fluid levels by looking at the reservoirs. All of these fluid reservoirs should have marks on the outside of them that indicate what the fluid level should be.
Step 3: Add more fluids as necessary. Brake fluid and power steering fluid might be at the right level already, but the windshield washer fluid should be refilled regularly. Add more unless it is already completely full.
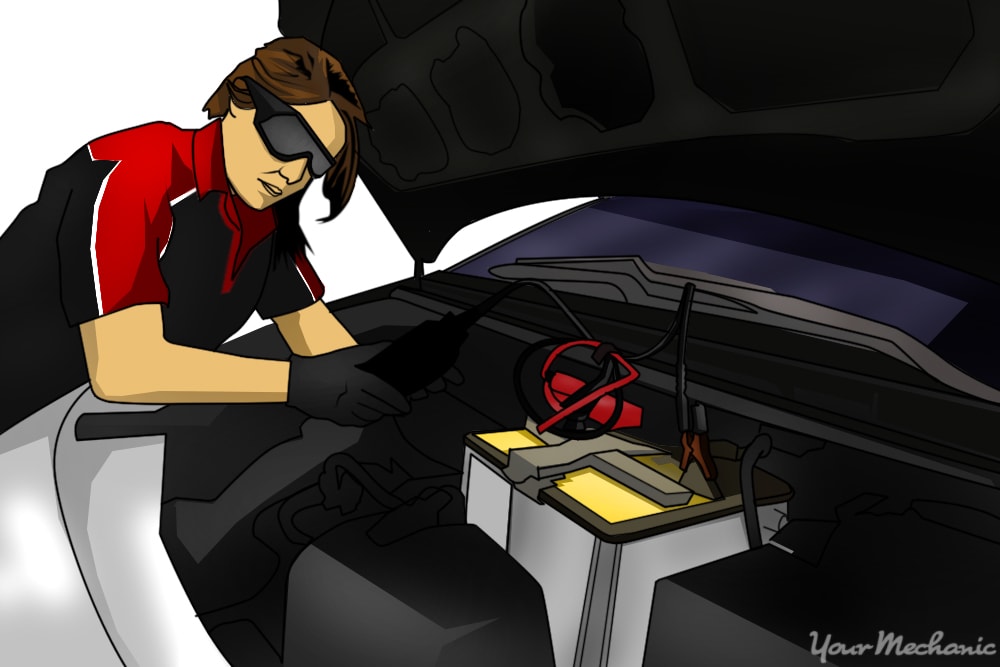
Part 5 of 10: Checking the battery

Step 1: Check the battery for signs of leaking or corrosion. Look at the battery terminals for any blue or white buildup, or rusted areas.
Corrosion can be cleaned off of the terminals of a battery using baking soda and a brush. If the battery is leaking, then it should be replaced.
Part 6 of 10: Check the air filter
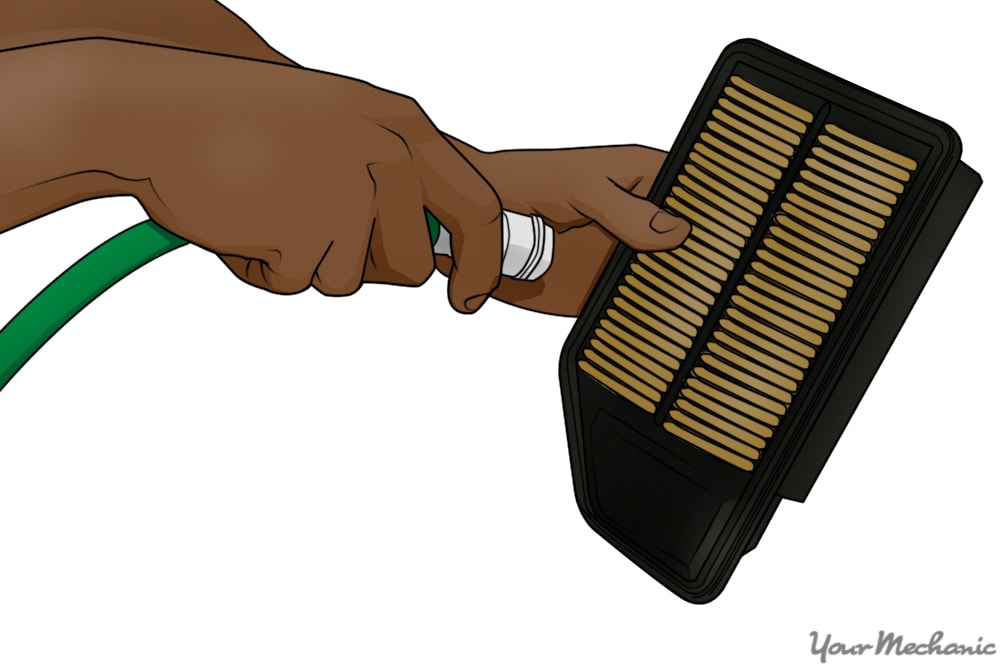
Step 1: Remove the air filter. Find the air filter box, usually towards the front of the engine.
If the air filter is easily accessible, remove it. Take note of how the filter was installed for when you replace it with a new filter.
Step 2: Clean the filter or replace it. If the air filter is only slightly dirty, you may be able to knock some of the dirt out of it or blow on it with an air compressor.
If it is in bad shape, it should be replaced. Insert the new air filter in the same position as the old one, and replace the air filter box.
Part 7 of 10: Check the tires
The tires are the only point of contact the vehicle has with the road, and bald or damaged tires are a real hazard. Avoid losing traction and tire blowouts by regularly inspecting the tires.

Step 1: Check the air in the tires. Using either a small handheld tire pressure gauge or a pressure gauge built into a air pump, check the PSI of the air in the tires.
The recommended PSI is written on the side of the tires.
Step 2: Add air to the tires as needed. If the initial pressure reading indicated underinflation, use an air compressor to inflate the tires.
Try to get the air pressure level in the tire between the recommended amounts when putting air into the tire.
Step 3: Check your tire tread and wear. Inspect the tread of each of the tires. If the tread is shallow (2mm or less), the tires probably need replacing.
If the tires are not too worn, inspect the sides of the tires for signs of cracking or any damage that may eventually result in a blowout. If they are in good condition, the tires are good to go.
- Tip: To keep the wear on the tires nice and even, consider having them rotated by a professional.
Part 8 of 10: Check the brakes
At this point, you can close the hood, get into the vehicle, and turn on the headlights to let them warm up for a minute before they are inspected in the next step following the brake inspection.
Step 1: Press on the brake pedal and feel how responsive the braking is. Watch out for brakes that feel weak or spongy.
Step 2: Check that the brake pedal is firmly in place. There should not be any “play” (uncontrolled movement) in the brake pedal, either to the left and right or from the front to the back. This can make the pedal move unpredictably, which is unsafe for the driver.
- Warning: If anything feels off or wrong about the brakes, get them inspected right away.
Part 9 of 10: Check the headlights
Step 1: Park the car with the engine idling and the parking brake engaged. Make sure the transmission is in park, and get out to inspect the headlights.
Step 2: Visually inspect the headlights by looking at the bulbs. Look to see if the lights are getting brighter or dimmer as the car idles, and look out for any flickering that may occur.
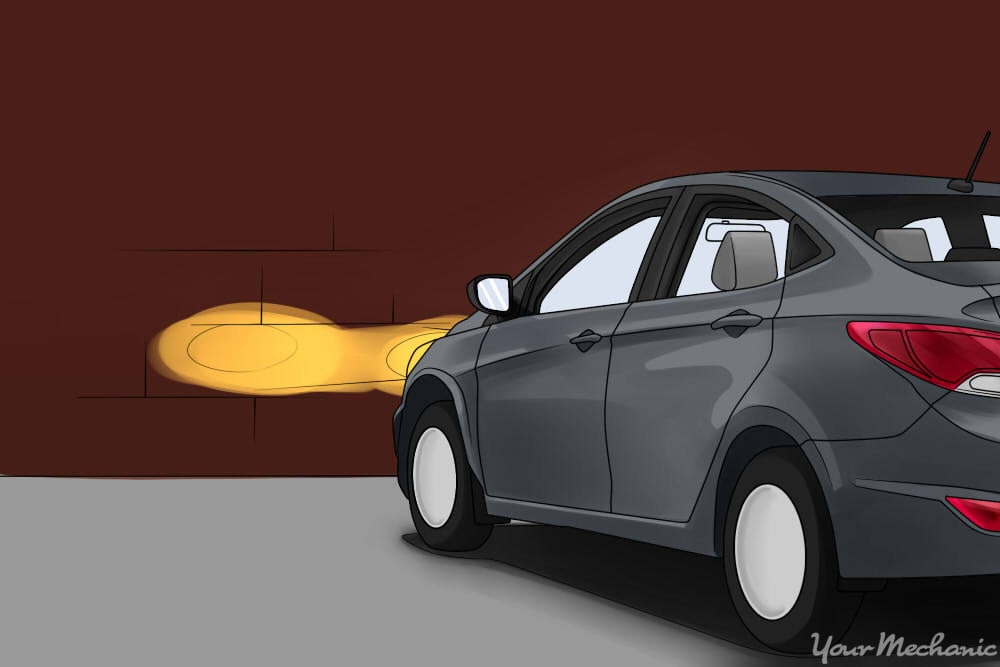
Step 3: Look at the pattern of the headlight beams. Point the lights at a wall or fence to see if the beams are projecting a symmetrical pattern. They can be adjusted if they are not.
If just one light is dim, it may be a good idea to change out the bulb.
Turn on the high beams and test them the same way to ensure they are in good working order.
Part 10 of 10: Check the windshield wipers
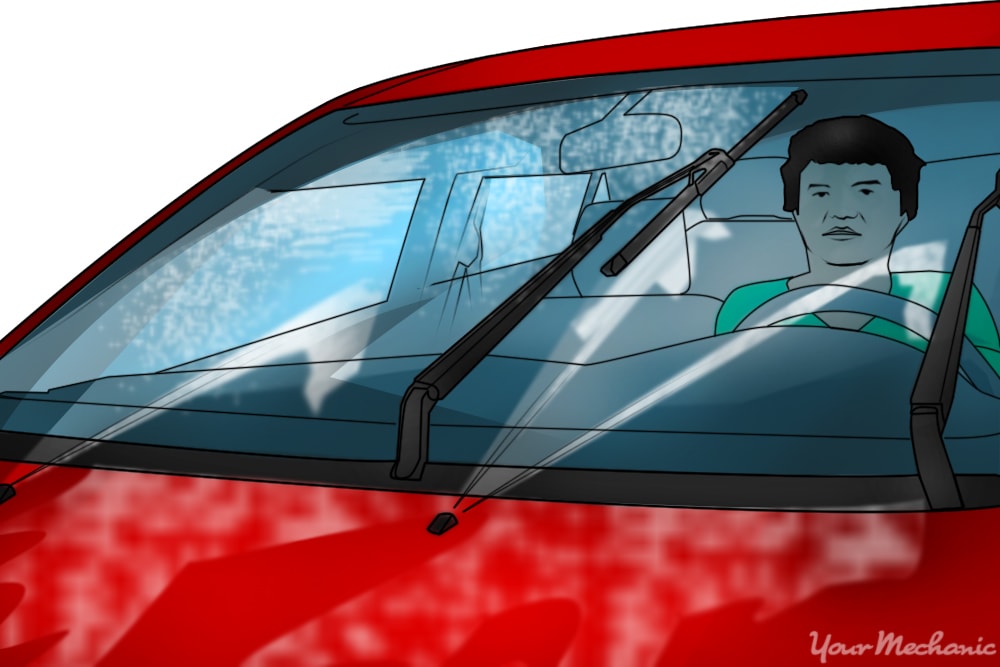
Step 1: Check the windshield wiper blades. Spray the windshield with windshield washer fluid and then use the wipers to remove it.
Lift the wiper blades up and inspect the edge of the blade to make sure there is a smooth edge. If necessary, clean the wiper blades.
Poorly performing wiper blades are more of a hazard than an aid - if yours are leaving streaks and smears instead of a clear view through the windshield, it’s time to replace them.
When you get back in your car, start up the engine and let it run for a minute. Listen for any unusual sounds and look for any warning lights on the dashboard. Shift through every position in the transmission to make sure it is working smoothly. Wash the windshield with the washer fluid and see how the wipers perform. Test all of the interior lights and the turn signals. Once all of that is done, and everything works, you can rest easy knowing that your vehicle has a clean bill of health.
If there is anything that you discover in the course of your vehicle’s tune-up that really concerns you, don’t hesitate to call a certified mechanic to come take a look. A mobile mechanic, such as one from YourMechanic, can come to you and diagnose any problems with your car.
