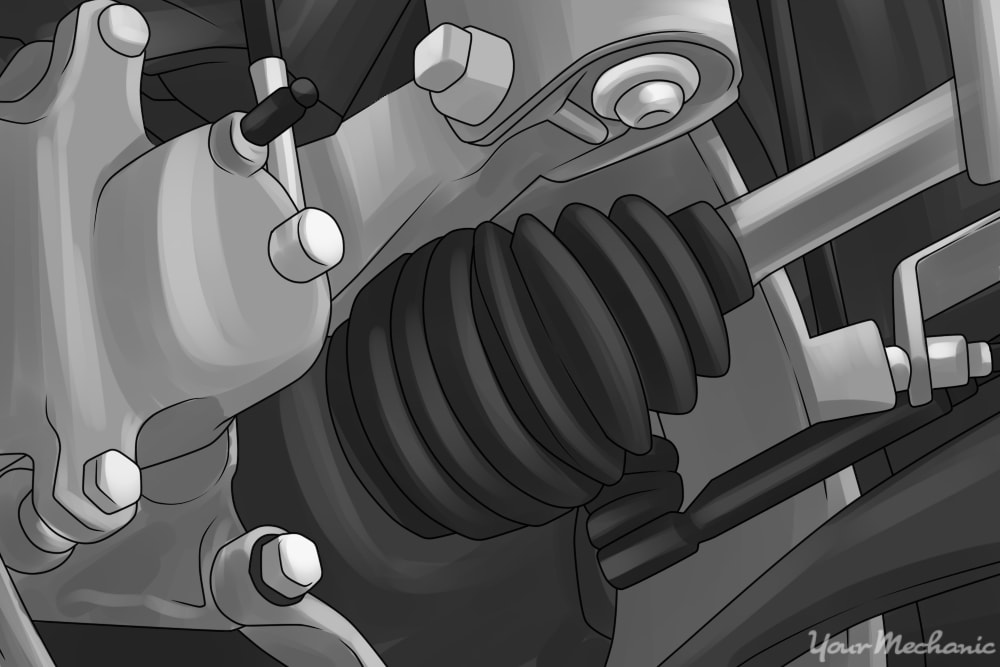
Ball joints are designed to support a hub that connects a tire and wheel assembly with a vertical and lateral movement in all degrees. The ball joints must sustain impacts from potholes and bumps along with braking and starting pressures.
There are two different types of ball joints, compression and decompression.
Compression
The compression ball joint is where the control arm is attached underneath the hub. When the weight of the vehicle is placed onto the hub, the hub is always trying to pry apart the ball joint. This type of ball joint is good, however, in the event that the joint fails, the control arm will separate from the hub making the vehicle not operational.
Decompression
The decompression ball joint is where the control arm is attached on top of the hub. As the weight of the vehicle is placed onto the hub, the hub is always in contact with the ball joint and always trying to squeeze it. This type is good to have in the event when the ball joint fails, for the control arm may stay in contact with the hub.
A ball joint press is used to remove the ball joints from a control arm that was pressed in from the manufacturer. Most aftermarket ball joints are bolt-on designs that replace the pressed-in ball joint. There are some aftermarket ball joints that are similar to the original manufactured equipment that is pressed in.
Signs of failure with a pressed in ball joint
When driving a vehicle around, you need to go over bumps, start, and stop and check for any movement from the front or rear of the vehicle. If there is movement, then it is possible that the joints could be a worn or broken. Lower ball joints will usually keep the wheel and control arm intact if the joint fails, unless the ball joint is a decompression joint. Upper ball joints will make the tire fall inward or outward and change the alignment of the hub location.
Part 1 of 8: Verifying the condition of the ball joint
Material Needed
- Flashlight
Step 1: Get a flashlight and check the condition of the ball joint. Visually look for any damages or if the joint is broken.
Step 2: Look around the wheel to make sure that the ball joints are intact. Do not attempt to test drive a vehicle with a broken ball joint because of the risk of the joint coming apart.
Step 3: If the ball joint is not in danger of vehicle use, you can perform a test drive. Drive around the block and listen for any unusual noises, vibrations, or clunking sounds.
Step 4: When you return from the road test, get your flashlight and recheck the condition of the ball joint.
Part 2 of 8: Preparing the vehicle to work on the wheel studs
Having all of the necessary tools and materials prior to starting the work will allow you to get the job done more efficiently.
Materials Needed
- Allen wrench set
- Boxed end wrenches
- Brass drift (long)
- Breaker bar
- Bungee cord
- Emery cloth 320 grit
- Flash light
- Floor jack
- Gear lube (enough for the job)
- Hammer 2 1/2 pound
- Jack stands
- Large flat tip screwdriver
- Non-lint cloth
- Oil drain pan (small)
- Protective clothing
- Putty knife/scraper
- Ratchet with metric and standard sockets
- Rotor wedge screw set
- Safety glasses
- Seal installer tool or a block of wood
- Seal removal tool
- Tire iron
- Torque wrench
- Torx bit set
- Wheel chocks
Part 3 of 8: Preparing the vehicle
Step 1: Park your vehicle on a flat, hard surface. Make sure that the transmission is in park (for automatics) or in first gear (for manuals).
Step 2: Place wheel chocks around the rear tires that will be remaining on the ground. In this case, the wheel chocks will be around the front tires since the rear of the vehicle will be lifted up. Engage the parking brake to the lock the rear tires from moving.
Step 3: If you are using a tire iron to remove the wheels from the vehicle, loosen the lug nut using your tire iron. Do not remove the lug nut, only loosen them.
Step 3: Raise the vehicle. Using a floor jack that is recommended for the weight of the vehicle, lift under the vehicle at its specified jacking points until the wheels are completely off the ground.
Step 4: Place the jack stands. The jack stands should go under the jacking point locations. Then lower the vehicle onto the jack stands. For most modern cars, the jacking points for jack stands will be on the pinch weld just under the doors along the bottom of the car.
Part 4 of 8: Removing the damaged or broken ball joint
For vehicles with tapered bearing and seal installation hubs
Step 1: Put on safety glasses. This will shield your eyes from flying debris as you remove the wheel studs. Put on gloves that are gear lube resistant.
Step 2: Use your tire iron to remove the lug nuts from the wheel studs.
Step 3: Remove the wheels from the wheel studs. Use chalk to mark the wheels if you tend to take off more than one wheel.
Step 4: If you are working on the front wheel studs, you will need to remove the front brakes. Remove the mounting bolts to the brake caliper. Take off the caliper and hang it to the frame or coil spring with a bungee cord. Then take off the brake rotor. You may need to have rotor wedge screws to force the rotor off the wheel hub.
Step 5: Place a small drain pan under the cap and remove the cap to the wheel hub. Drain out the oil from the bearings and hub into the drain pan. If the bearings had grease, then some grease may come out but it is good to have a drain pan for to put the bearing into.
- Note: If you have locking hubs for four wheel drive, you would need to remove the locking hubs from the drive hub. Make sure that you watch how all of the parts come out so you know how to put it back together.
Step 6: Remove the outer nut to the wheel hub. Get a hammer and small chisel and punch back the tabs on the locking ring if there is one. Slide off the hub and catch the small tapered bearing that will fall out.
Step 7: Drain the rest of the gear oil out from the wheel hub. Turn the hub over to the back side where the seal is located.
- Note: After pulling off the wheel hub, the seal in the hub will slightly cut as it comes off the spindle from the axle. This will destroy the seal and needs to be replaced before putting the wheel hub back on. You will also need to inspect the wheel bearings for wear while the wheel hub is off.
Step 8: Get a seal remover tool and remove the wheel seal from the wheel hub. Pull out the bigger bearing that is inside the wheel hub.
Step 9: Clean off the two bearings and inspect them. Make sure that the bearings are not colored or pitted. If the bearings are colored or pitted they will need to be replaced for they got too hot or mangled up from debris in the oil.
Step 10: Remove the cotter pin to the castle nut on the steering tie rod. Remove the castle nut from the steering tie rod. Grab a pickle fork and strike the joint to pull off the steering tie rod outer end and joint.
- Note: If you are working on the rear of the vehicle, you may not need to perform step 10 if there is no tie rods to remove.
Step 11: Turn the spindle and knuckle all the way back against the steering lock. If there is a snap ring on the ball joint, you will need to remove it before pressing out the ball joint. Grab a ball joint press kit and put the press onto the ball joint that is damaged or broken.
Step 12: Press out the ball joint. Grab a 320 grit emery cloth and clean out the bore where the ball joint was pressed into. Wipe out the bore clean with a lint free cloth.
For vehicles with pressed in bearings and bolt on hubs
Step 1: Put on safety glasses. This will shield your eyes from flying debris as you remove the wheel studs.
Step 2: Use your tire iron to remove the lug nuts from the wheel studs.
Step 3: Remove the wheels from the wheel studs. Use chalk to mark the wheels if you tend to take off more than one wheel.
Step 4: If you are working on the front wheel studs, you will need to remove the front brakes. Remove the mounting bolts to the brake caliper. Take off the caliper and hang it to the frame or coil spring with a bungee cord. Then take off the brake rotor. You may need to have rotor wedge screws to force the rotor off the wheel hub.
Step 5: Disconnect the harness to the ABS sensor on the wheel hub. Remove the brackets that hold the harness to the knuckle on the axle.
Step 6: Get a breaker bar and remove the mounting bolts that hold on the wheel hub to the suspension. Take off the wheel hub and place the hub on the ground or table.
Step 7: Remove the cotter pin to the castle nut on the steering tie rod. Remove the castle nut from the steering tie rod. Grab a pickle fork and strike the joint to pull off the steering tie rod outer end and joint.
- Note: If you are working on the rear of the vehicle, you may not need to perform step 10 if there is no tie rods to remove.
Step 8: Turn the spindle and knuckle all the way back against the steering lock. If there is a snap ring on the ball joint, you will need to remove it before pressing out the ball joint. Grab a ball joint press kit and put the press onto the ball joint that is damaged or broken.
Step 9: Press out the ball joint. Use a 320 grit emery cloth and clean out the bore where the ball joint was pressed into. Wipe out the bore clean with a lint free cloth.
Part 5 of 8: Installing the new ball joint
For vehicles with tapered bearing and seal installation hubs
Step 1: Press in the new ball joint. If you had to remove a snap ring, be sure to put the new snap ring in place.
If the ball joint did not come with a snap ring, you can use the old snap ring from the old ball joint. It is suggested to us a new snap ring due to rust and contaminants that can damage the snap ring.
- Note: If the tie rod rubber boot was damaged when removing the tie rod, you must replace the tie rod before installing it into the knuckle arm.
Step 2: Turn the spindle outward to align up the outer tie rod. Install the outer tie rod into the knuckle arm. Put on the castle nut tight and turn to locate the hole for a cotter pin.
- Warning: Do not back off the castle nut to locate the hole for the cotter pin. This will make the steering loose and possible break.
Step 3: Install a new cotter pin into the castle nut on the outer tie rod. Do not use the old cotter pin for it will be work harden and it will break off or be fatigue.
Step 4: Grab the hub and lube up the larger inner bearing. Install the bearing into the hub. Install a new wheel seal into the hub with using a seal installer or a block of wood.
Step 5: Put the hub onto the spindle. Fill up the hub with oil or grease, which ever came out. Install the outer, smaller bearing onto the spindle and into the hub. If you removed a spacer, put the spacer on and then the inner nut onto the spindle.
Step 6: Tighten the inner nut all the way down to seat the hub. Back off the outer nut and torque the nut to 50 foot pounds. Install the lock ring or locking washer and bend over the tabs.
Step 7: Install the outer nut onto the spindle. Torque the nut to 250 foot pounds. If you had to remove a cotter pin, install a new cotter pin onto the spindle to secure the outer nut.
Step 8: Install the hub cover. Tighten the bolts up snug and fill the hub up with oil, if that is the lubricant that was removed. You will need to rotate the hub and let the oil drain into the hub through the bearings. You will probably need to spin the hub four to five times before the hub is full of oil.
Step 9: Install the rotor onto the hub. If there was locking bolts holding on the rotor, be sure to put the bolts back on.
Step 10: Remove the brake caliper from the bungee cord and install it back onto the bracket. Torque the mounting bolts to 30 foot pounds.
Step 11: Put the wheel back onto the wheel hub. Put on the lug nuts and tighten them down snug tight with the tire iron. If you intend to use an air or electric impact, make sure that you do not exceed 85 to 100 pounds of torque that you need.
For vehicles with pressed in bearings and bolt on hubs
Step 1: Press in the new ball joint. If you had to remove a snap ring, be sure to put the new snap ring in place.
If the ball joint did not come with a snap ring, you can use the old snap ring from the old ball joint. It is suggested to us a new snap ring due to rust and contaminants that can damage the snap ring.
- Note: If the tie rod rubber boot was damaged when removing the tie rod, you must replace the tie rod before installing it into the knuckle arm.
Step 2: Turn the spindle outward to align up the outer tie rod. Install the outer tie rod into the knuckle arm. Put on the castle nut tight and turn to locate the hole for a cotter pin.
- Warning: Do not back off the castle nut to locate the hole for the cotter pin. This will make the steering loose and possible break.
Step 3: Install a new cotter pin into the castle nut on the outer tie rod. Do not use the old cotter pin for it will be work harden and it will break off or be fatigue.
Step 4: Place the wheel hub onto the suspension and install the mounting bolts. Torque the bolts down to 150 foot pounds. If you have a cv shaft that goes through the hub, make sure you torque the cv shaft axle nut to 250 foot pounds.
Step 5: Connect the harness back up to the ABS wheel sensor. install the brackets back on to secure the harness.
Step 6: Install the rotor onto the hub. If there was locking bolts holding on the rotor, be sure to put the bolts back on.
Step 7: Remove the brake caliper from the bungee cord and install it back onto the bracket. Torque the mounting bolts to 30 foot pounds.
Step 8: Put the wheel back onto the wheel hub. Put on the lug nuts and tighten them down snug tight with the tire iron. If you intend to use an air or electric impact, make sure that you do not exceed 85 to 100 pounds of torque that you need.
Part 6 of 9: Lowering the vehicle
Step 1: collect all tools and your creeper and place them out of the way.
Step 2: Raise the vehicle. Using a floor jack that is recommended for the weight of the vehicle, lift under the vehicle at its specified jacking points until the wheels are completely off the ground.
Step 3: Remove the jack stands and keep them far away from the vehicle.
Part 7 of 8: Torque the wheels
Grab your torque wrench and torque the lug nuts to the proper specs for your vehicle. Make sure that if you use a star pattern to torque. This prevents runout (wobble) of the wheel.
Wheel lug nut torque values
- 4 cylinder and V6 engine vehicles 80 to 90 foot pounds
- V8 engines on cars and vans 90 to 110 foot pounds
- Large vans, trucks, and trailers 100 to 120 foot pounds
- One ton and 3/4 ton vehicles 120 to 135 foot pounds
Part 8 of 8: Test drive the vehicle
Material Needed
- Flashlight
Step 1: Drive the vehicle around the block. Listen for any unusual noises or vibrations.
Step 2: Check for looseness. When you return from the road test, get your flashlight and check the ball joints for any looseness.
If your vehicle continues to makes noises or vibrate after replacing the ball joints, seek help from a certified mechanic who can inspect and diagnosis the ball joints.
