The performance of an engine partly relies on the computer's ability to adjust the vehicle’s operations to meet its needs and handle the surrounding conditions. The temperature of the air entering the engine is one of the factors that influences engine performance.
The air cleaner temperature sensor collects information about the air entering the engine and sends it to the computer so that it can adjust the engine timing, as well as the fuel-to-air ratio. If the air cleaner temperature sensor detects cold air, the computer will add more fuel. If the sensor reads hot, the computer will dump less gas.
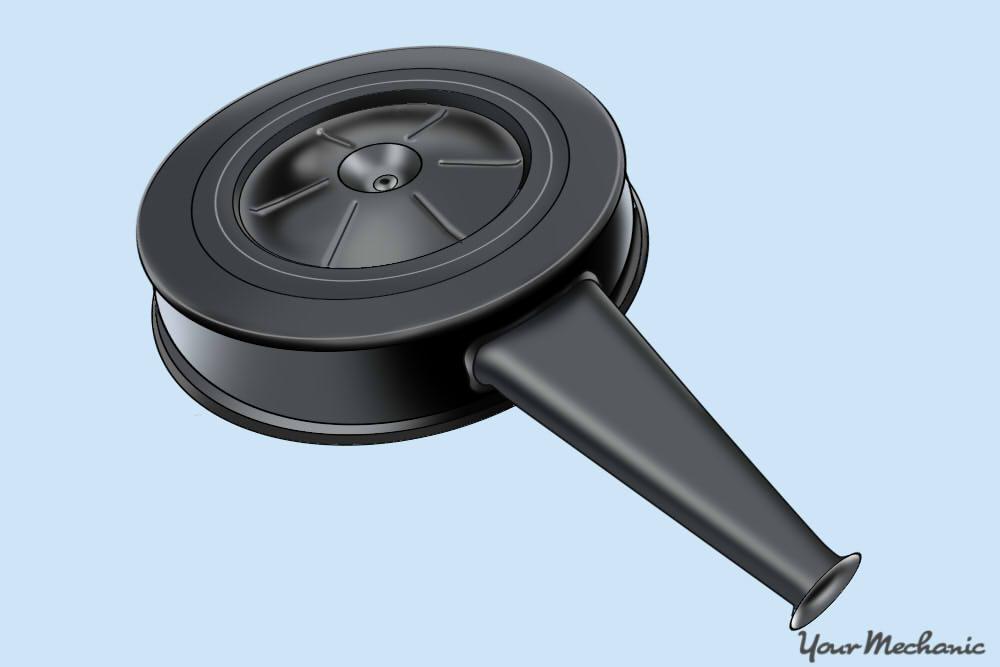
On older carbureted engines, the air cleaner temperature sensor is typically found in a larger circular housing unit between the air intake and the throttle. The air filter and the air cleaner temperature sensor sit inside the housing unit.
If the air cleaner temperature sensor fails, you can expect a variety of issues in your vehicle including rough idling, lean or rich fuel-to-air ratios, and a feeling of “engine lag”. If you suspect that the air cleaner temperature sensor is failing, you can replace it on your own as the sensor is not horribly expensive. A new air cleaner temperature sensor can make a world of difference in the drivability of your vehicle.
Part 1 of 2: Remove the old sensor
Materials Needed
- Gloves (optional)
- Plier assortment
- Replacement temperature sensor
- Safety goggles
- Socket set
Warning: Always ensure that you have adequate eye protection when working on your vehicle. Dirt and engine debris can easily become airborne and get into your eyes.
Step 1: Disconnect the ground connection to the battery. Locate the negative battery terminal or the black cable attached to your car’s battery. The lead will be held onto the terminal by a retaining bolt or a bolt attached to the negative battery cable lead itself.
Using a 10mm socket, remove this bolt and tuck the wire aside so that it does not touch any metal. Cutting power from the battery when you are working on any type of electrical system on your vehicle is critical for your safety.
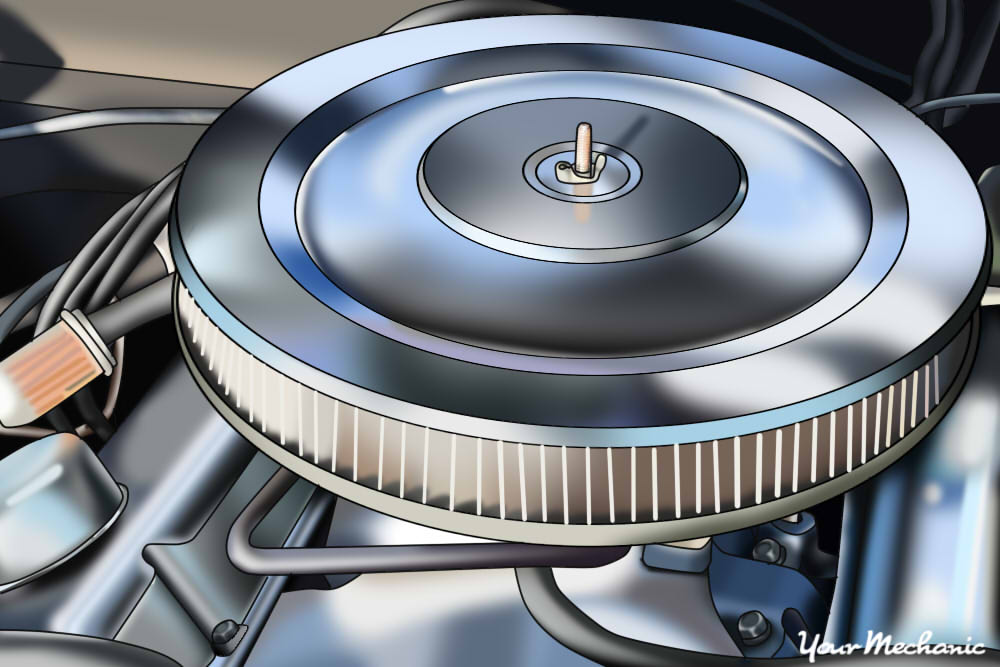
Step 2: Access the air filter. The air cleaner temperature sensor is usually connected and braced on the inside of the air cleaner housing. Remove the nut, usually a wing nut, that holds the cover to the housing. You can use your hands or grip the nut with a pair of pliers and remove it.
Remove the cover to the housing, and set aside. Remove the air filter; it should lift out freely.

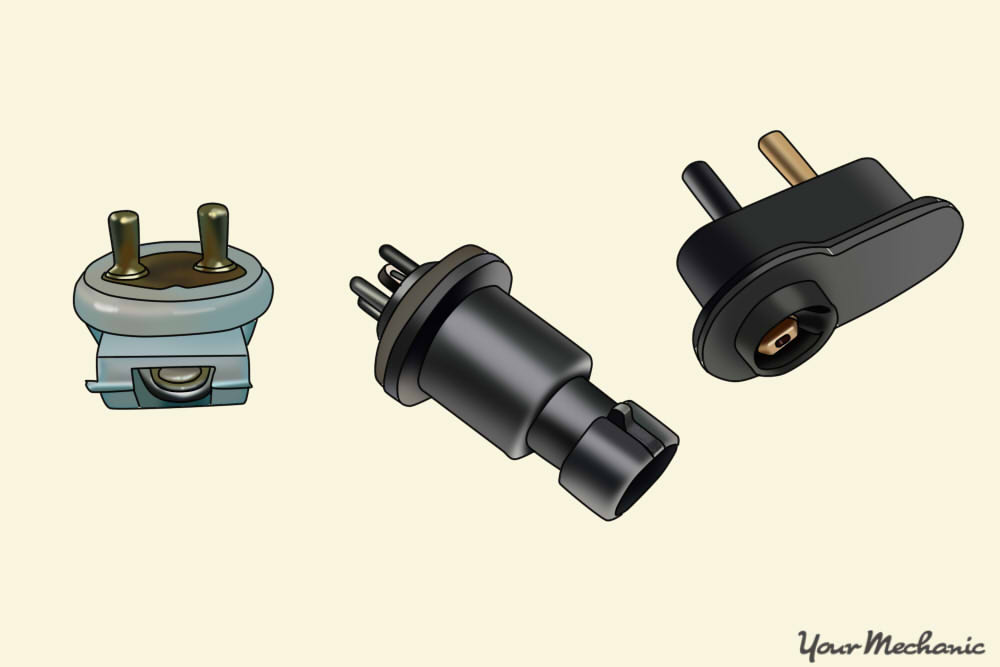
Step 3: Locate the air cleaner sensor. Once you have removed the air cleaner, you should be able to locate the sensor. Usually, the sensor is at the bottom of the housing, closer to the center of the circle. The sensor needs to stand freely in order to obtain accurate readings.

Step 4: Disconnect the sensor. Usually, these types of temperature sensors can be disconnected from their wiring first and then can be twisted out or unclipped. The wiring will be fed into a “terminal” or a plastic clip so that you can easily disconnect the wires without doing any major electrical work. Unclip these wires and set them aside.
- Tip: Some older sensors are simpler in design and only need to be removed. As the sensor and its components communicate internally, you will not need to disconnect any wiring.
Step 5: Remove the sensor. You can now pull out, twist out or unclip the sensor.
Once it is removed, inspect the sensor for any major damage. Due to its location, the sensor should be relatively clean and dry. If your sensor failed due to issues with components surrounding the sensor, you will need to address those issues first, otherwise, those issues will cause the new sensor to fail as well.
Part 2 of 2: Install the new air cleaner temperature sensor
Step 1: Insert new sensor. Insert the new sensor in the same way as you removed the last sensor. Screw in or clip in the new sensor. It should fit exactly as the other did. Keep in mind that some newer replacement parts are designed a little differently and may not look exactly the same. However, they should fit and plug in like the old sensors.
Step 2: Reconnect the wiring terminals. Insert the existing wiring to the new sensor. The new sensor should accept the existing wires the same way the old part did.

- Note: Never force a wiring terminal into its counterpart. Wiring terminals can be stubborn, but breaking them and having to rewire a new terminal can be time-consuming and costly. The terminal should click in and stay in position. Inspect the terminals when working with them to make sure that they are in good condition.
Step 3: Reassemble the air cleaner and housing unit. After you plug in the sensor, you can reinsert the air filter.
Attach the top of the filter housing, and screw on the retaining nut.
Step 4: Reconnect negative battery terminal. Reconnect the negative battery terminal. At this point, you are ready to test the new sensors performance.
Step 5: Test drive your vehicle. Start your engine and let it warm up. Allow it to idle and listen for the improvements in timing and idle speed. If it sounds good enough to drive, take it for a test drive and listen for rough idle speeds or the signs of a failing air cleaner temperature sensor.
Your car’s computer looks for certain signals from its sensors and components that indicate that they are functioning as expected. Sensors that are failing to send the signal or are sending false signals your vehicle will cause driveability and performance issues.
If you are not comfortable with performing this process on your own, get a certified technician from YourMechanic to replace the temperature sensor for you.